
WARNING: THIS PROJECT USES BUTTON CELL BATTERIES THAT ARE EASILY REMOVED. Button cell batteries can be fatal to small children and animals if swallowed.The small size of these batteries makes them easy to swallow. Please use caution and common sense to keep your batteries (and the displays) out of the reach of small children and animals
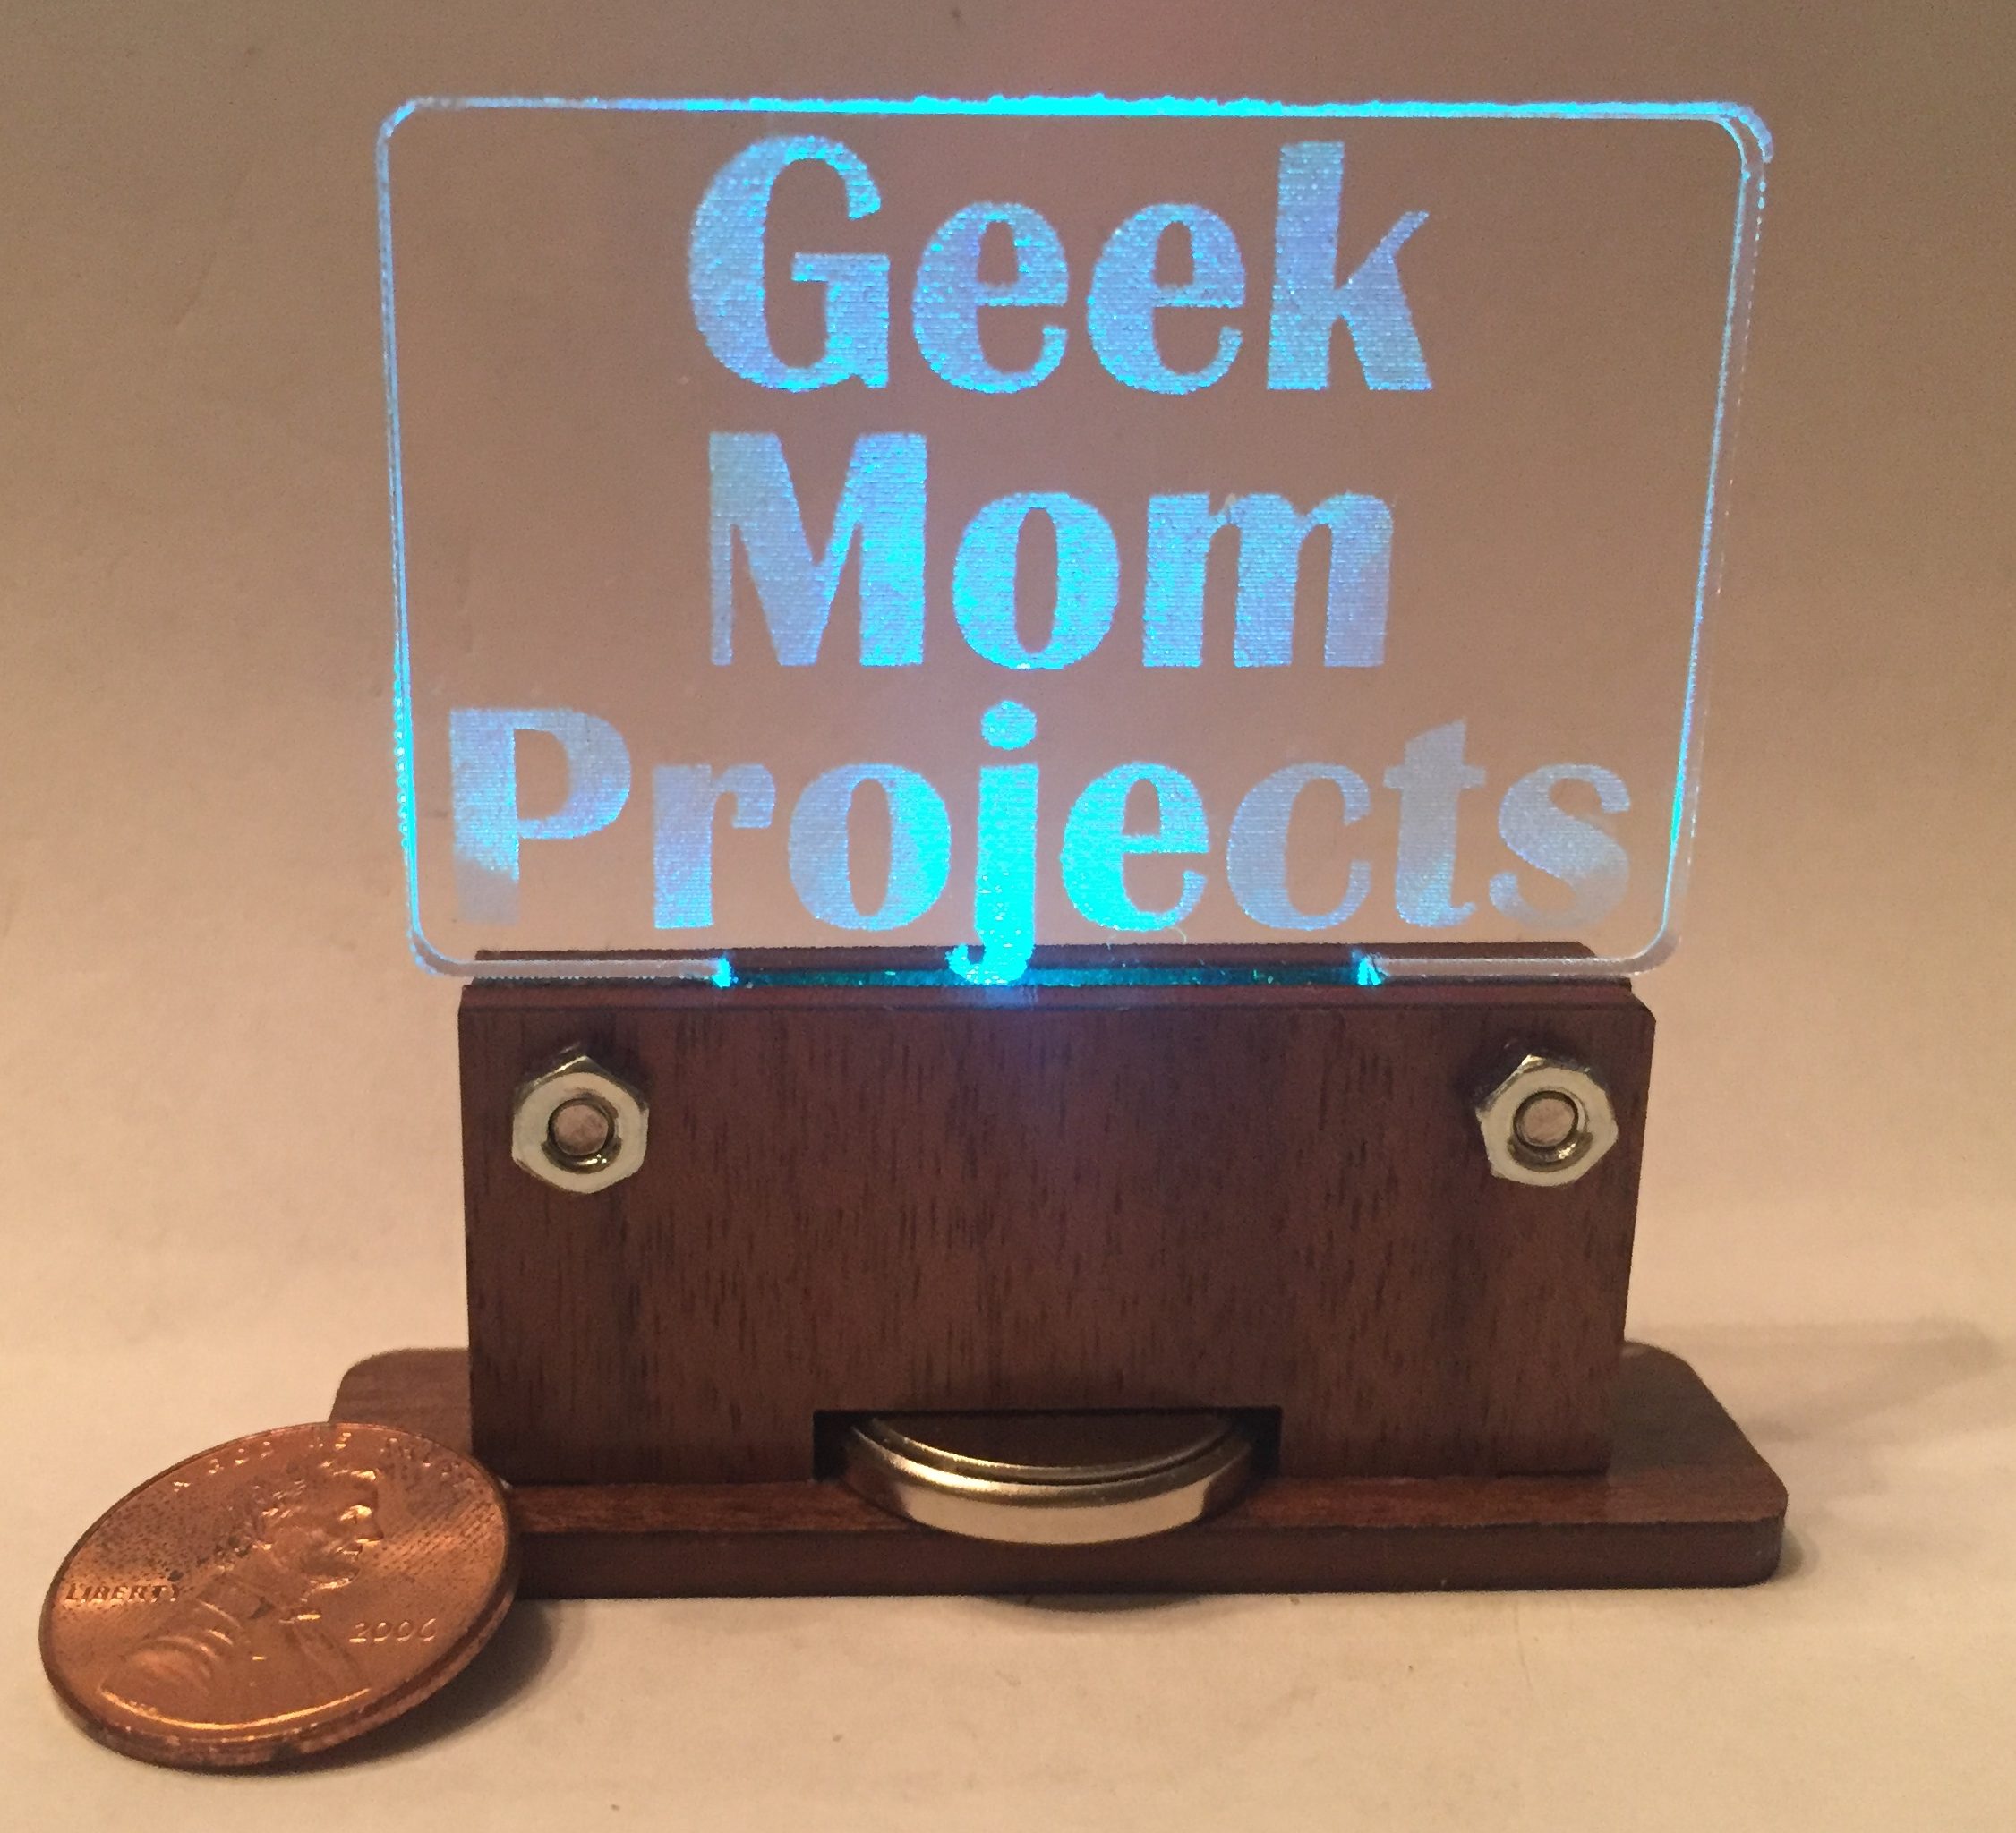
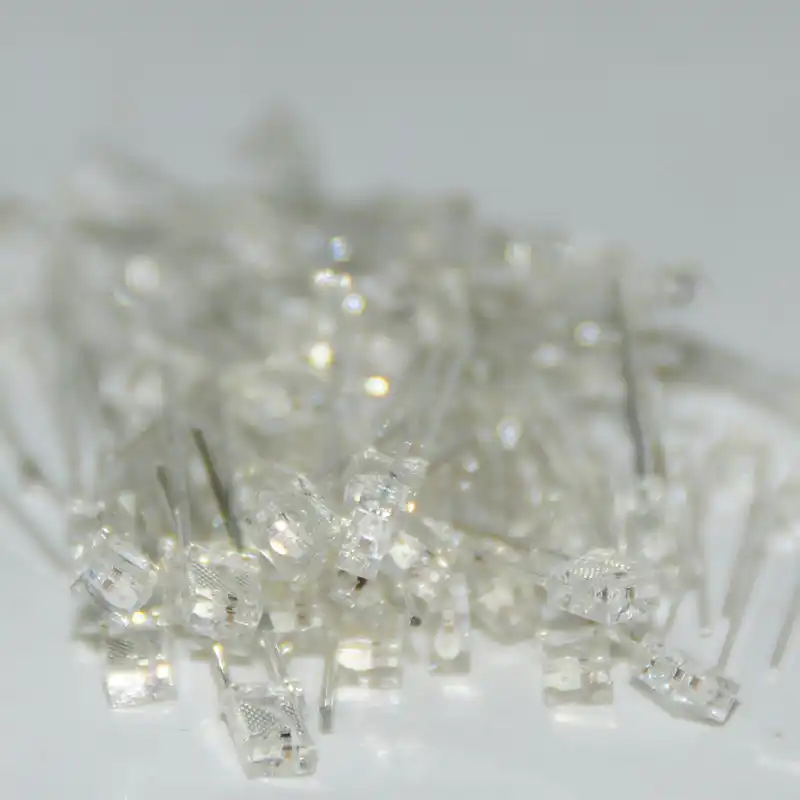
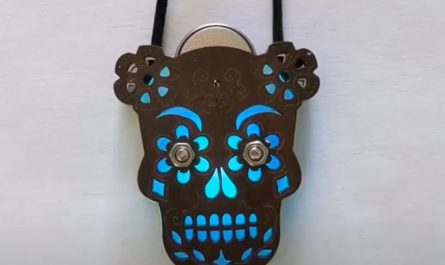
I made a teeny-tiny edge-lit display! I don’t have time to write this up in detail, but I’m posting a couple of build pictures and the vector files. The key to this project is to get hold of these super small 4x3x2mm rectangular color-cycling LEDs:
They are narrower than a standard 1/8″ piece of wood or acrylic, so the base of the edge-lit display can be super thin – only 3/8″ thick.
Aside from the LEDs, you’ll need:
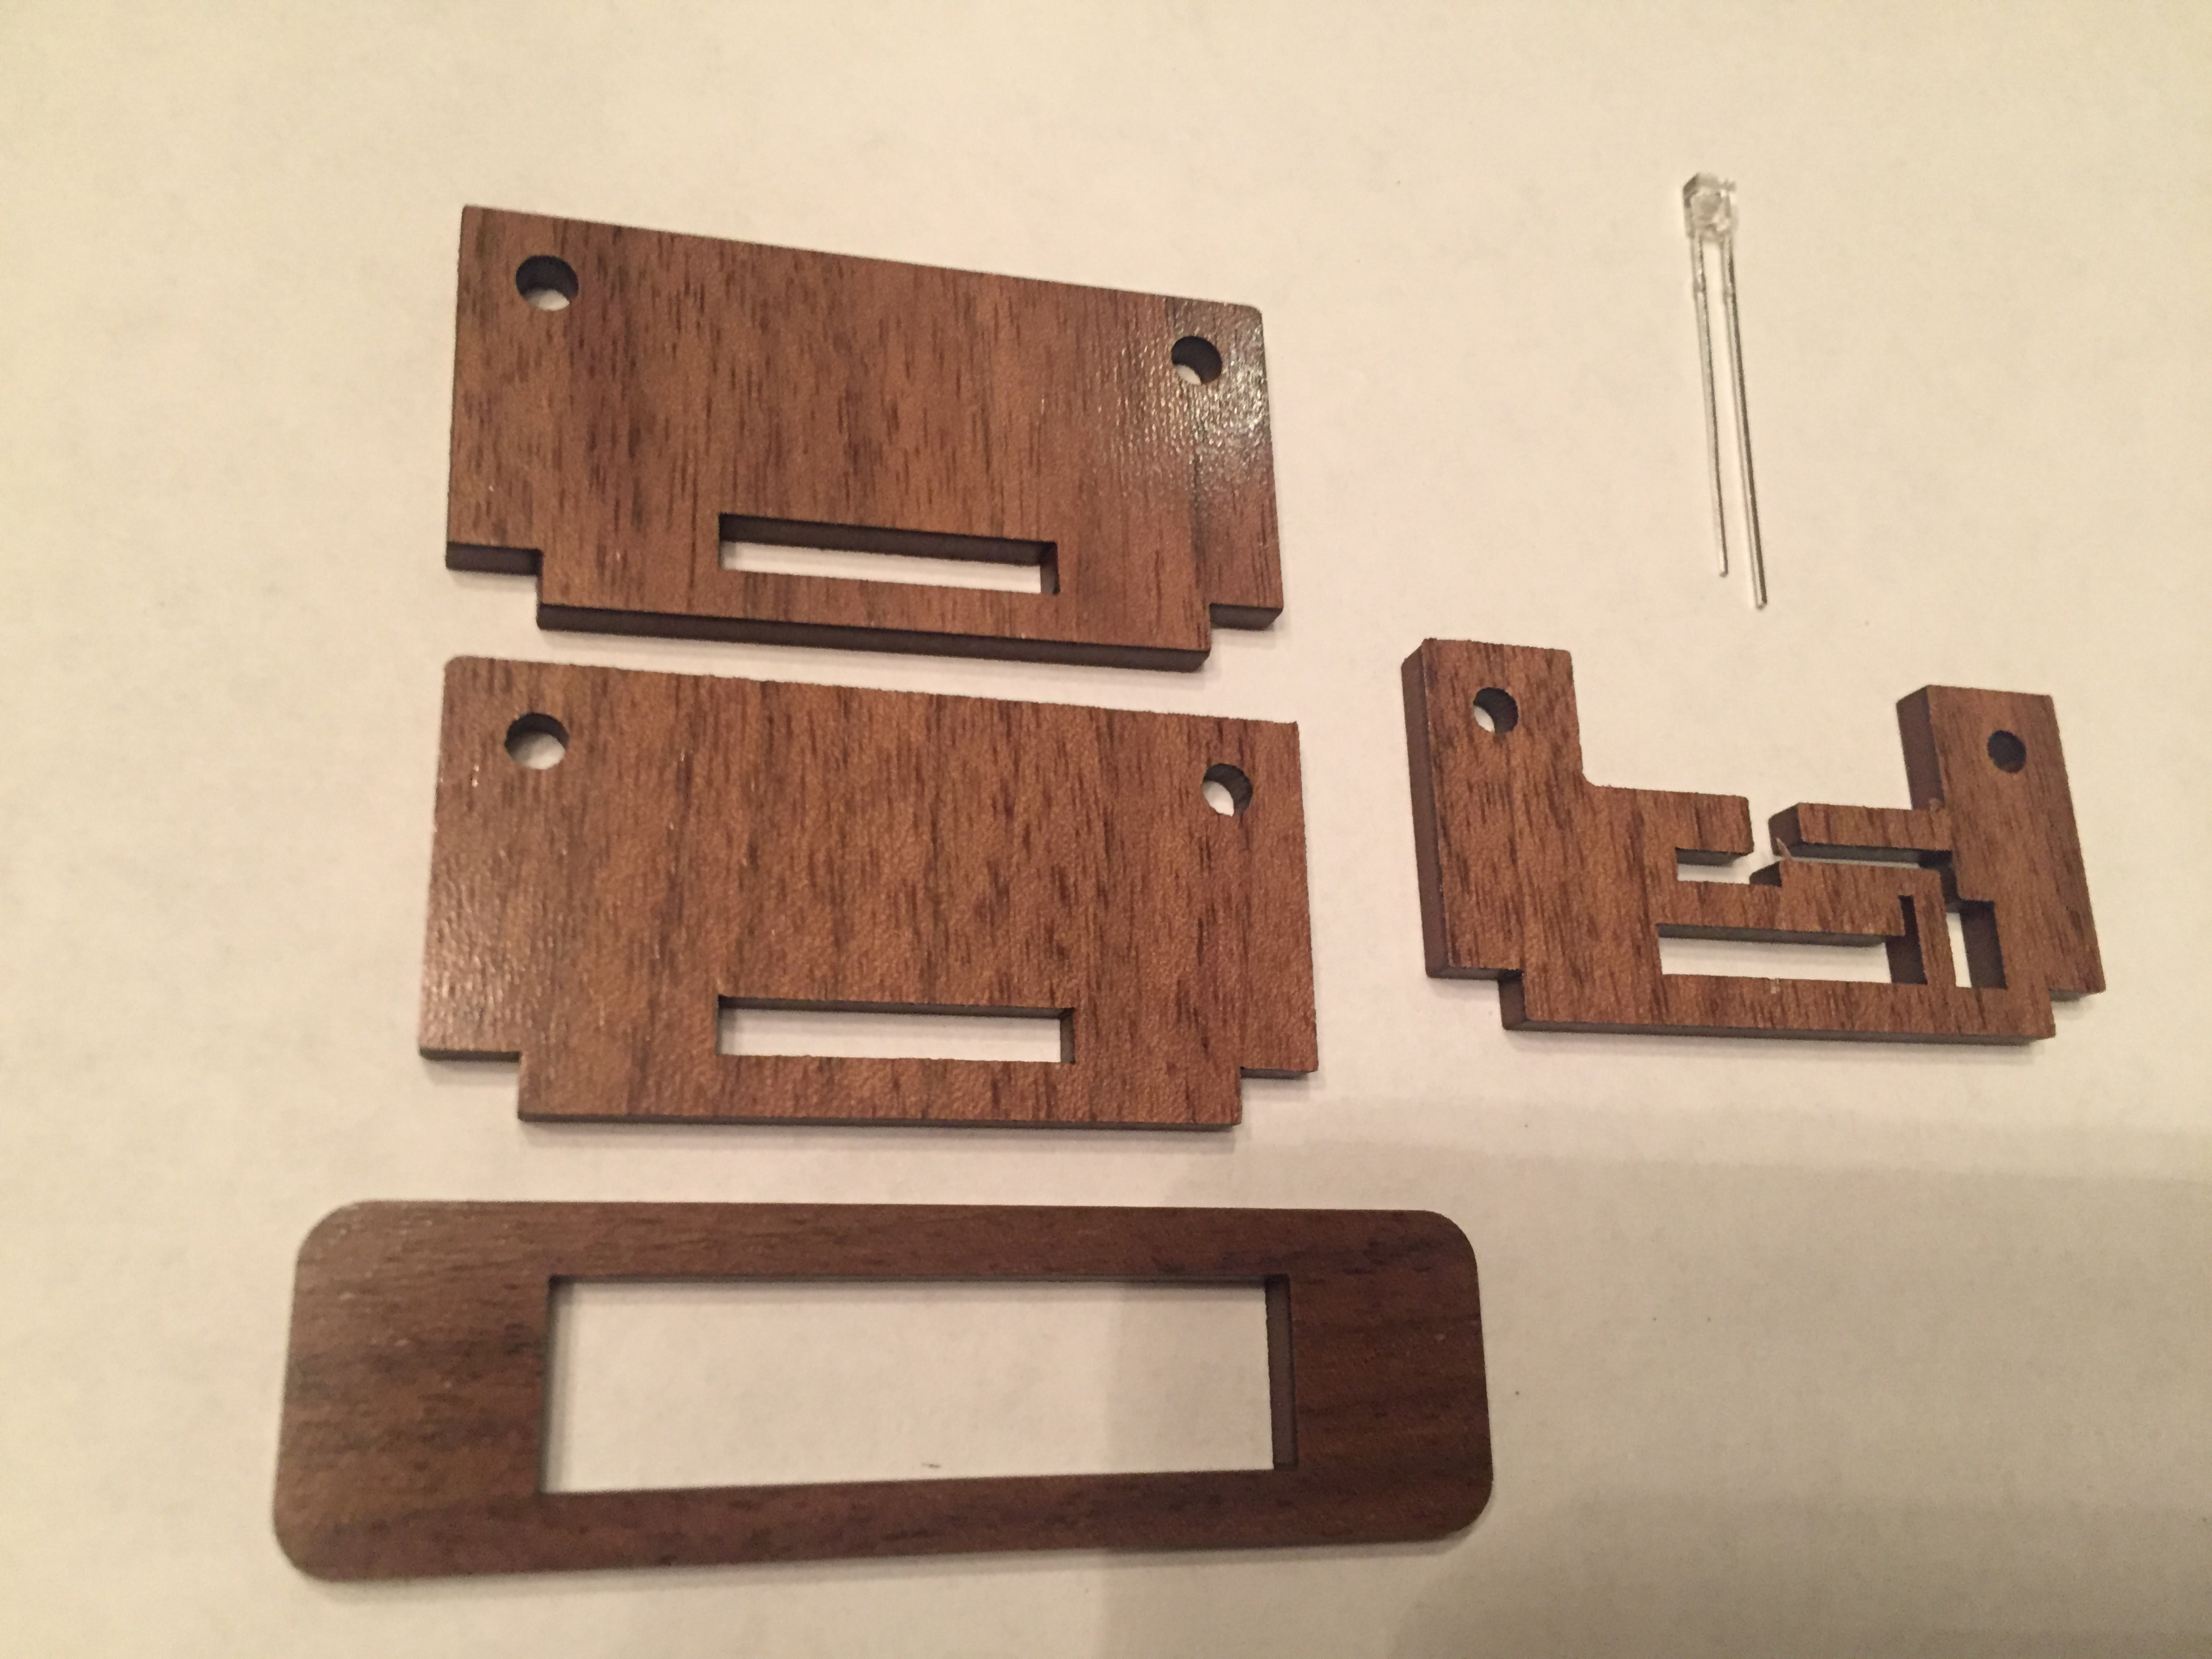
- 1/8″ wood for laser cutting
- 1/8″ clear acrylic sheet
- 2 x12 mm M3 screws and 2 M3 nuts
- 1/8″ or 1/4″ copper tape (conductive on both sides)
- 1 x CR2032 battery
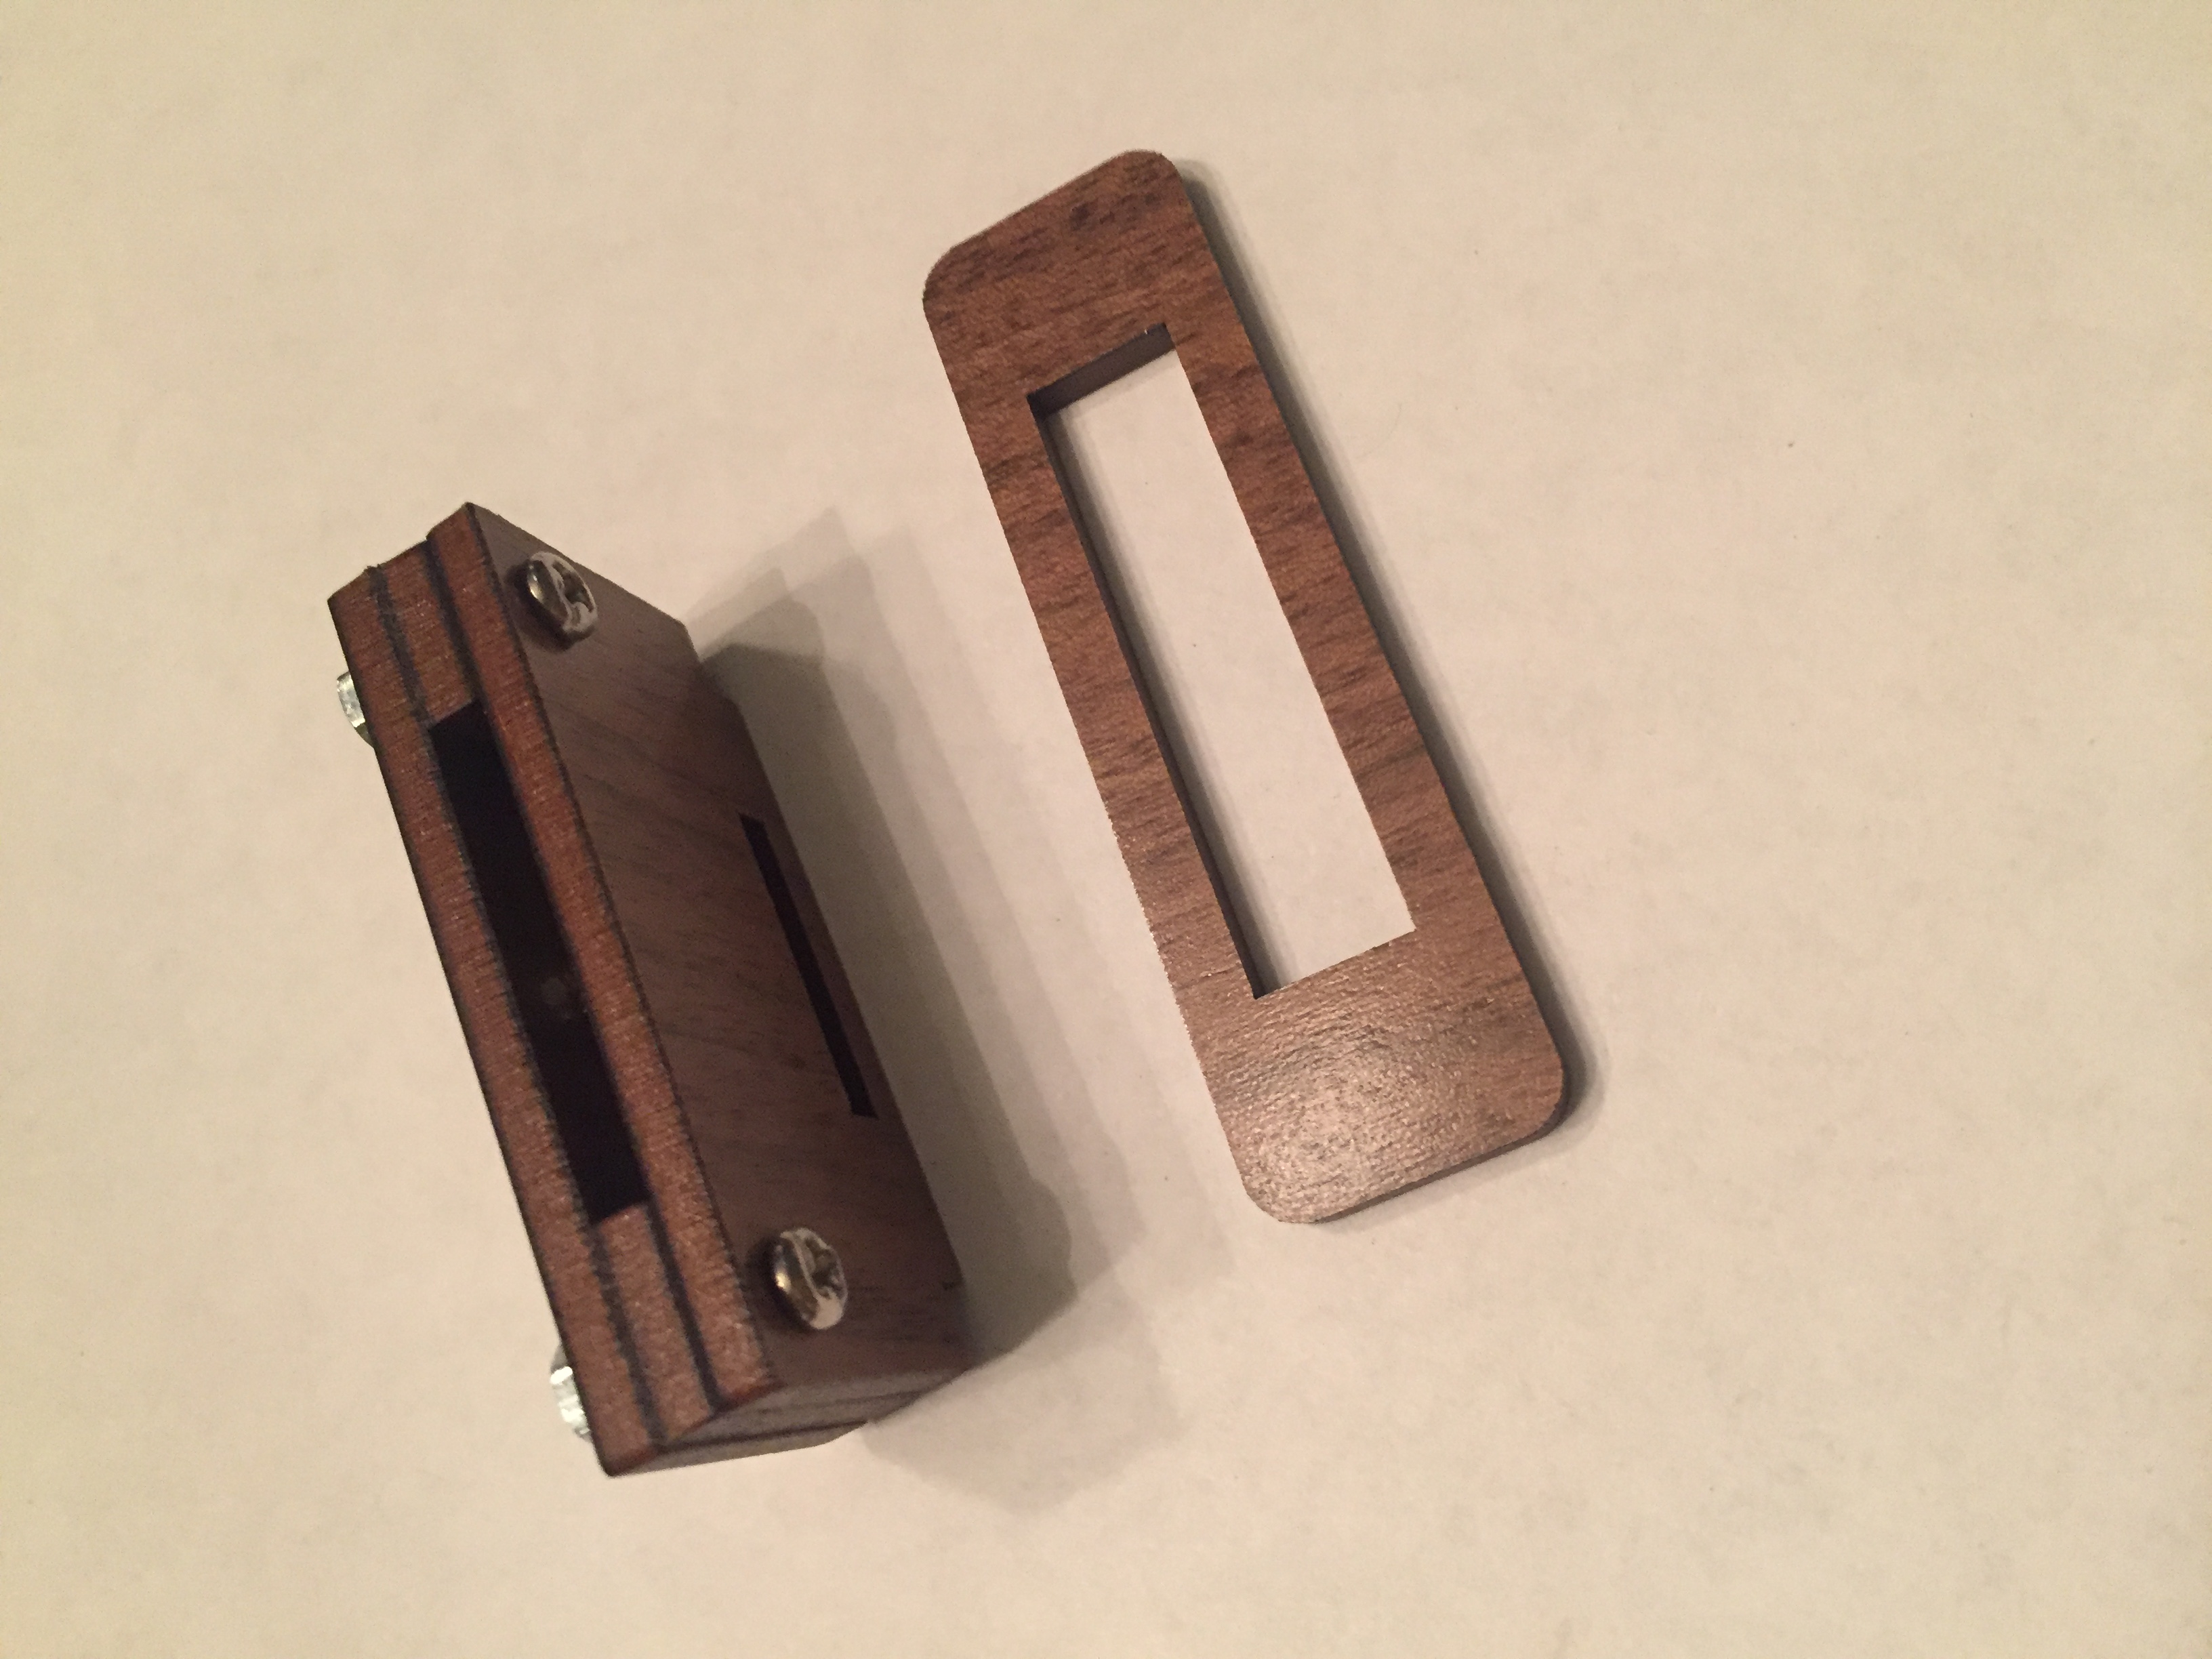
Here are the vector files for the base and acrylic:
Cut the three base pieces from 1/8″ wood, and add whatever design you’d like to the acrylic before laser cutting it (or keep the “Geek Mom Projects” logo if you’d like!)
Peel off any protective paper and trim the legs, then bend them to fit in the slots of the middle base piece as shown below. The negative LED leg is cut the shortest.
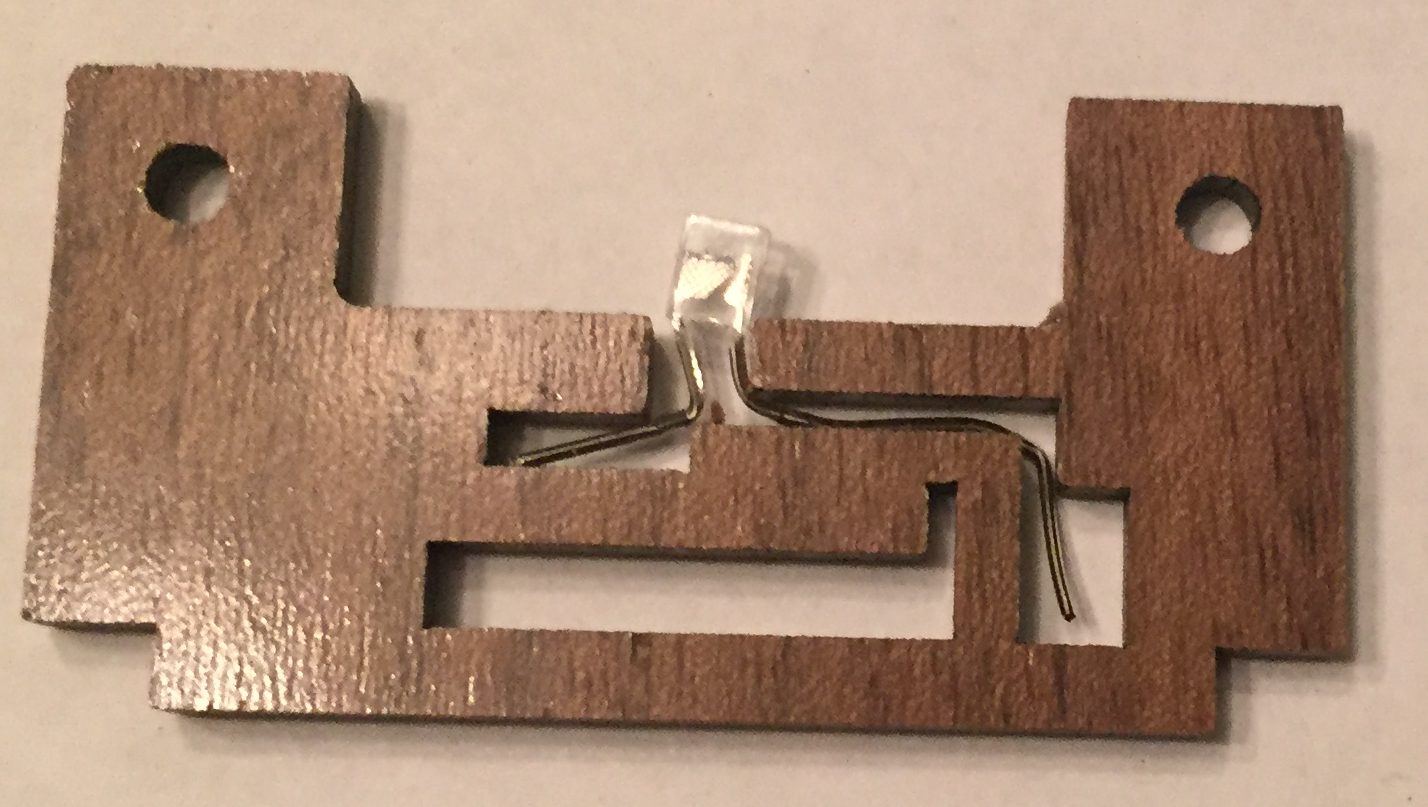
Then wrap copper tape arround the legs and middle base piece as shown below. The tape below is a little sloppy, so make sure the tape is tight and secure. Do several layers if needed.
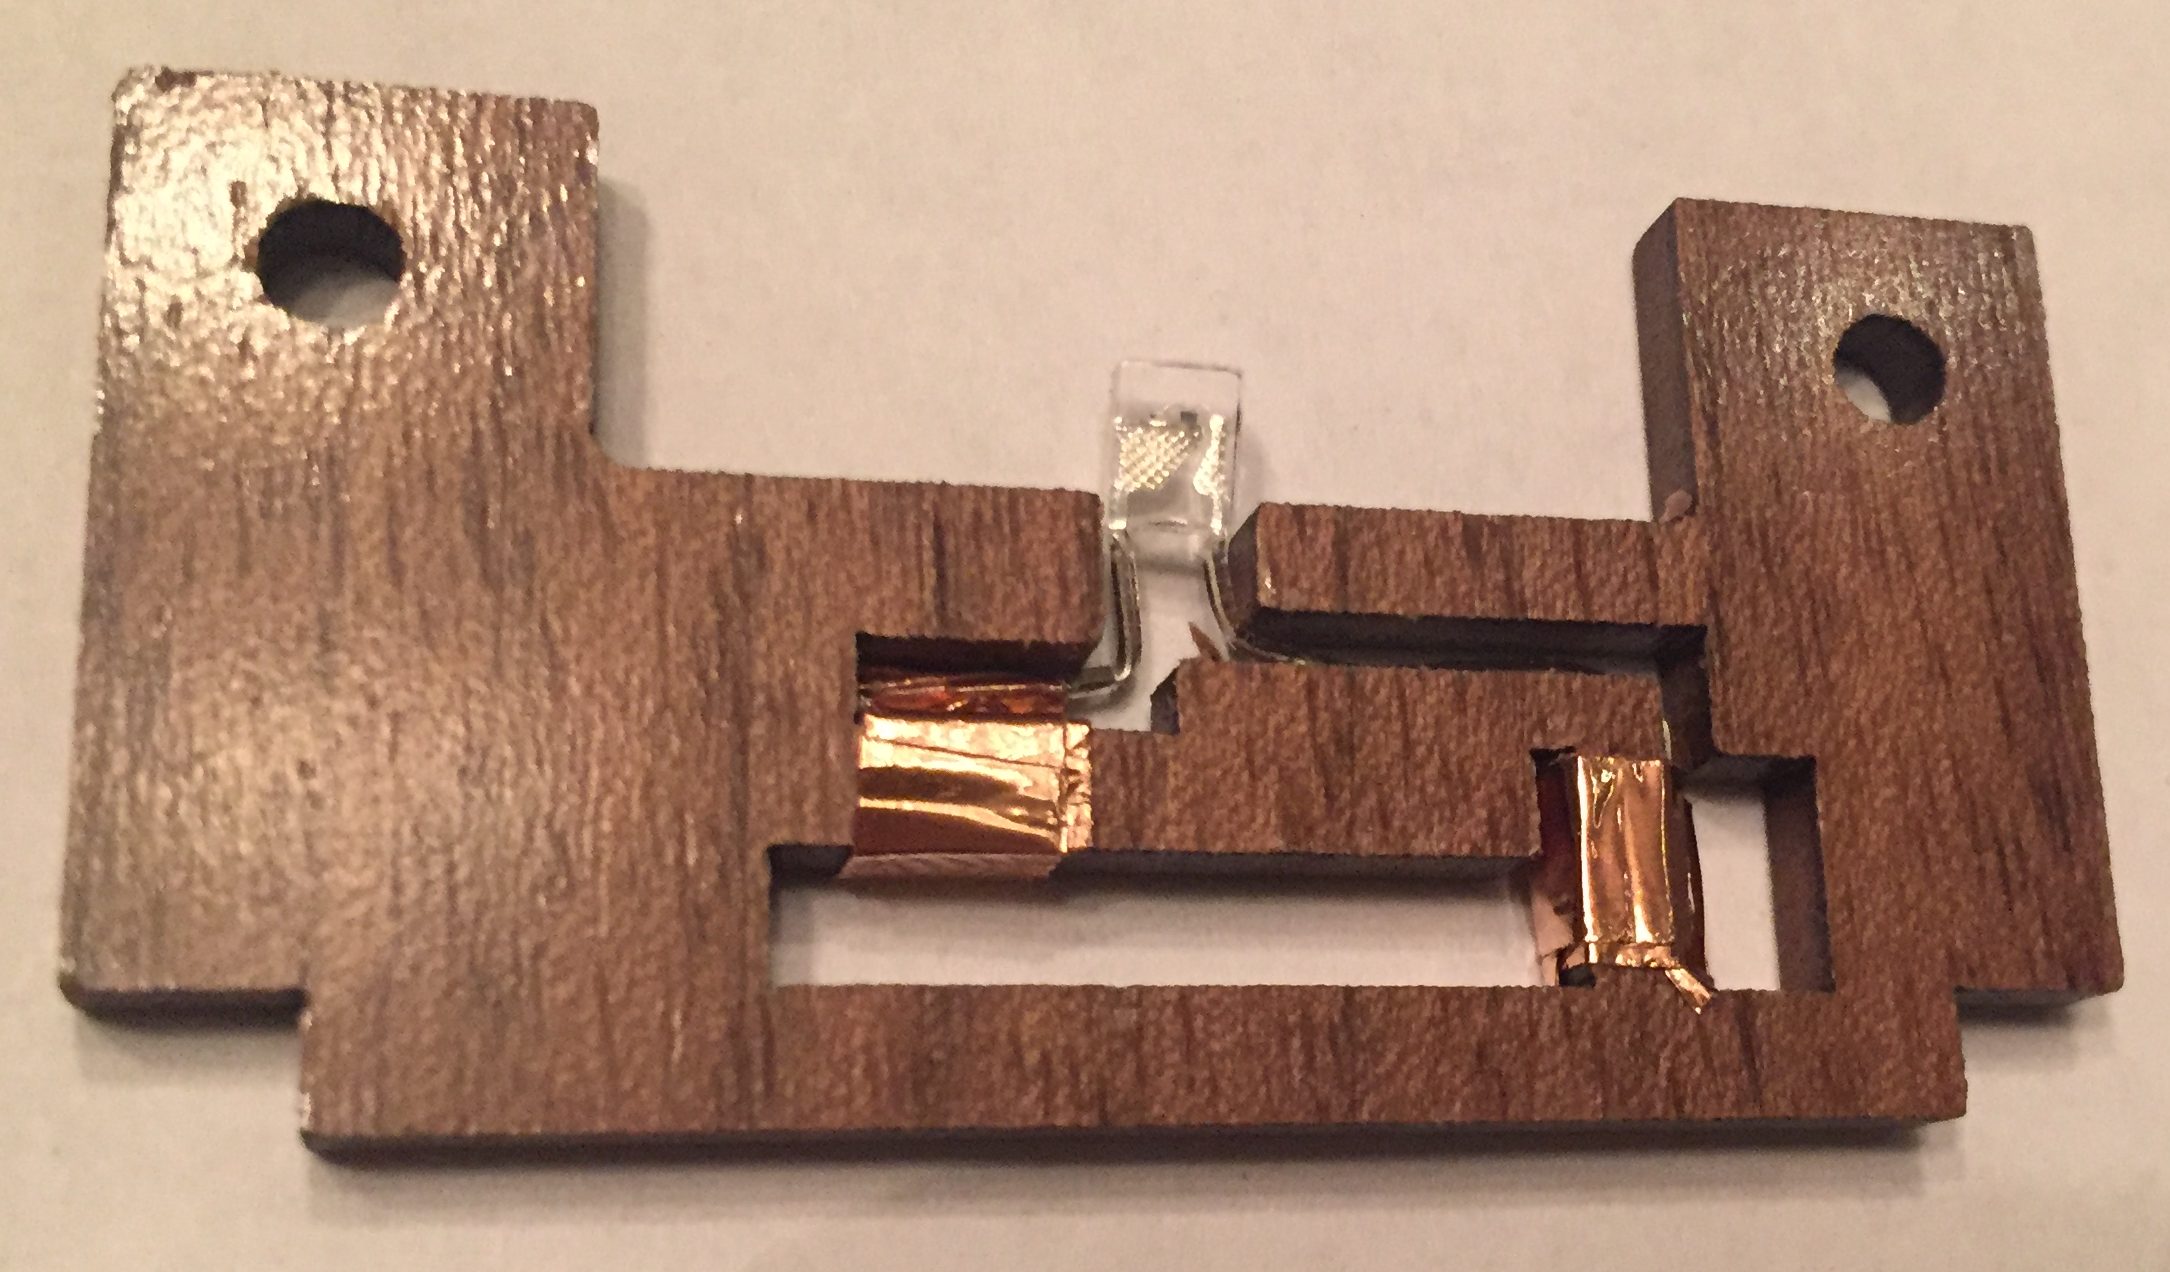
Sandwich the three similar shaped base layers and use the M3 screws and nuts to join them.
Slide them into the base, and slide the CR2032 battery into the slot with the negative side facing up. If all goes well, the negative side will make contact with the tape wrapped around the top of the slot and the positive side will make contact with the tape wrapped around the side of the slot. Slide the acrylic into the slot at the top to see the edge-lit effect.
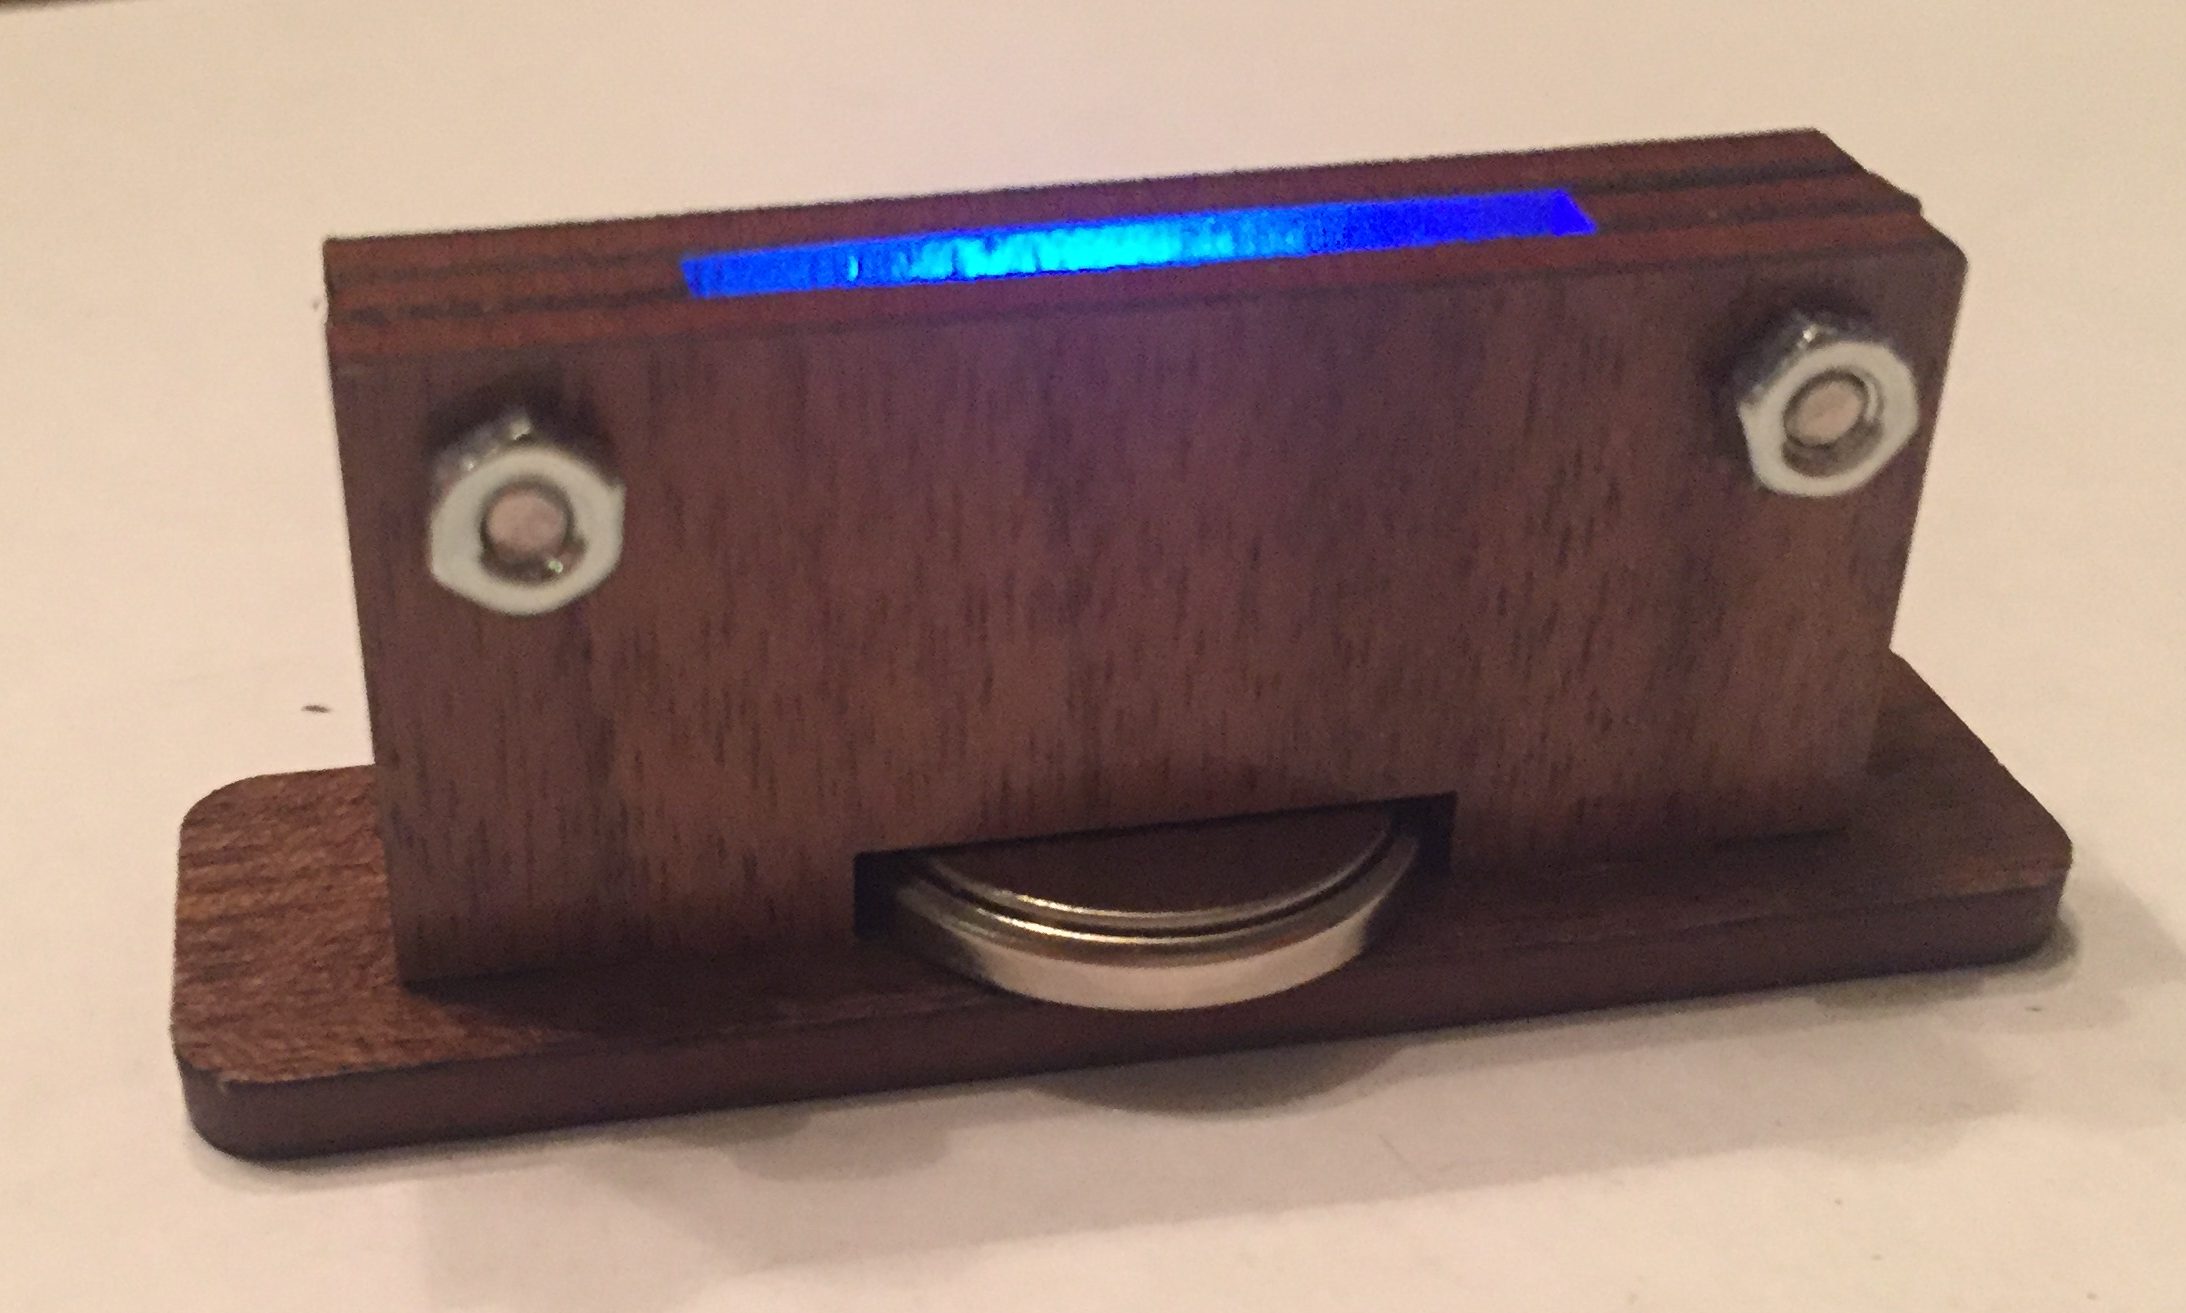

To turn the display off, simply remove the battery.
These teeny-tiny edge-lit displays are super cheap and easy to make. They’d make fun name cards at a dinner event or party favors – or even a DIY activity for kids to build using blank acrylic pieces and a dremel to draw their own designs.
2 thoughts on “Teeny-Tiny Edge-Lit Display”