This post shares a design for a laser-cut box to hold a collection of micro:bits. It’s very useful if you need to keep track of a set for a classroom. The top of the box slides into place and is secured by a swivel tab than locks into place in its own slot. There are two versions of the design – one for a box that holds 10 micro:bits, and one for a box that holds 20. Images in this post show the assembly of the 10 micro:bit box design.
Materials:
- 1/8″ wood sheets
- 1/8″ clear acrylic (if you’d like an acrylic top)
- wood glue
Tools:
- Laser cutter
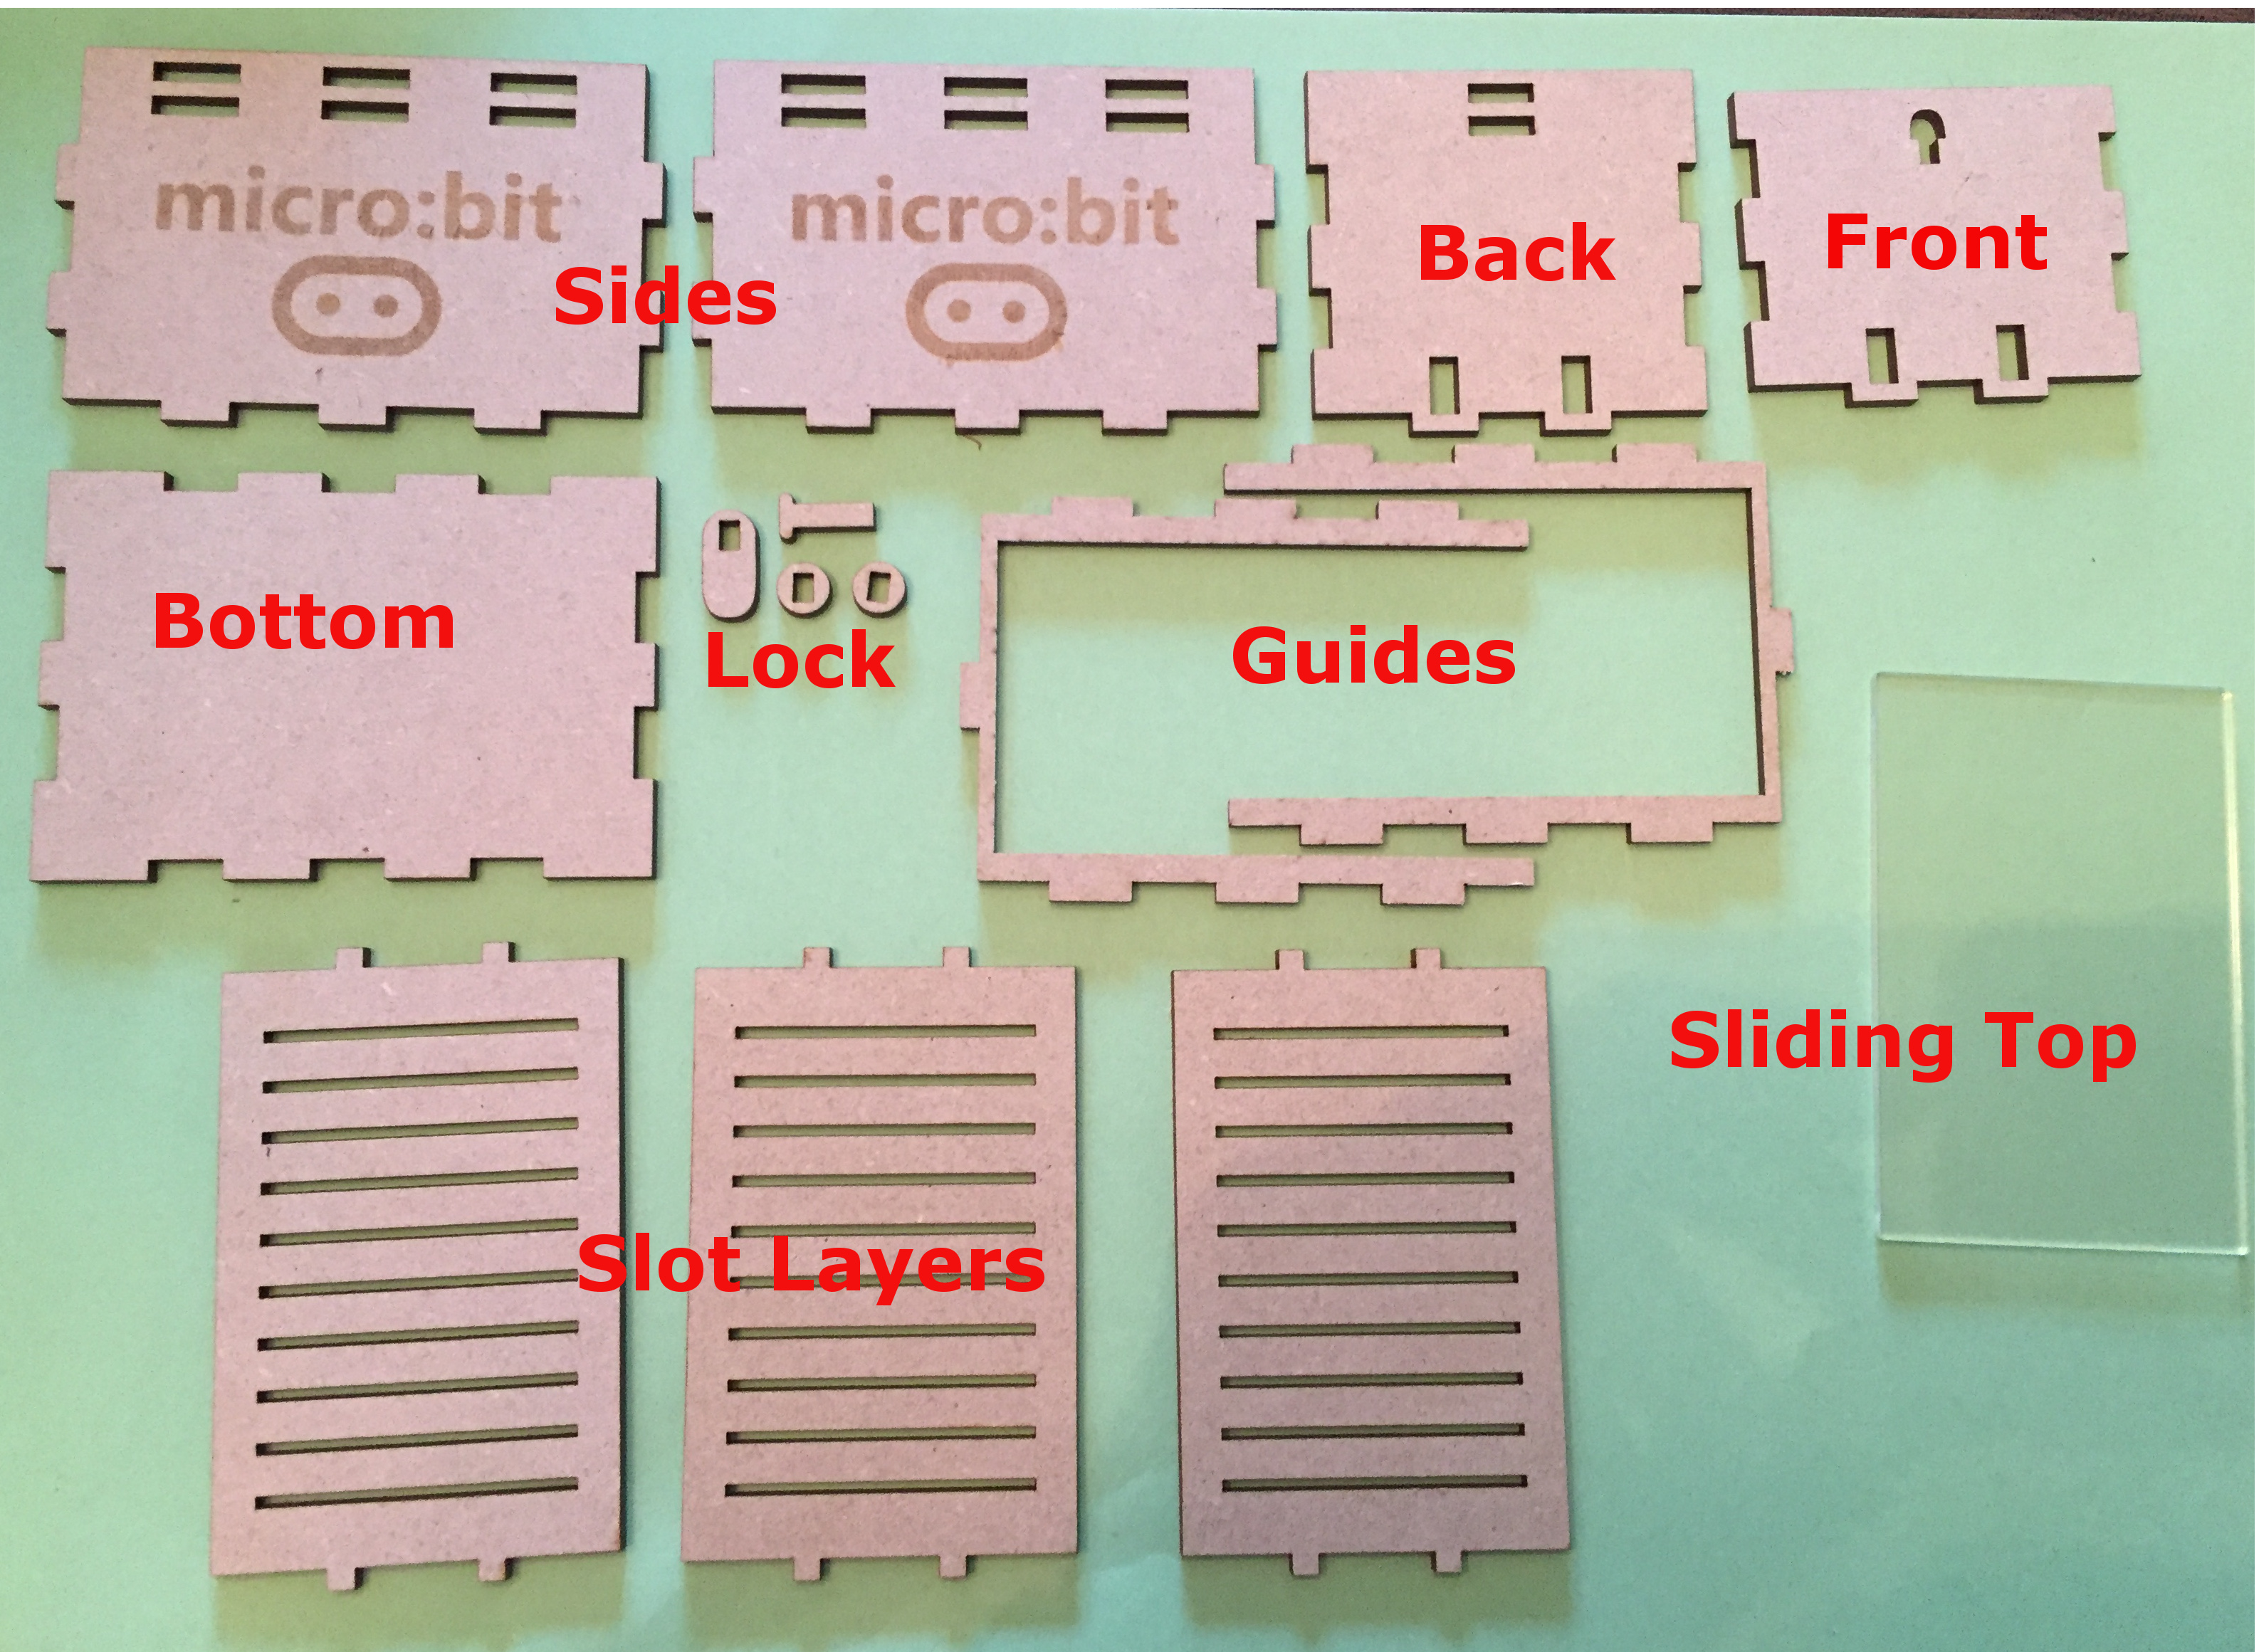
Laser Cut the Parts:
SVG design files for both the 10 and 20 micro:bit boxes are in the zip file below. These designs are meant for 1/8″ (3.2 mm) wood. If your wood is thicker, it will be very difficult to assemble the box, and you may have to widen the slots in the side and back box pieces.
Cut the pieces for the body from 1/8″ wood, and the sliding top may be cut from either 1/8″ acrylic or wood. The green lettering in the SVG files is meant to be decorative etching, and may be omitted if you prefer.
Assemble the Box:
It’s easiest to assemble the box in two halves and then join the halves. For the first half (below, right) stack the three slot layers on top of each other, then slide the tabs into the slots in the Front side of the box. Rest the connected slot layers on top of the box bottom as shown at right in the image below. For the second half (below, left), attach the sides and back of the box to the tabs in the two guide pieces. The guide pieces are thin and may snap if the slots in the box sides and back are not wide enough.
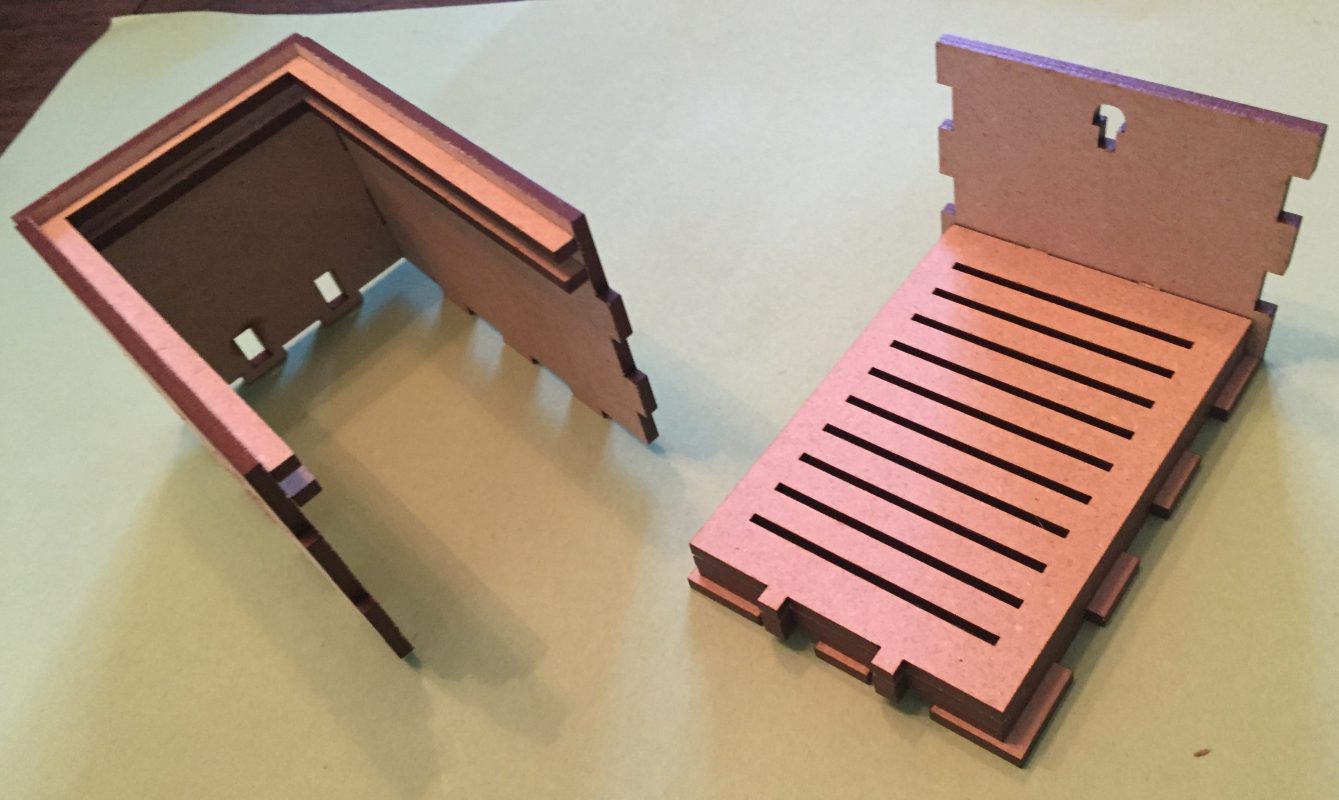
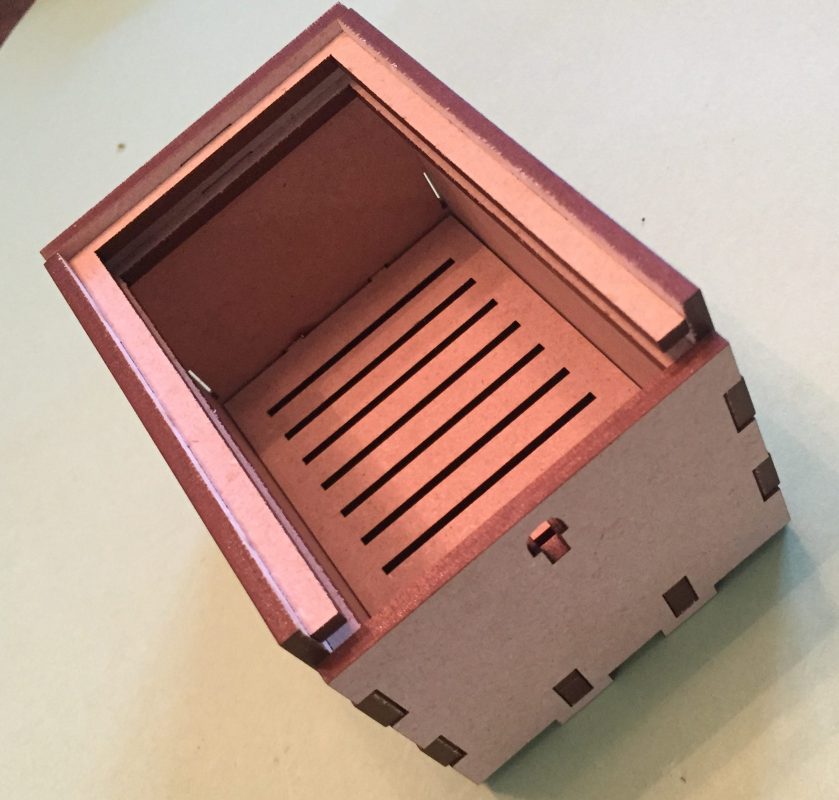
Now carefully join the two halves together, placing the tabs in the slot layers into the slots in the back side of the box as shown. You may need to remove the bottom of the box and then replace it to put all the pieces together. if they fit well, then separate them a little bit, apply some wood glue, and place them back together to bond.
Next add the locking mechanism. The steps are shown below. Slide one of the small circles over the long post, then slide the post through the mushroom-shaped hole in the front of the box from the inside. Slide the long oval tab tab followed by the other small circle over the post that protrudes through the front of the box. Add a bit of glue to keep them together if needed, but be careful not to glue the lock to the front of the box.
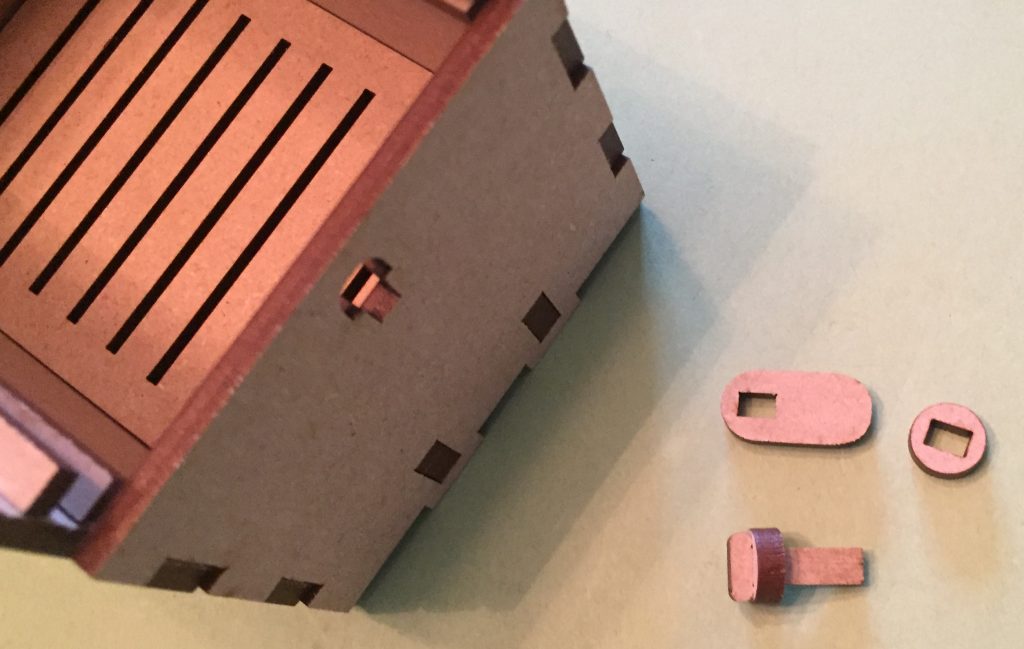
Slide one of the circles over the long post 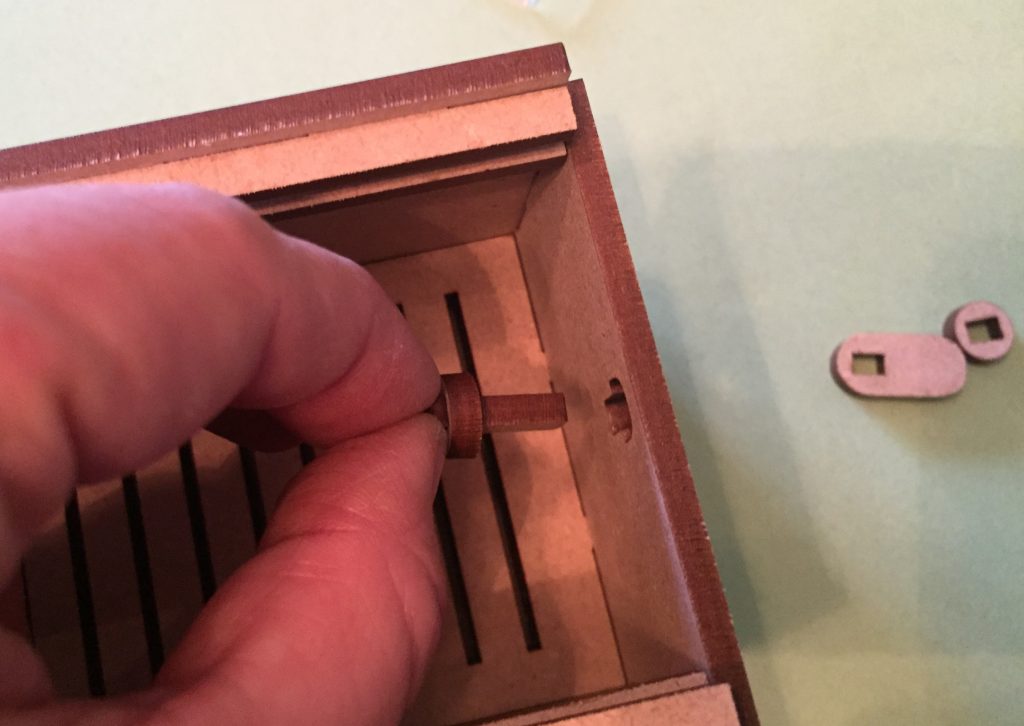
Slide the lock through the front of the box from the inside 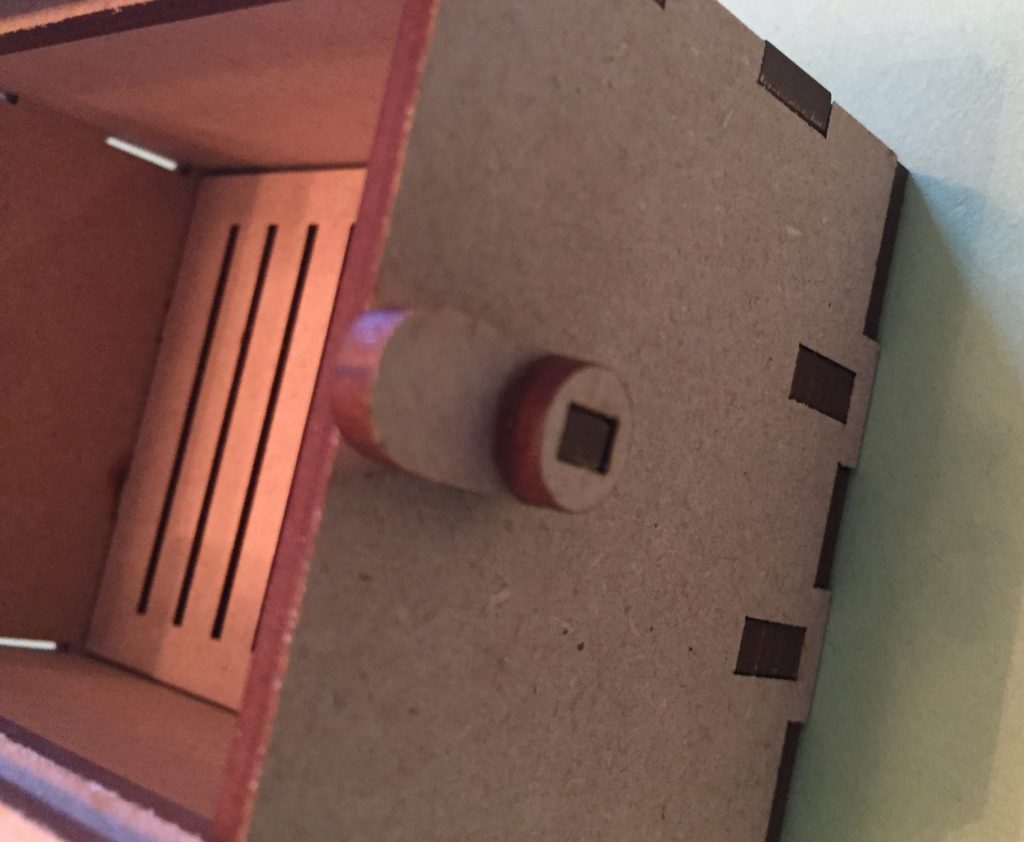
Slide the oval tab over the post, followed by the circle. Glue together iif needed.
Now you will be able to slide the lid into place between the guides and turn the lock to hold it in. Pushing the lock down into the slot will keep it from rotating.
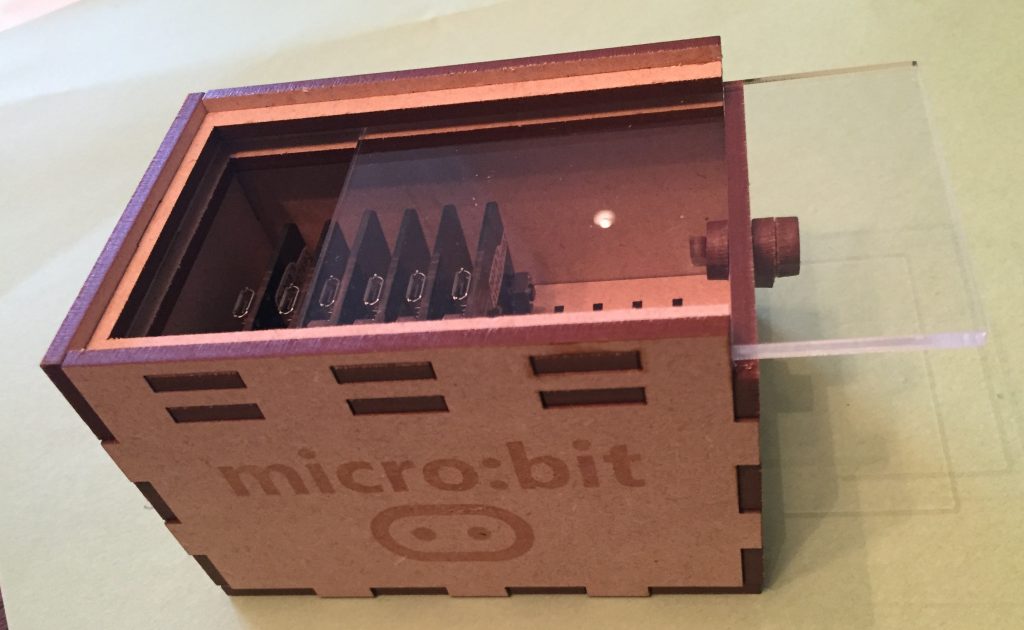
The lid slides between the guides 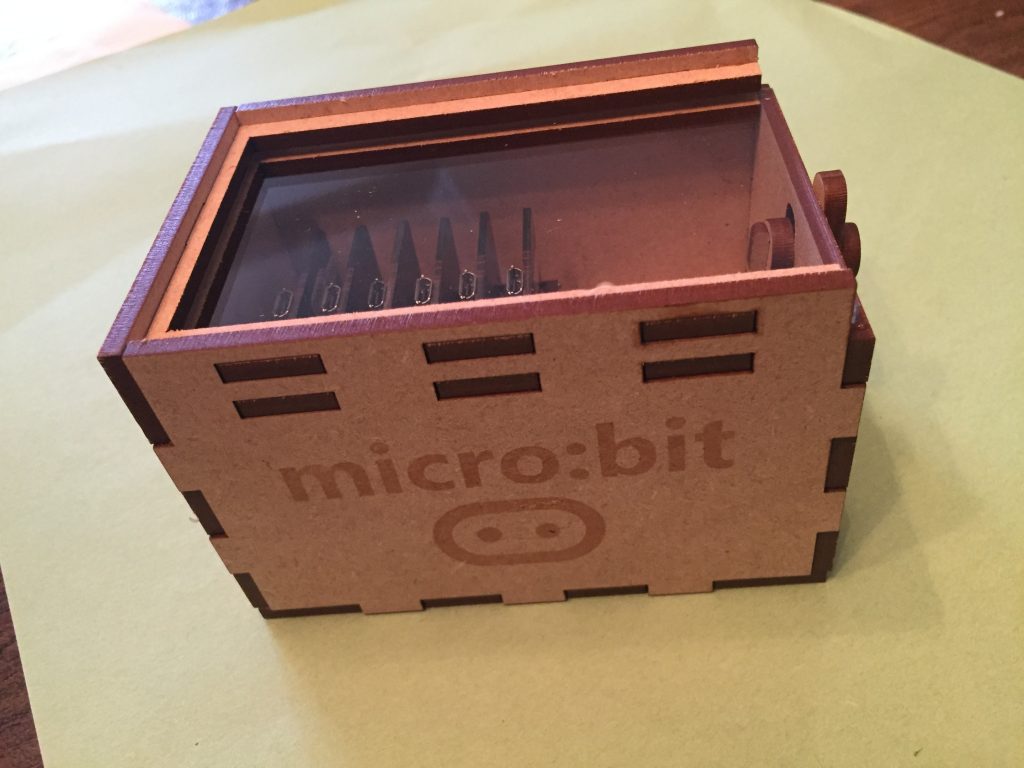
Turn the lock and push it down to keep the lid in place