
WARNING: THIS PROJECT USES BUTTON CELL BATTERIES THAT ARE EASILY REMOVED. Button cell batteries can be fatal to small children and animals if swallowed.The small size of these batteries makes them easy to swallow. Please use caution and common sense to keep your batteries (and the trophies) out of the reach of small children and animals
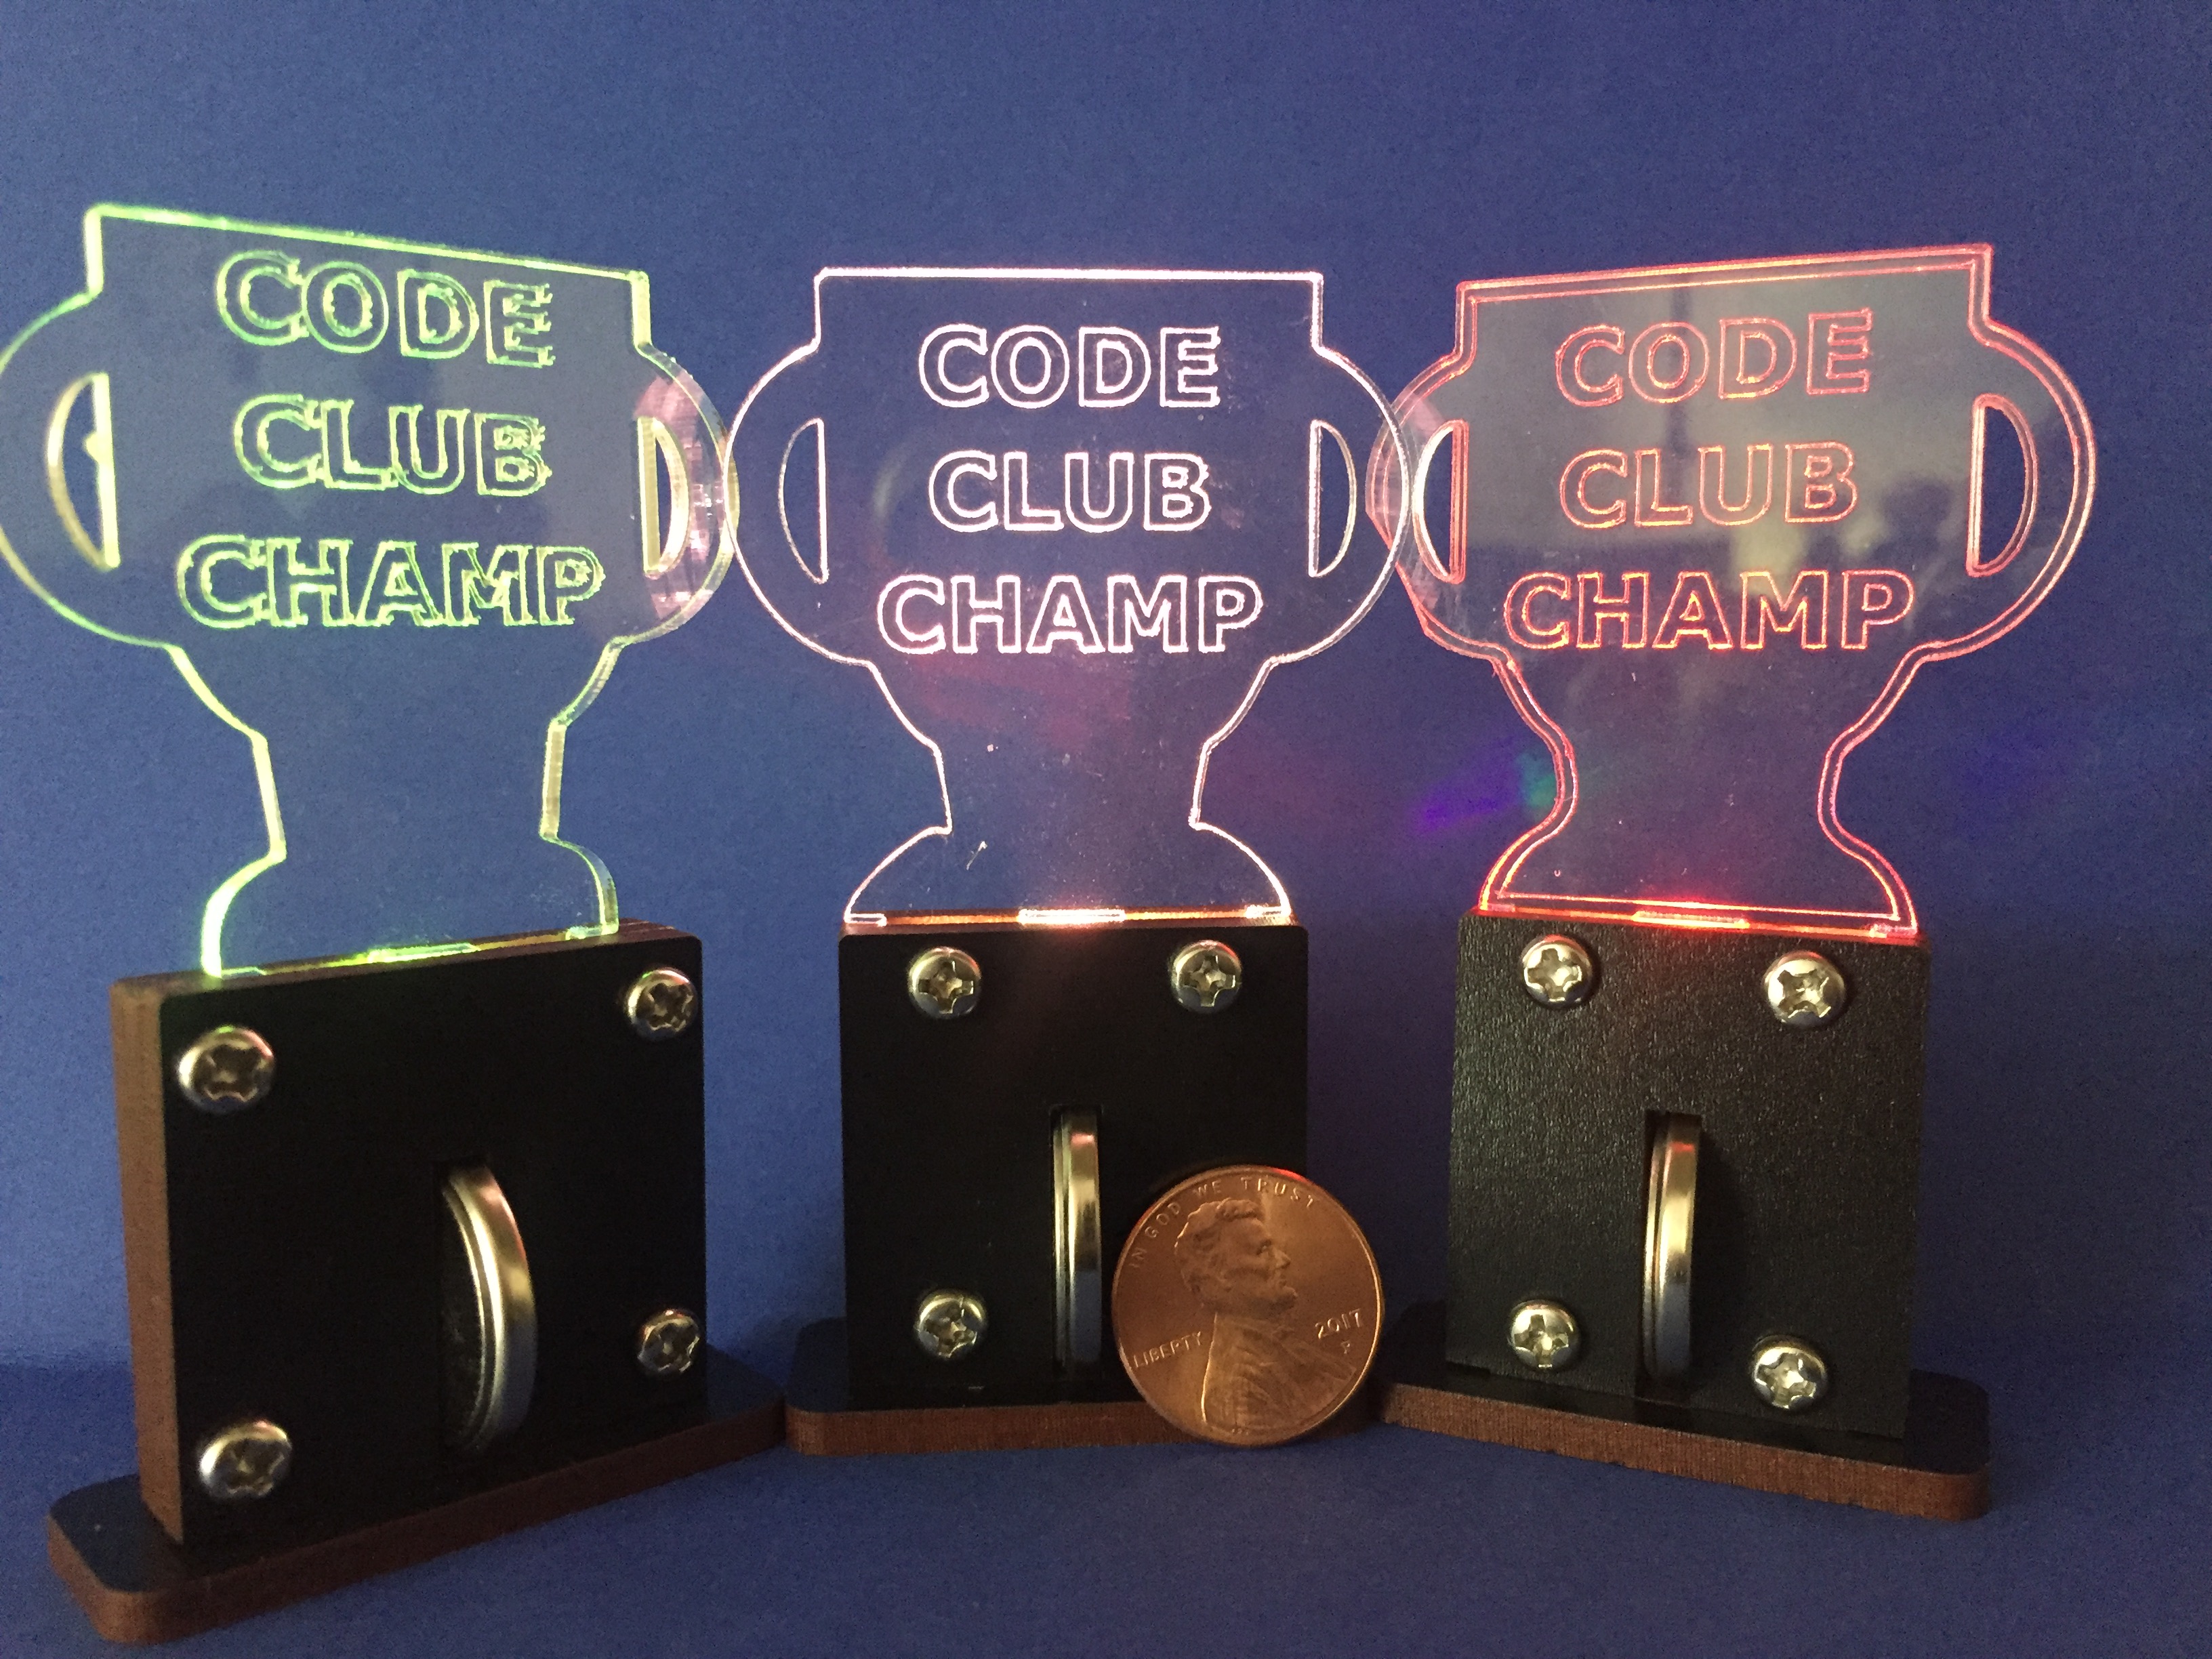
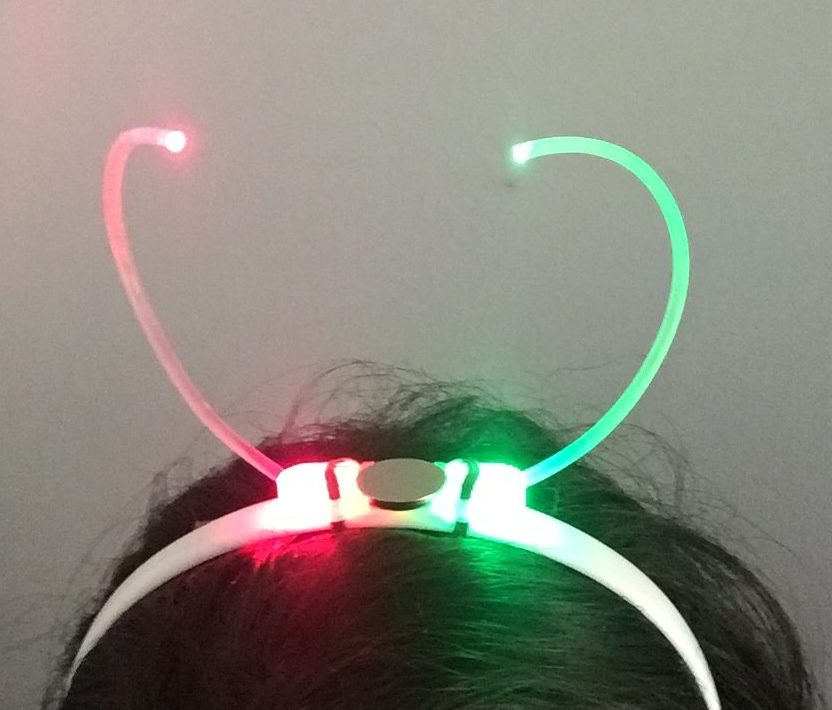
Our code club is having and end-of year party this week, so I adapted the Teeny Tiny Edge-Lit display into edge-lit color-cycling trophies that they’d be able to assemble themselves as an activity. This small edge-lit display is a bit easier to assemble than the previous one, and holds the edge-lit acrylic in place with screws.A brief how-to guide follows.
Components:
- Super small color cycling 2x3x4mm rectangular LEDs
- 1/8″ wood for laser cutting
- 1/8″ clear acrylic sheet
- 4 x12 mm M3 screws and 4 M3 nuts
- 1/8″ or 1/4″ copper tape (conductive on both sides)
- 1 x CR2032 battery
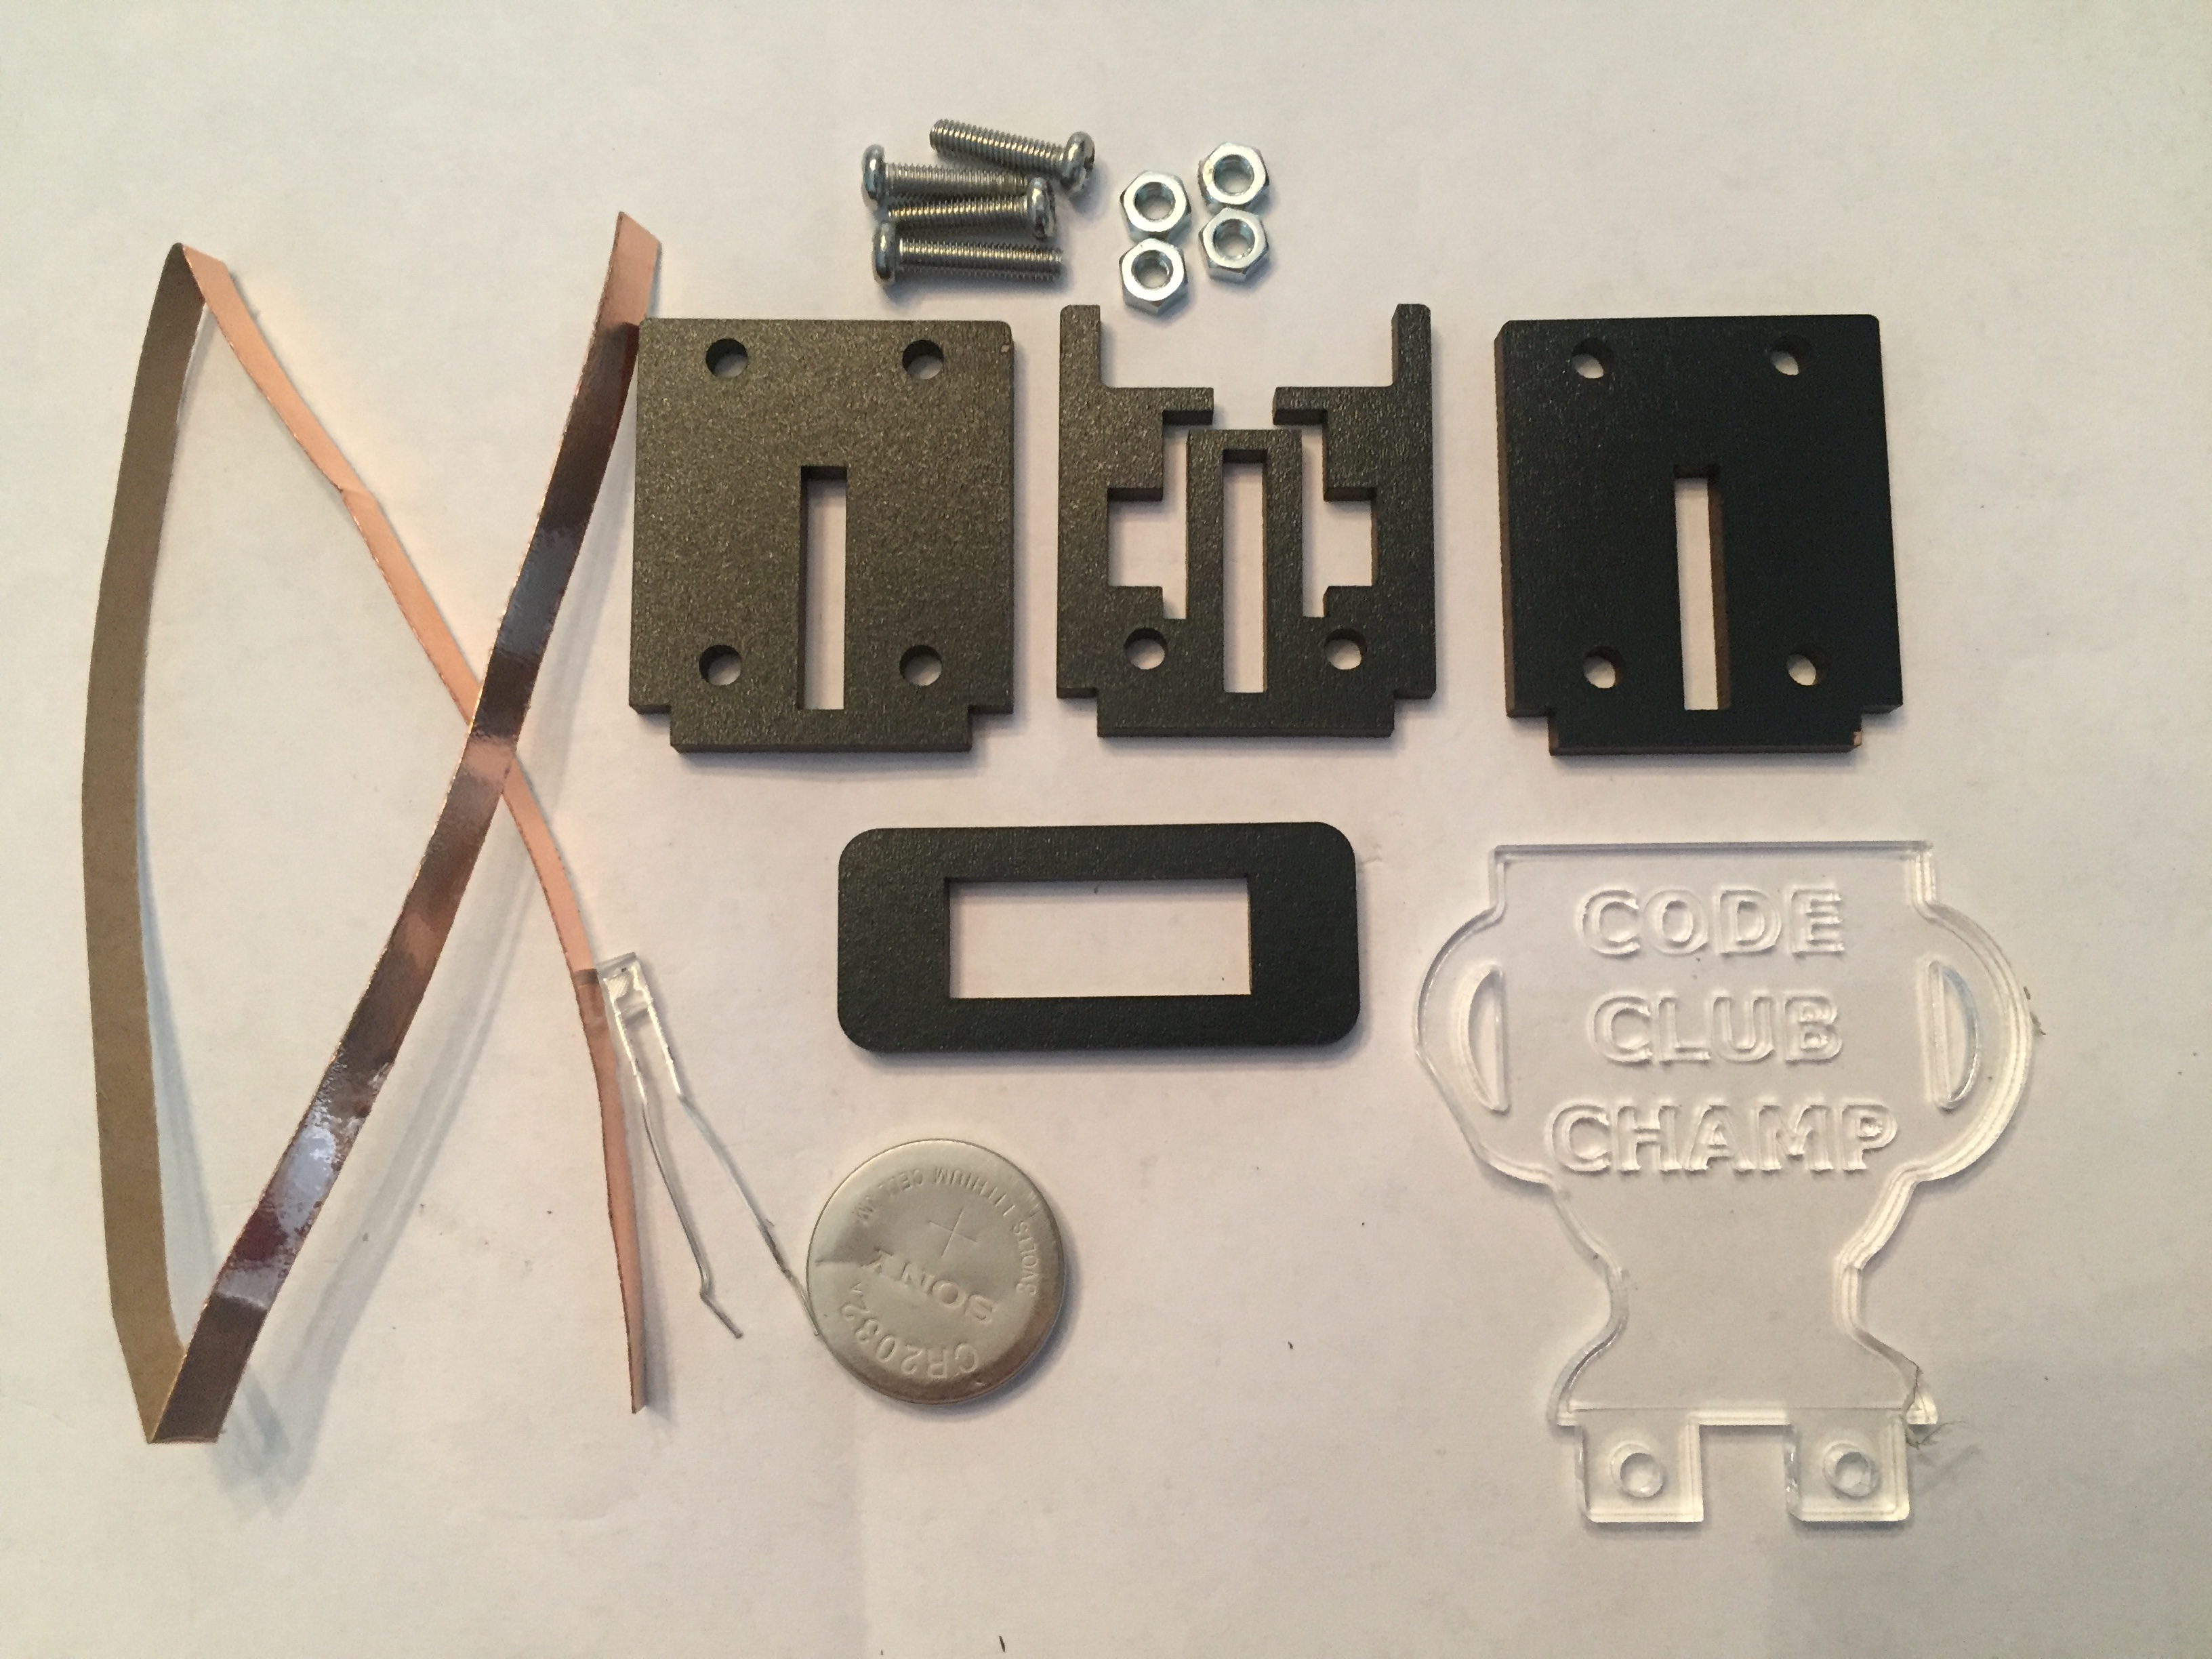
Vector Files:
The link contains two vector files for laser cutting the trophy parts – one for wood and one for acrylic. Don’t resize them before cutting, as they are designed to hold all parts snugly.
Insert the LED:
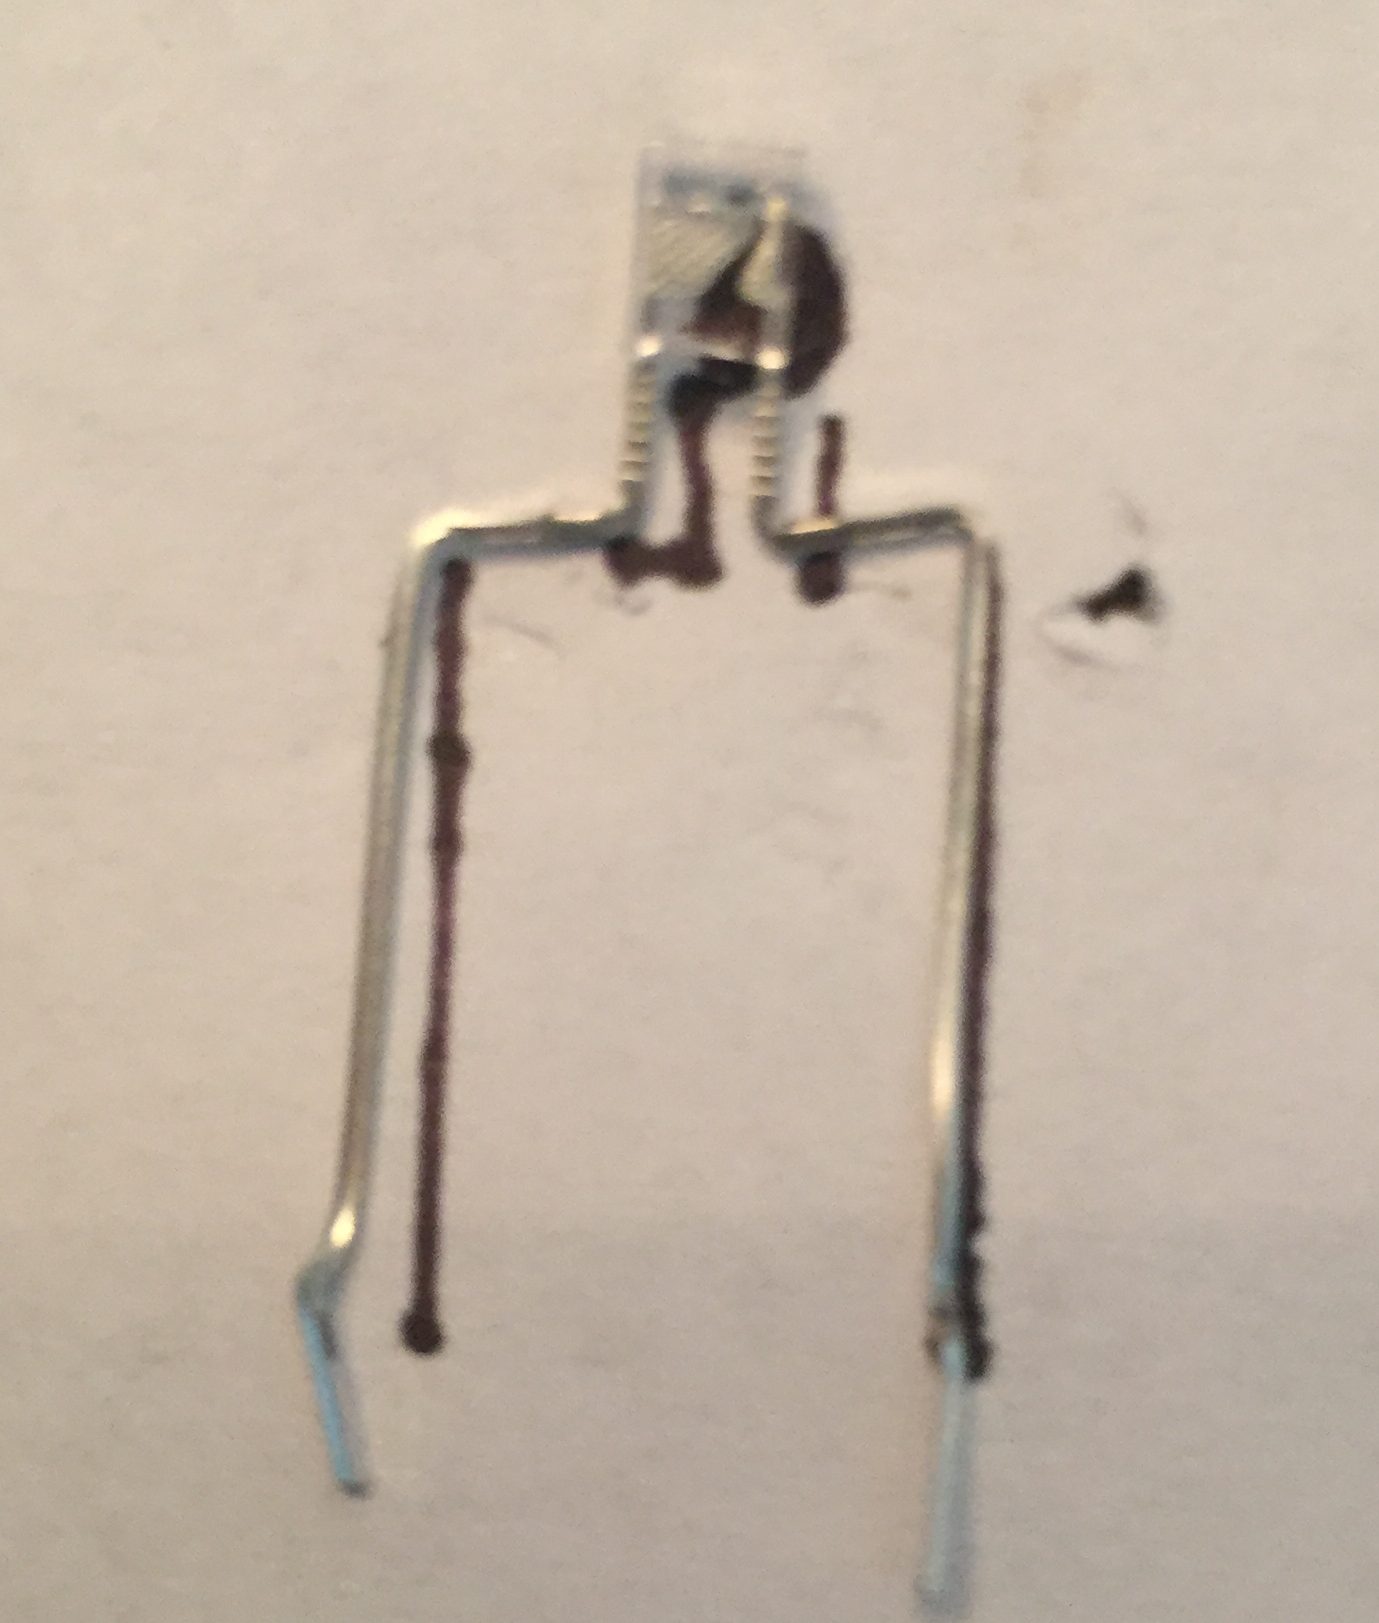
It’s easiest to bend the LED before attempting to insert it into its slot. Place the middle wood section on a piece of paper and trace the path for the LED legs, using a sharpie.
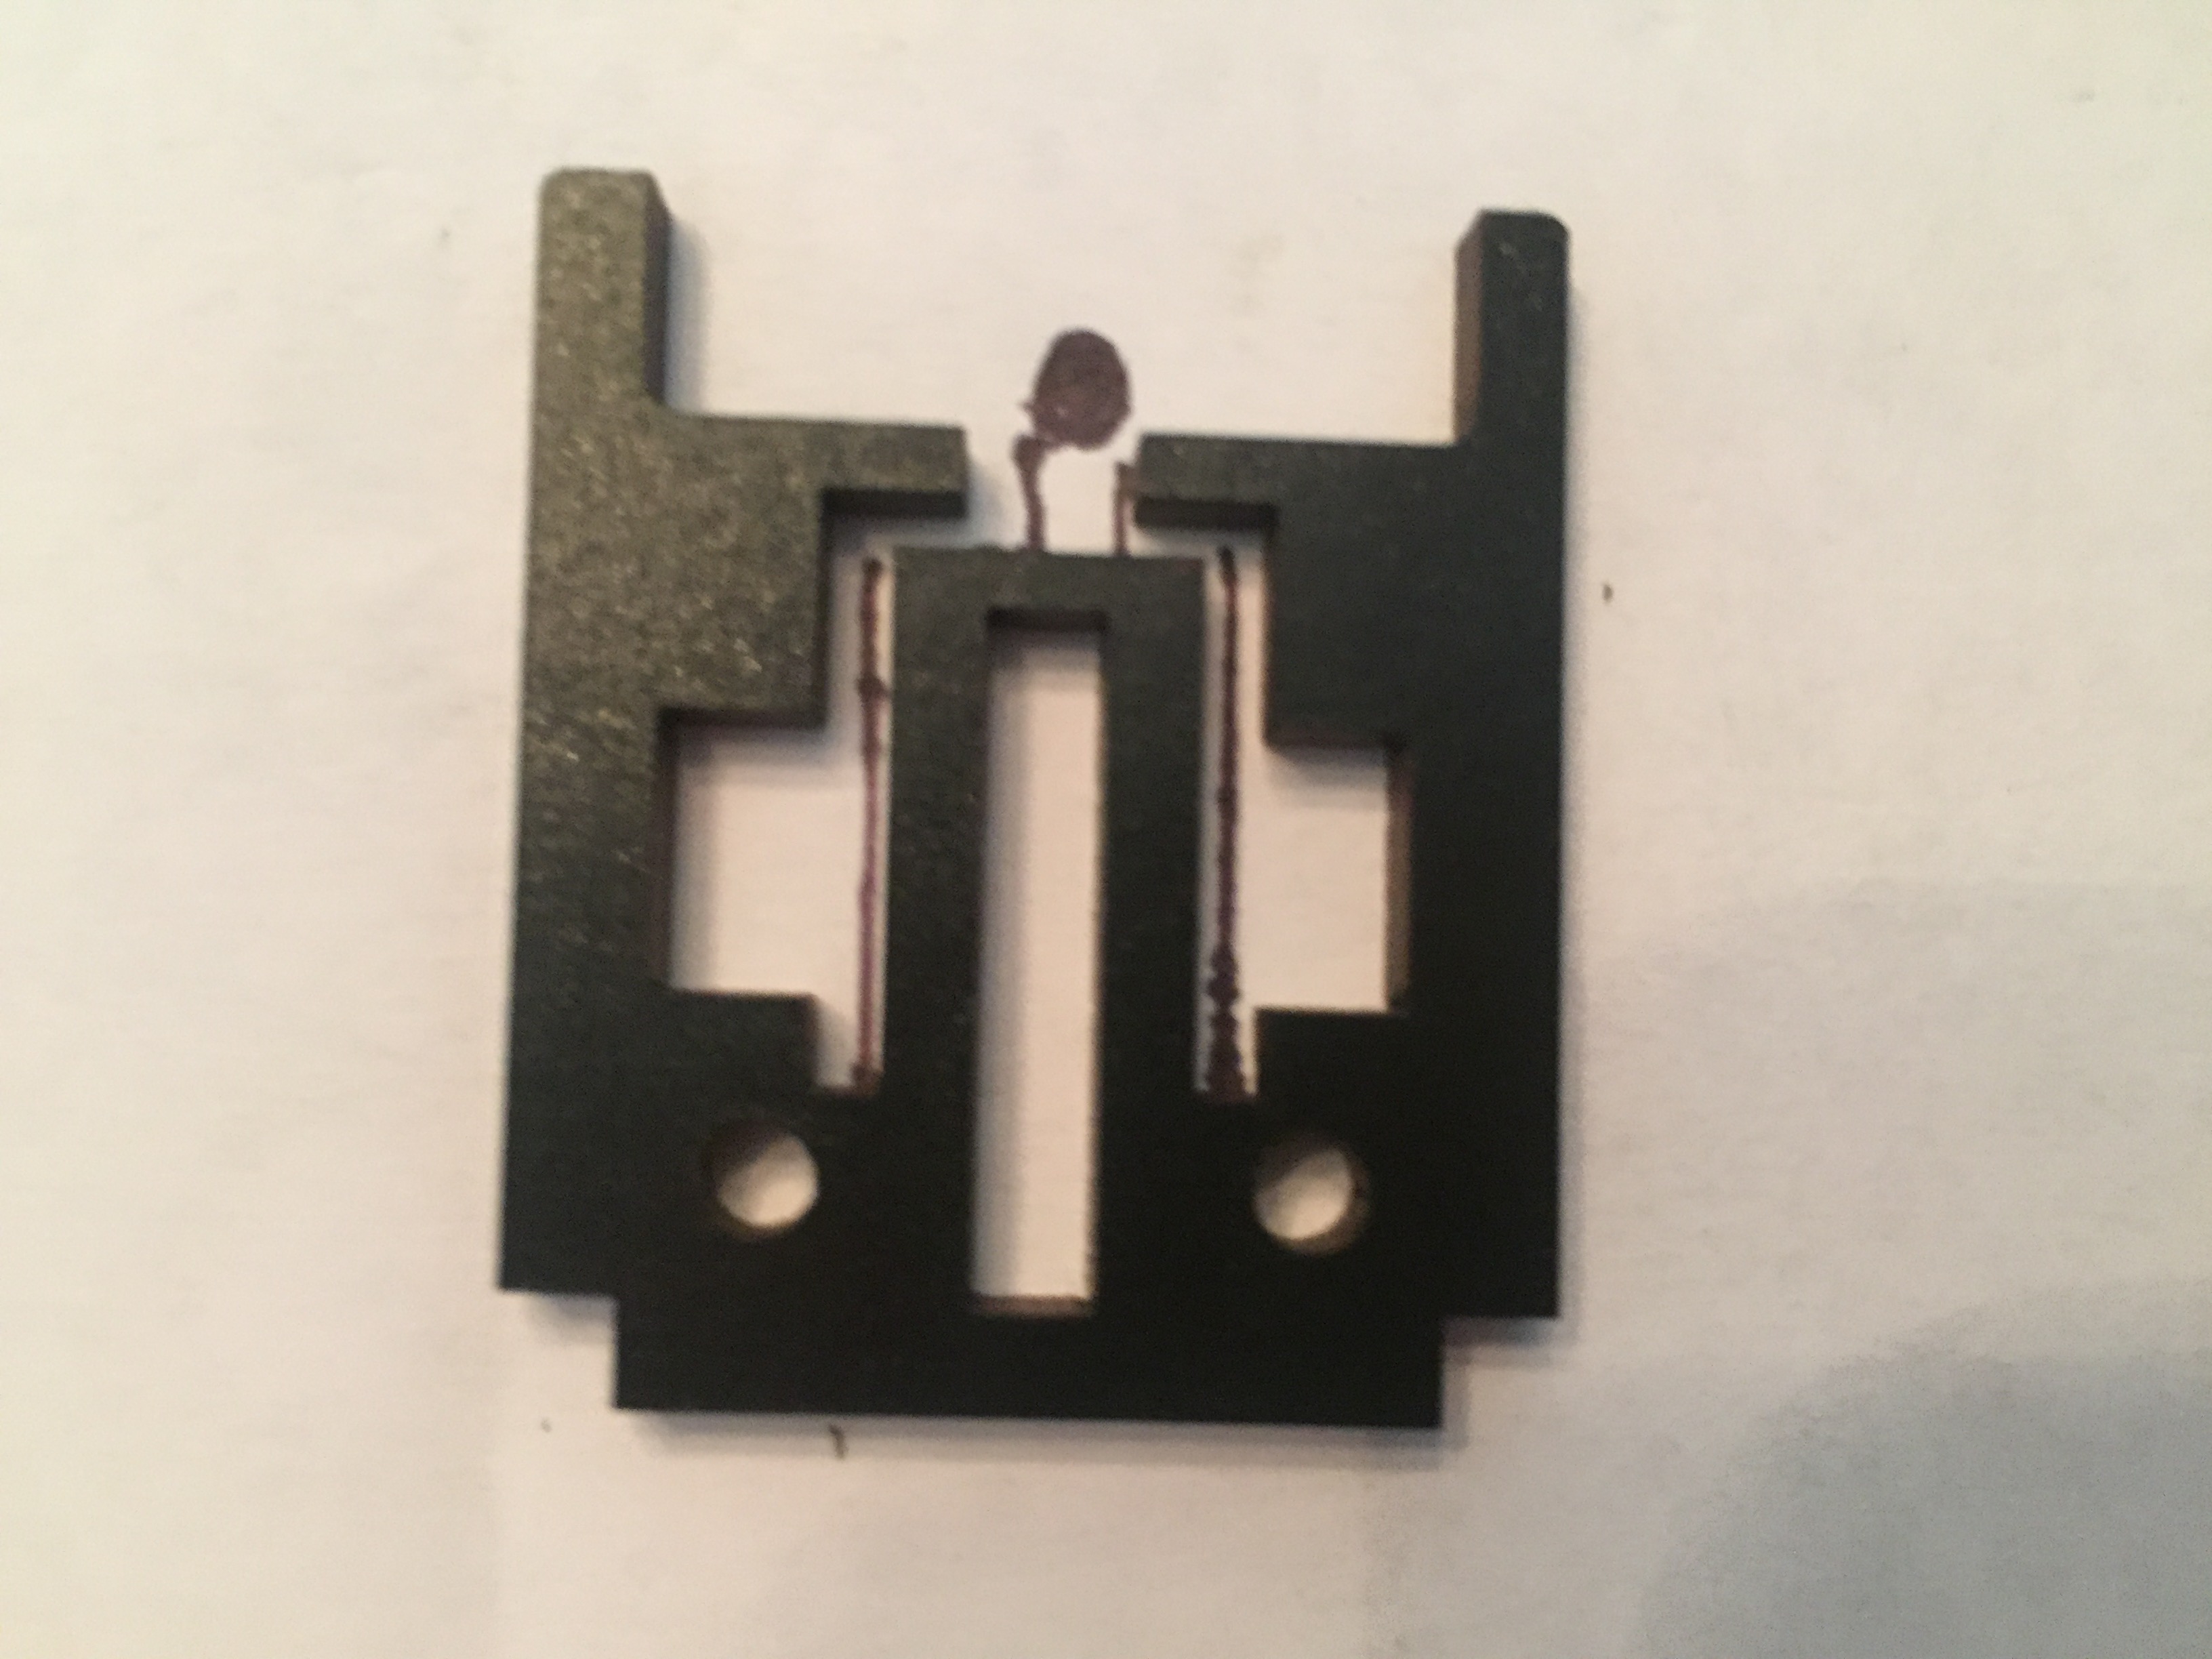
Now place your led over the path, and using pliers, carefully bend the legs to match the path you traced. Using a wire cutter, trim the ends of the legs to fit the slots.
Insert the LED into the slots as shown, and cut two short pieces of copper tape.
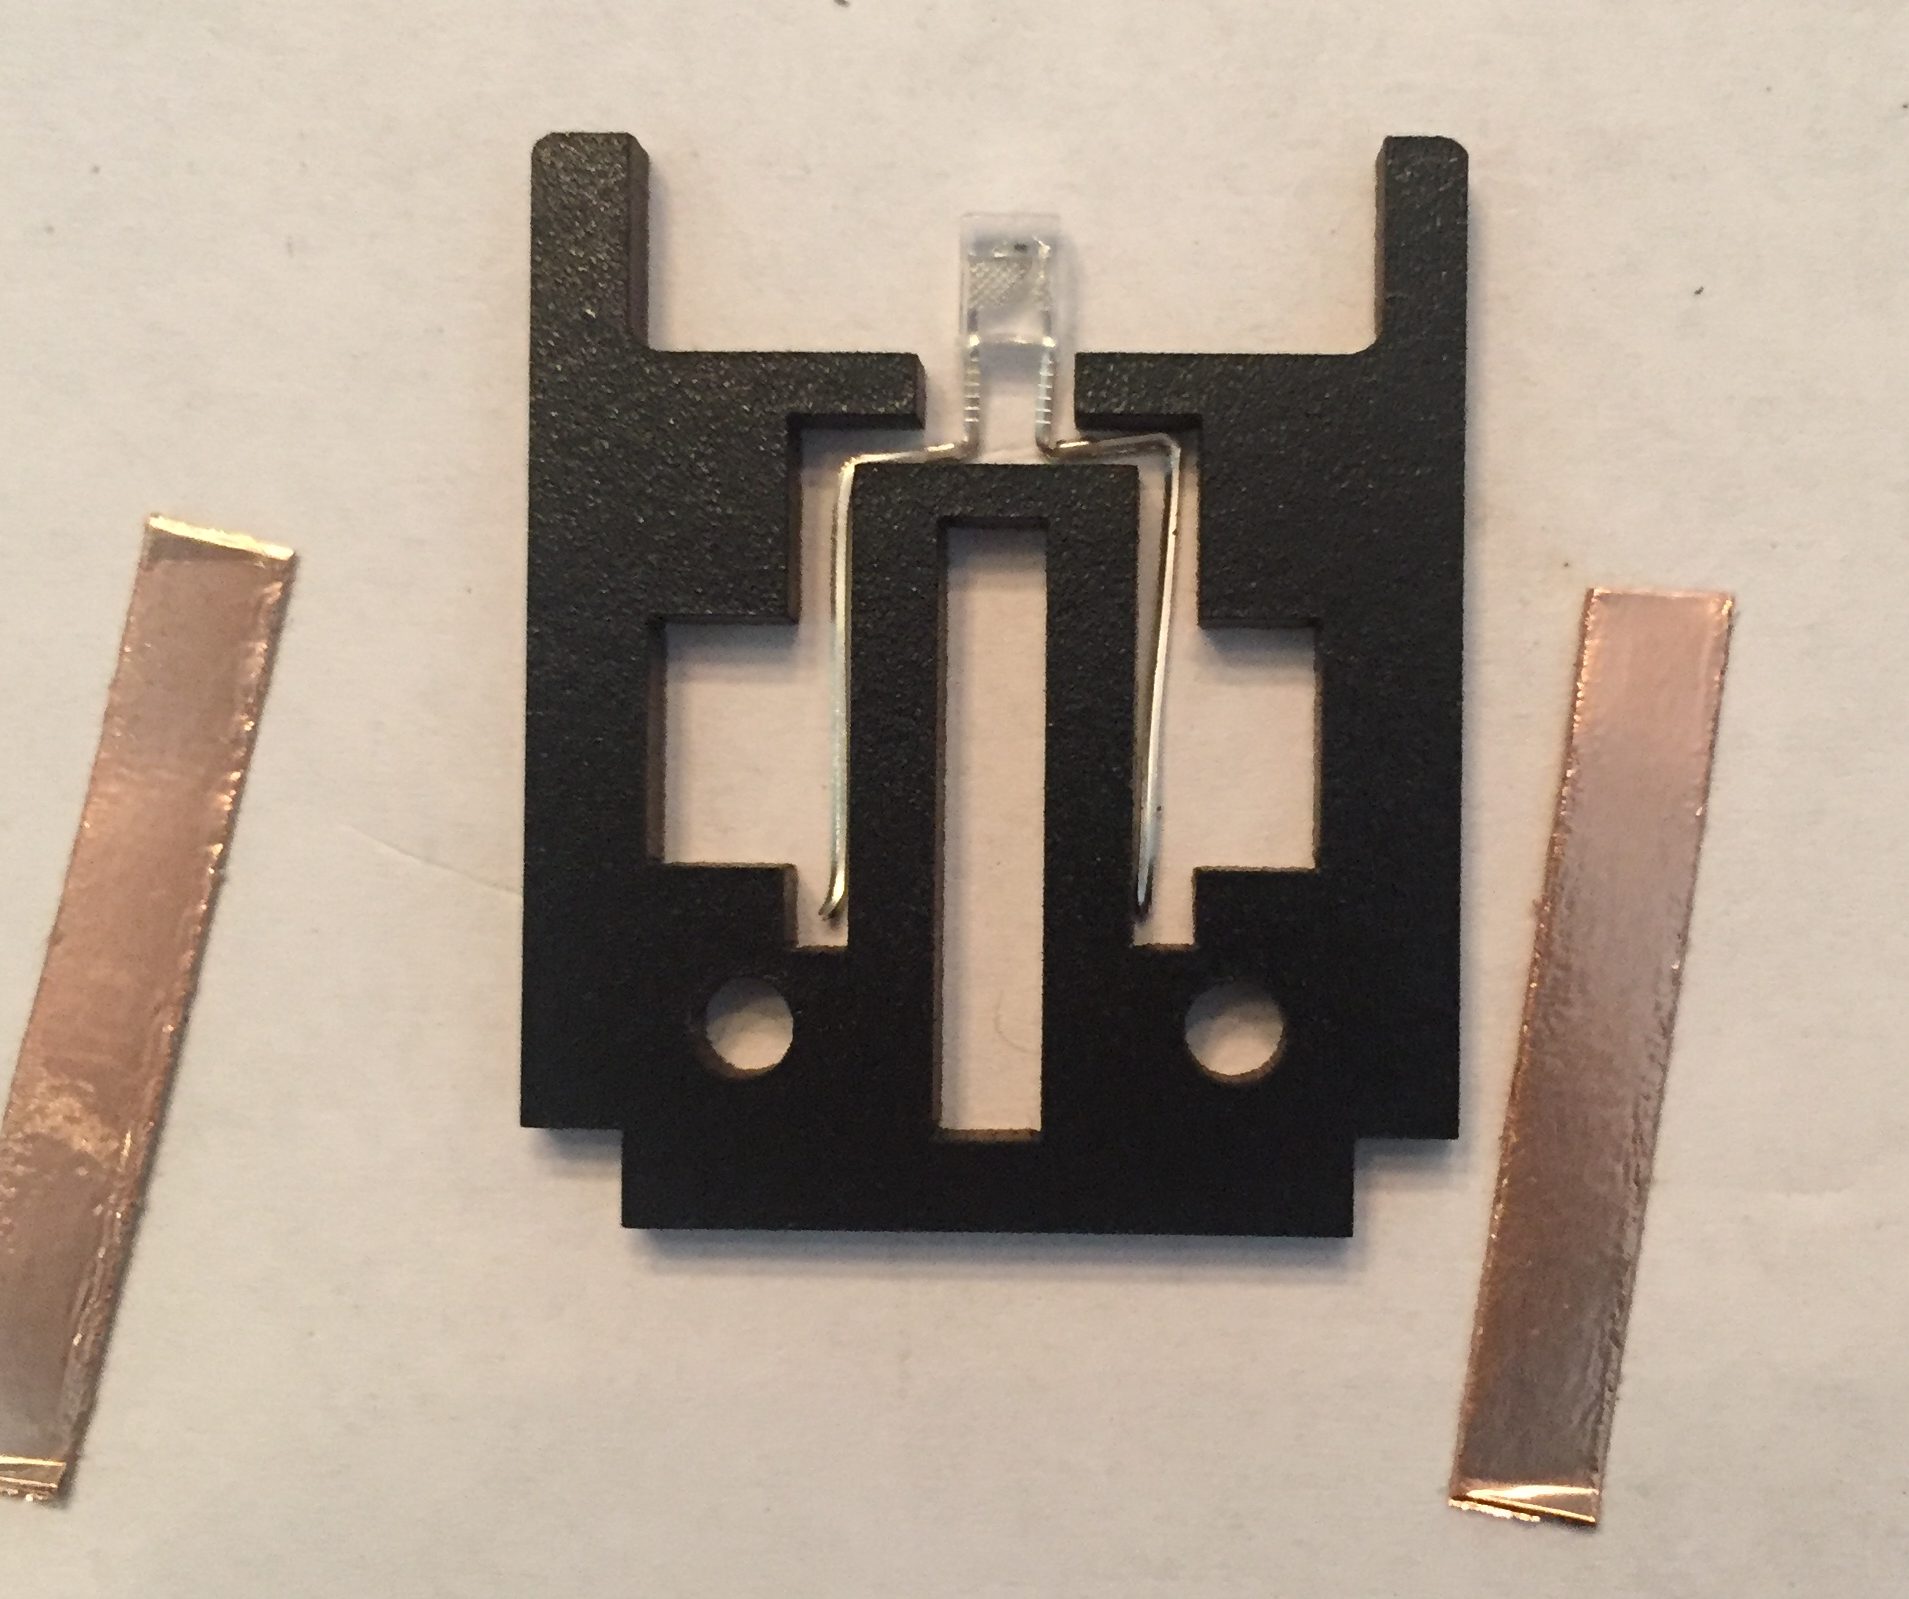
Firmly wrap the tape around the LED legs to hold them in place and smooth the tape down around the legs and the slot to create good electrical contact. Make sure the very end of the copper tape piece doesn’t end up in the slot for the coin cell battery, or it will get displaced when sliding the battery in and out.
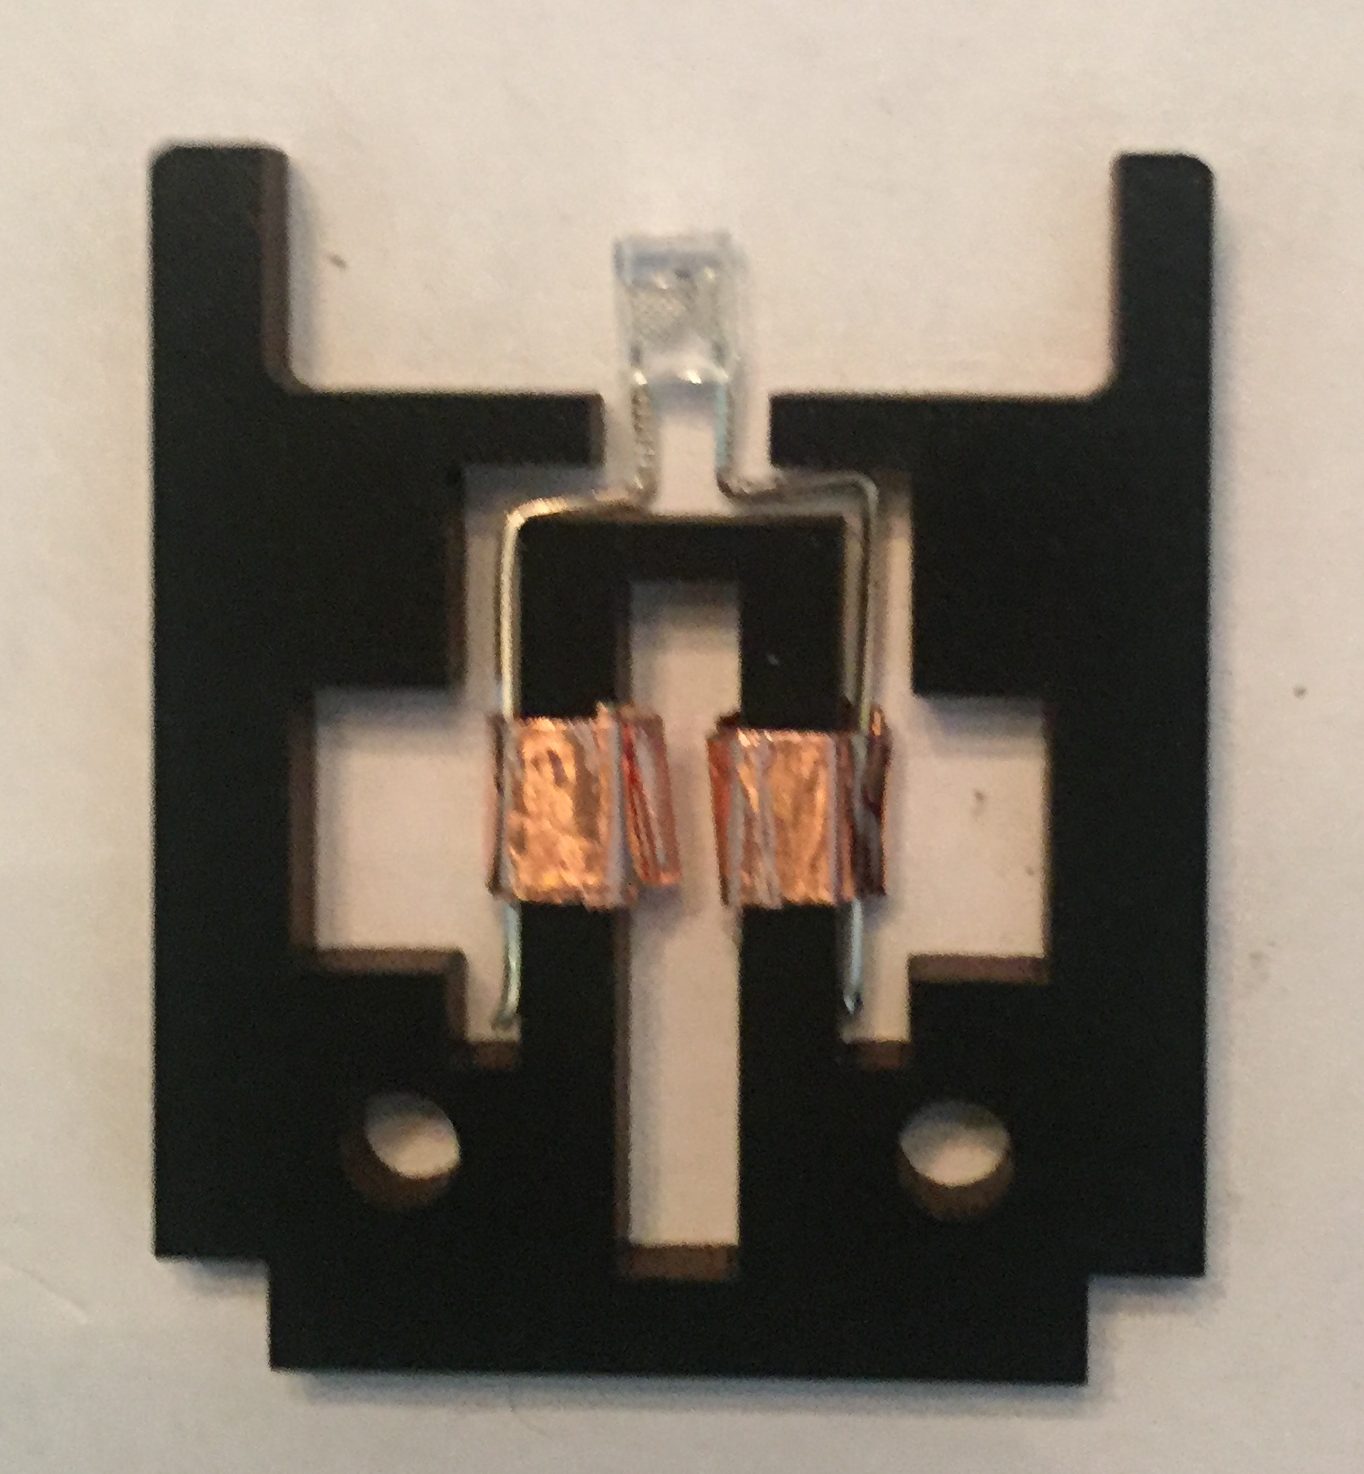
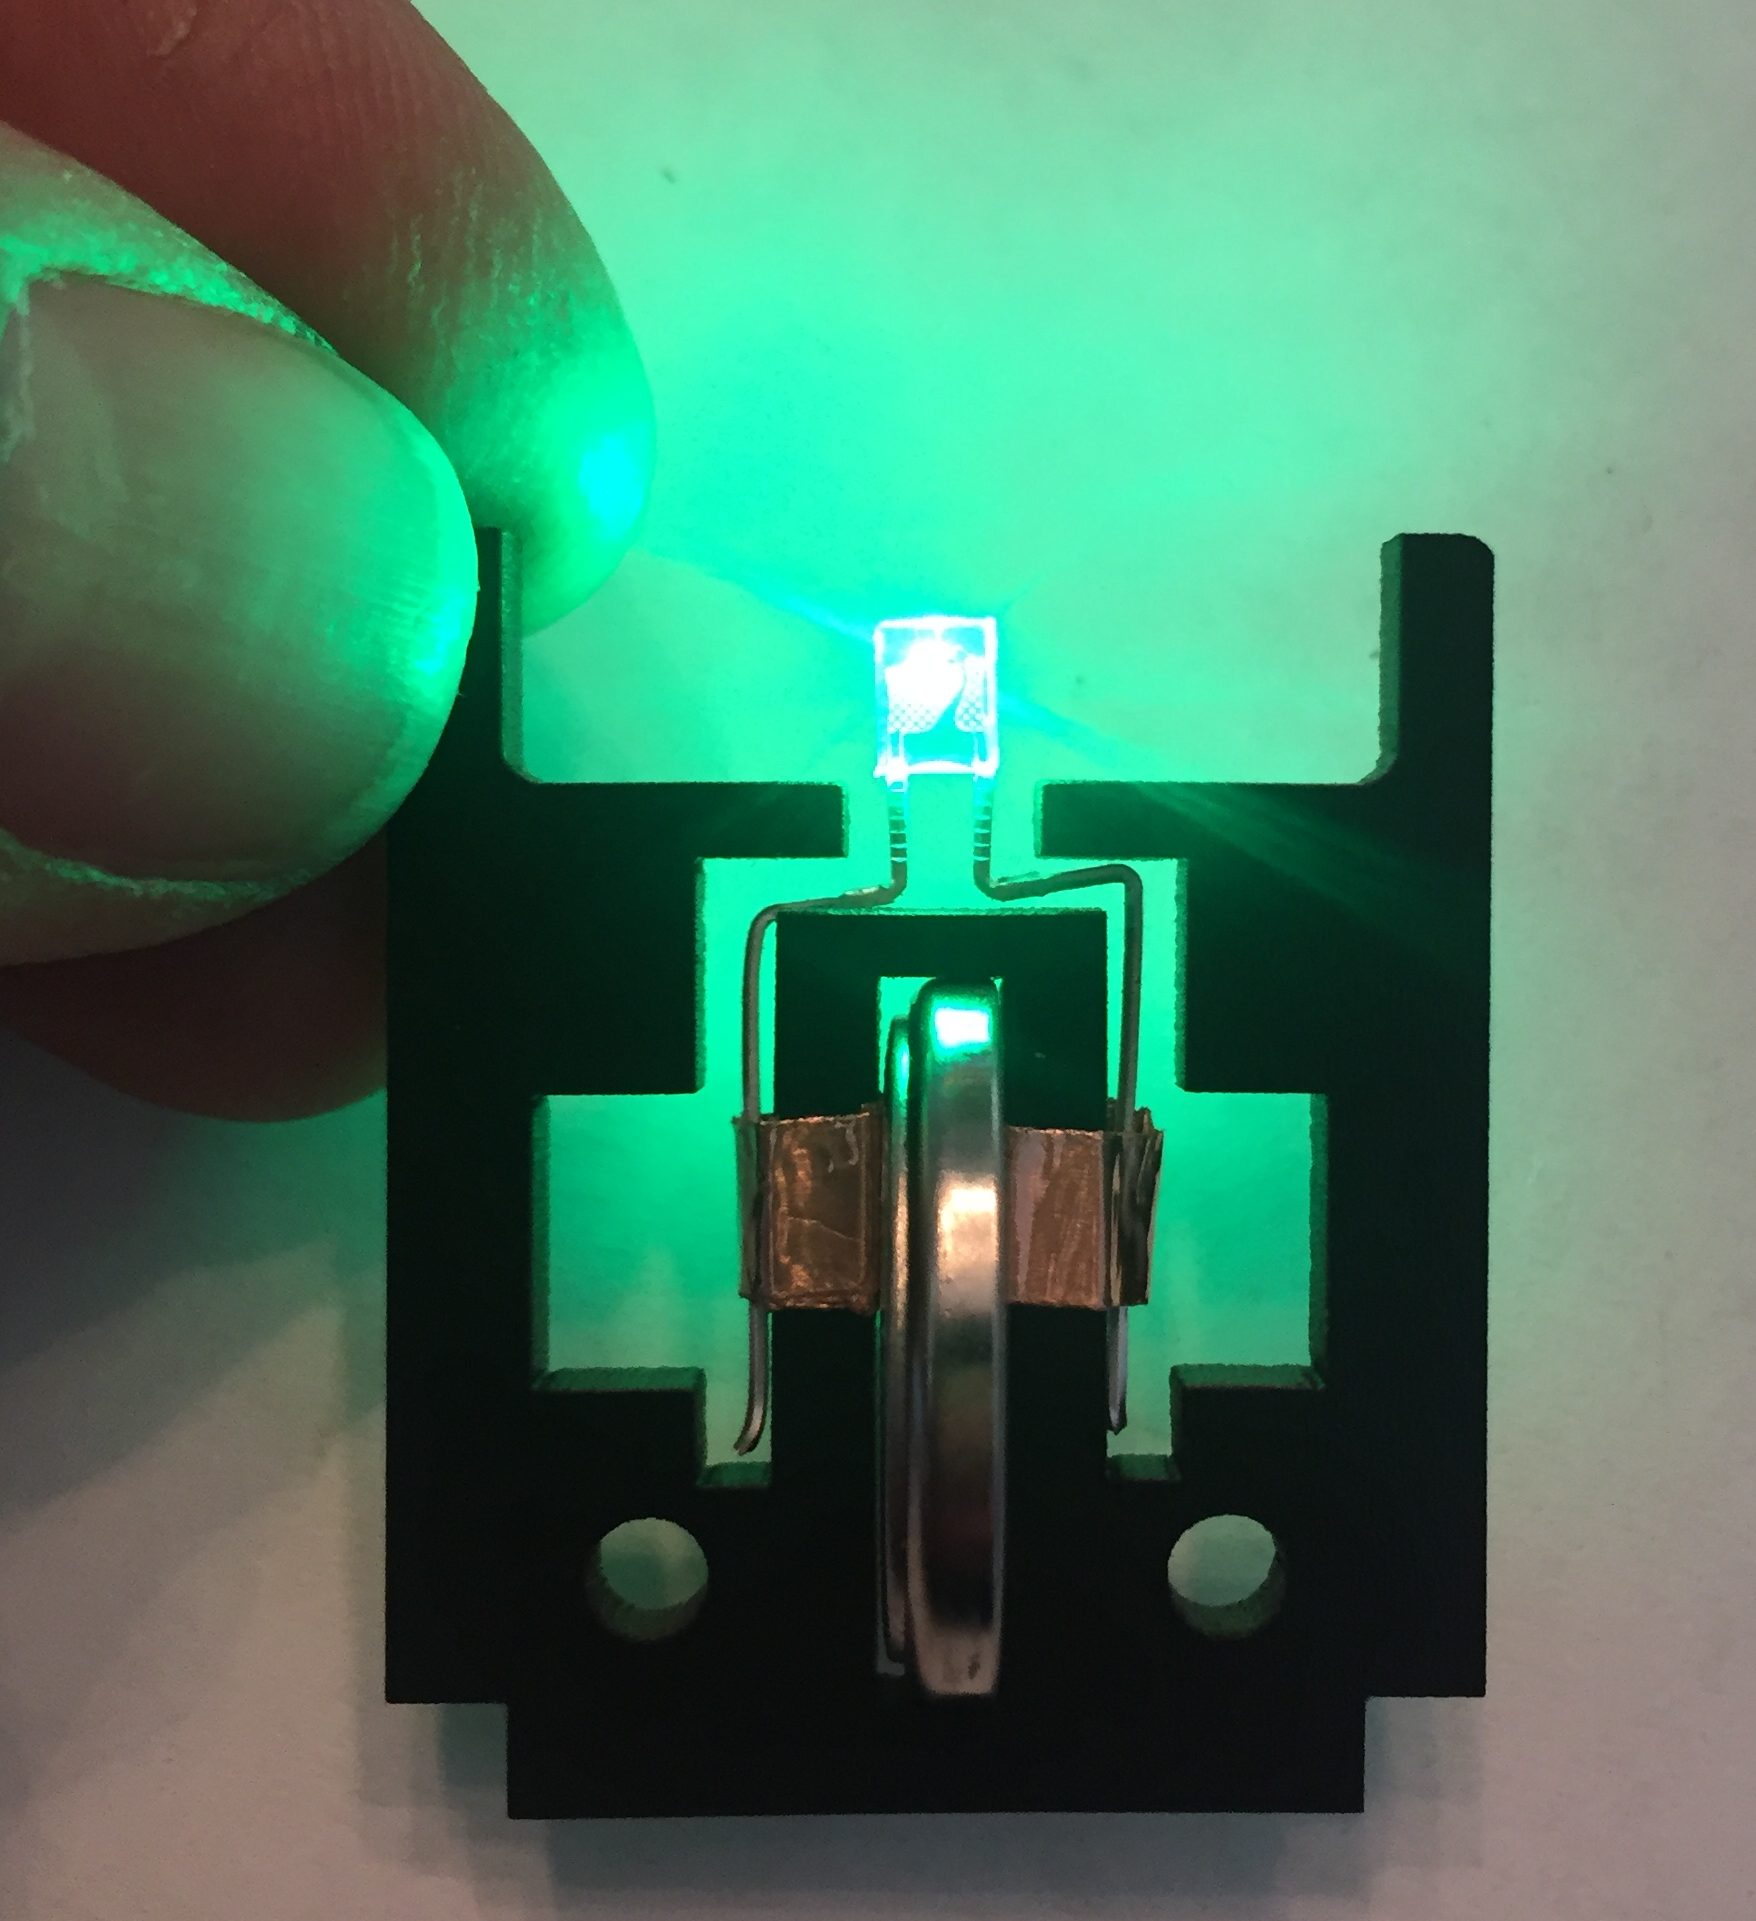
Once the tape is in place, insert the CR2032 battery in the middle slot to make sure it can slide into place and that the circuit works. The fit will be tight, but you should be able to slide the battery in and out of the slot with a little effort.
Assemble the Trophy:
Now stack the three matching wood layers together and insert the 12mm M3 screws in the *bottom* two holes to keep them together. Attach the corresponding two M3 nuts and tighten them.
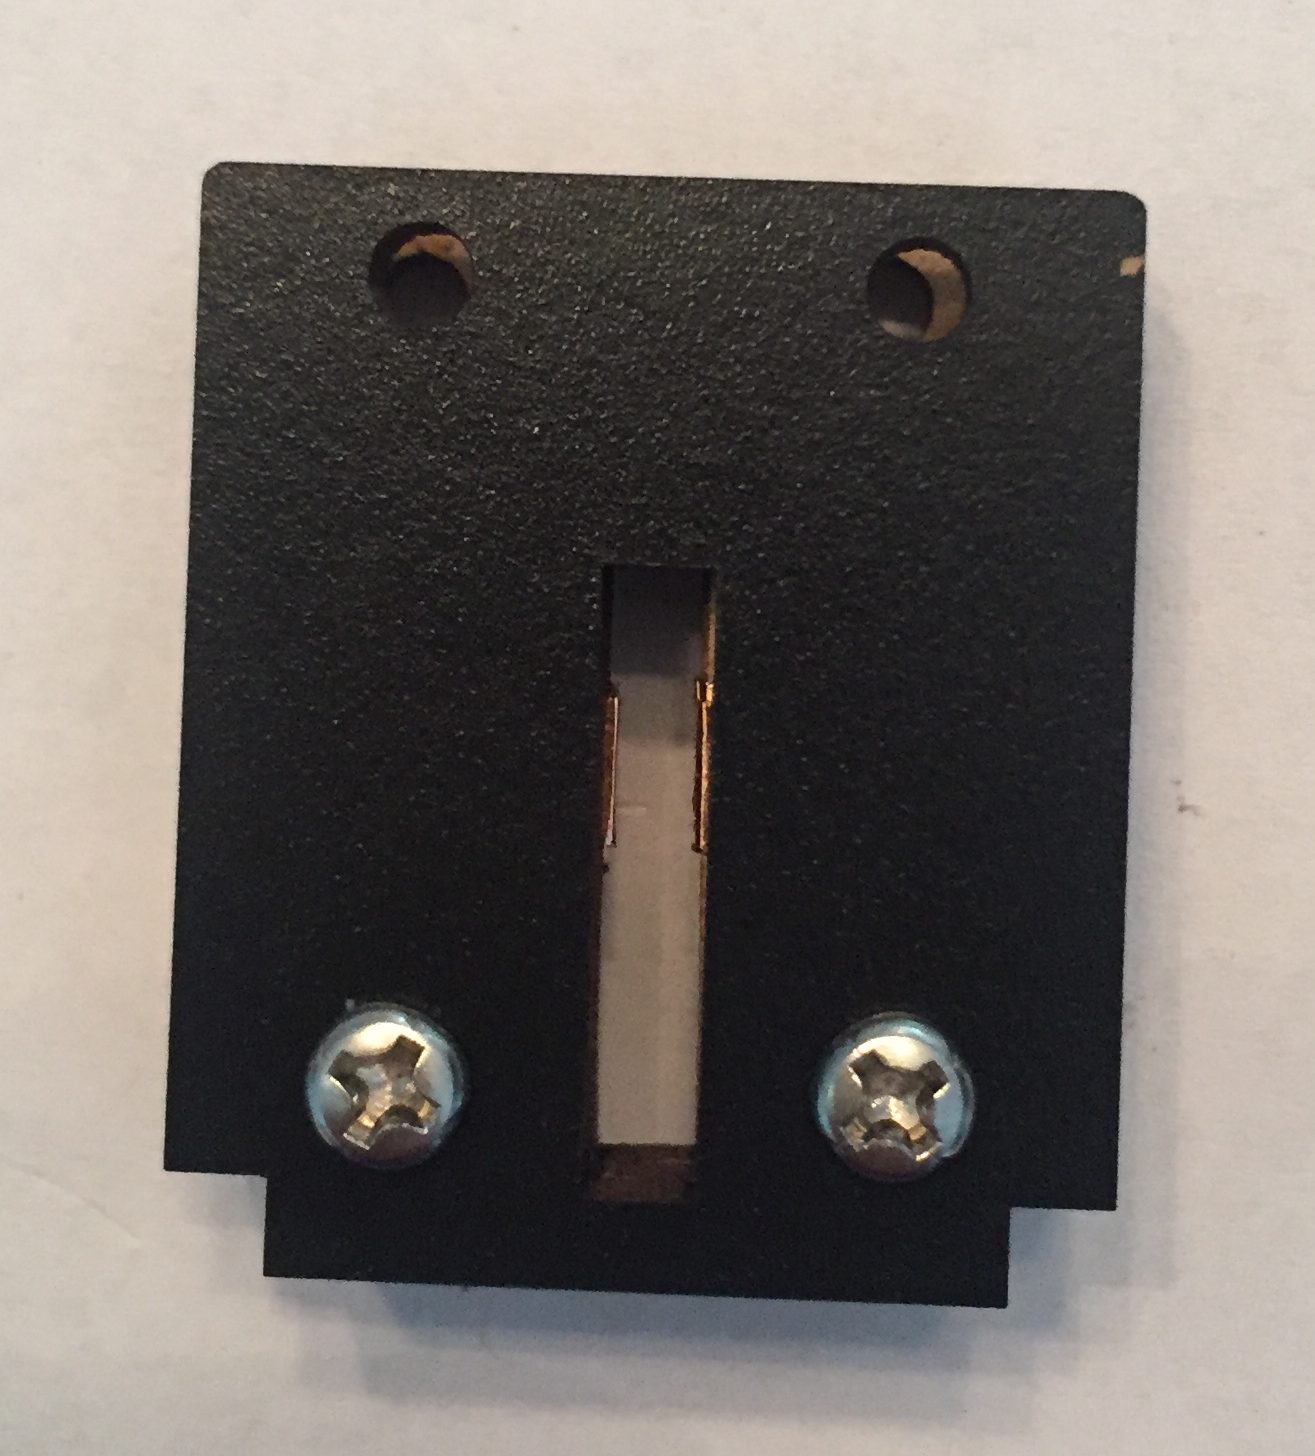
Insert the acrylic in the top slot, and then insert the remaining two M3 screws into the top two holes to hold the acrylic in its place.
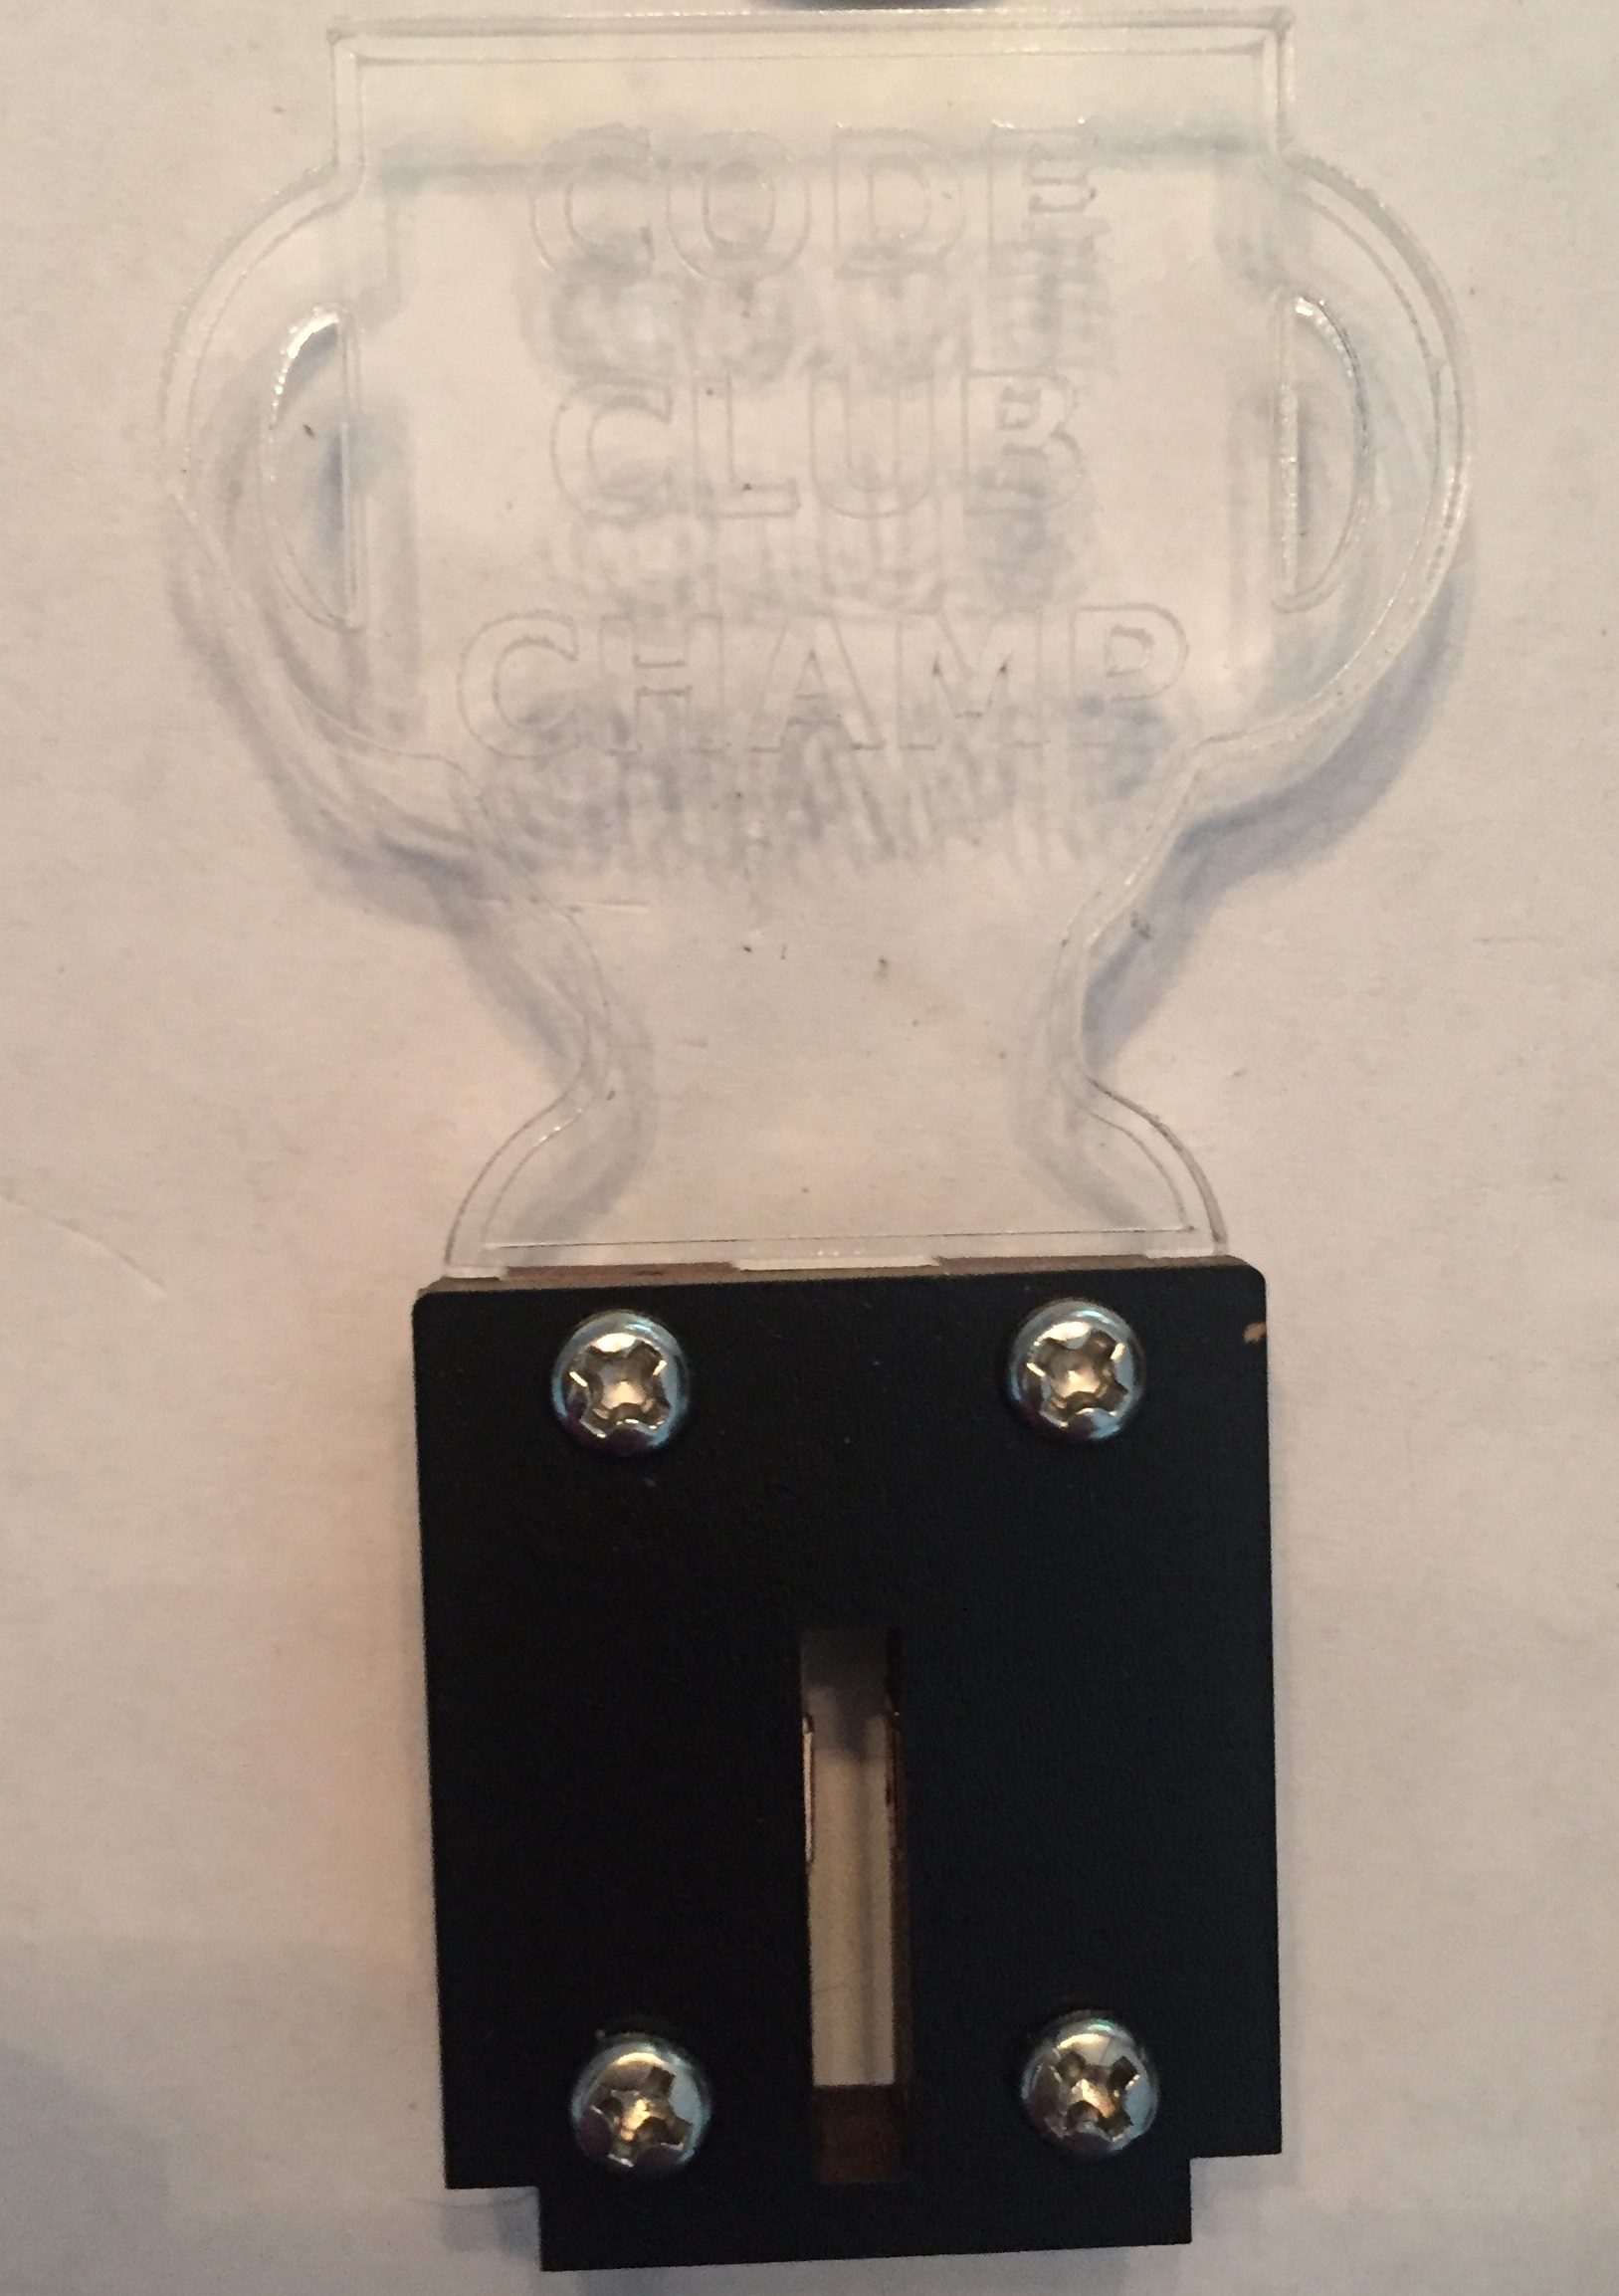
Slot the wood layers into the wood base. You may want to use wood glue to keep the base attached. Stand up the trophy and insert the CR2032 battery to get it to light up. To turn it off, you can remove the battery, and place it back in the slot backwards so it won’t get lost.
One thought on “Teeny-Tiny Edge-Lit Trophy”