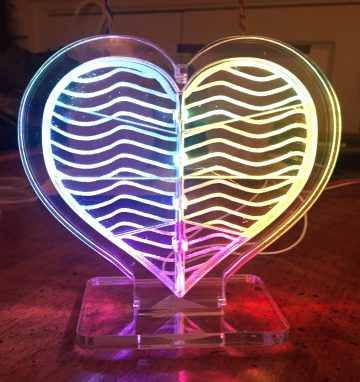
I’ve been experimenting with embedding LED strips inside cut pieces of acrylic. This technique allows each individual piece of acrylic to be illuminated independently, with its own color, separately from its neighbors. With this project, I was trying to create a clean, minimalist look, by using an acrylic outer frame to hold the edge-lit pieces together.
This LED heart is divided into eight pieces which are lit from the inside. It’s a relatively simple project to create, if you have access to a laser cutter.
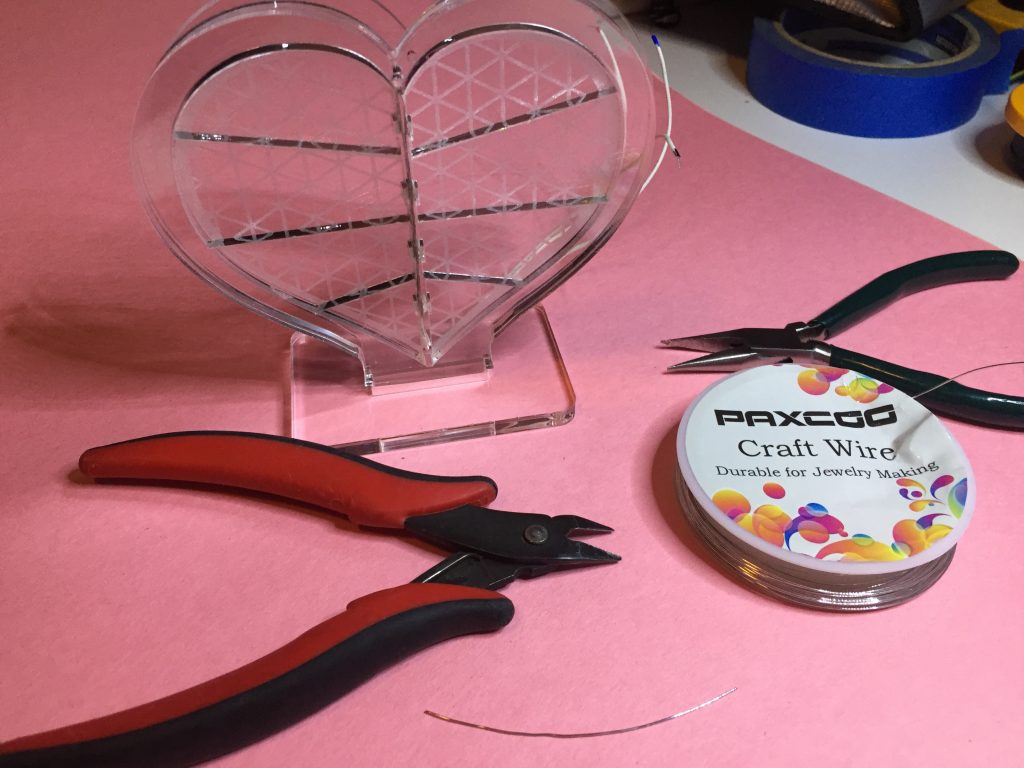
Materials:
- 1/8″ thick cast Acrylic Sheet
- 1/4″ thick cast Acrylic Sheet
- Skinny (4 or 5 mm – must be less than 1/4″) WS2812 LED strip with 60 LEDs/m
- Micro controller to program patterns for the LED strip
- Small piece of wire, string, or zip-tie to secure the layers together
- Hookup wire (I use white wire as it shows less)
- Microcontroller (I usually use an Adafruit Gemma M0)
Tools:
- Soldering iron/solder
- Laser cutter
Laser Cut the Acrylic:
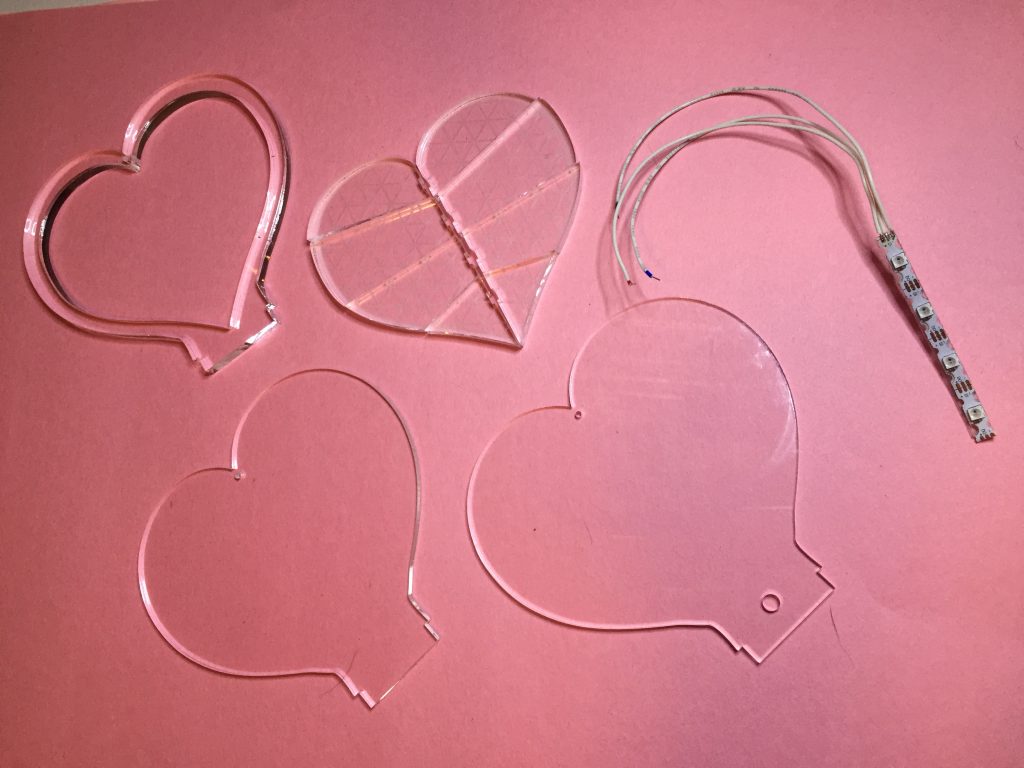
The “Inner Glow” consists of three acrylic layers which are sandwiched together. The outer two layers cut from 1/8″ acrylic and the middle layer is cut from 1/4″ acrylic.
There is also a base which may be cut from 1/4″ acrylic or 1/4″ wood. The layers of the heart press-fit into a slot in the base, so the fit must be exact. Acrylic thicknesses can vary, so you may need to change the width of the slot in the base if the thickness of your acrylic differs from the dimensions I used. Wood is a little more flexible, so you may want to consider using it for your base if you think your acrylic might not fit perfectly.
Cut the acrylic shapes from the vector files given below with a laser cutter. The file for the middle layer contains three heart shapes with different etching patterns (the filled pink shapes). You will only need one of them for your middle layer. Do not change the scaling of the pieces because they are designed to fit an LED strip with 60 LEDs/meter.


Peel the protective paper from the acrylic. Because there are many small pieces, and the etching may also leave a sticky residue on the acrylic, I find the following steps make the process of removing paper and reside easier:
- Soak the paper covered pieces in water with a bit of dish soap for 15-30 minutes
- Rub the pieces between your fingers to slide the paper off and remove them from the water
- If there is gummy residue where the etching happened, squeeze a small amount of “Goo Gone” on a cloth and rub it over the gummy surface until the residue is gone.
- The “Goo Gone” leaves an oily residue behind, so return the pieces to the soapy water, and rub gently with fingers or a cloth until they no longer feel oily.
- Dry the acrylic pieces gently with an old t-shirt or soft cloth
Prepare the LED Strip:
Cut a length of 8 LEDs from your LED strip. Solder wires to the data input end that will connect to your micro controller. I like to use three white wires, which are less visible through the clear acrylic. I color code the ends of the wires with sharpie, so I’ll know which is power, ground and signal.
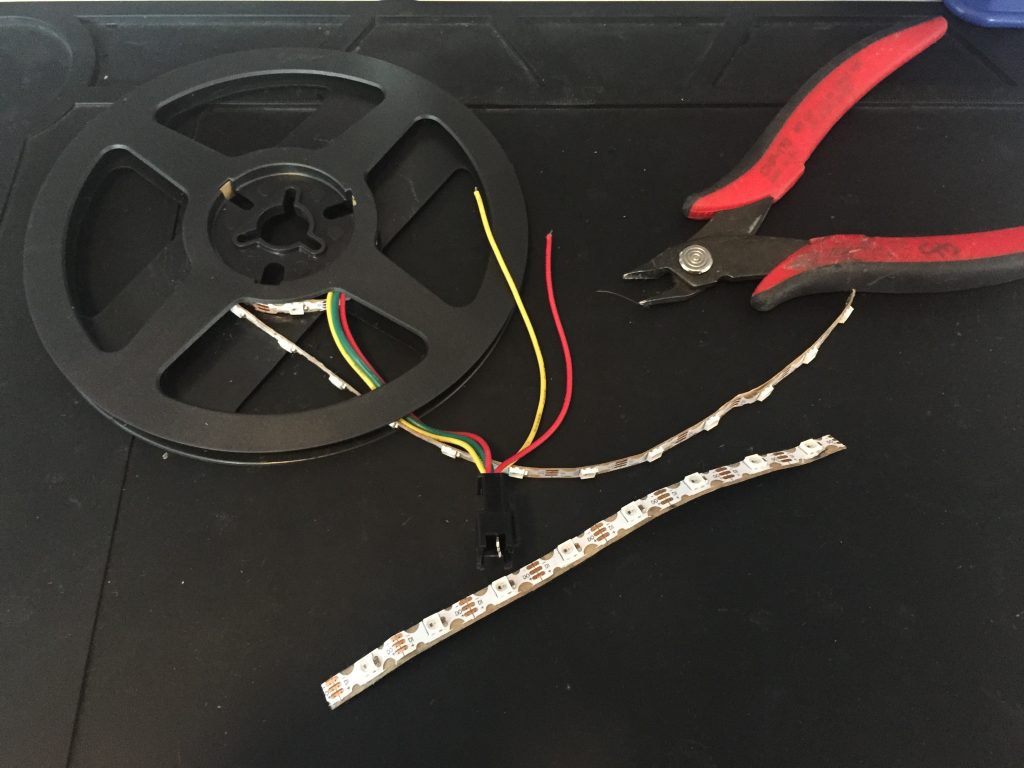
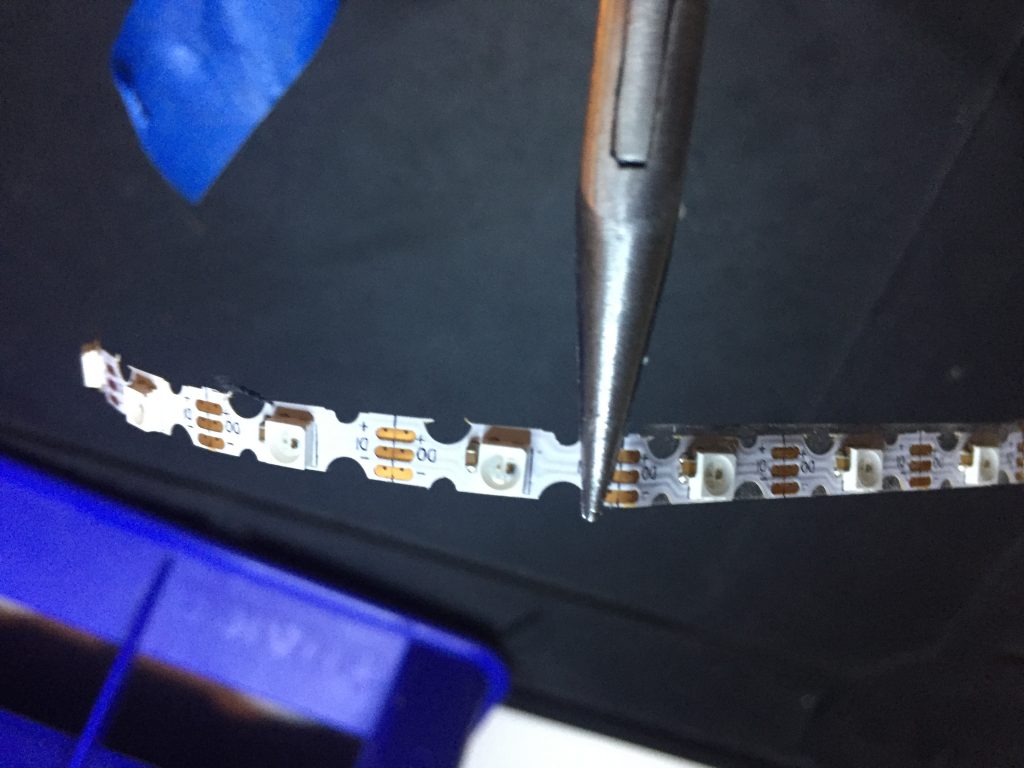
Cut 8 LEDs from the strip 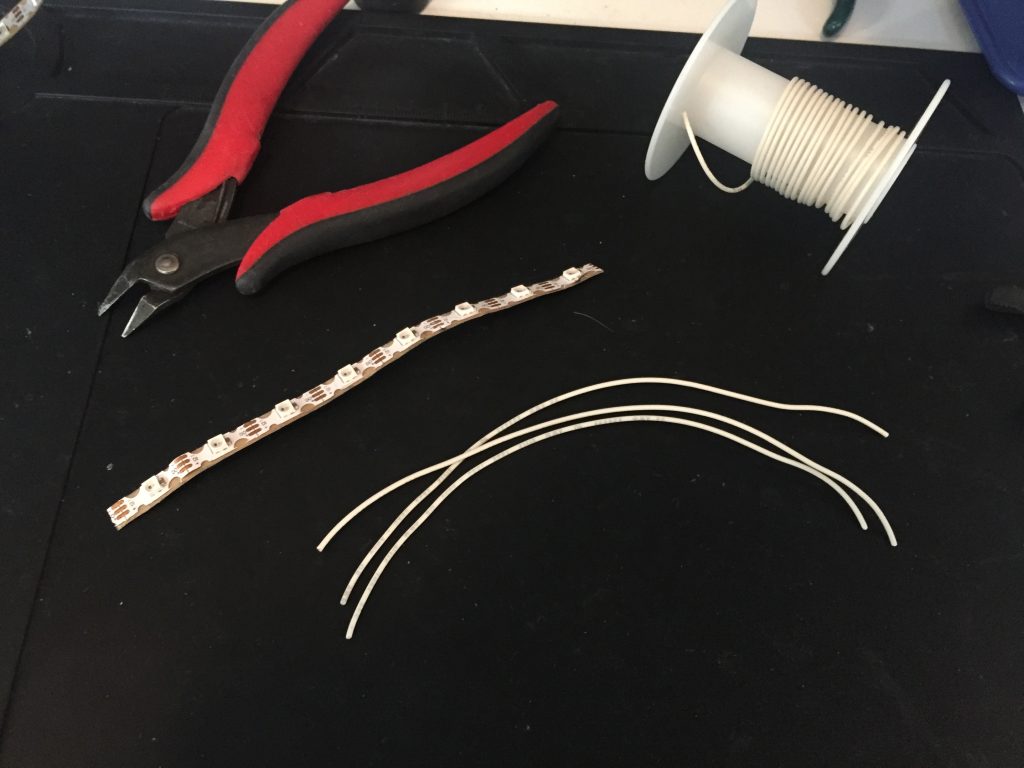
White wires are less visible through the acrylic 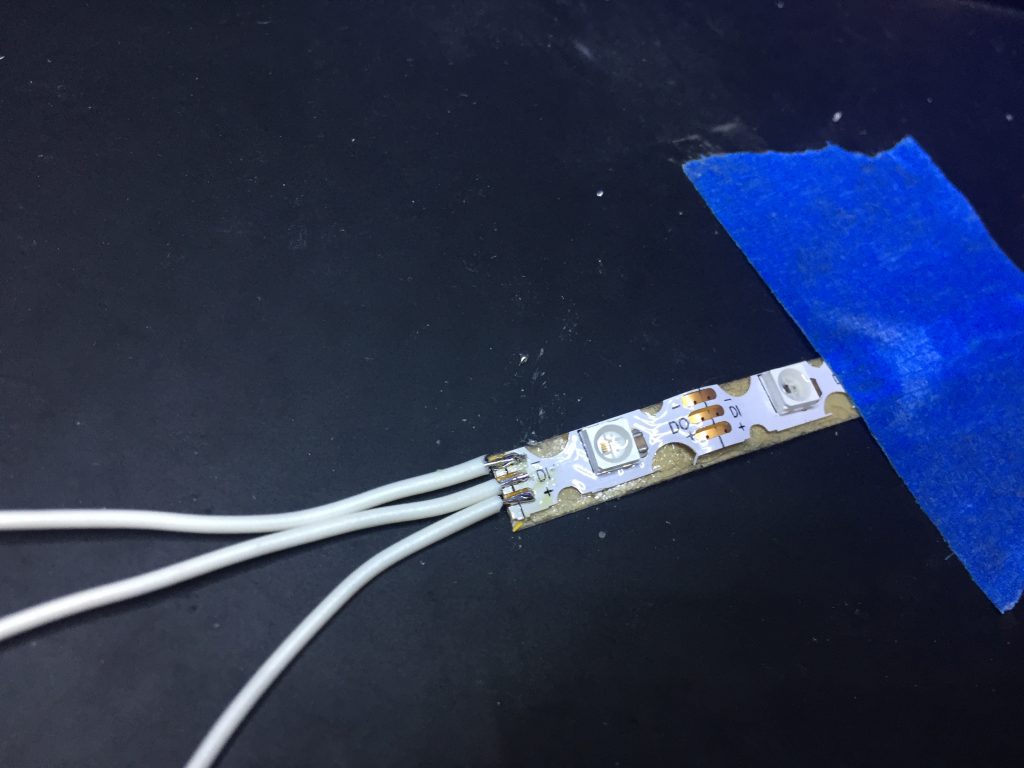
Solder the wires to the LED strip input 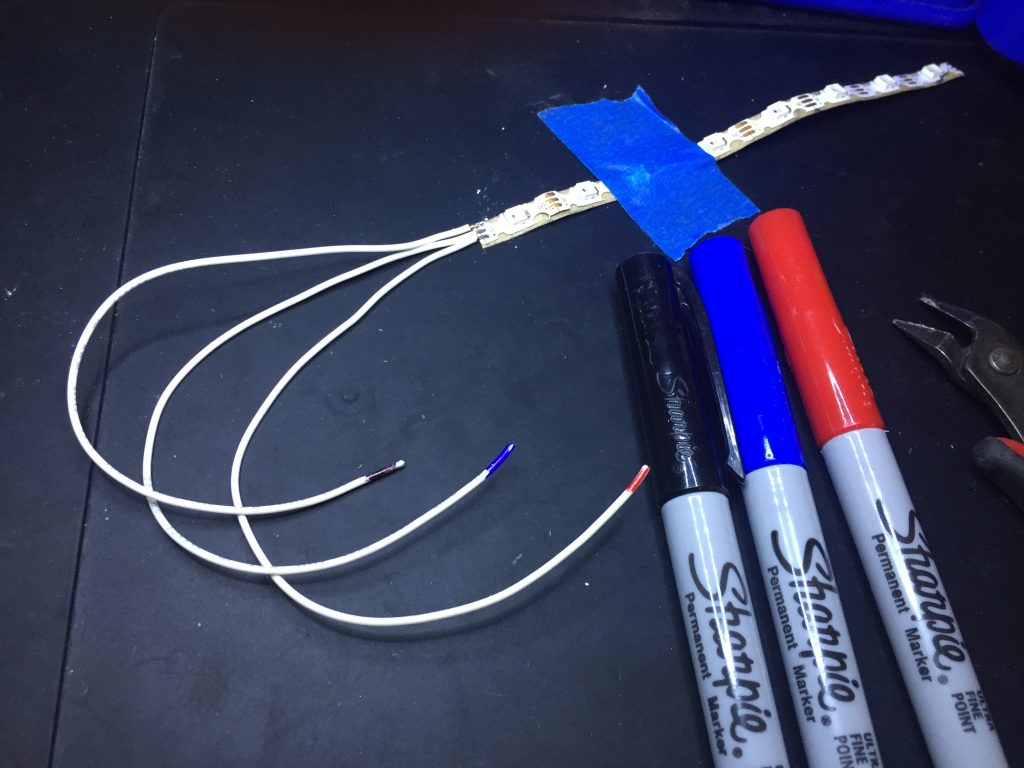
Marking the ends of the wires with sharpie helps keep them straight
Using a pliers, carefully bend the LED strip in half at the middle so that the LEDs on either half of the strip sit perfectly back to back. Don’t crease the strip at the fold – it is OK to leave a little separation between the halves there. Peel the backing off of the LED strip and *carefully* stick the halves together.
Bend the strip at the middle so the LEDs will line up 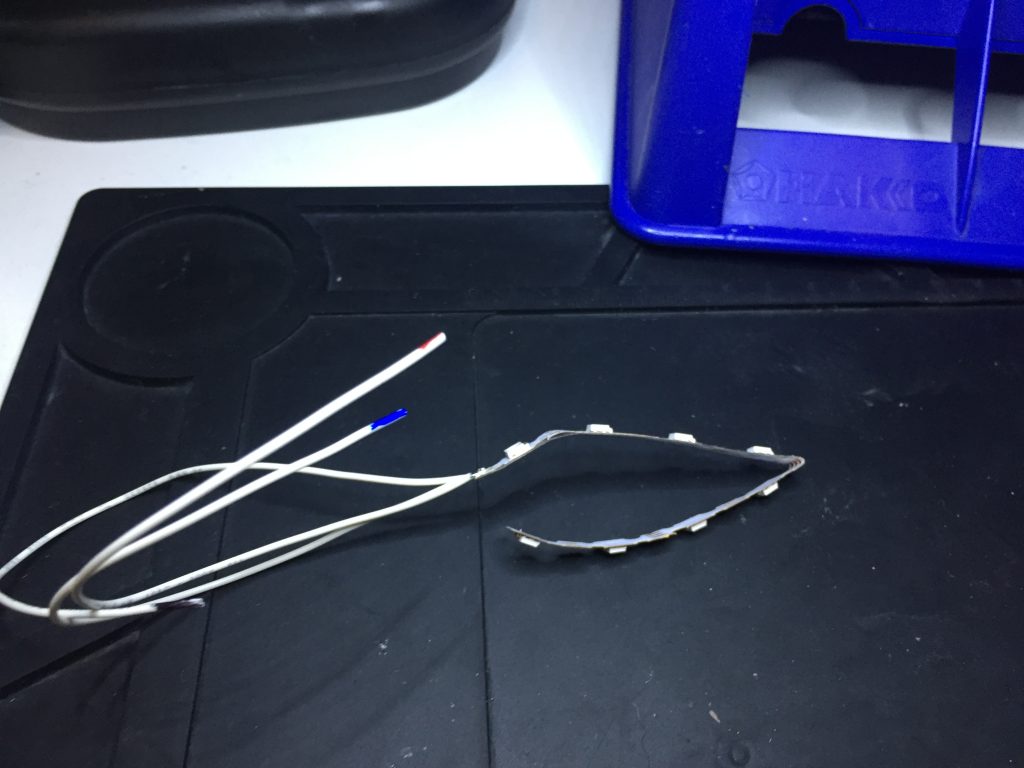
Check the LED alignment 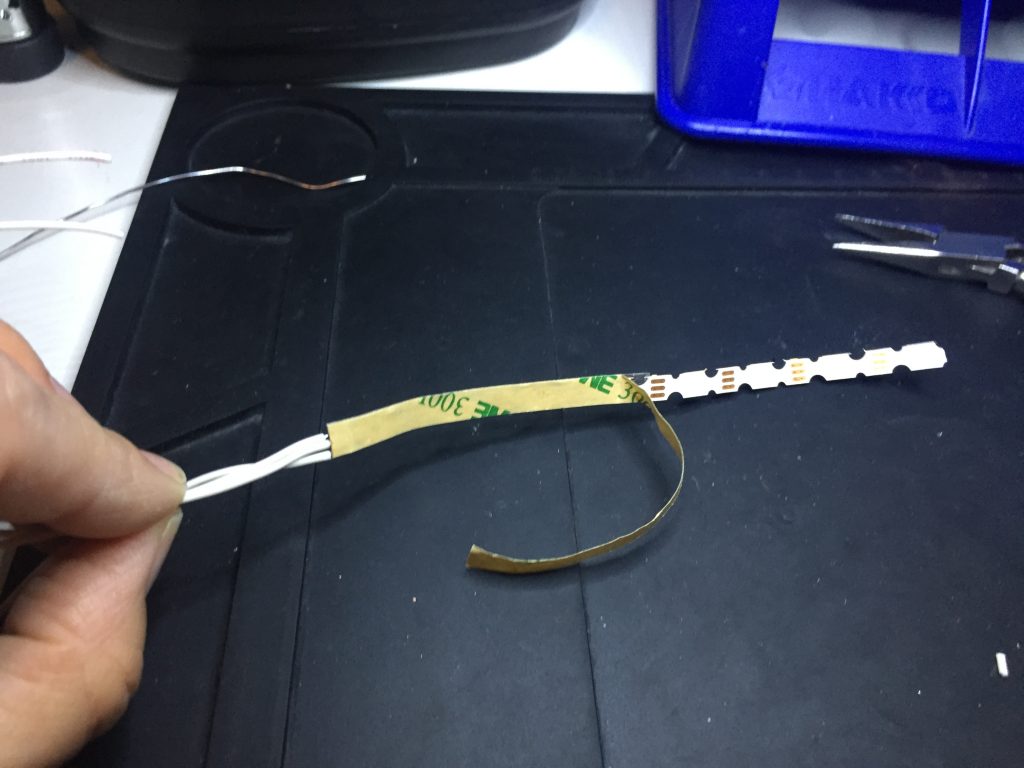
Peel off the backing 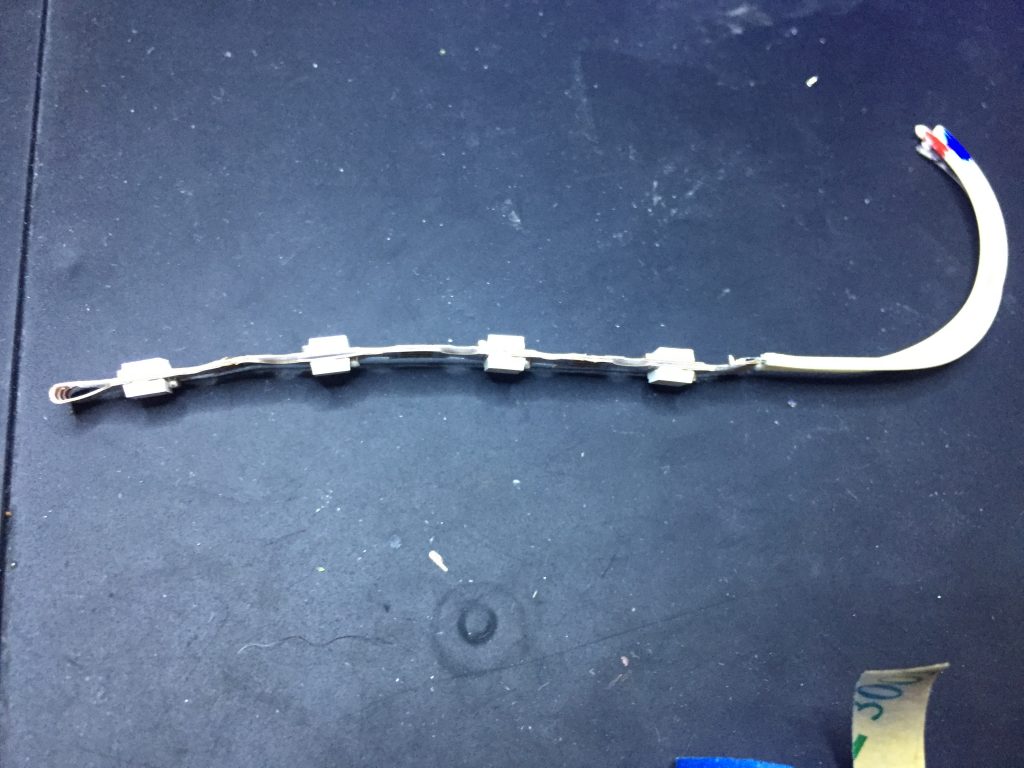
Stick the two halves together
| Connect the strip to the micro controller and run a test it to make sure the LEDs light up correctly. Do NOT solder the controller in place yet, as you will need to pass the wires through a small hole in the acrylic. | 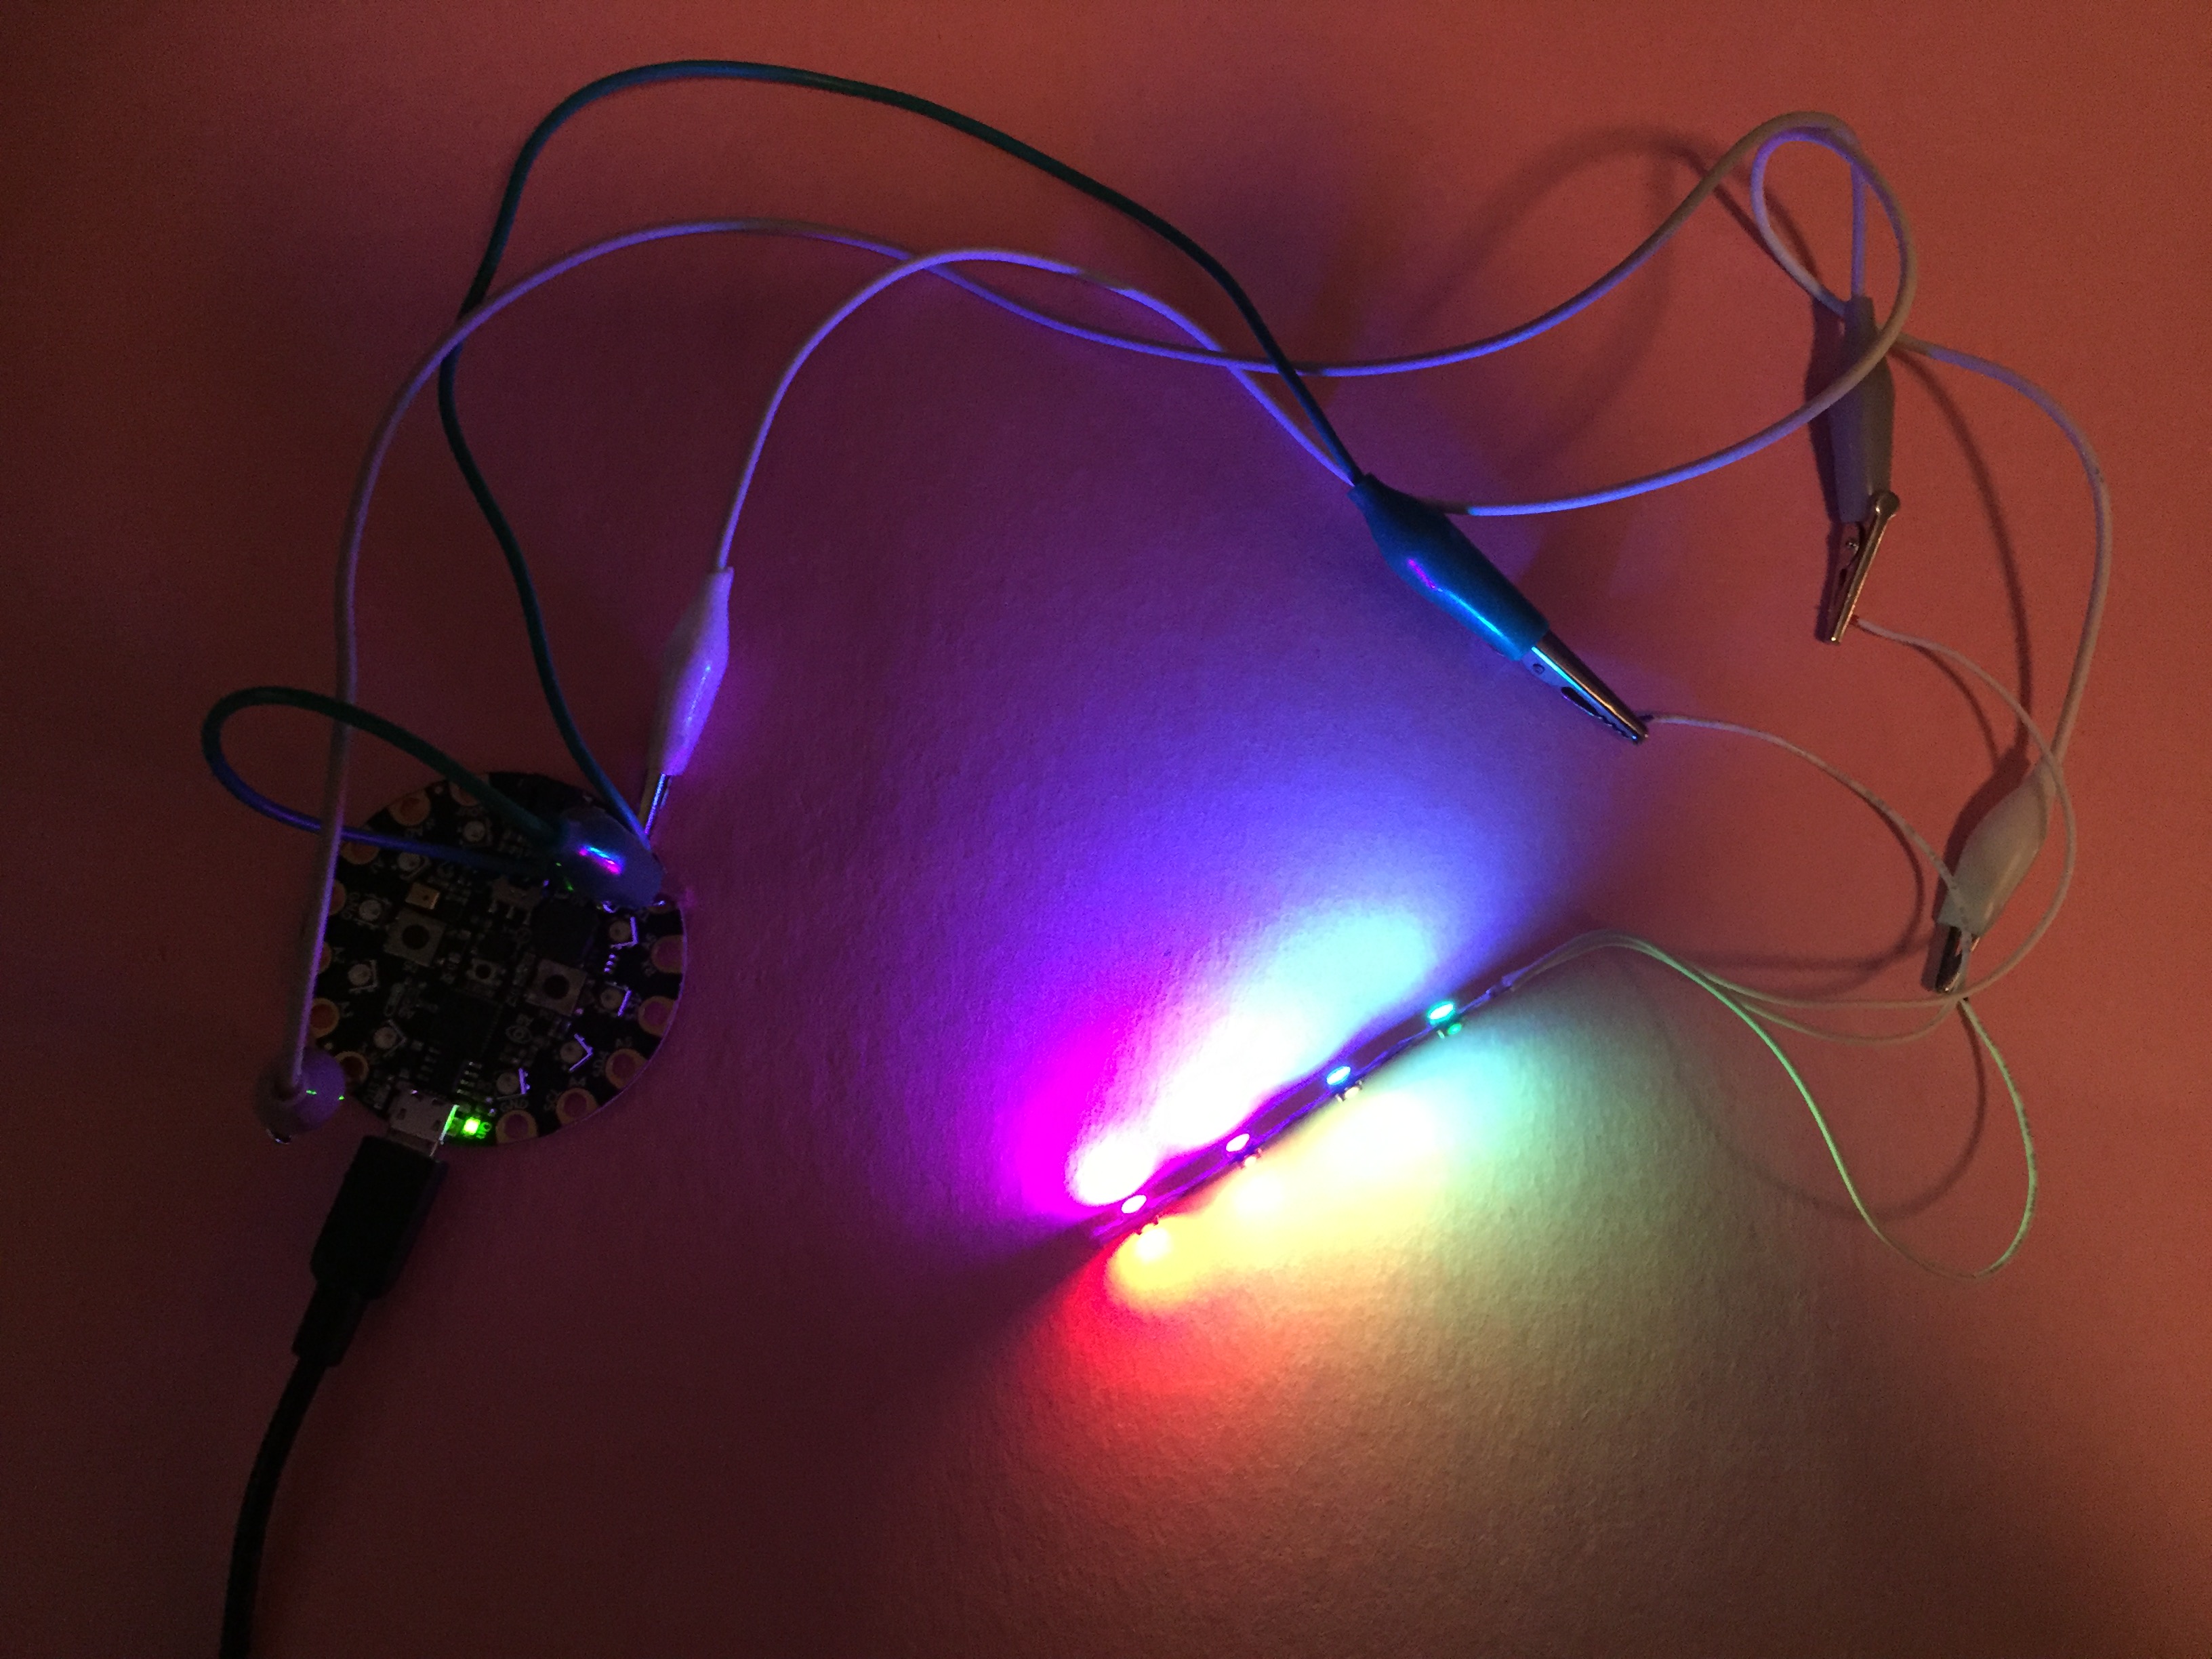 |
Assemble The Heart:
The heart has three layers. The two outer layers are large hearts cut from 1/8″ acrylic. The back layer has a hole in it for the wires. Place the front outside piece (the one without the hole) down on a level surface. On top of the front piece, assemble the middle layer. The eight heart pieces fit inside a heart-shaped frame to keep them in place. The etched side of the middle pieces should face *upwards* (towards the back of the heart). Nudge the middle pieces away from the center line, so there is a gap where the LED strip will go.
Lay the cut acrylic pieces on a flat surface. The first layer is the 1/8″ heart without the hole 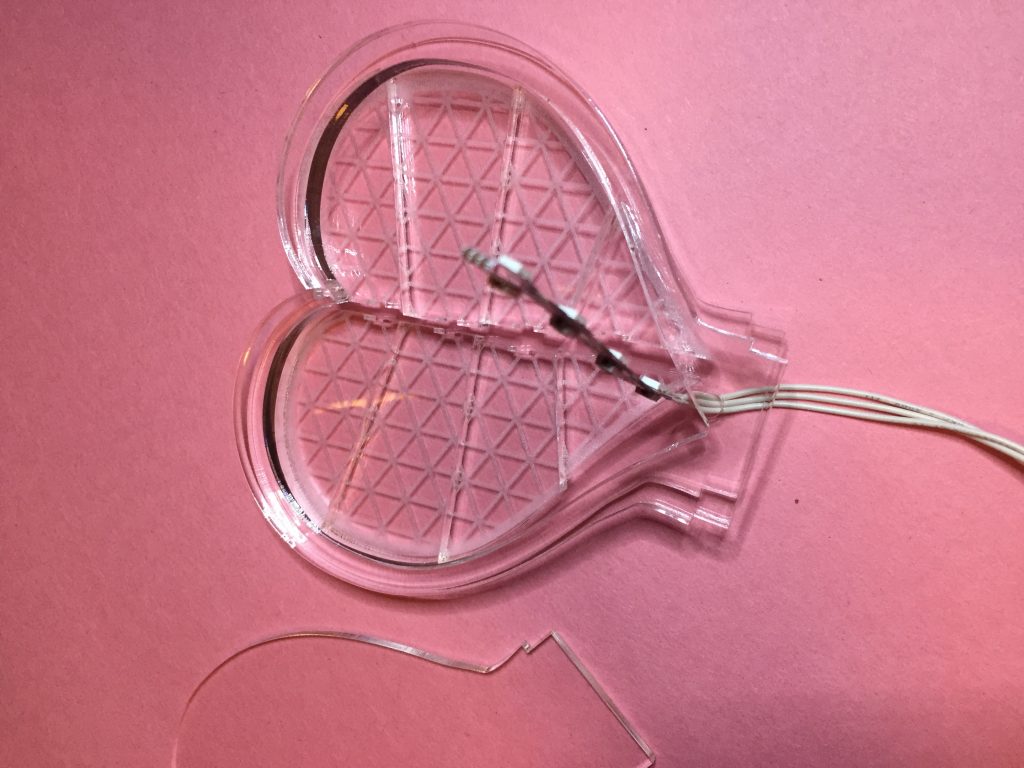
Assemble the middle layer (1/4″ pieces) on top of the piece without the hole 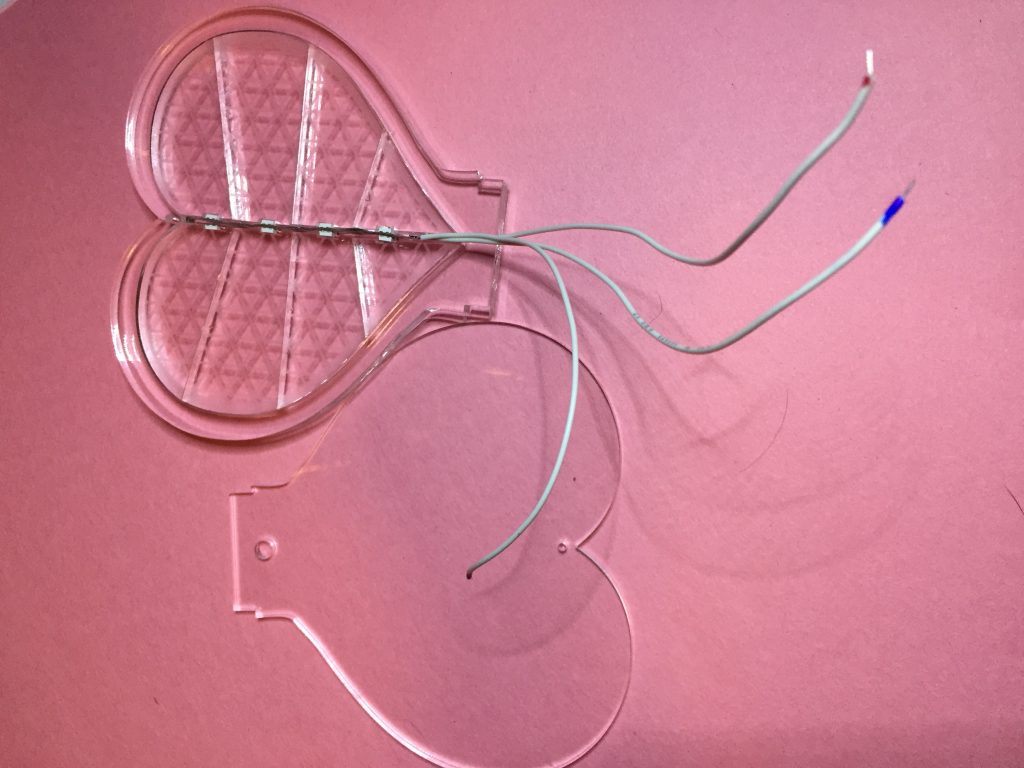
Slide the folded LED strip in between the cut pieces 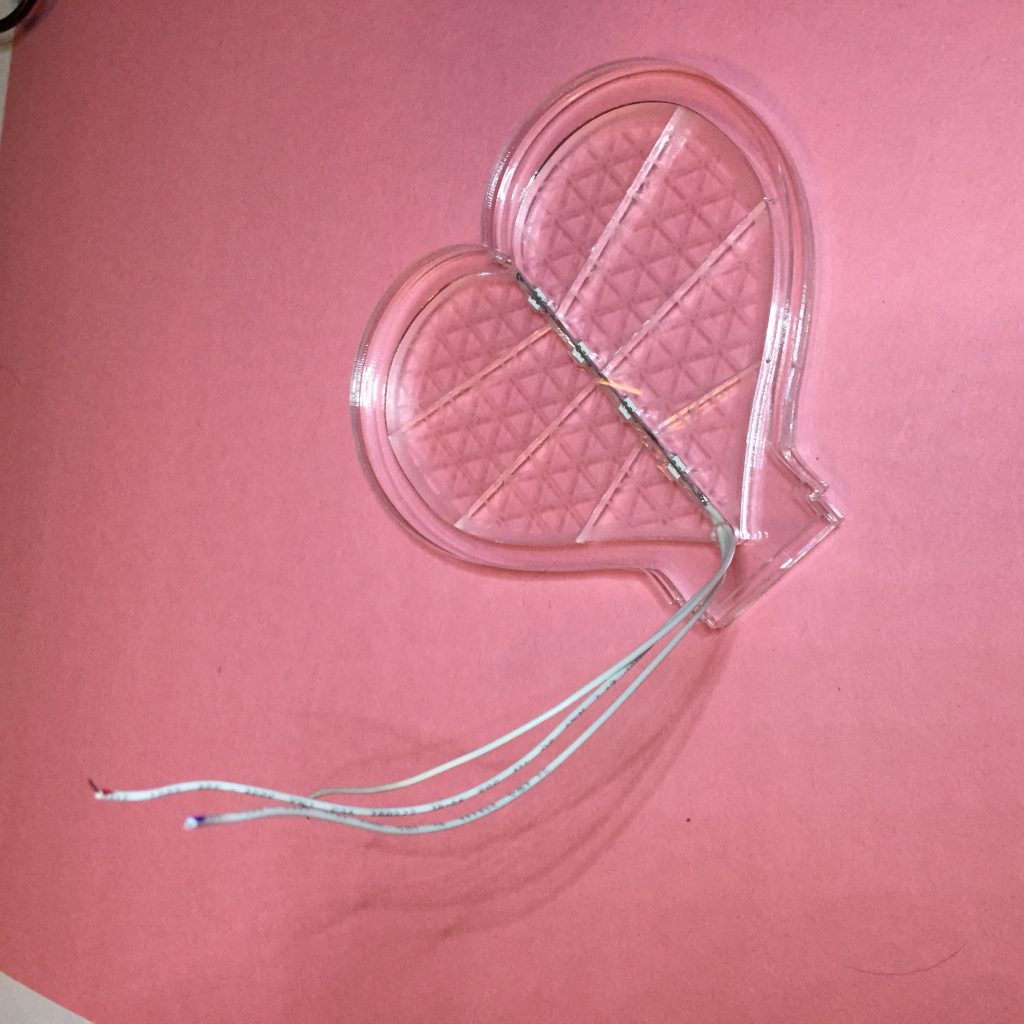
Slide the last 1/8″ layer on top, pulling the wires through the hole
Lay the LED strip along the center gap in the middle layer. Once everything is in place, lay the remaining 1/8″ layer (the one with the small hole in it) over the top to sandwich the pieces together. Pull the wires through the hole carefully as you do.
You should now be able to press fit the pieces into the base with the wires sticking out above the base. Remember, the width of the slot in the base will depend on the exact thickness of your acrylic. If your slot is just a little bit too large, you can wrap the bottom of the acrylic pieces with duct tape before pressing them into the hole.
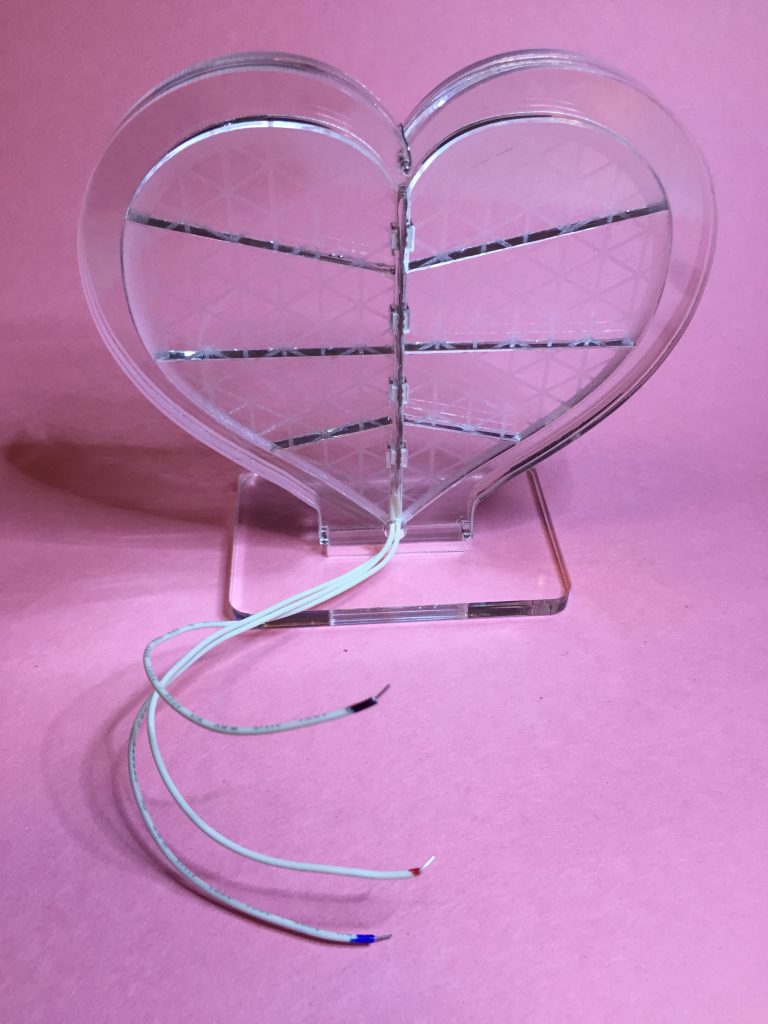
Press fit the acrylic heart “sandwich” into the slot in the base. 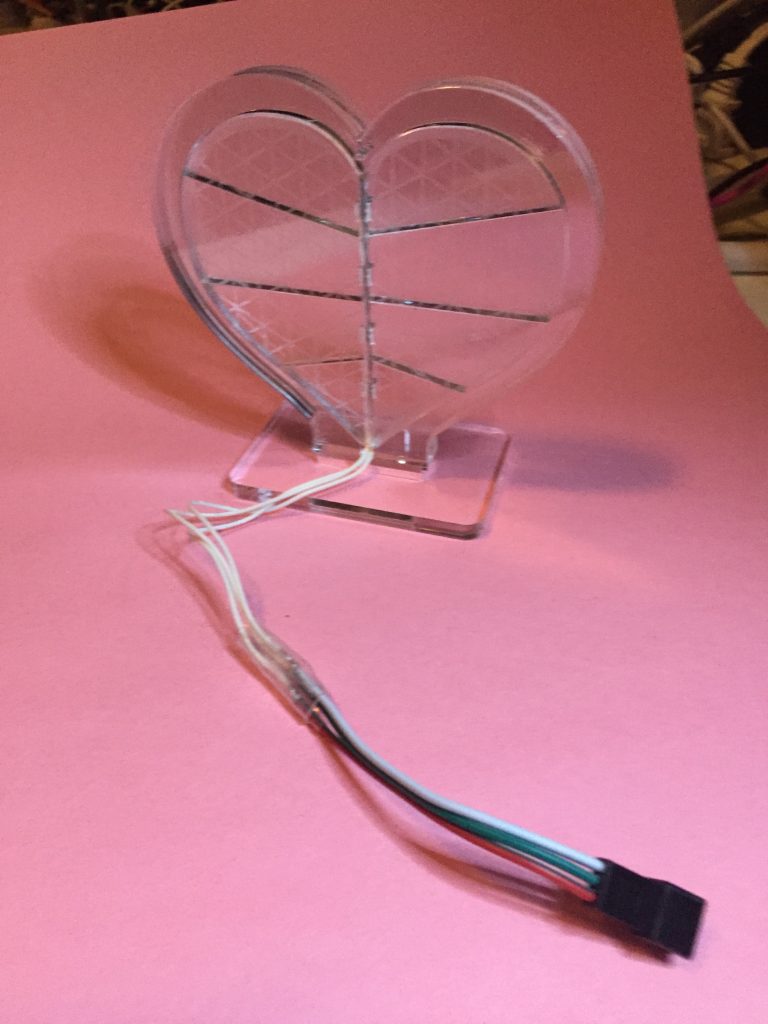
Add a microcontroller (or connector) to the LED strip wires
Secure the three layers of acrylic together by cutting a piece of wire or string and passing it through the hole at the top. Twist or tie the ends together securely, then trim the free end, and tuck any excess wire into the hole.
Craft wire works well for securing the layers 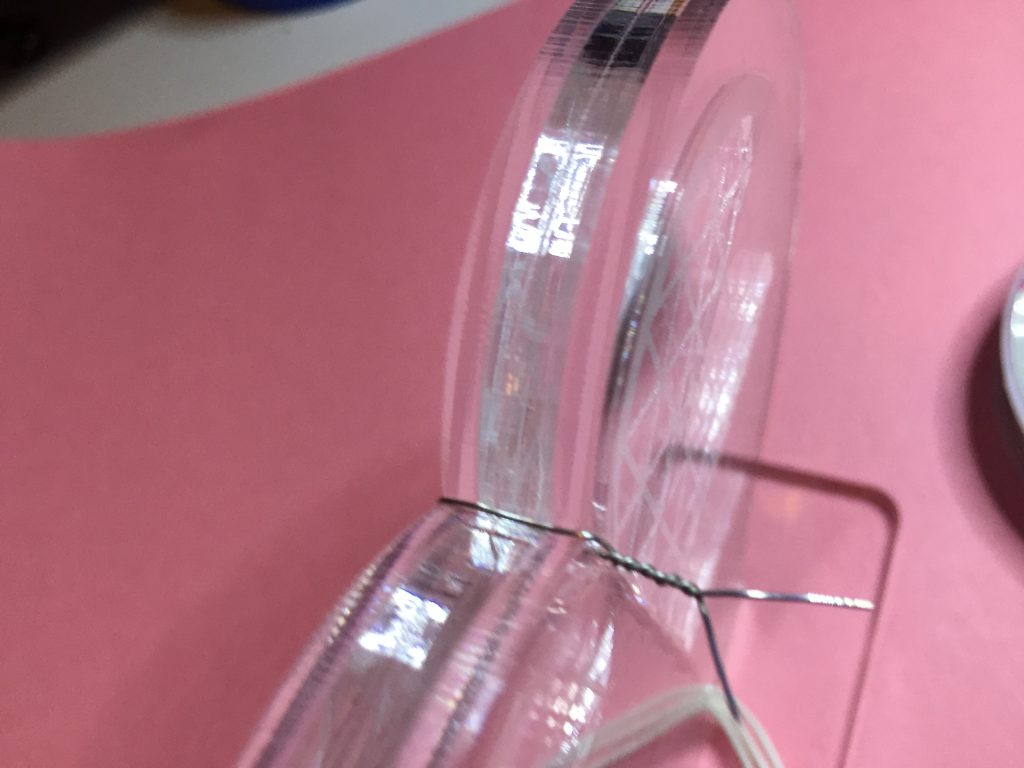
Secure the layers together at the top with a wire through the small hole
Make Some Colors and Patterns:
Now all that’s left to do is connect and program your micro controller to light up your heart with colors and patterns. I use an Adafruit Gemma M0 running CircuitPython to program the LED strip. I’m able to create simple patterns quickly using Brightly – a LED strip CircuitPython code generator I wrote.
Enjoy the light show when you are done!
I’m fascinated with your imaginative projects, lucky children!
I think I might have to try some of these, thank you for such detailed instructions. Could you tell me what laser cutter you use?
Hi Mary,
Thank you! I use a 60 watt Thunder Laser clone, which has just enough power to cut through the 1/4″ acrylic pieces. It won’t easily go through anything thicker than that.
Best,
Debra