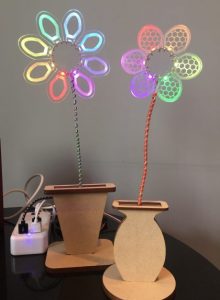
Materials:
- a Powered Flower
- 1/8″ wood sheets for laser cutting
- wood glue or epoxy
Laser Cutting the Wood:
Below are links to SVG and DXF files for both the vase template and the flowerpot template. Please note that in both templates there are shapes containing slots to hold four sheets of laser cut wood sandwiched together. The size of these slots will depend on the exact thickness of your wood, which often varies, and you may need to edit the file to fit your material. The current files assume that your material is exactly 1/8″ (3.2 mm) thick.


Chose the file for either the vase or the flower pot, and edit the width of the specified slots to be four times the thickness of your material in width, if needed. Laser cut the pieces for the pot or vase.
-
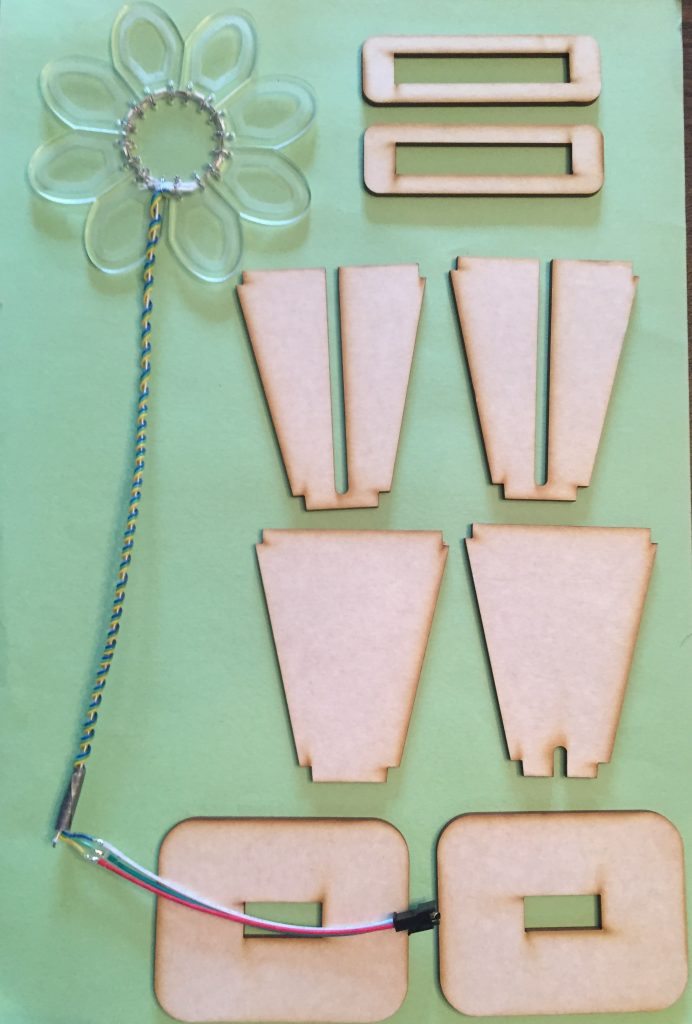
Powered Flower Pot -
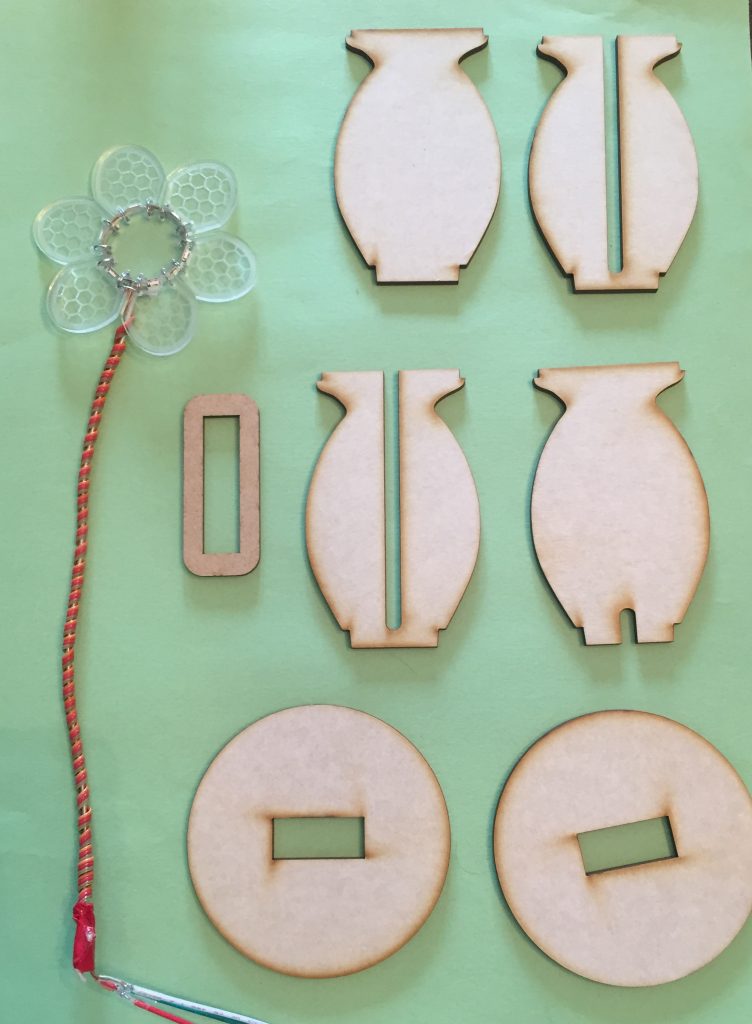
Powered Flower Vase
Remove any paper from the laser cut pieces. Both the vase and the flower pot assemble in a similar fashion. Both have two base pieces (the flower pot has a rectangular base, and the vase has a circular base, though both bases can be swapped). Both have four pieces which stack together to make up the main body. The flower pot has two pieces that make up the rim while the vase has only one.
Take the piece (or pieces) for the rim and slide them up over the stem of the flower as shown below:


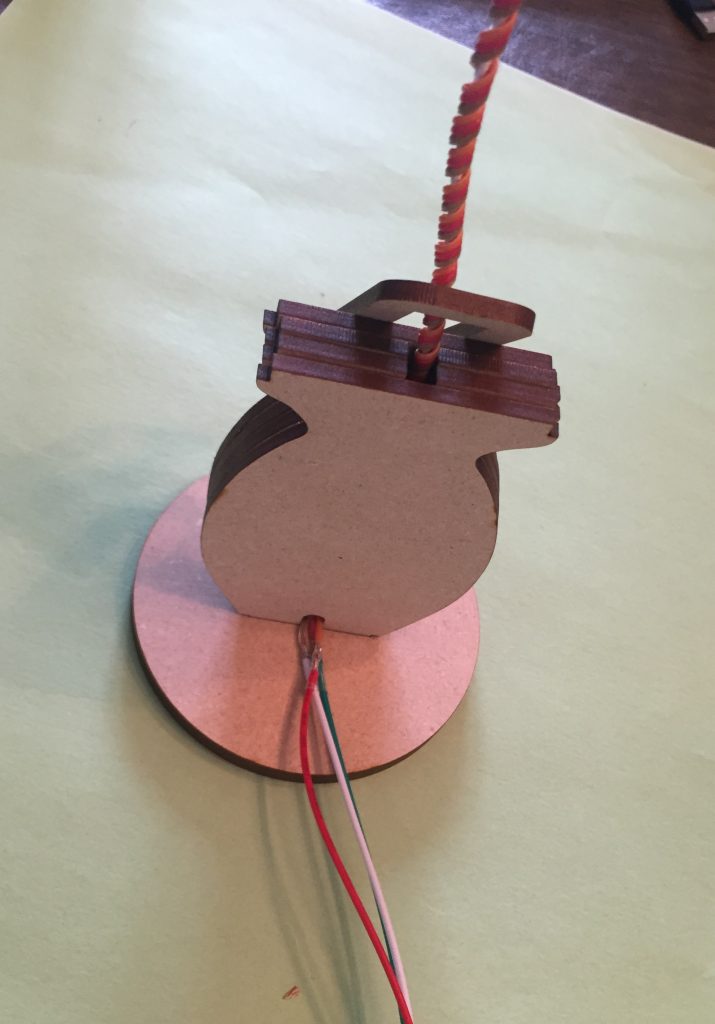
Now stack three of the four pieces that comprise the body of the vase/pot as follows: On the bottom layer, place the piece with *no* notches. The next two layers should be the identical pieces containing the very long notches as shown below. Take the stem of the flower and tuck it into the long notches. It is ok if the bottom of the stem hangs out of the bottom of the notch, but the rest of the stem should tuck securely within the notched part of the pot or vase.

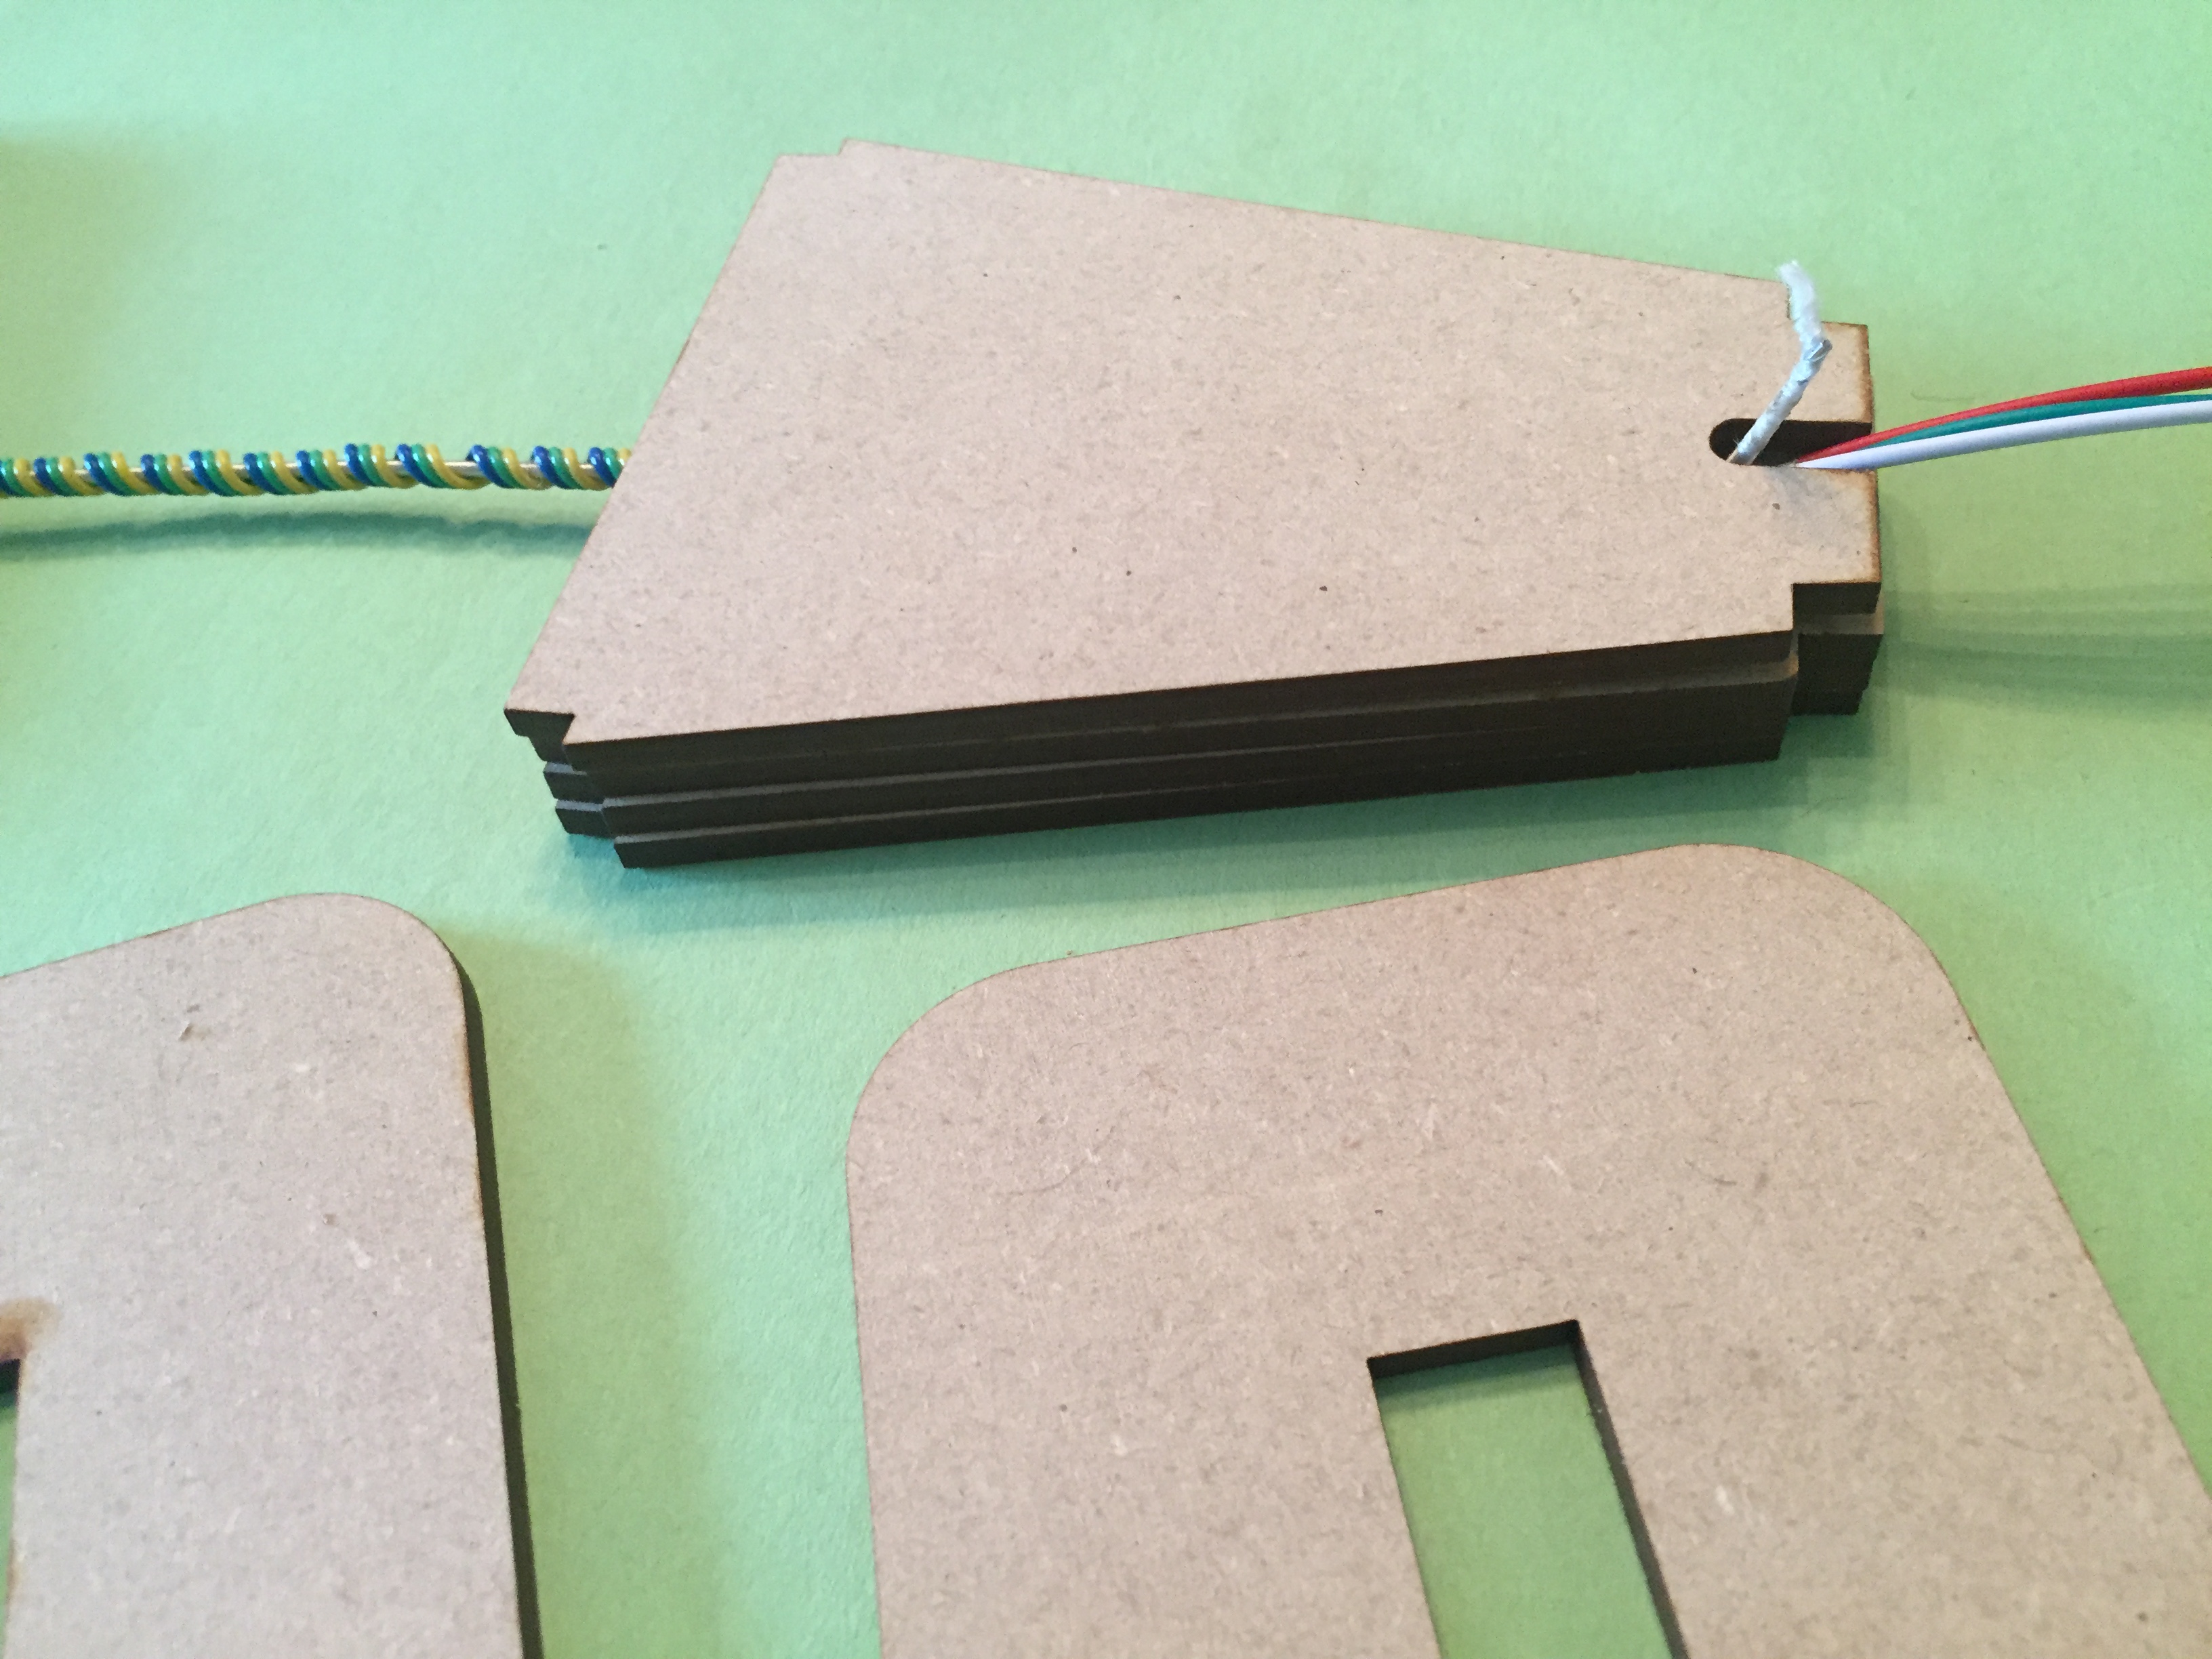
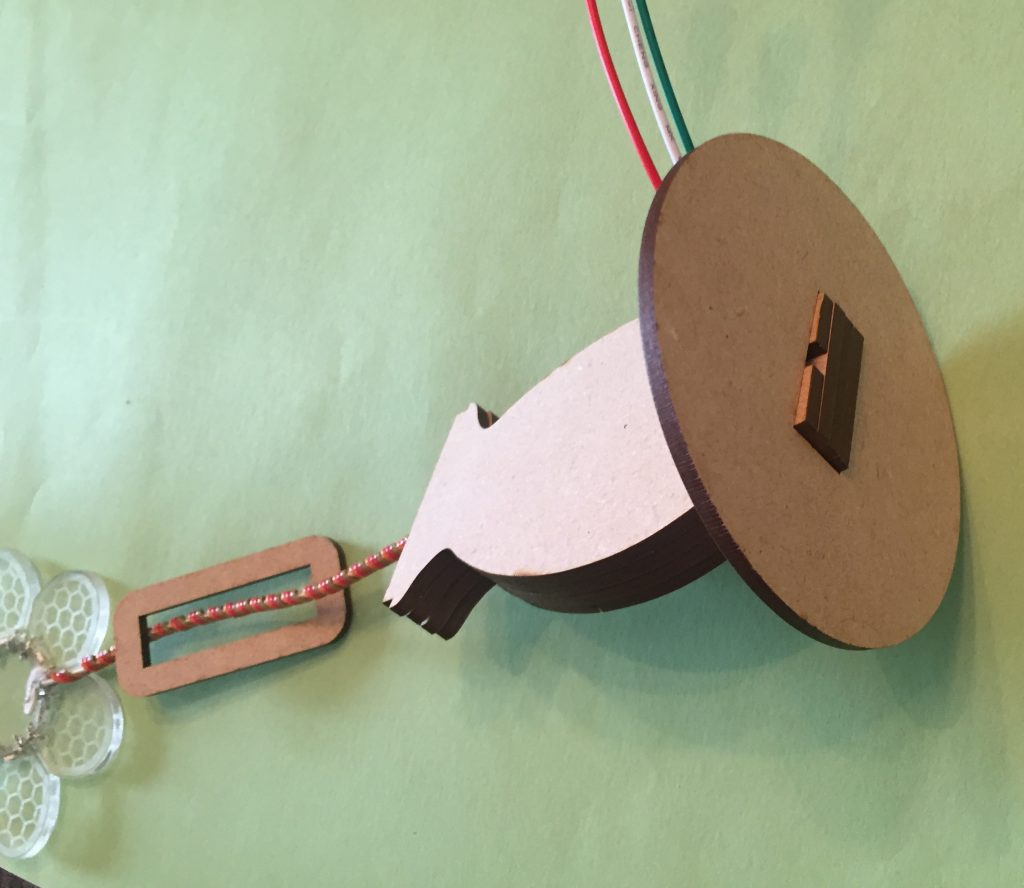
Now place the last layer of the vase or pot body over the stem so that it aligns with the other layers. The end of the stem, with the attached wires should protrude through the small notch in the bottom of the top layer as shown.
Next align all the layers of the vase or pot very well and slide them into one of the base layers as shown. Make sure the wires sit above the base layer. The fit will be snug,
-
Base piece will hold the layers of the vase or pot together -
The wires extrude through the notch in the vase or pot and sit above the base.
Now slide the the rim of the vase over the four layers of the body from the top. There will be two layers to the rim if you are using the flower pot. Again, the fit will be snug.


Once everything fits together nicely, add the second base layer to the bottom of the vase or flower pot. You can use clippers to (carefully) trim any support wire (NOT electrical wires) that protrude from the notch near the base. You can loosen the pieces slightly and add a few drops of wood glue or epoxy to hold all the pieces together.
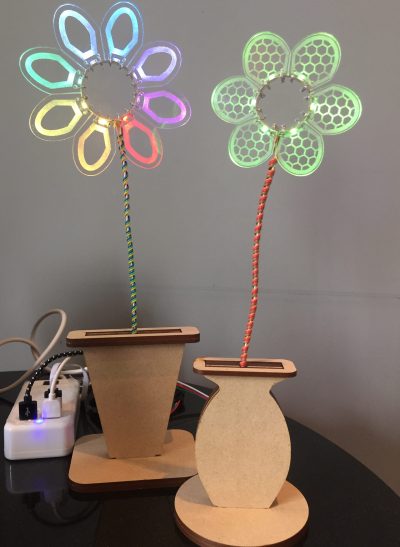
That’s it! Your powered flower can now stand on its own in its new vase or flower pot. Plug it into its microcontroller and give it power to enjoy a colorful light show.