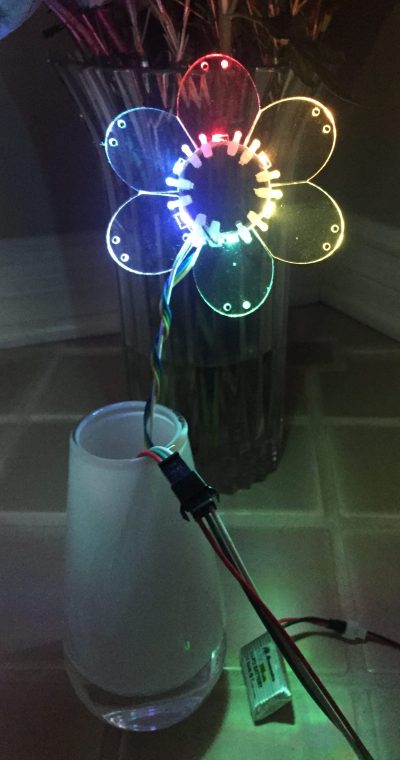
I recently purchased a second-hand laser cutter, and have really been enjoying the speed, flexibility and precision it gives in cutting up materials for my projects. Having easy access to a laser cutter helped me create this edge-lit flower project, which is remarkably simple but looks quite polished when finished.
Materials:
Components:
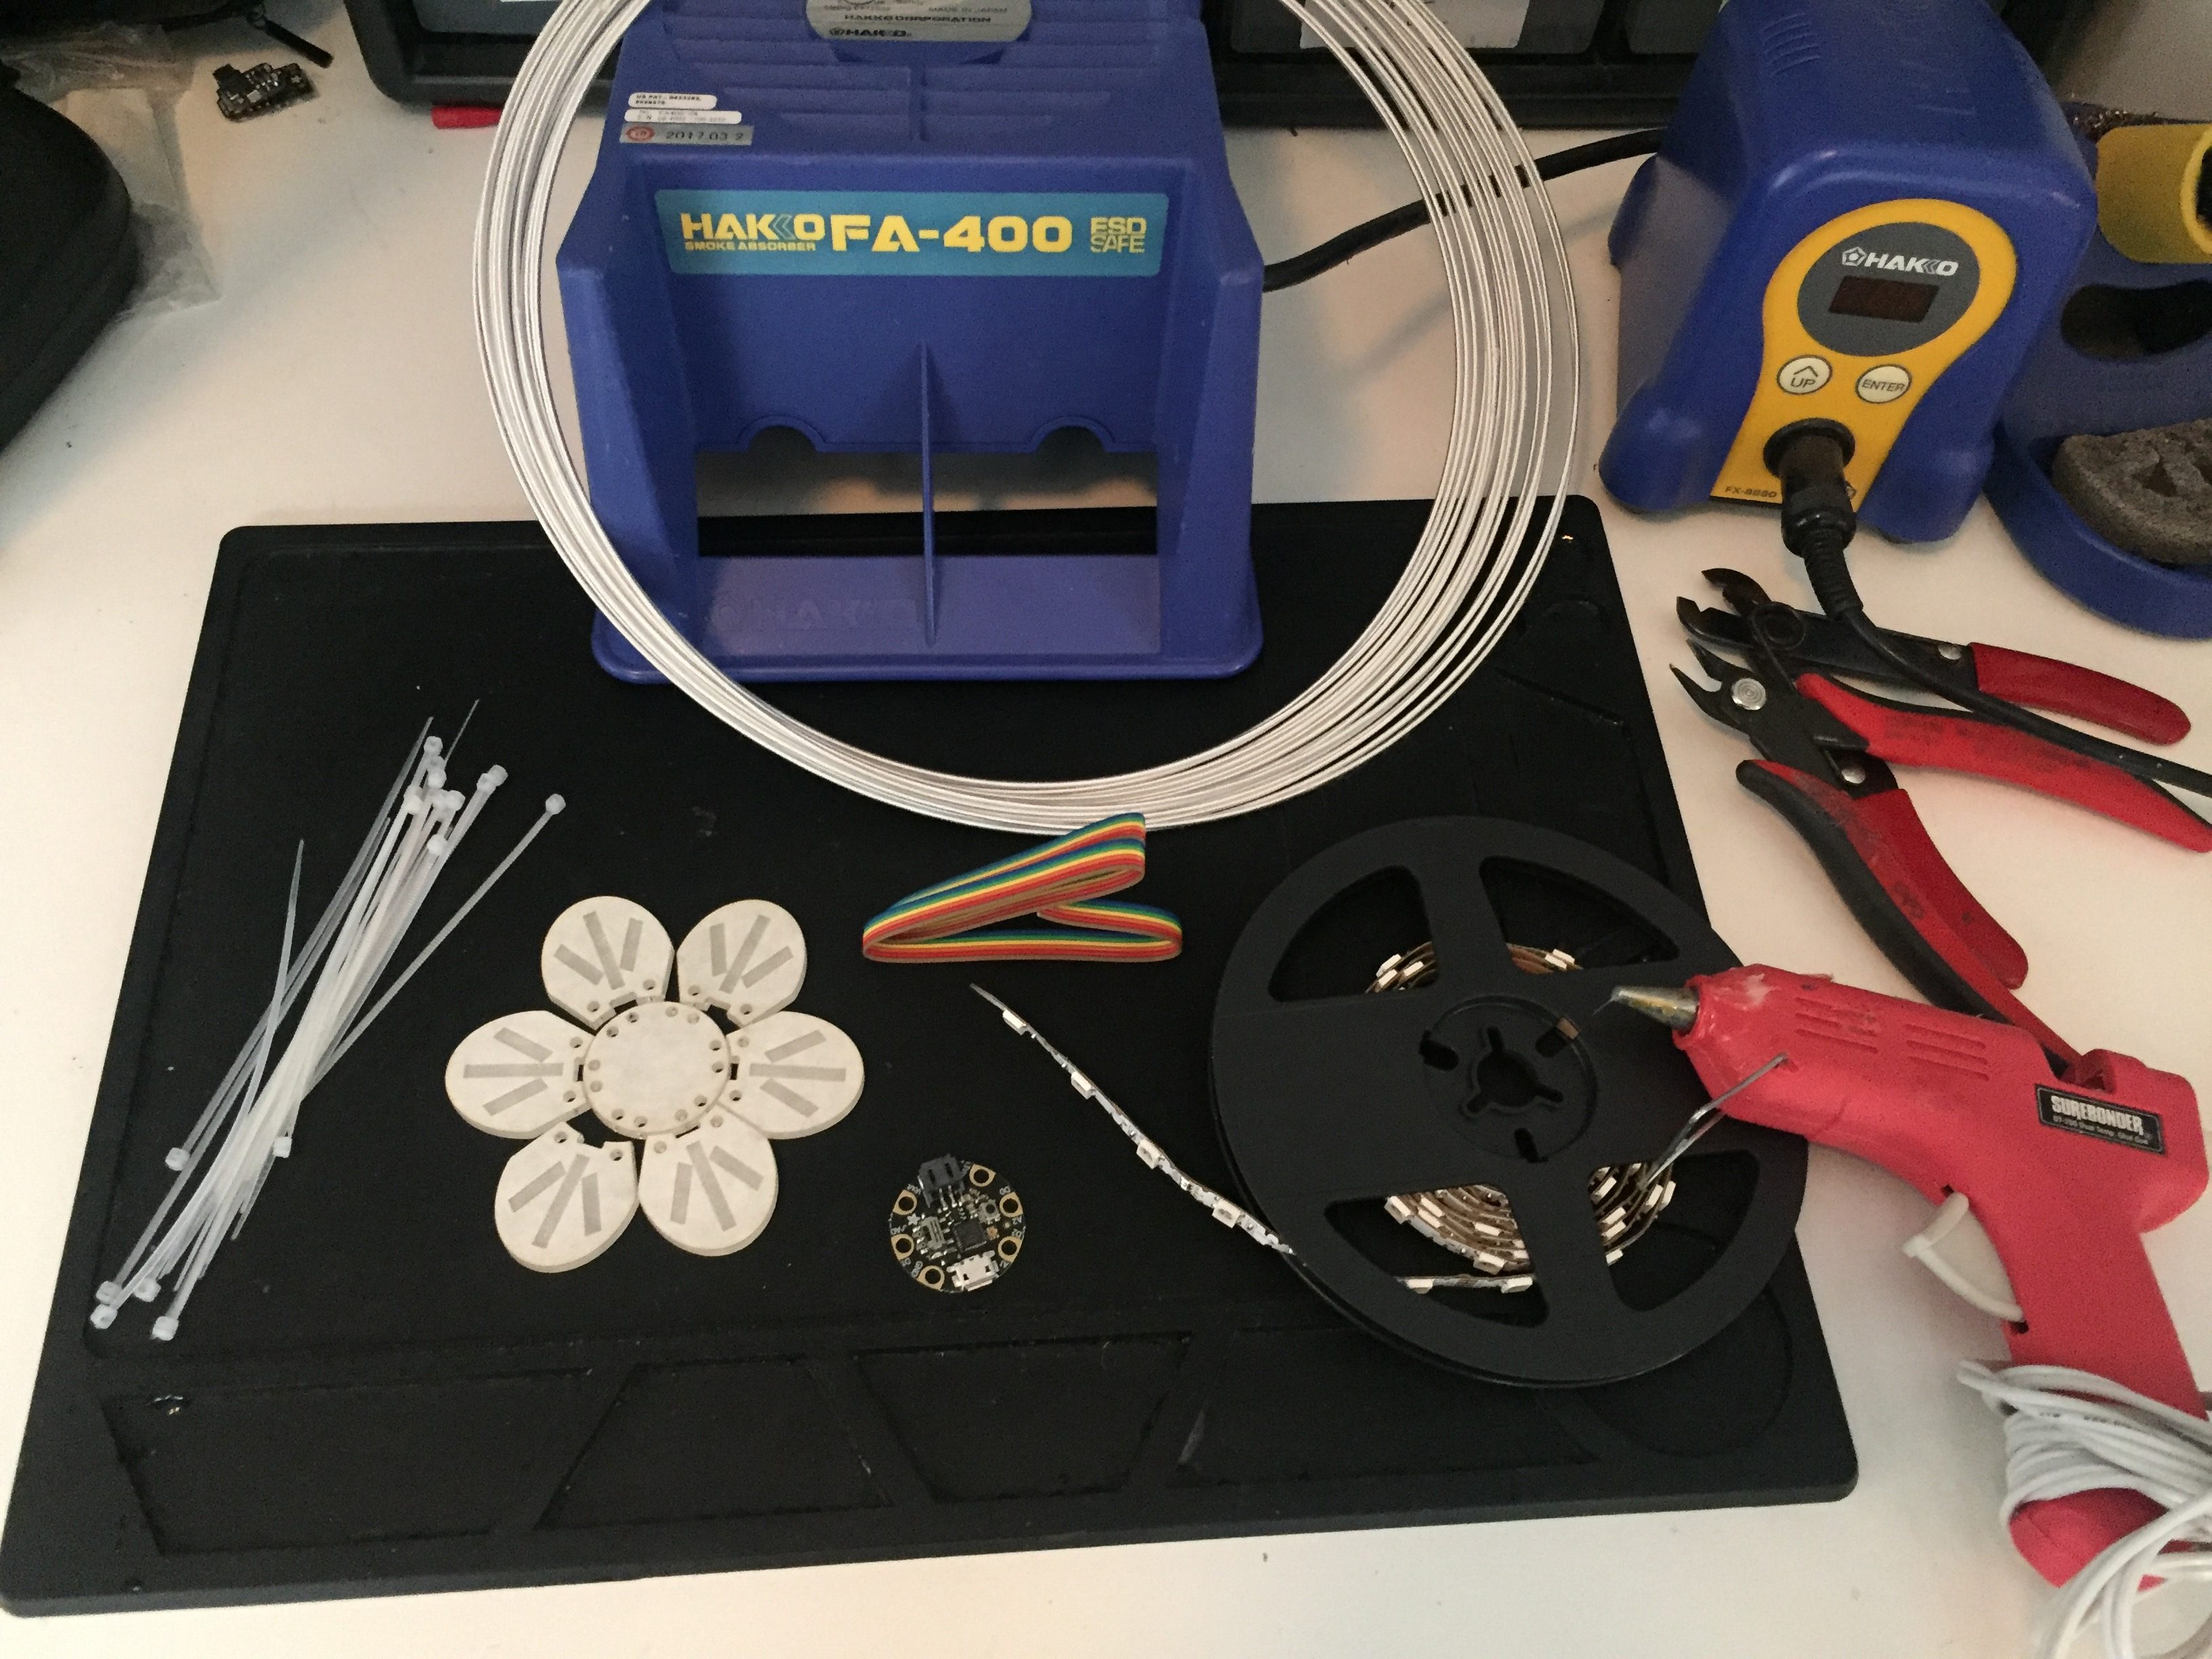
- laser-cut clear 3mm acrylic (vector file given below)
- skinny (4-5 mm wide) SK6812 3535 LED strip with 60 LEDs/m (like this )
- 2mm wide zip ties – OR – enamel coated wire (about 24 gauge)
- ribbon cable
- sturdy wire or pipe-cleaner for the stem (I used milliners wire)
- microcontroller
- shrink tube
Tools:
- Soldering iron/solder
- Hot glue gun
- Pliers
- Wire cutter/stripper
Cutting the Acrylic:

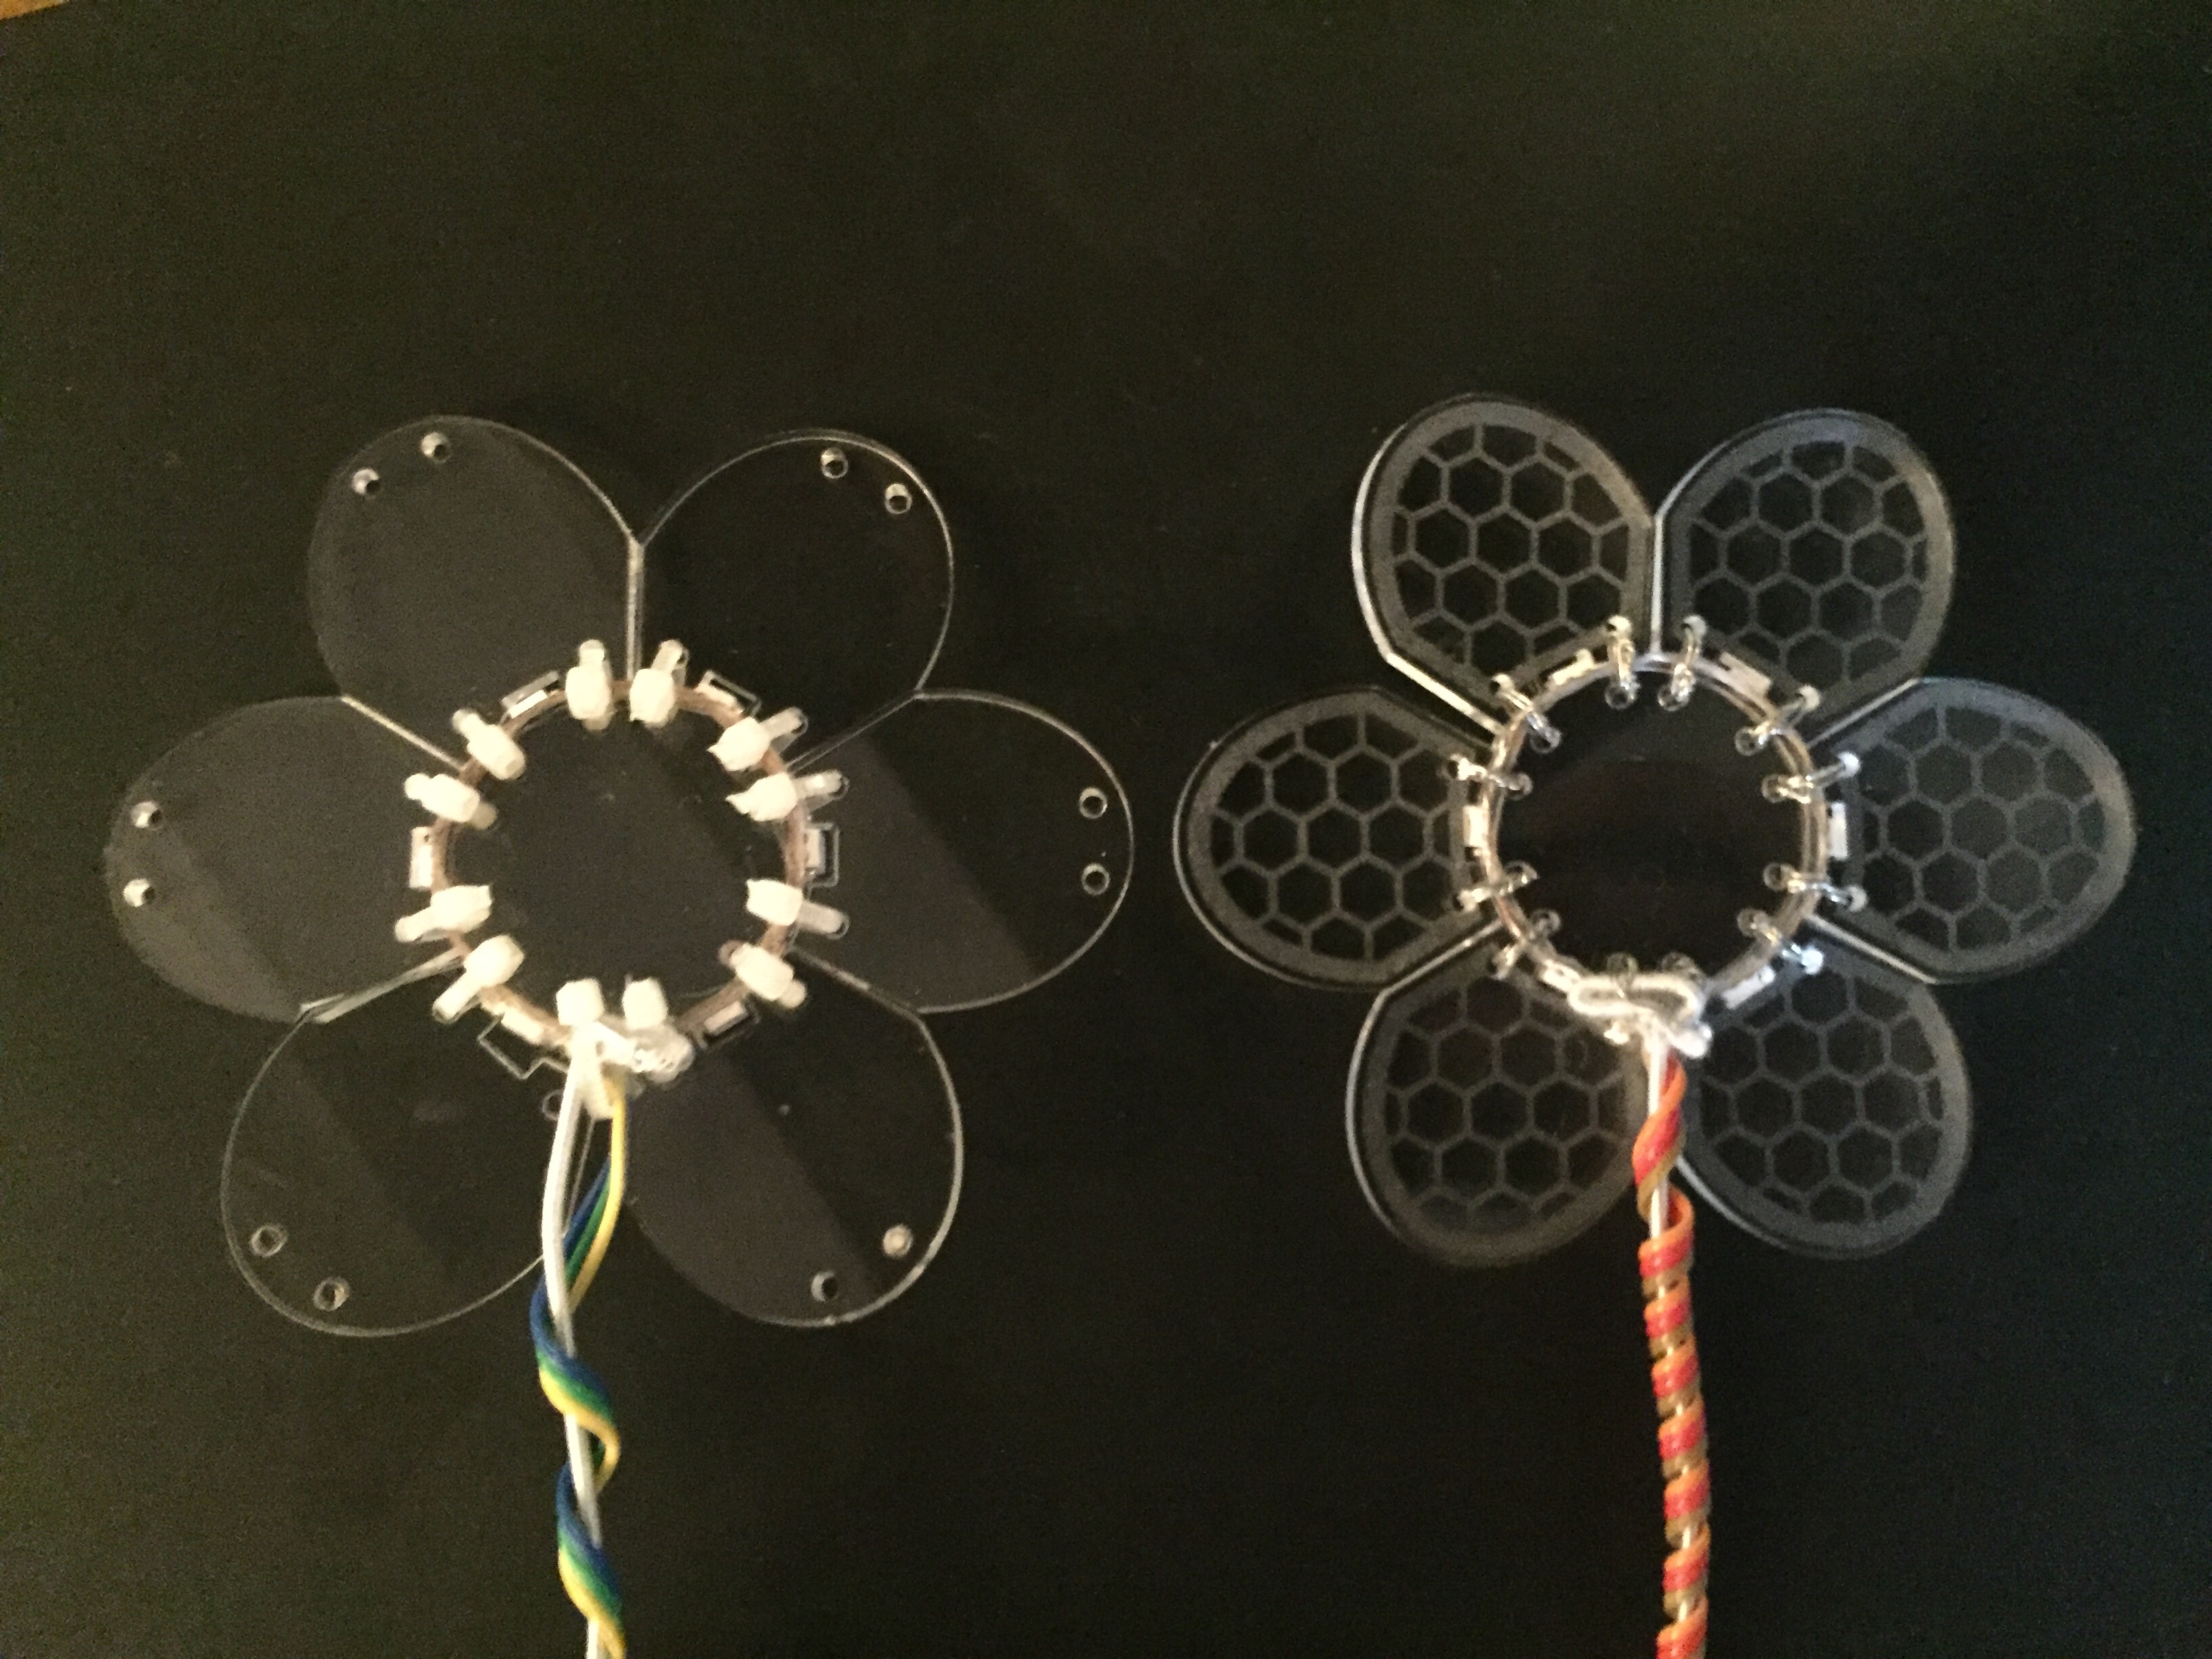
Download the vector file (available in SVG and DXF) for the flower and cut it from 3mm acrylic. Threre are three different designs in the files. Two designs have six petals and one has eight. All of the designs center an LED at the base of each flower petal. Don’t rescale the vector images or the LED spacing will be wrong. This file includes etching (the pink shapes) in the middle of the petals, because I think that the etching helps show the LED colors more clearly. You can omit the etching.

Wiring the LEDs:
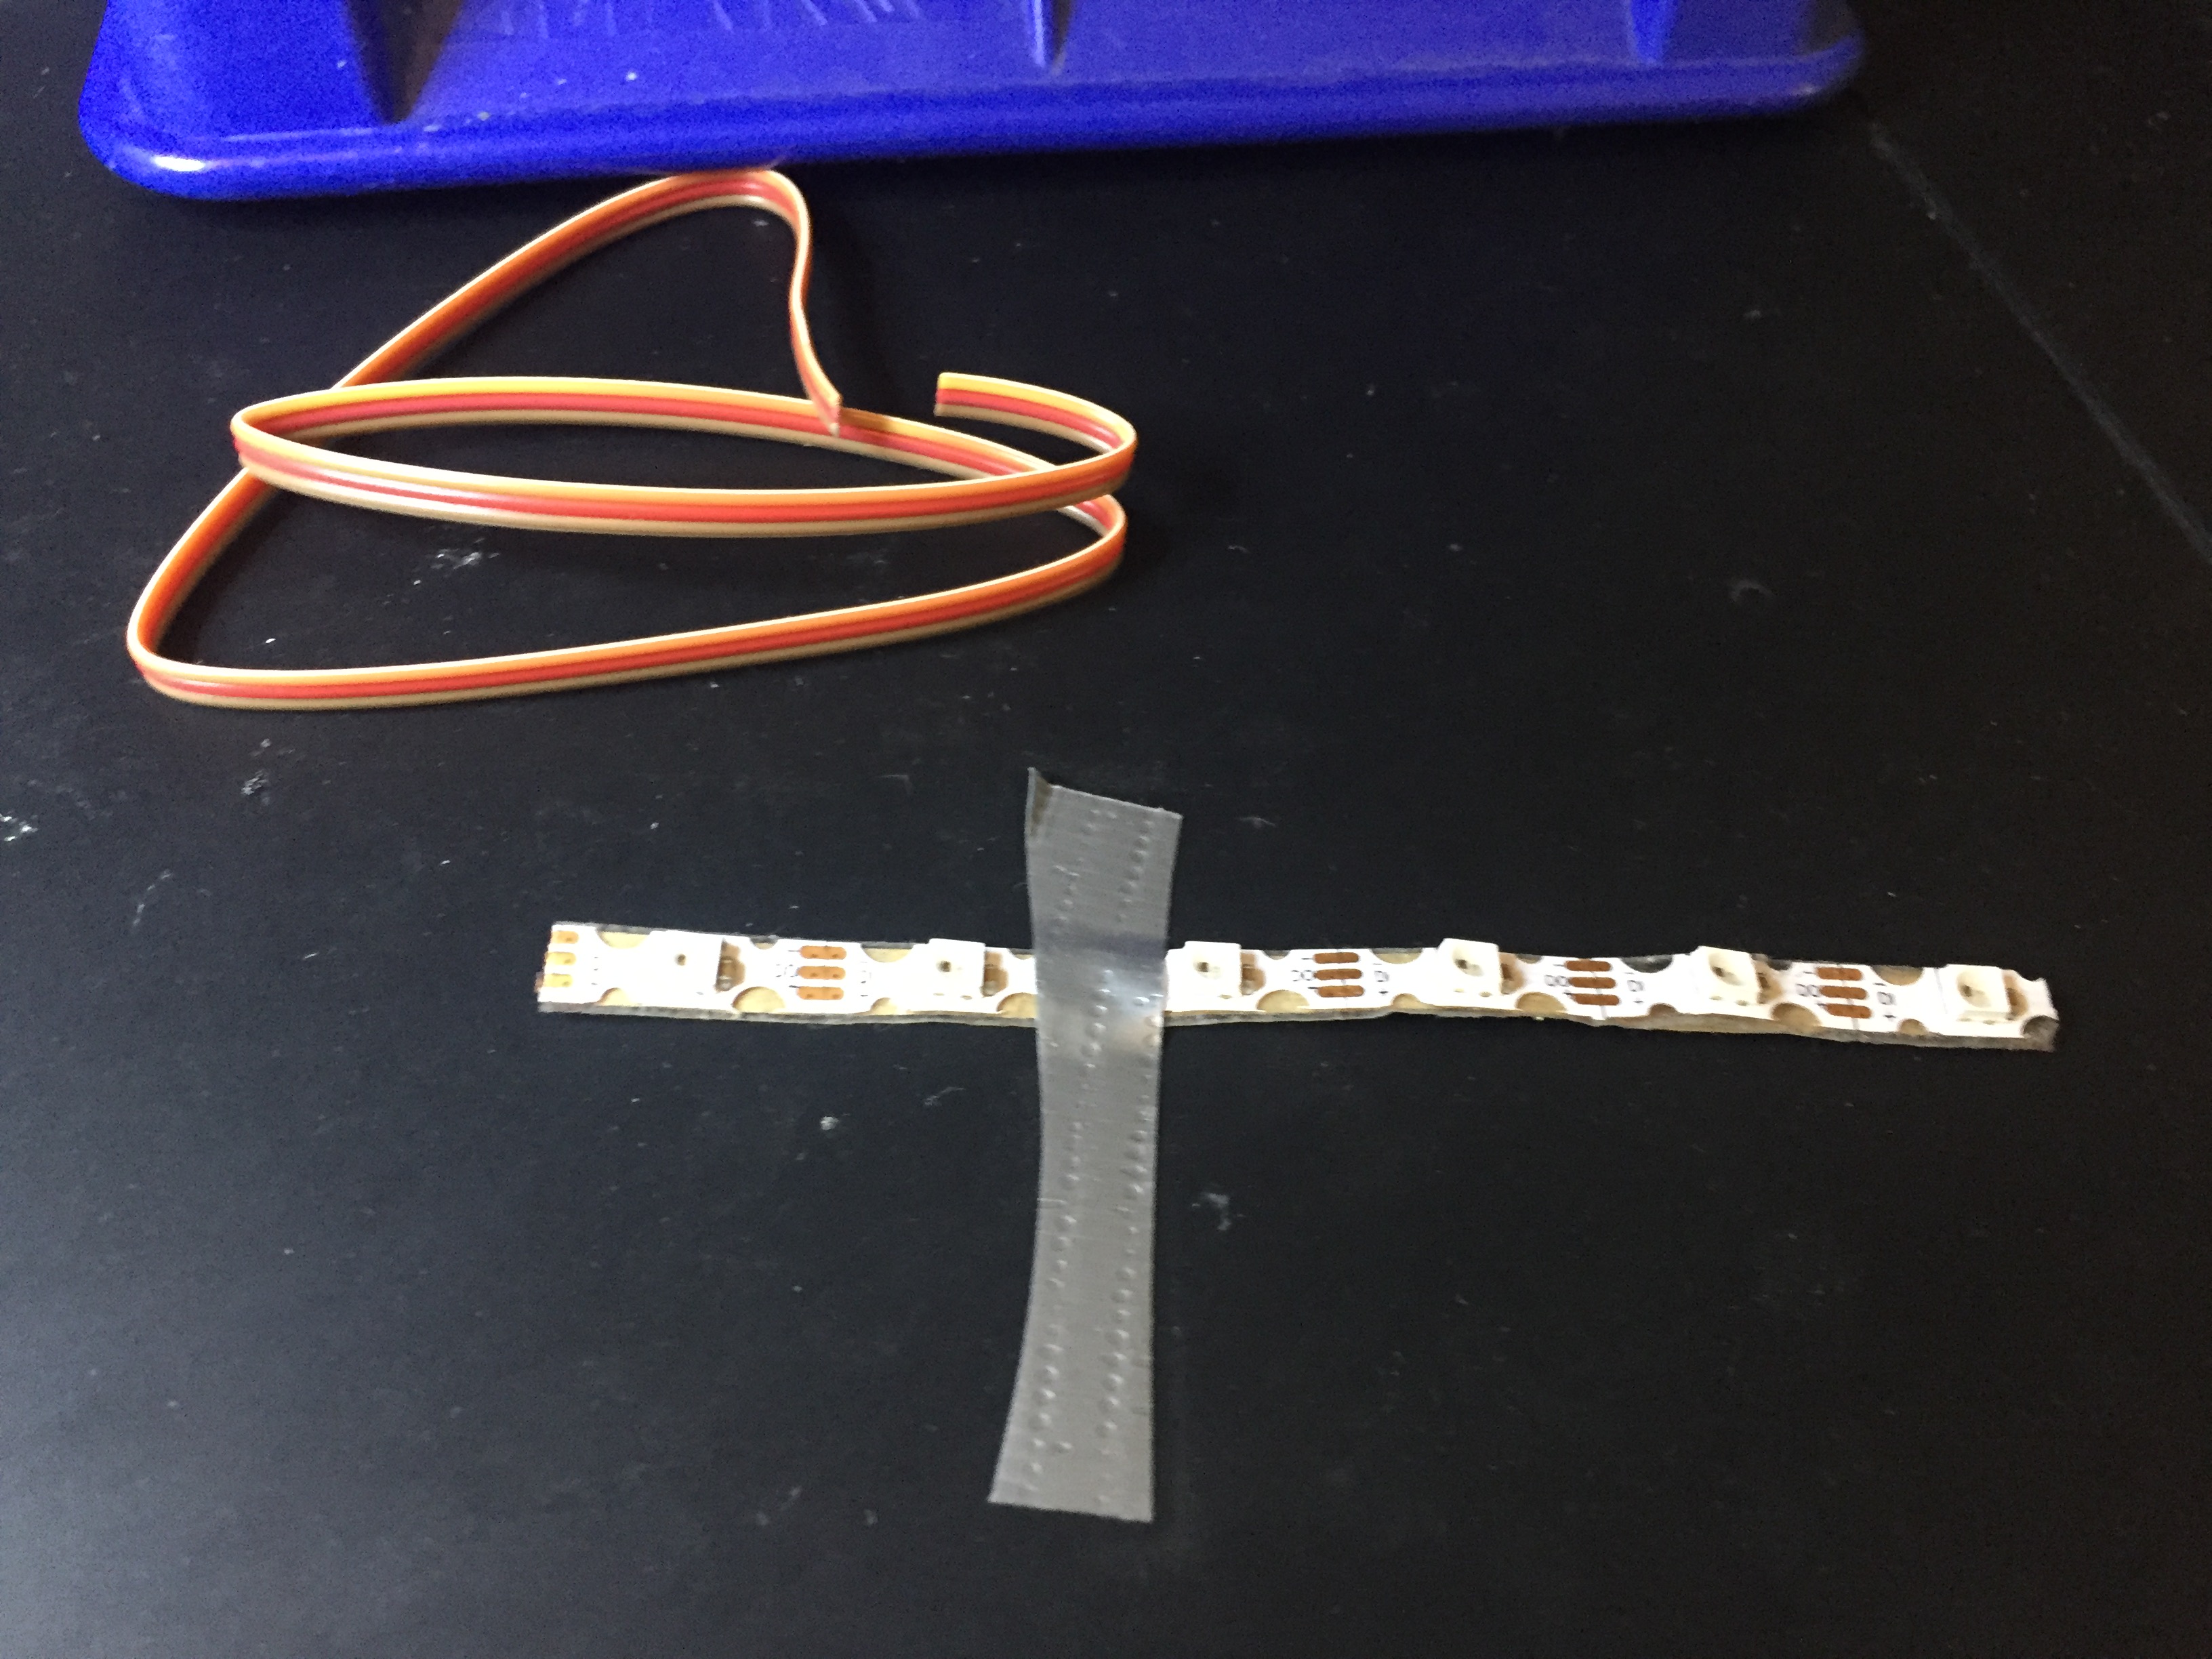
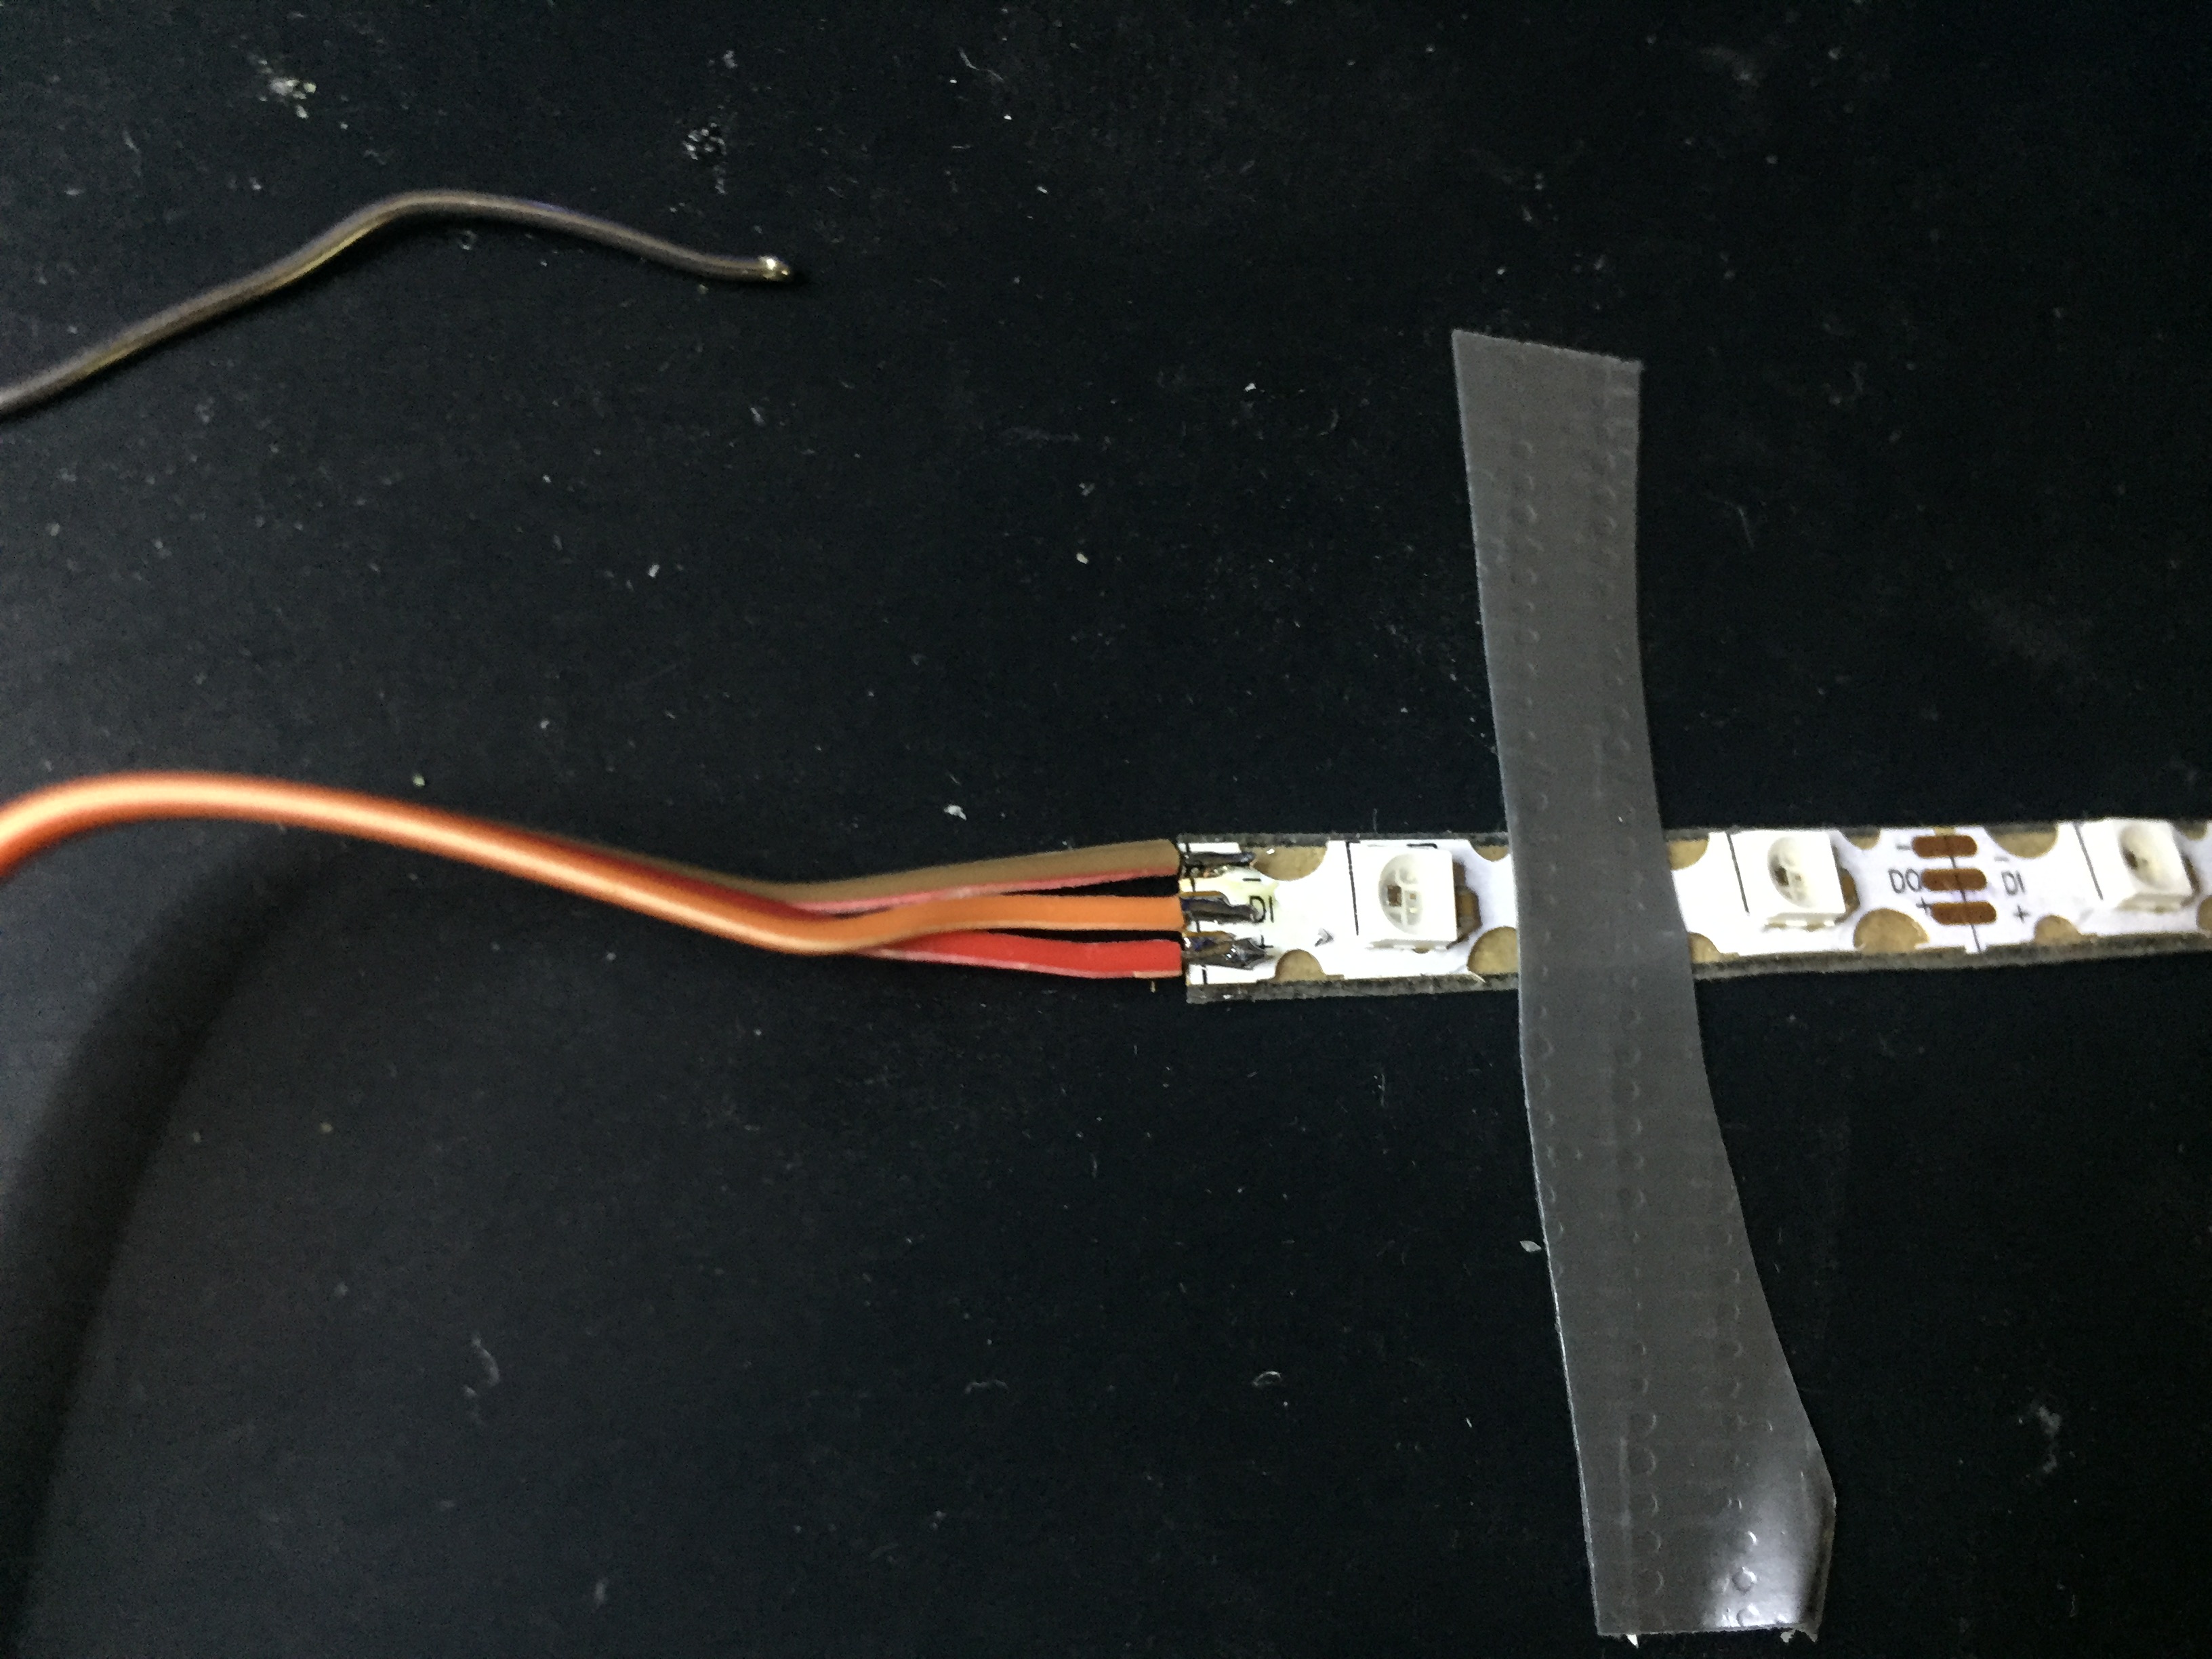
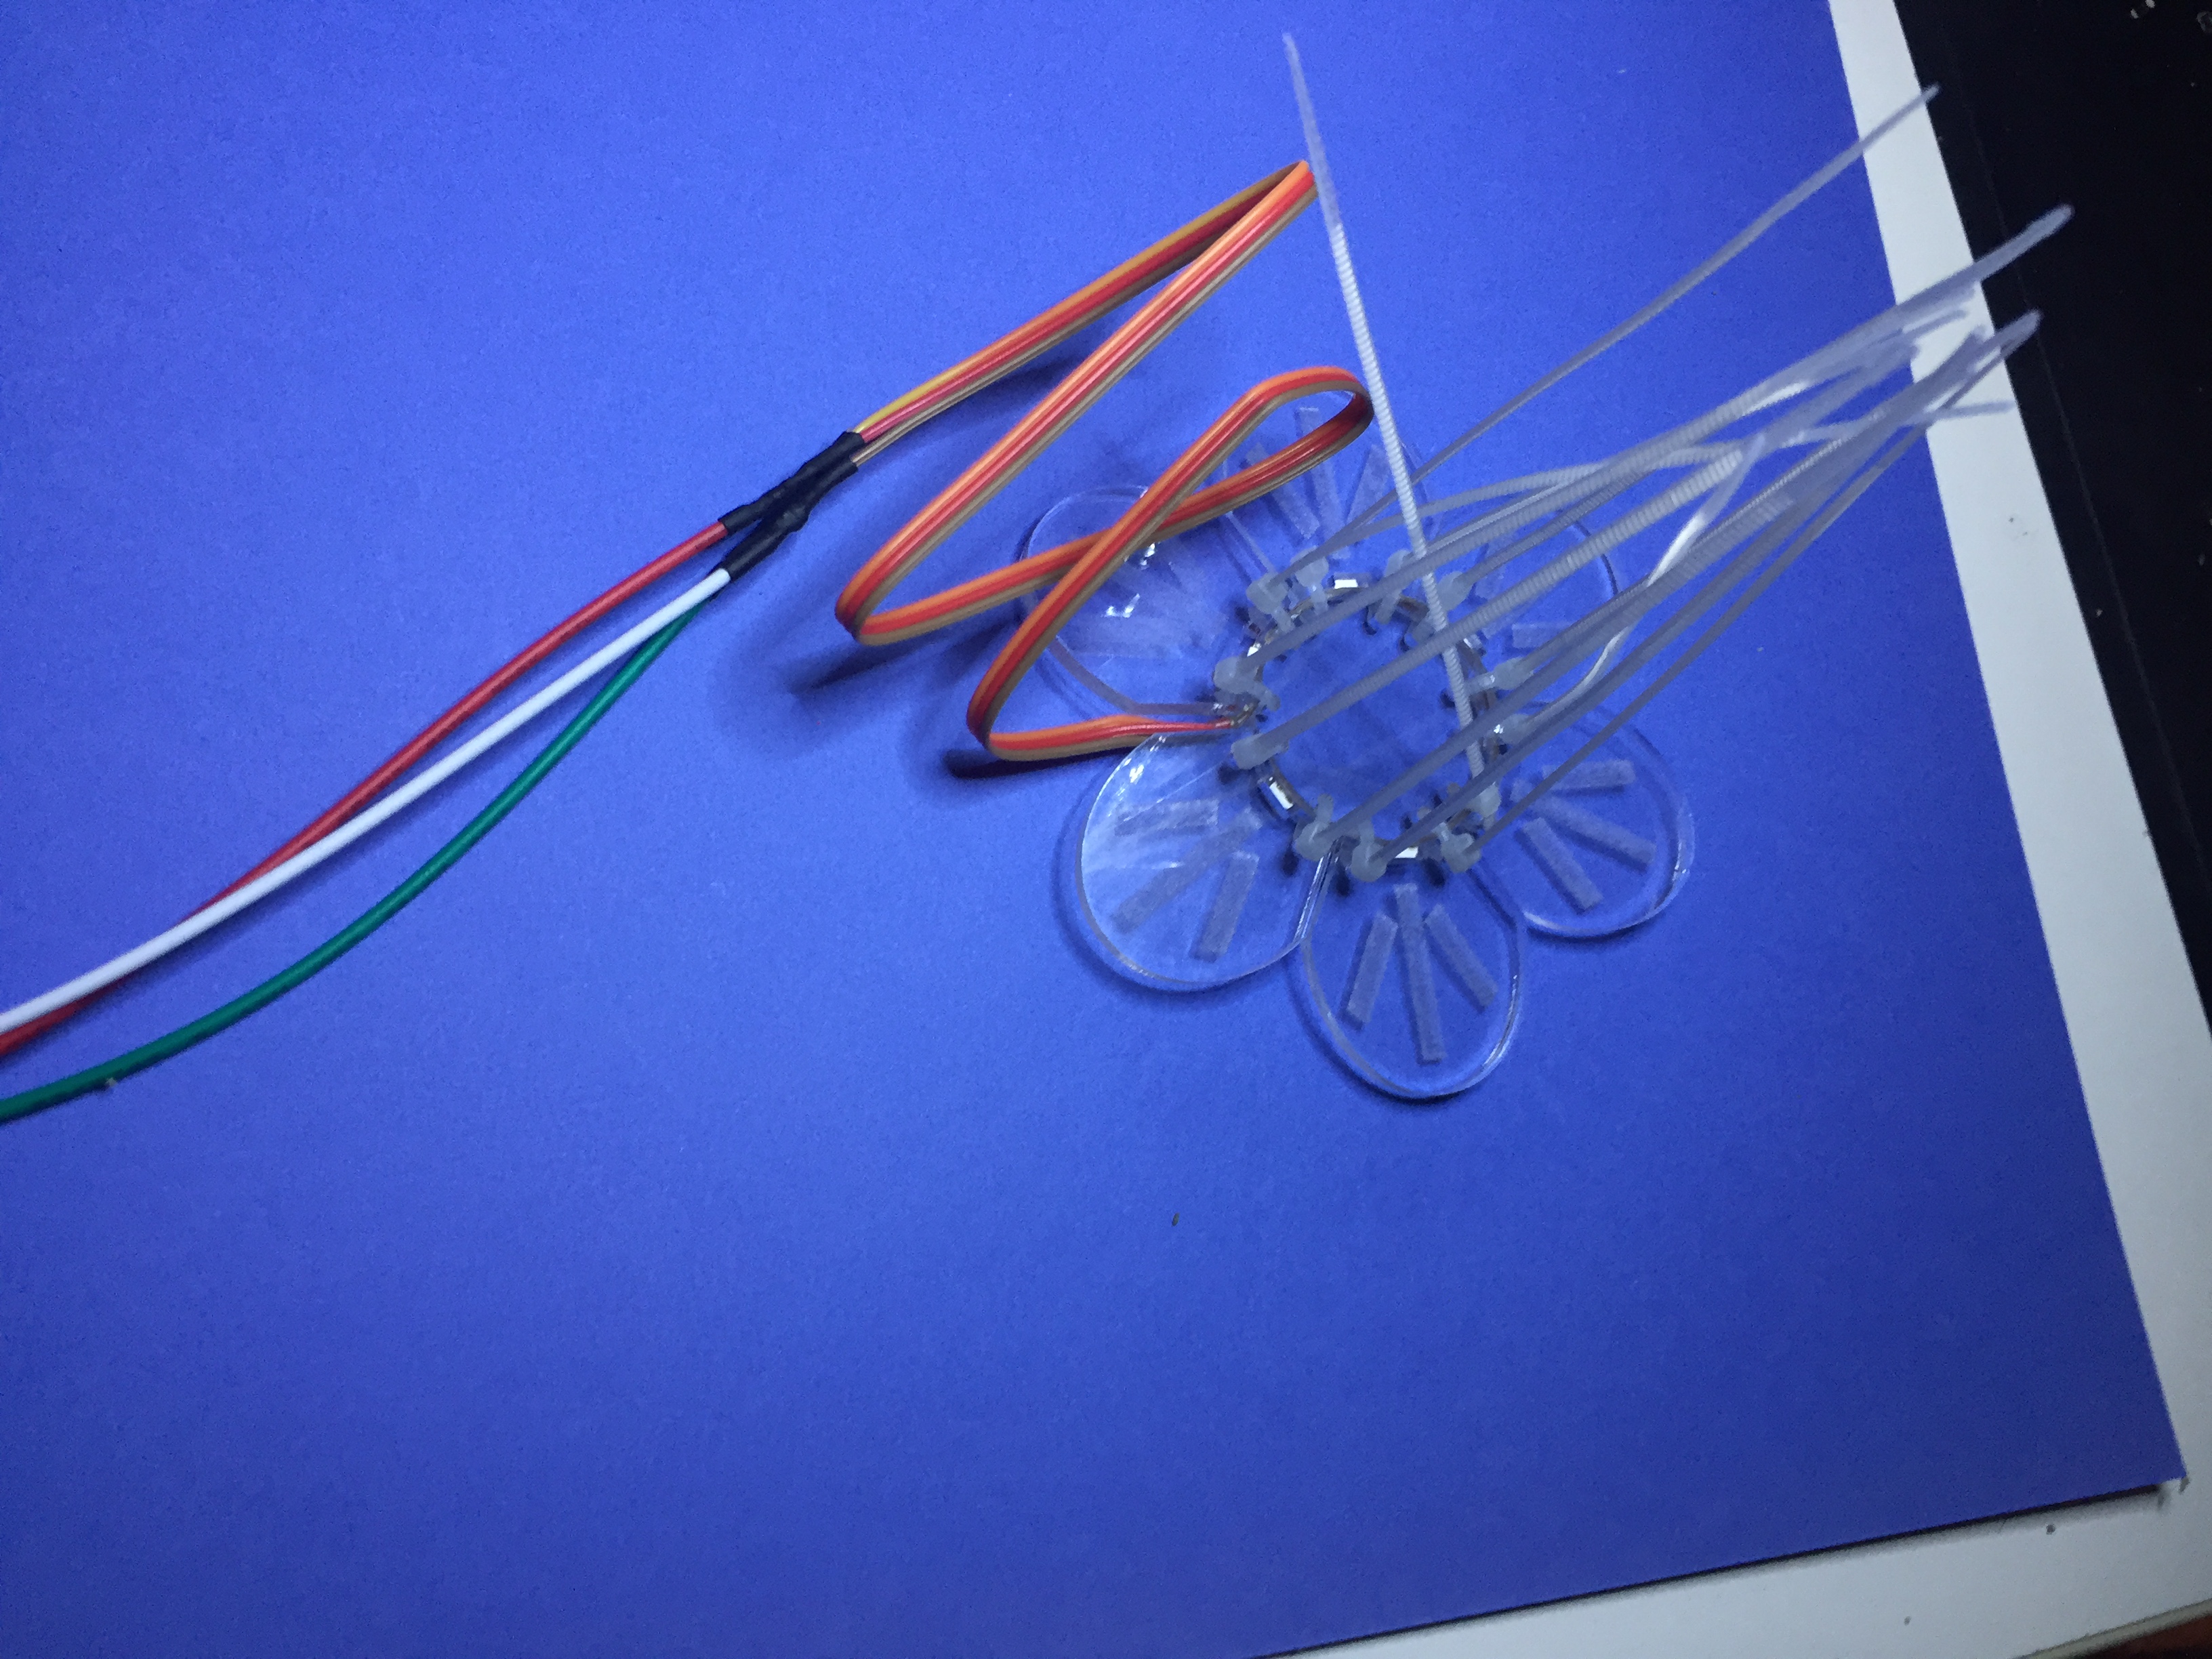
Cut a length of 6 LEDs from the LED strip – one to illuminate each petal. Separate a length of three wires from the ribbon cable – at least 12 inches long. The ribbon cable will be wrapped around the “stem” of the flower.
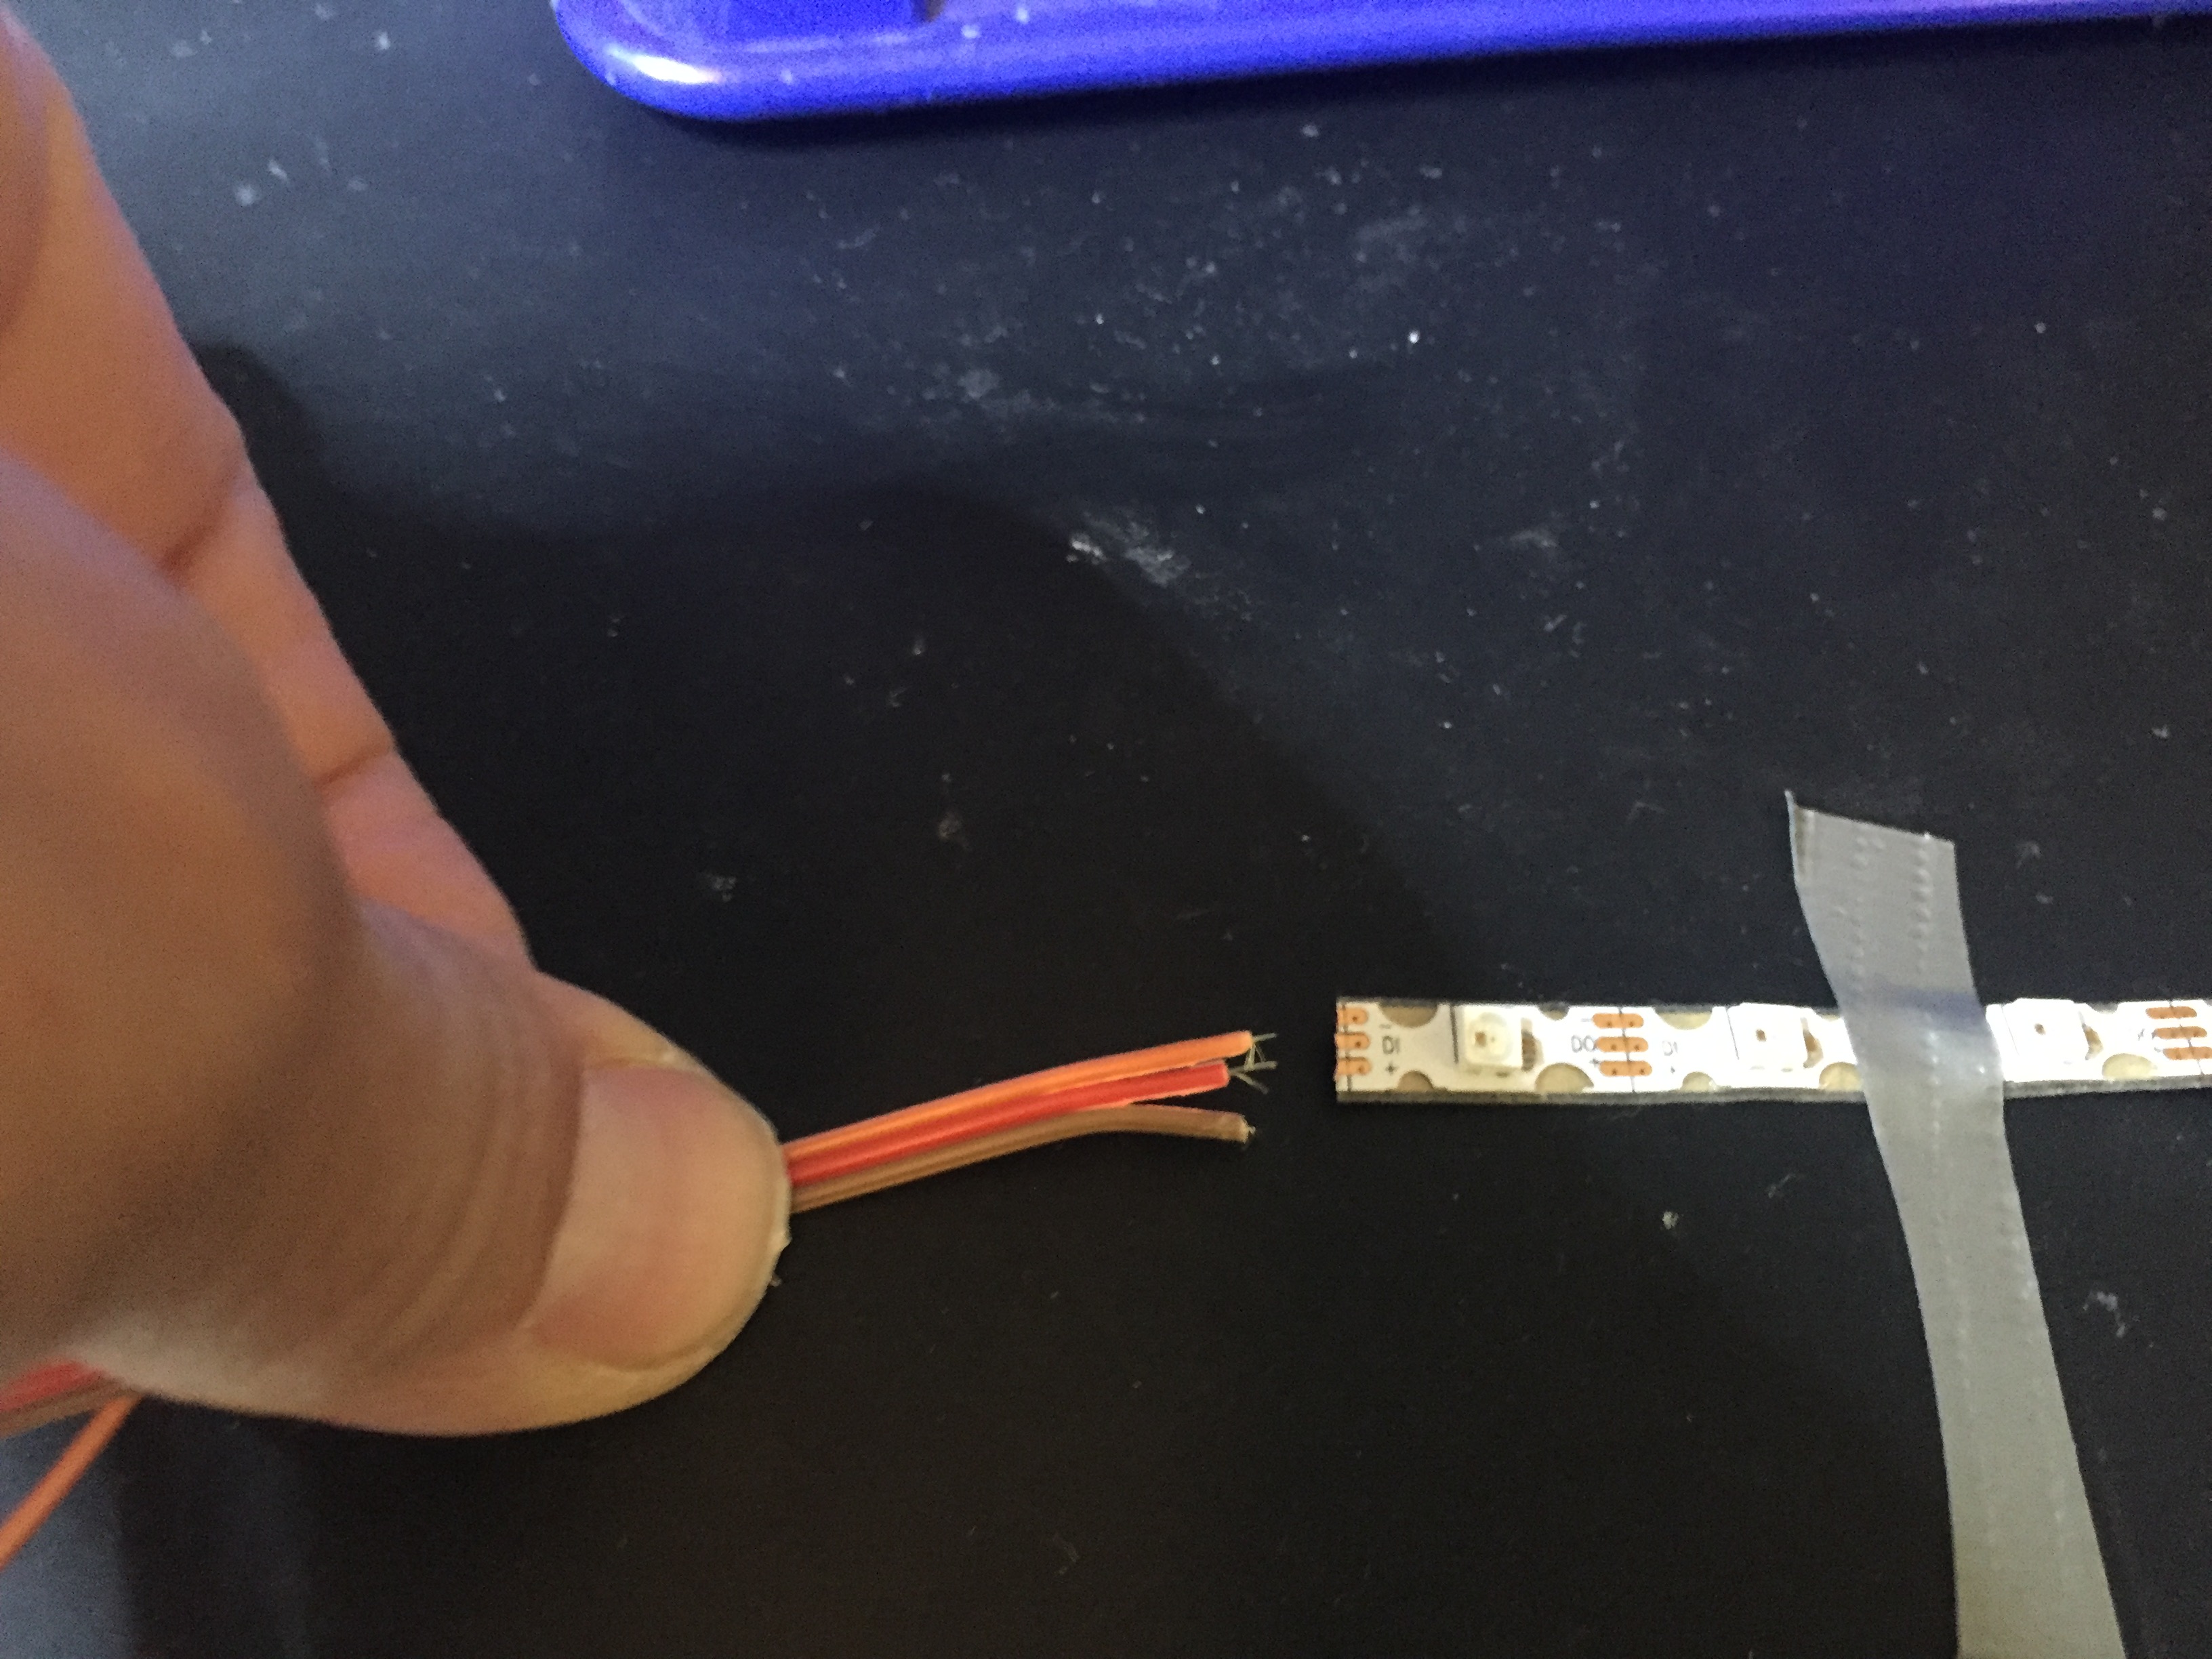
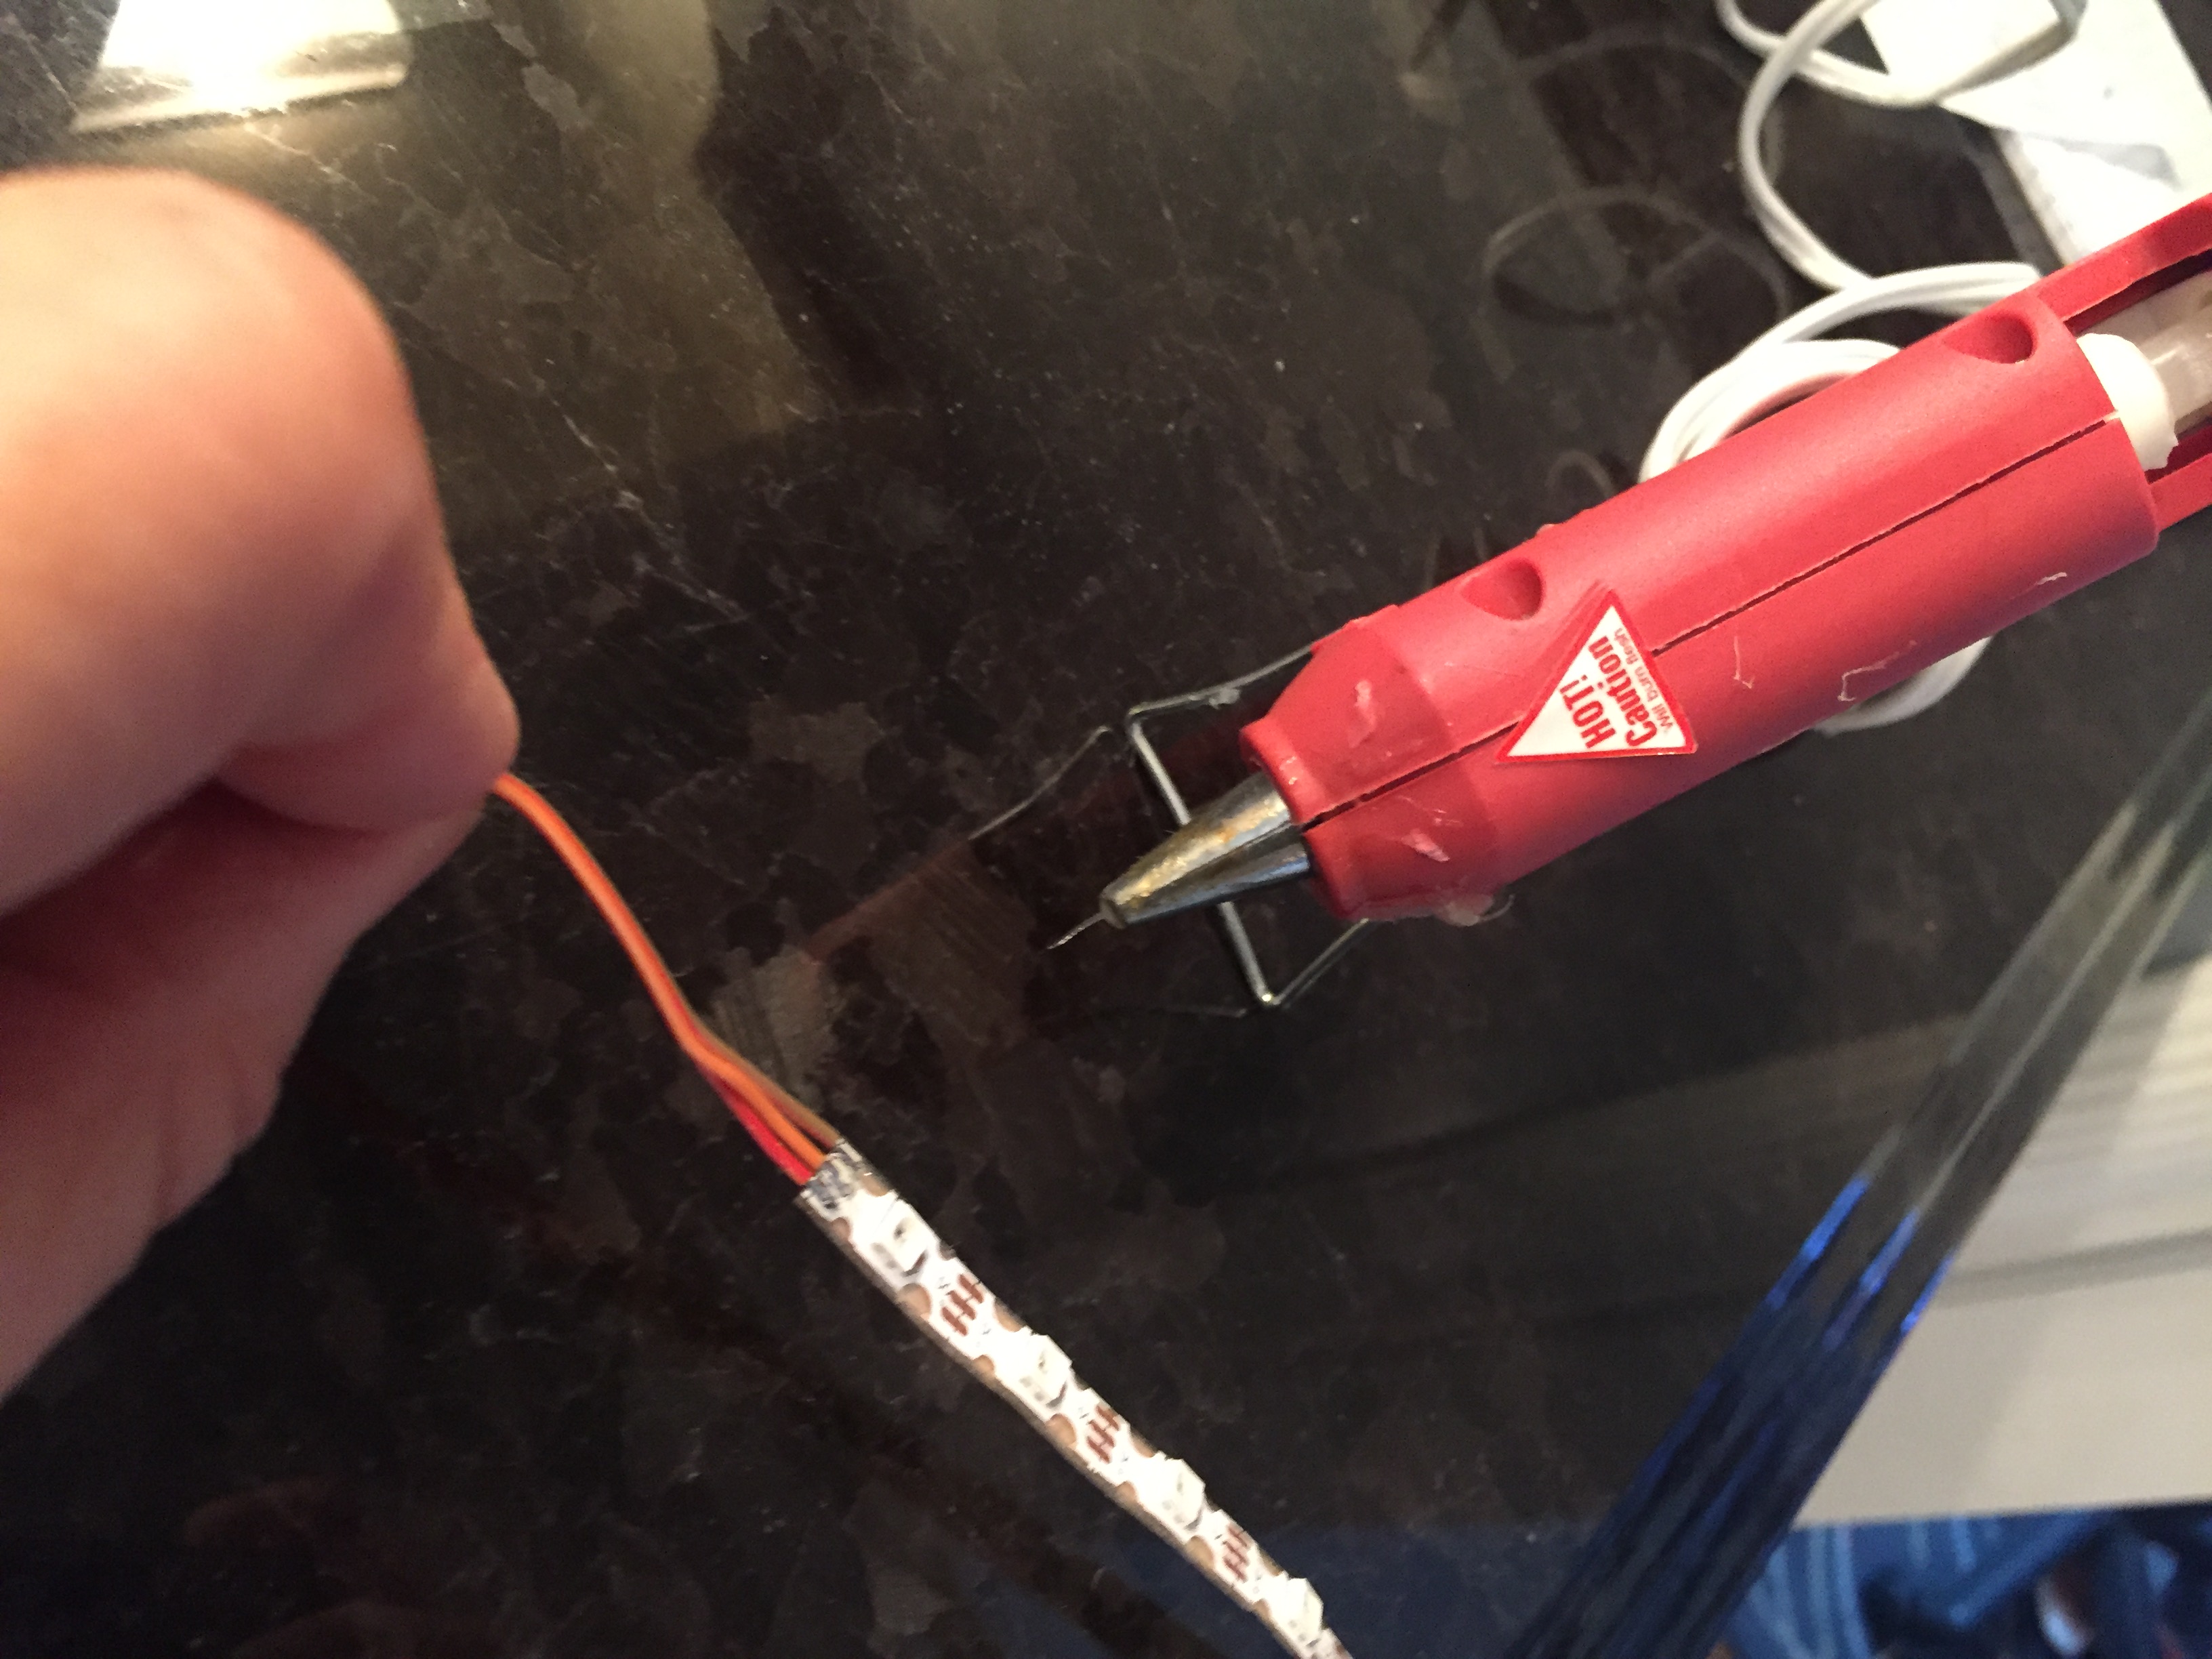
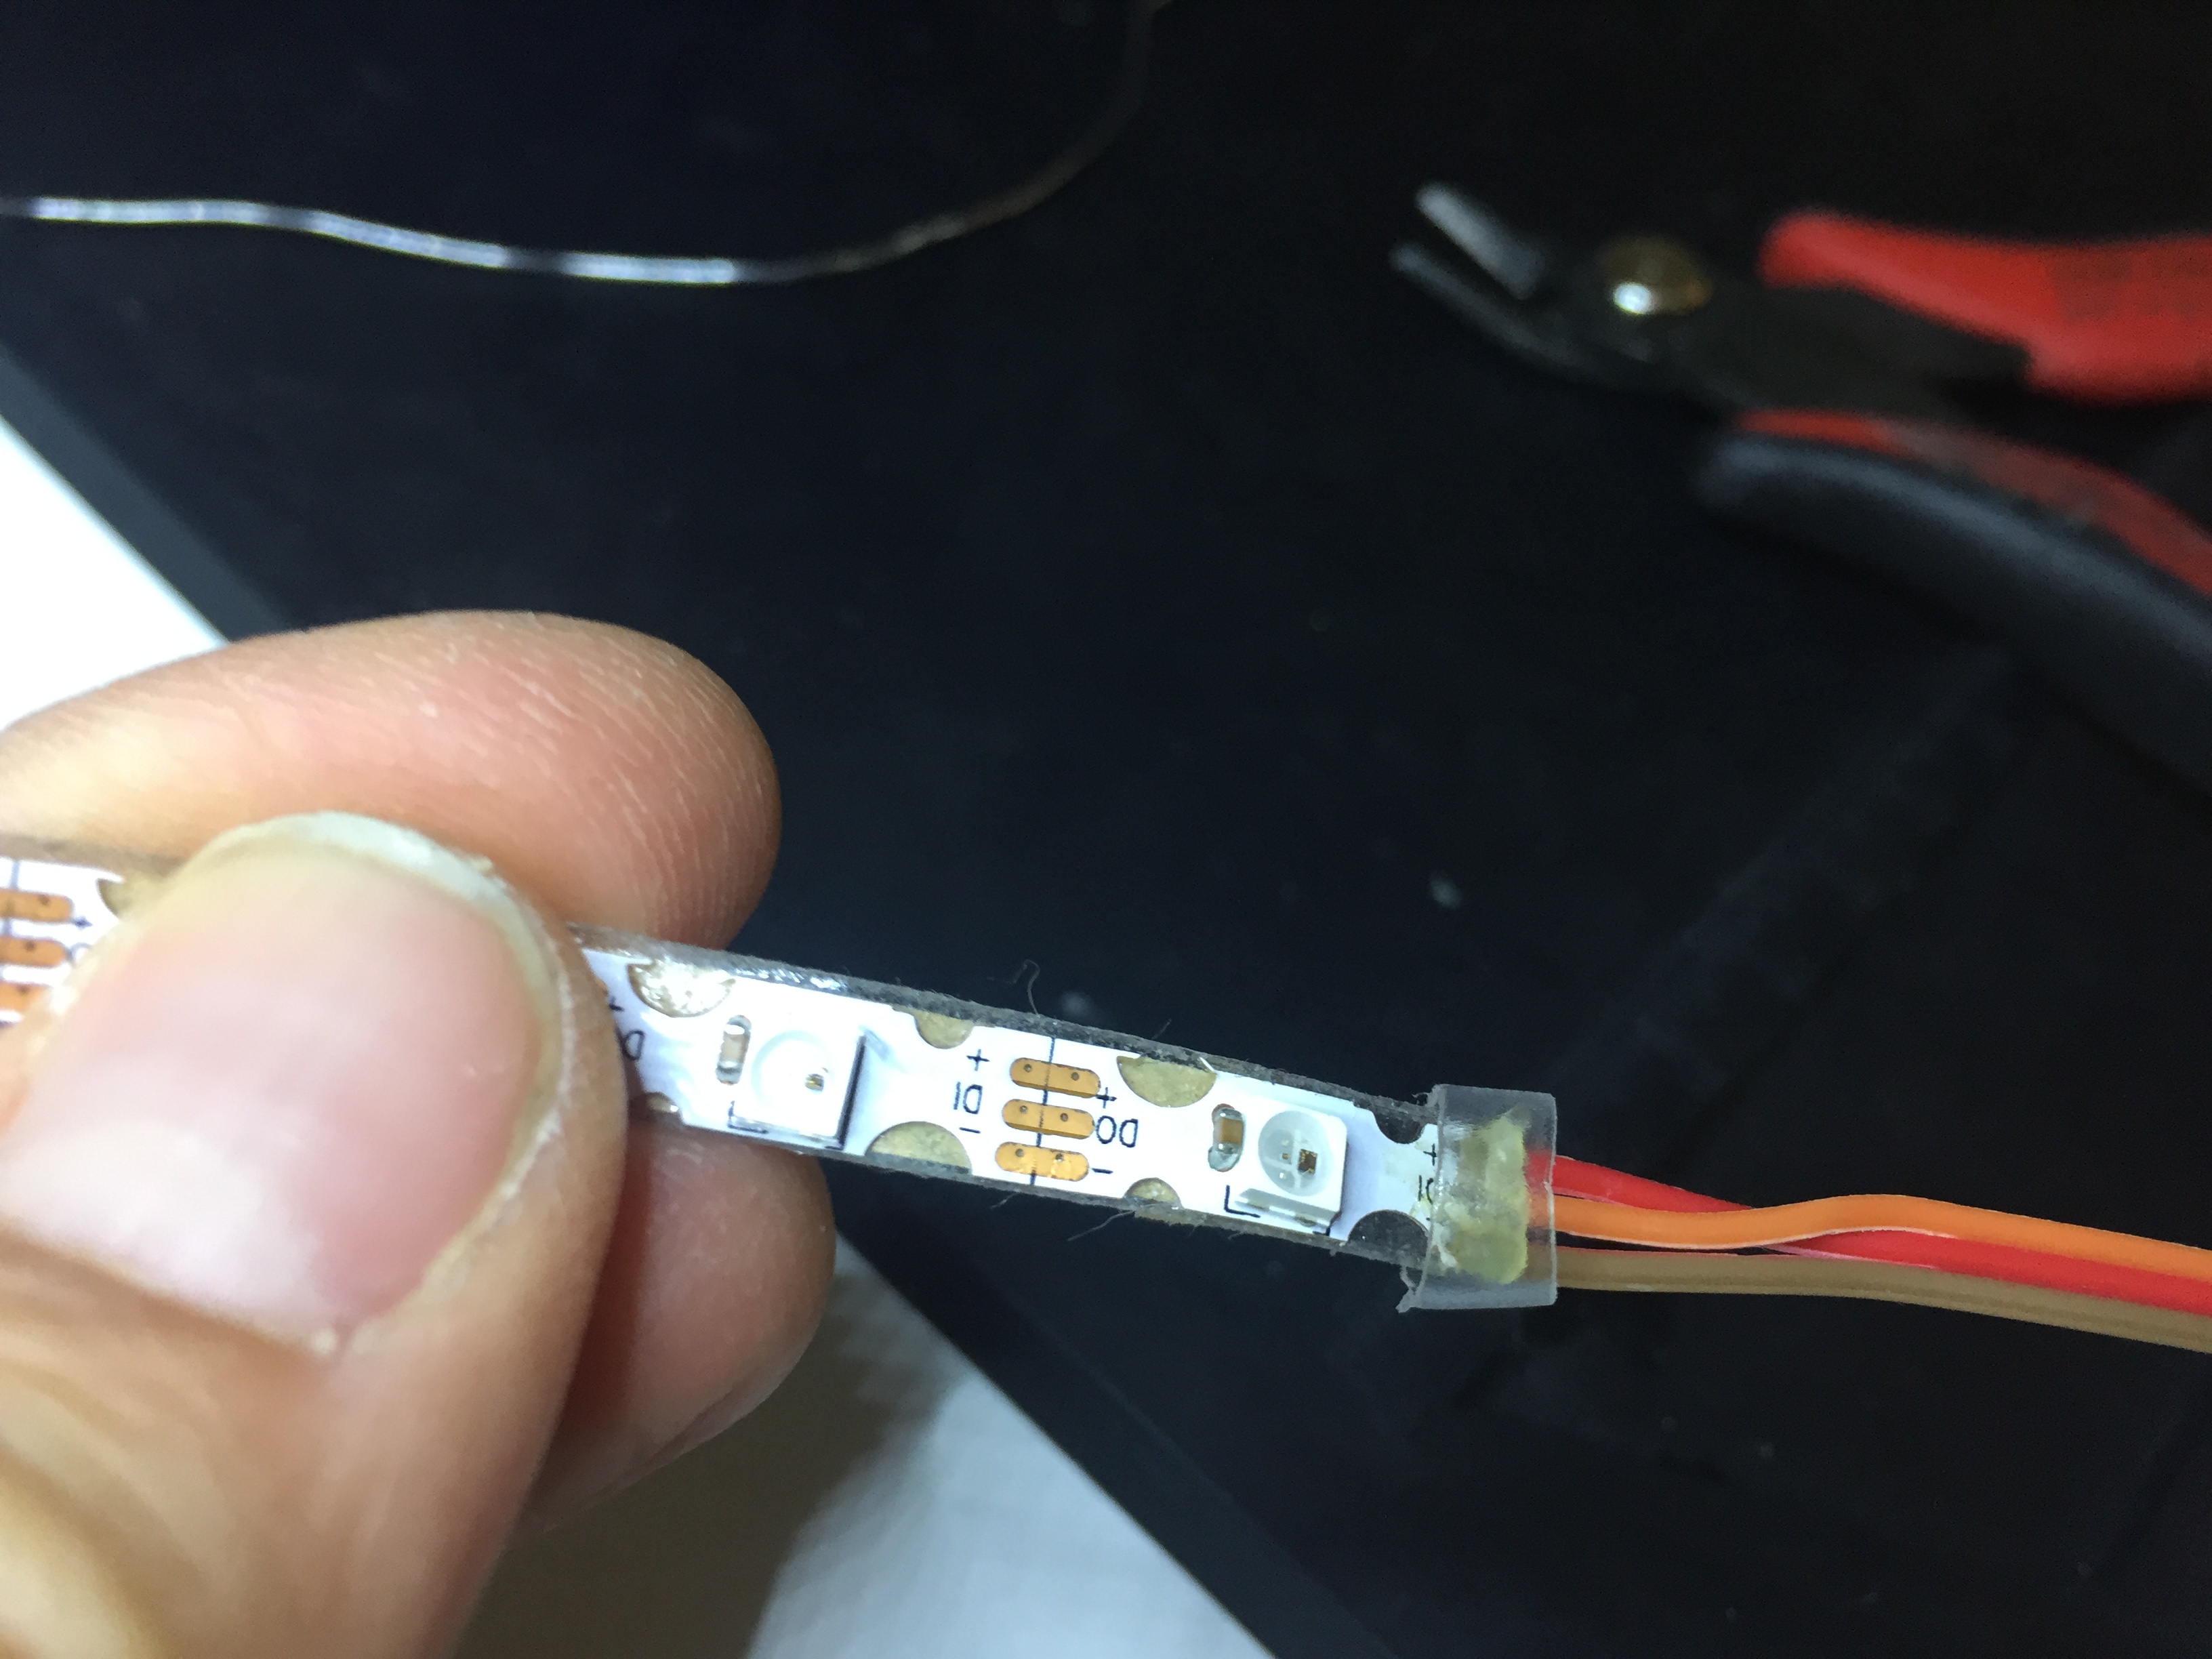
Strip the ends of the three wires of the ribbon cable. Solder them carefully to the inputs of the LED strip. Cover the solder with a small amount of hot glue to provide insulation and stop stray wires from shorting. Peel back the e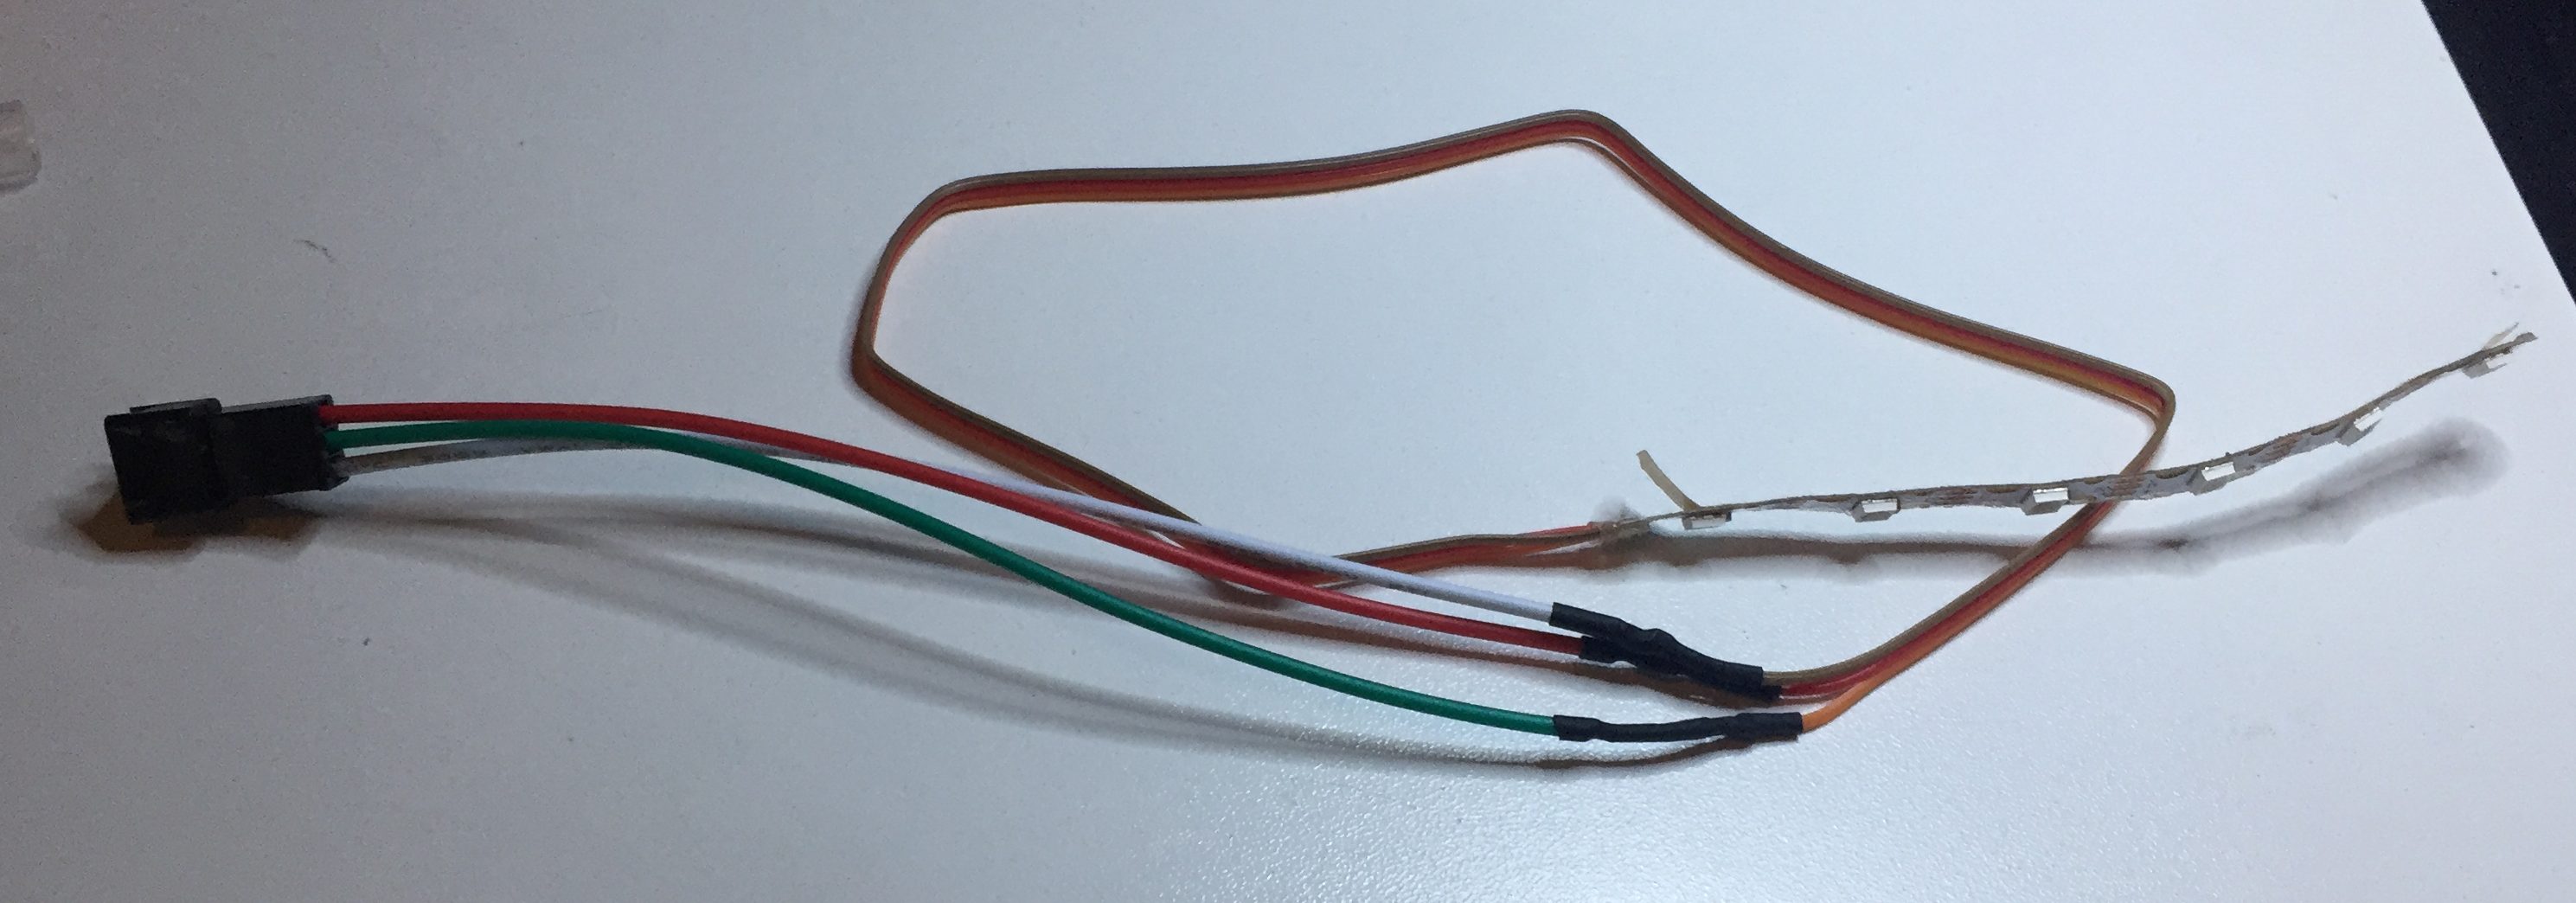 nd of the LED strip’s adhesive backing and place a small length of shrink tube over the solder joints to provide extra reinforcement.
Connect the other end of the ribbon cable to your micro controller and power. I connected the ends to a three-wire JST connector, so I’d be able to use it with a number of different controllers.
Assembling the Flower:
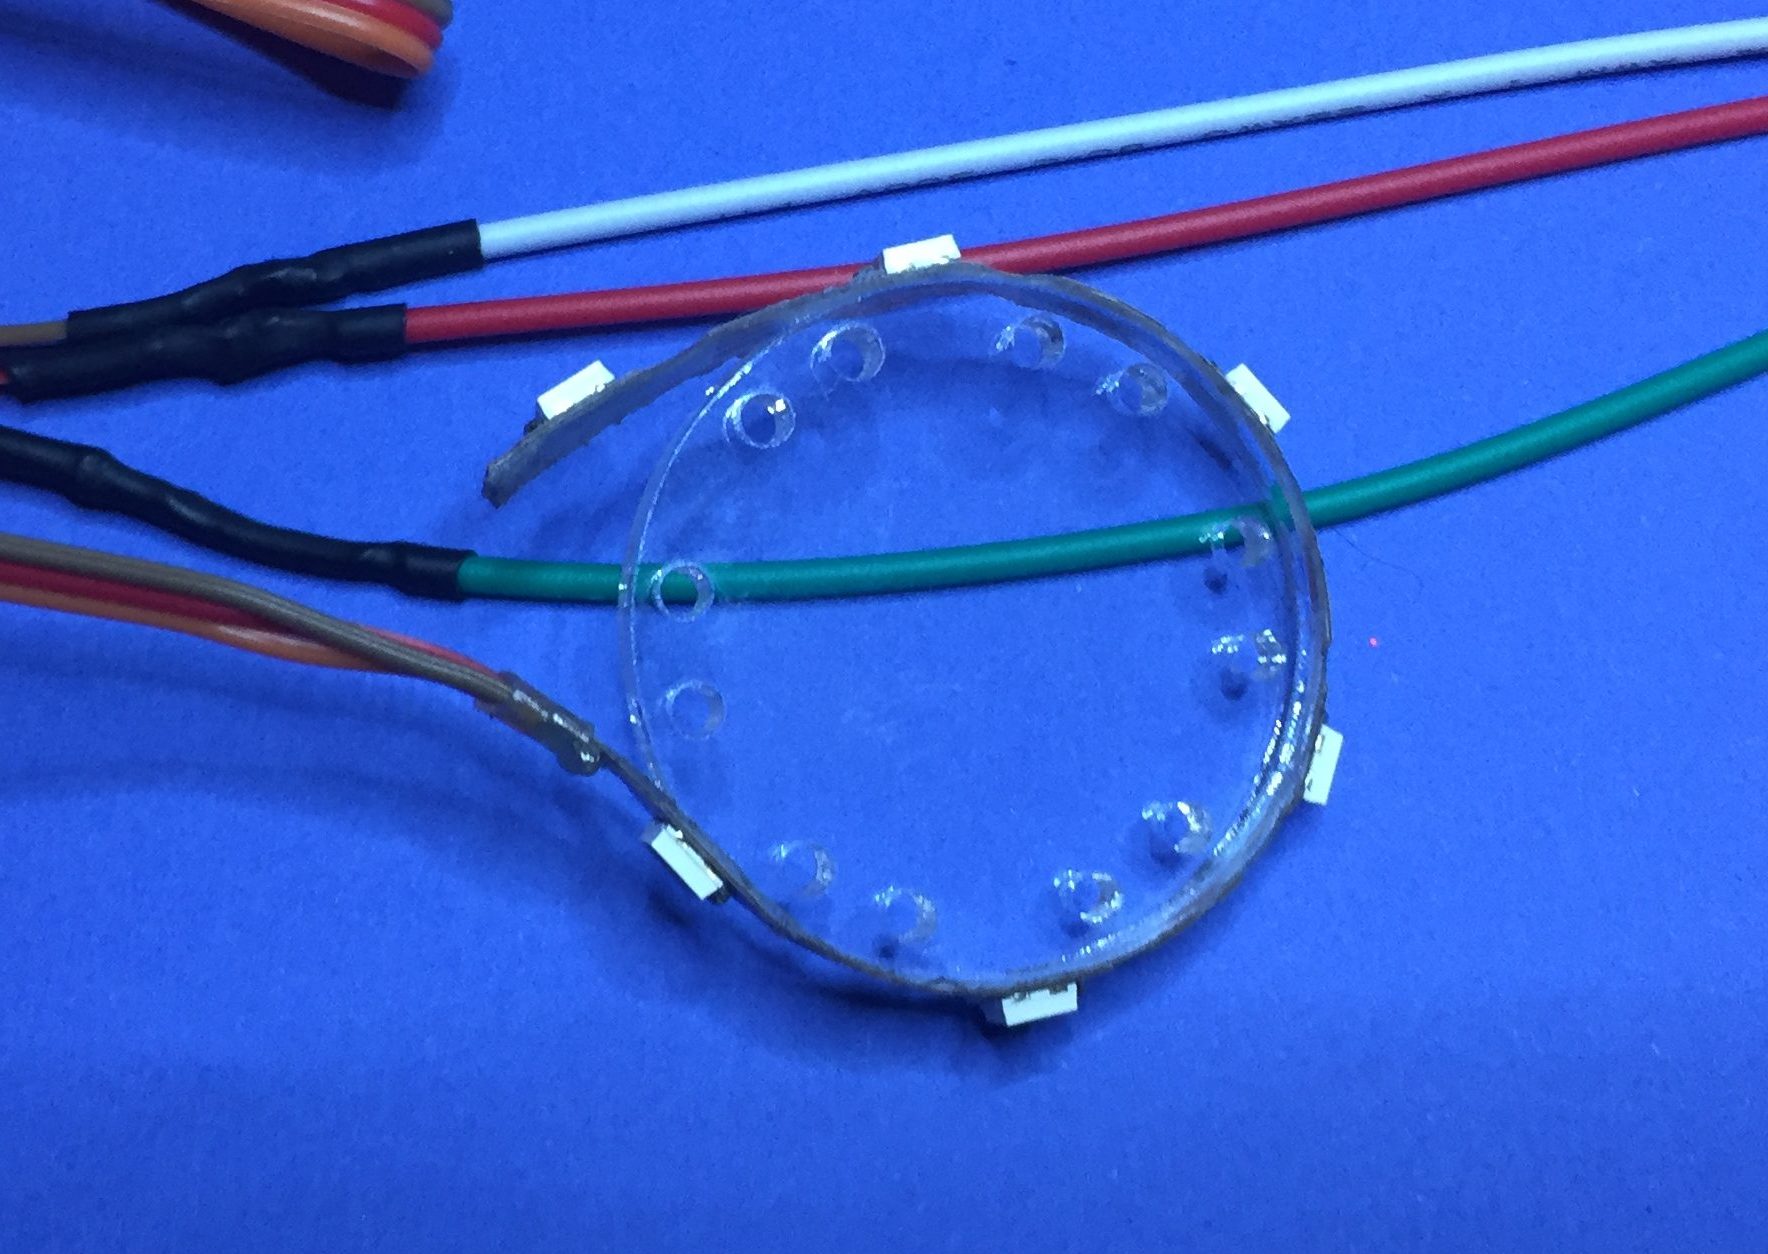
Peel any paper covering from the acrylic pieces. Take the circle which will be the center of the flower. Peel the backing off of the LED strip, and wrap it around the circle. Align the strip so that the LEDs are centered as closely as possible in the large gaps between holes in the flower center (see image). It’s ok if the end of strip peels off a little bit. The petals and zip ties will hold it in place.
METHOD 1 – Zip Ties:
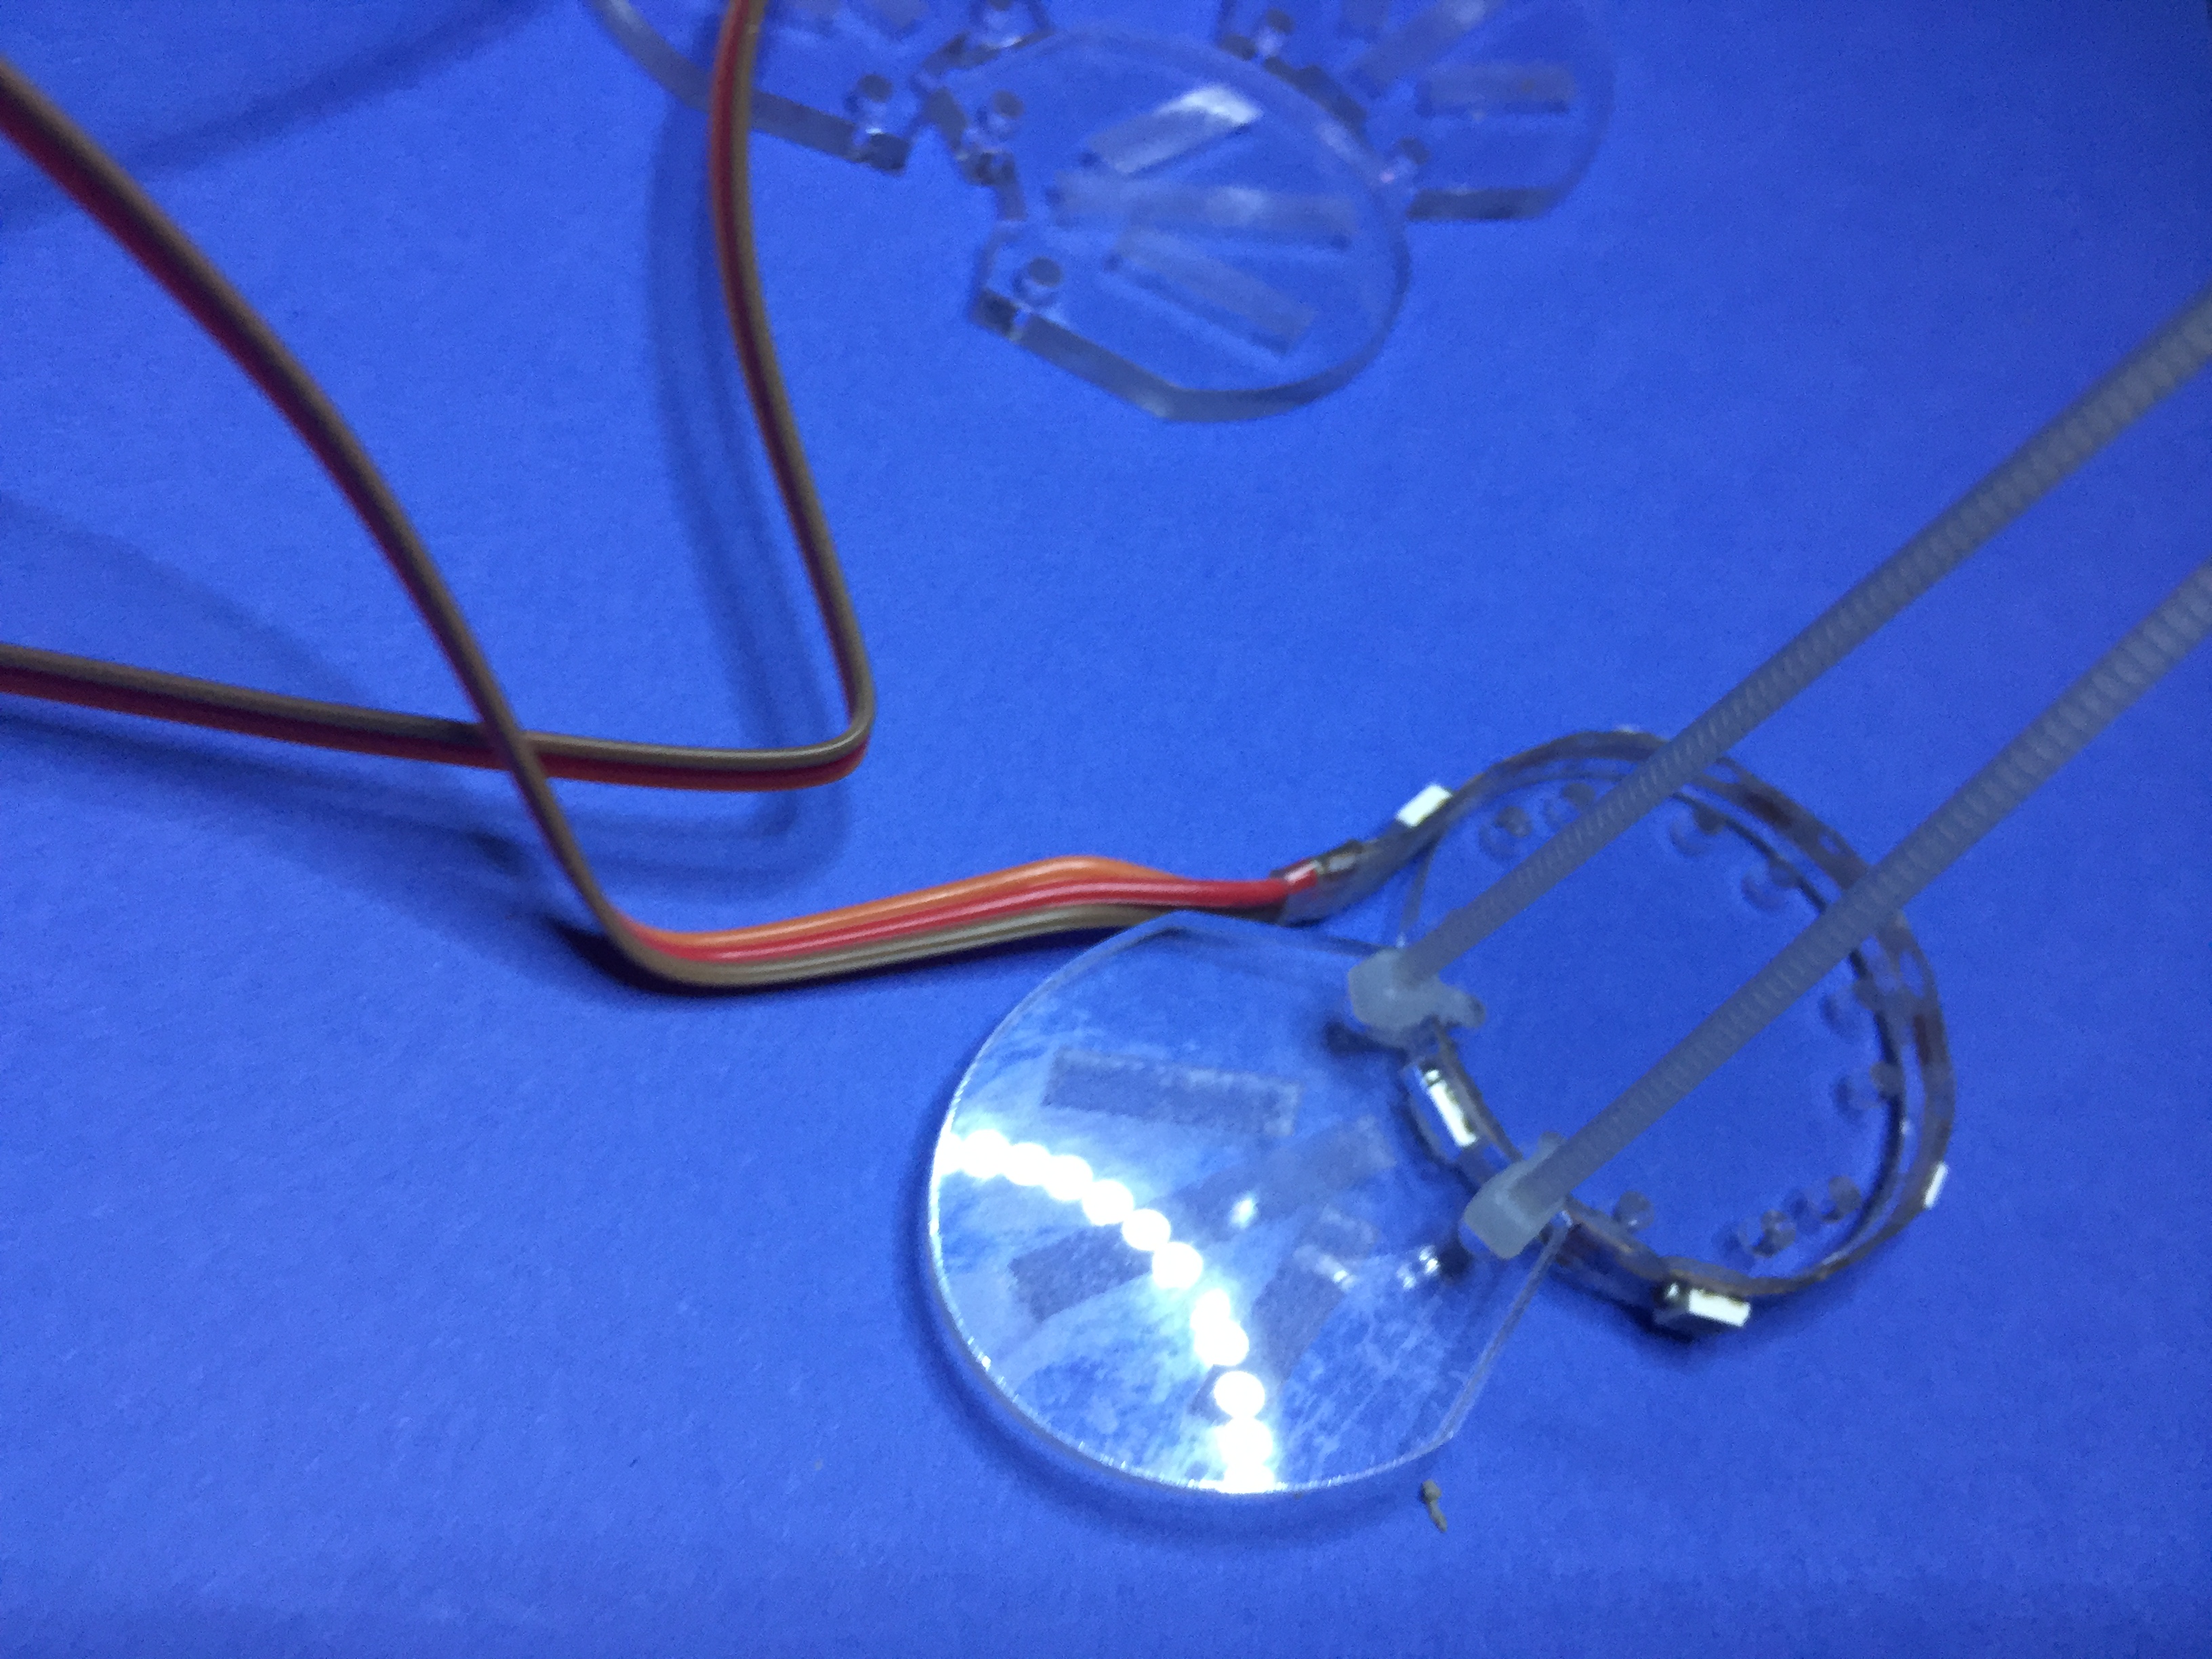
Now take the two zip ties and one flower petal. Starting with the loose end of the strip, align the holes in the petal with the holes in the center of the flower. Place the petal against the center of the flower so that the LED just fits into the notch in the petal as shown. Use two of the zip ties to attach the petal to the flower. Don’t over tighten, or you risk cracking the acrylic.
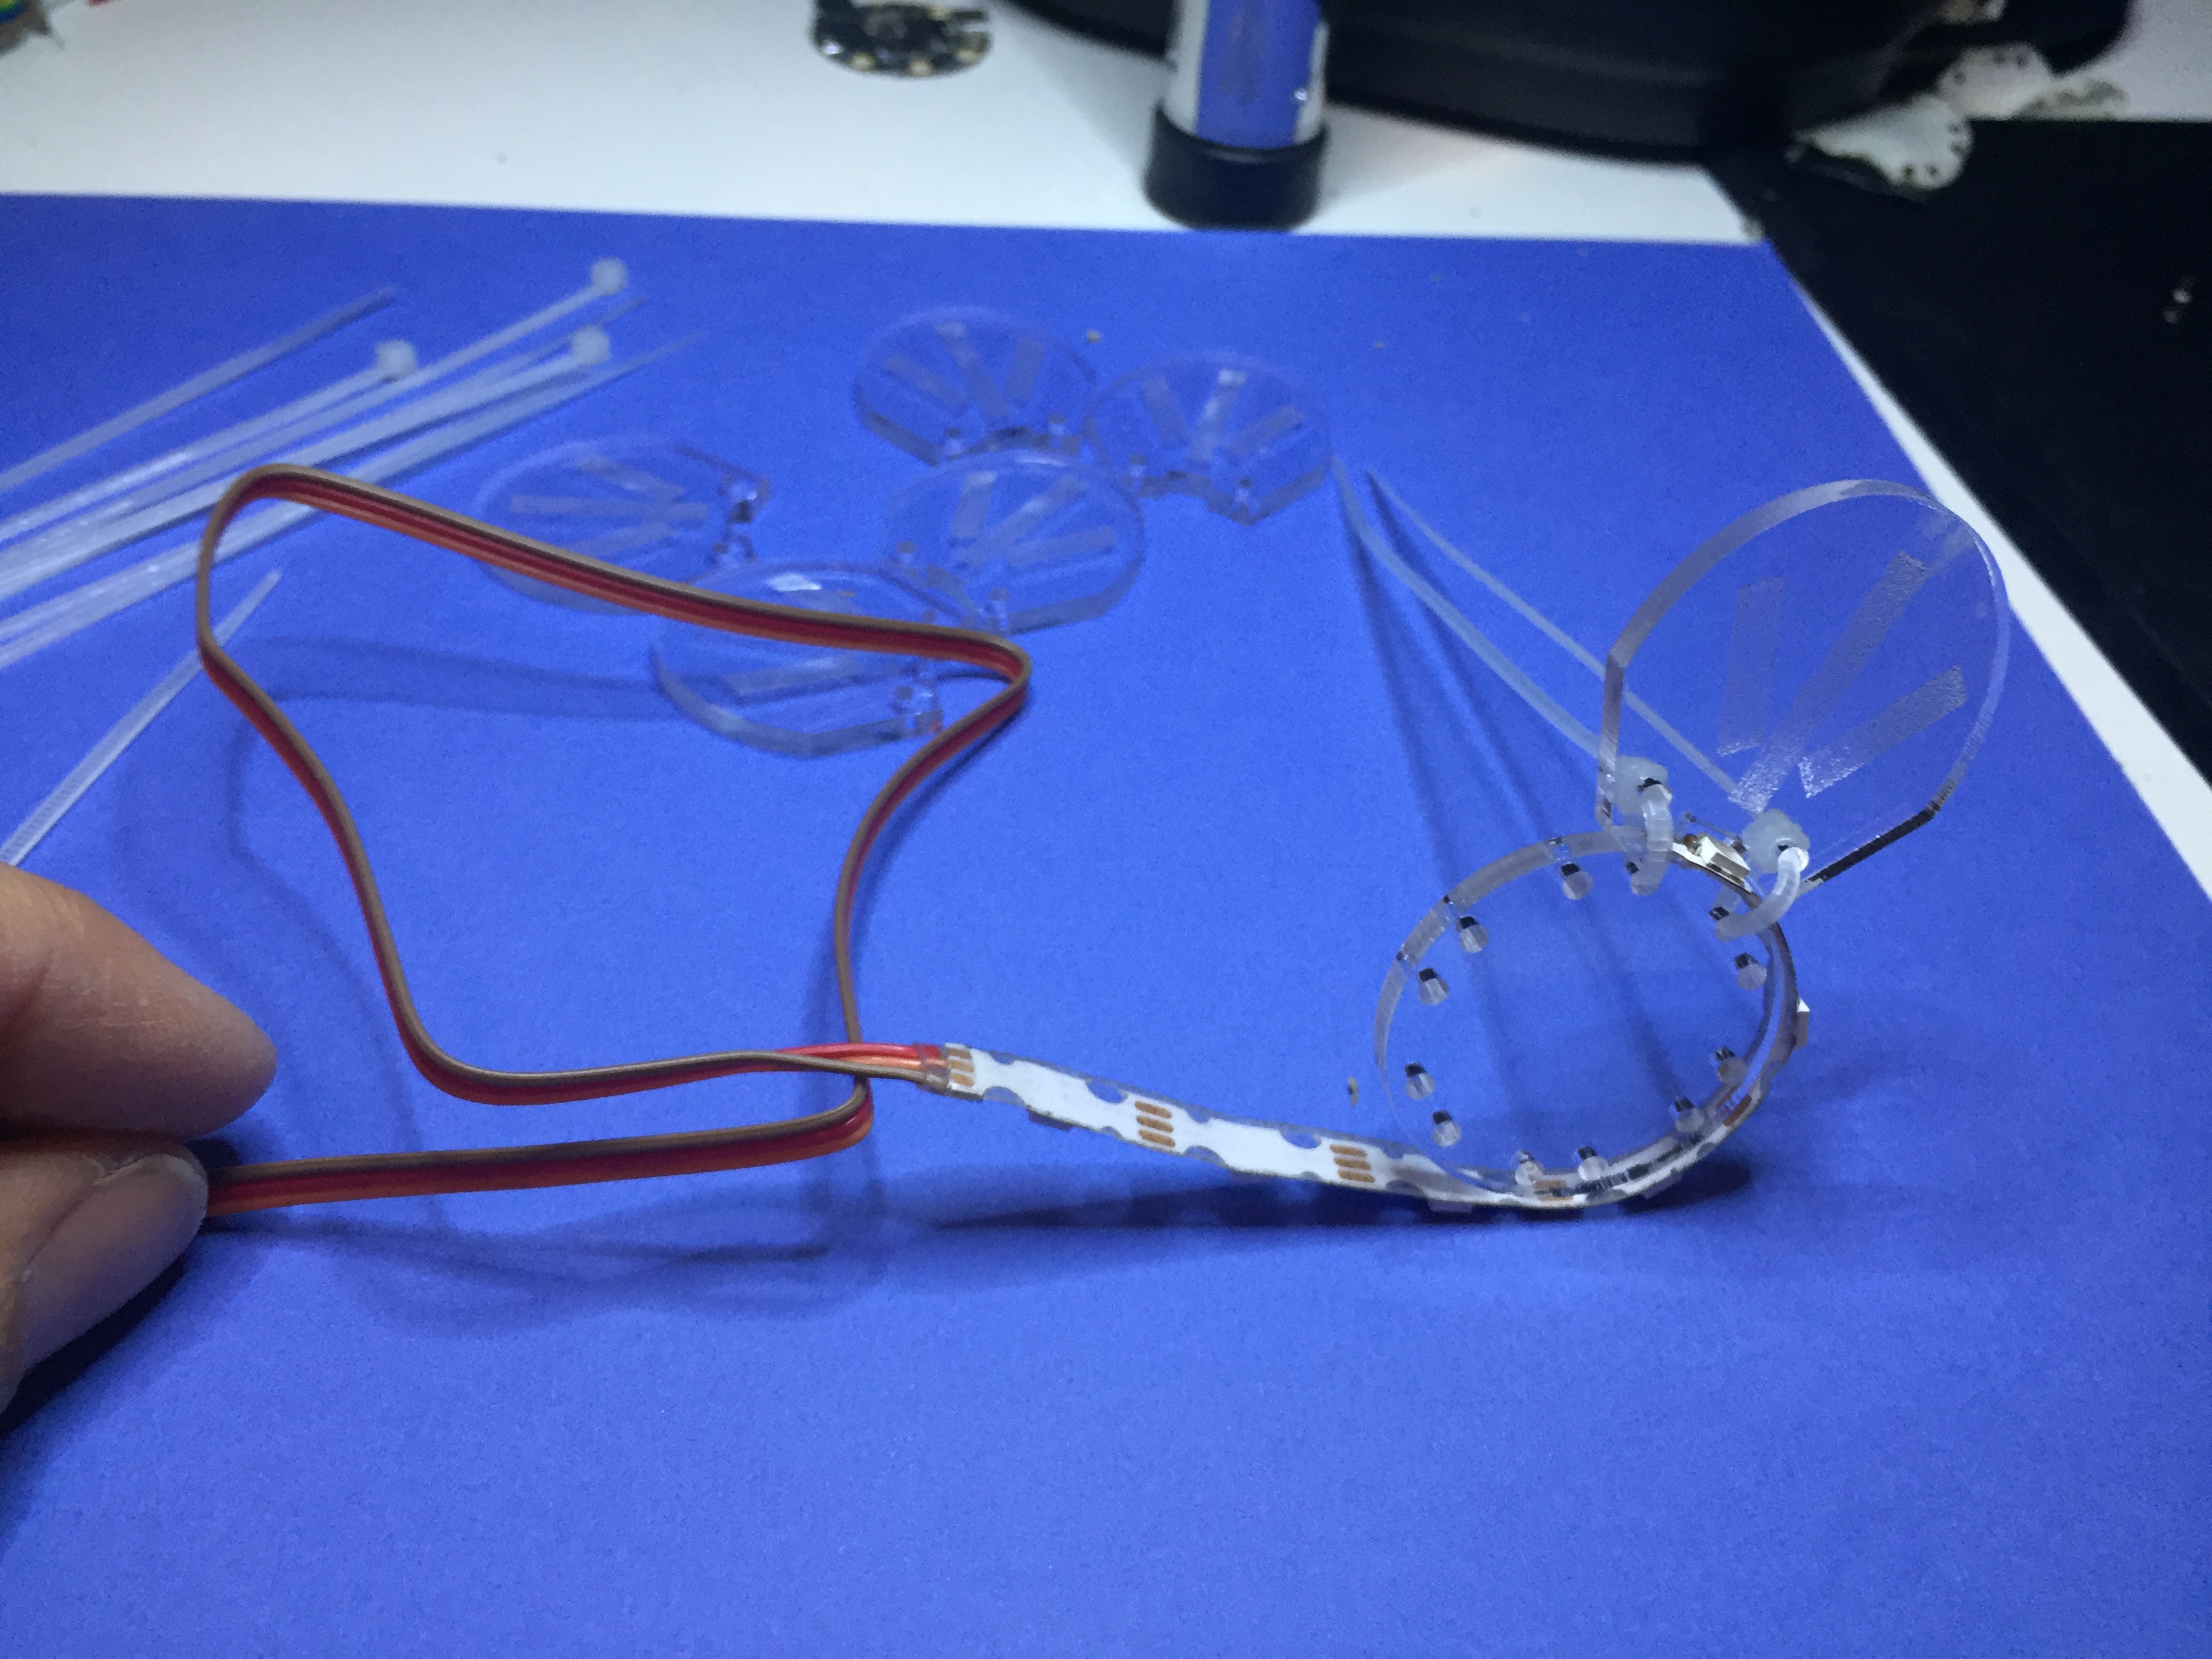
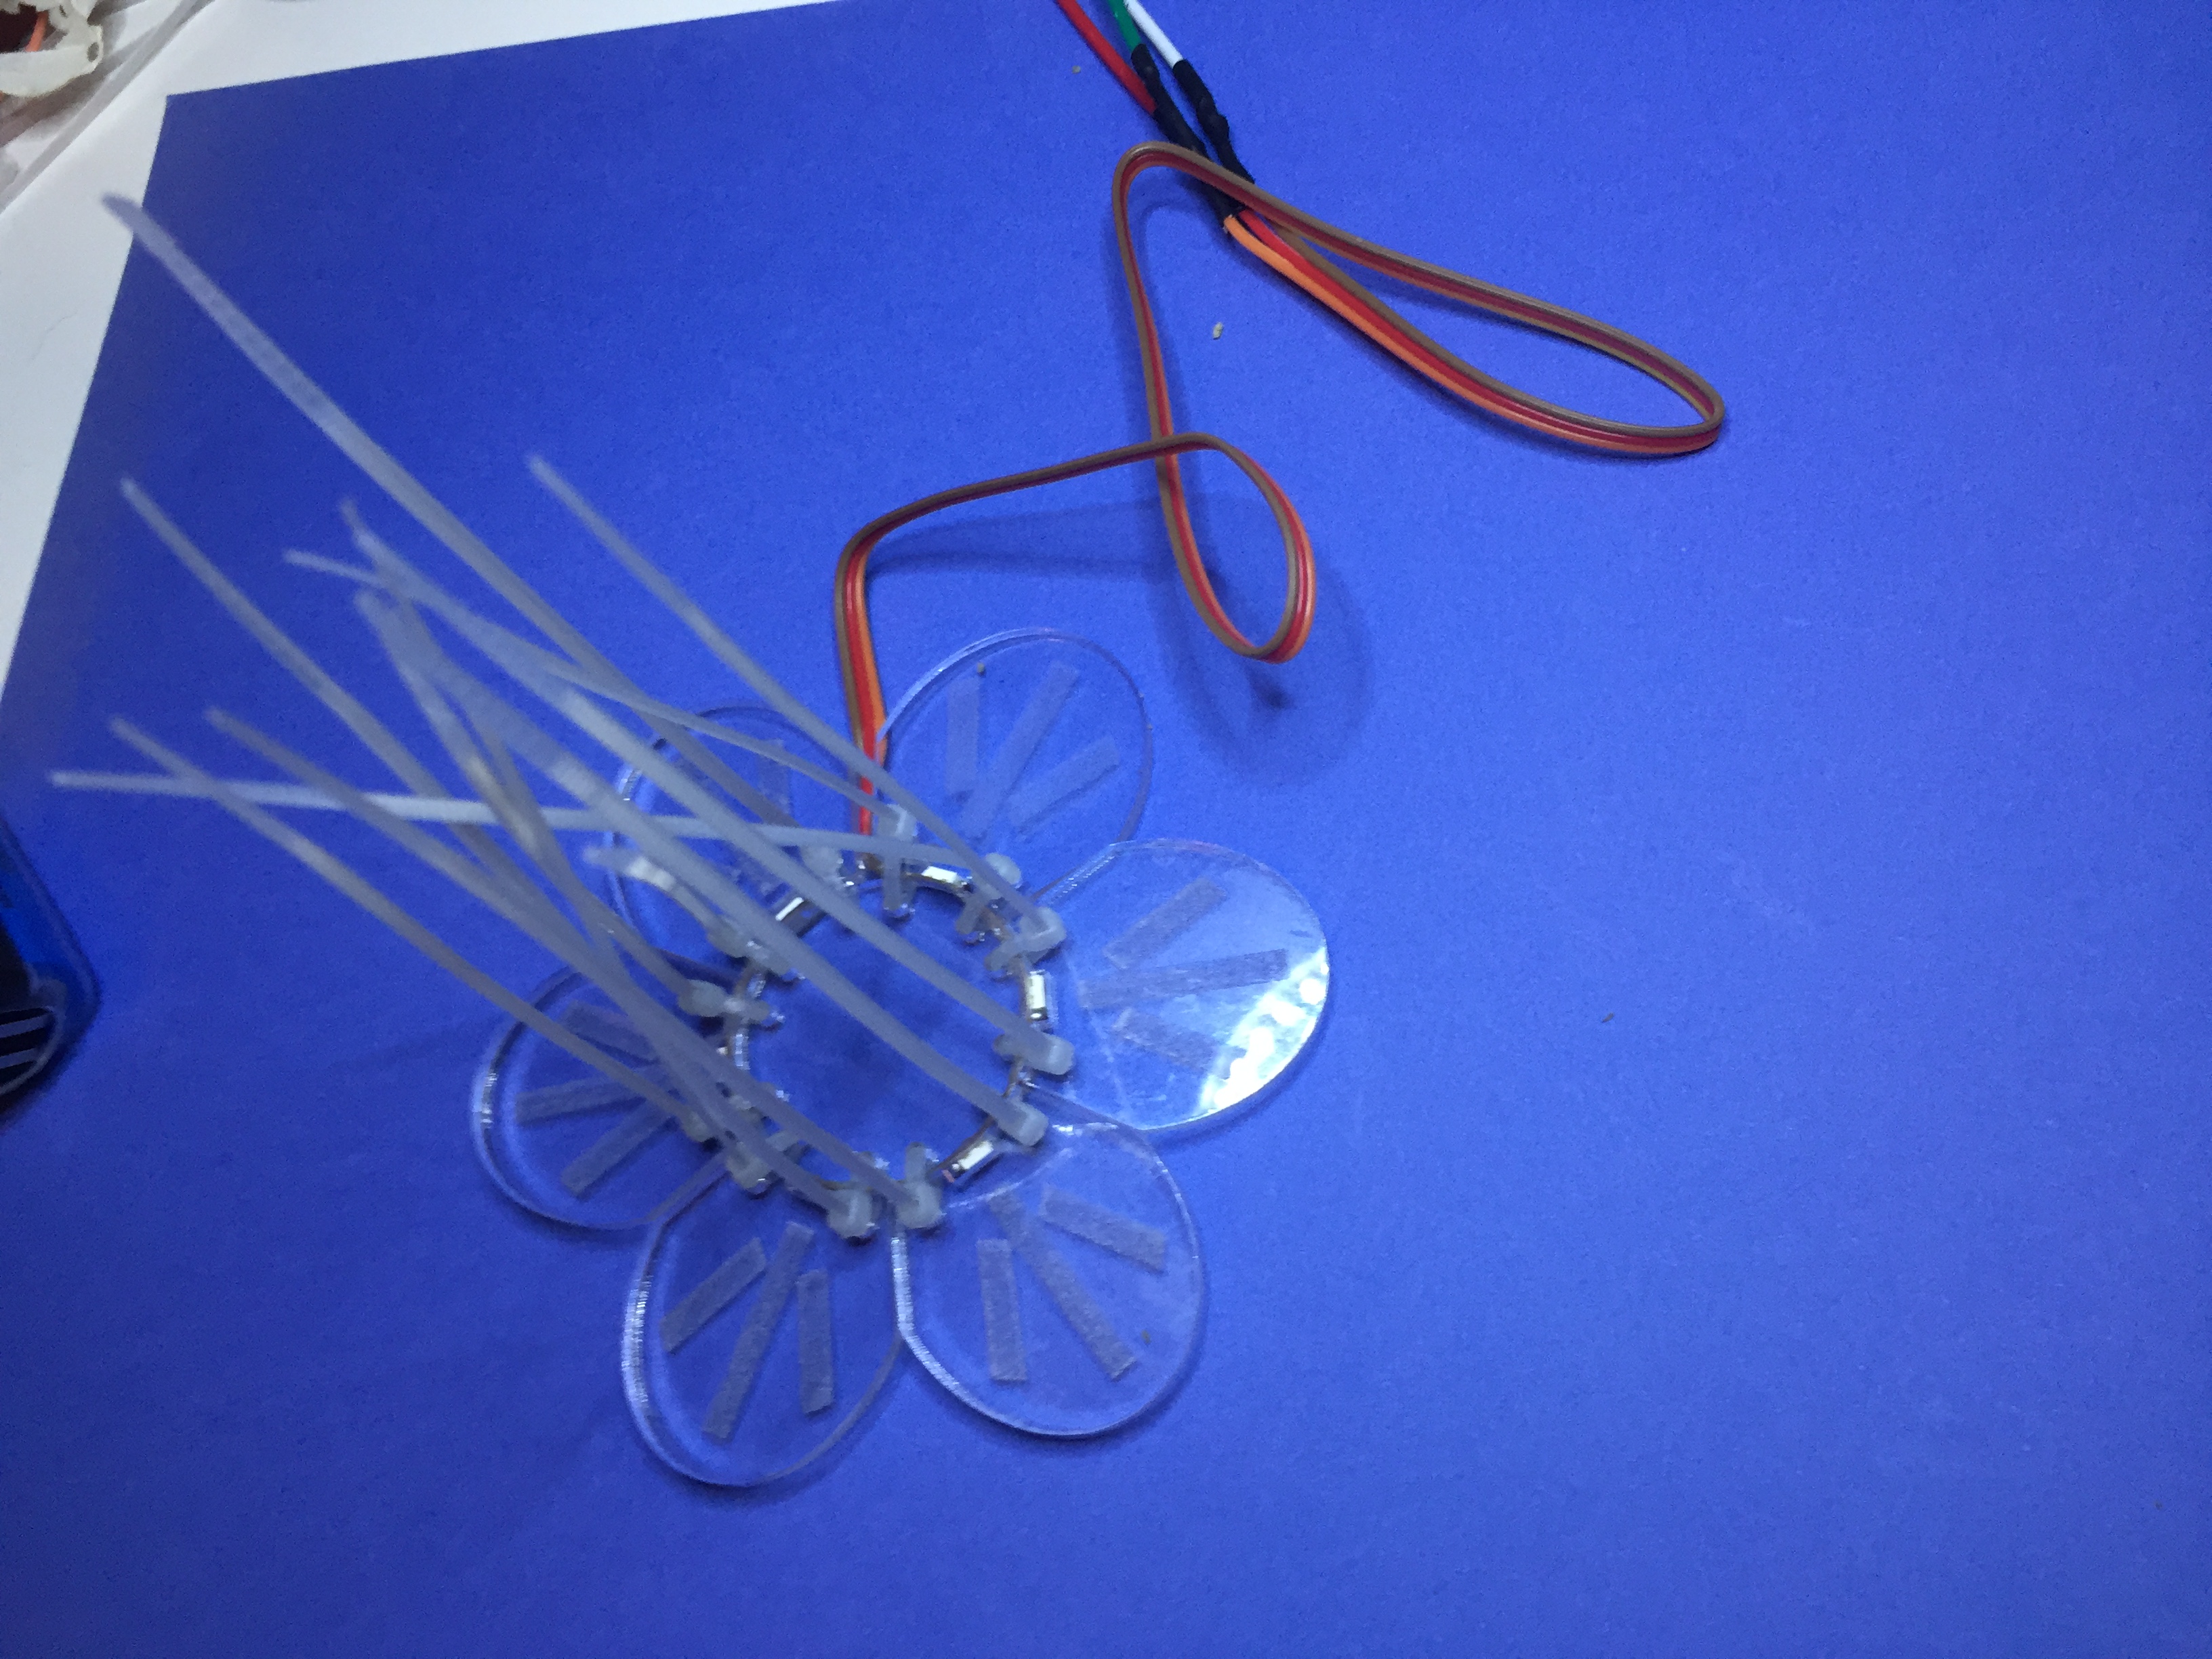
Continue attaching the petals with the zip ties. When you get to the last petal, carefully bend the ribbon cable away from the center of the flower so that it just fits between two adjacent petals.
METHOD 2 – Coated Wire:
I don’t have any pictures of construction using this method, but you can see the result in the image below. Instead of zip-ties, you can take a length (about 2 inches) of coated wire and wrap it through a matching pair of holes two times. With both ends of the wire pointing out the back side of the flower, twist them firmly around each other a number of times (5-10) until there is no slack in the wrapped wire wire. Then cut the wire about 1/2 cm from the base of the twist, and using pliers, tuck the wire into one of the holes as shown below. Repeat this technique for all petal-center hole pairs.
Now take the wire to use as the stem (I used milliner’s wire, but a sturdy pipe-cleaner would work as well. Bend the end of the wire to slide between the zip ties on either end of the ribbon cable. If the zip ties are too tight – cut them off and re-do them with the wire in place. The zip ties will hold the flower on the end of the wire. Now bend the wire to form the stem of the flower. Trim the ends of the zip ties.
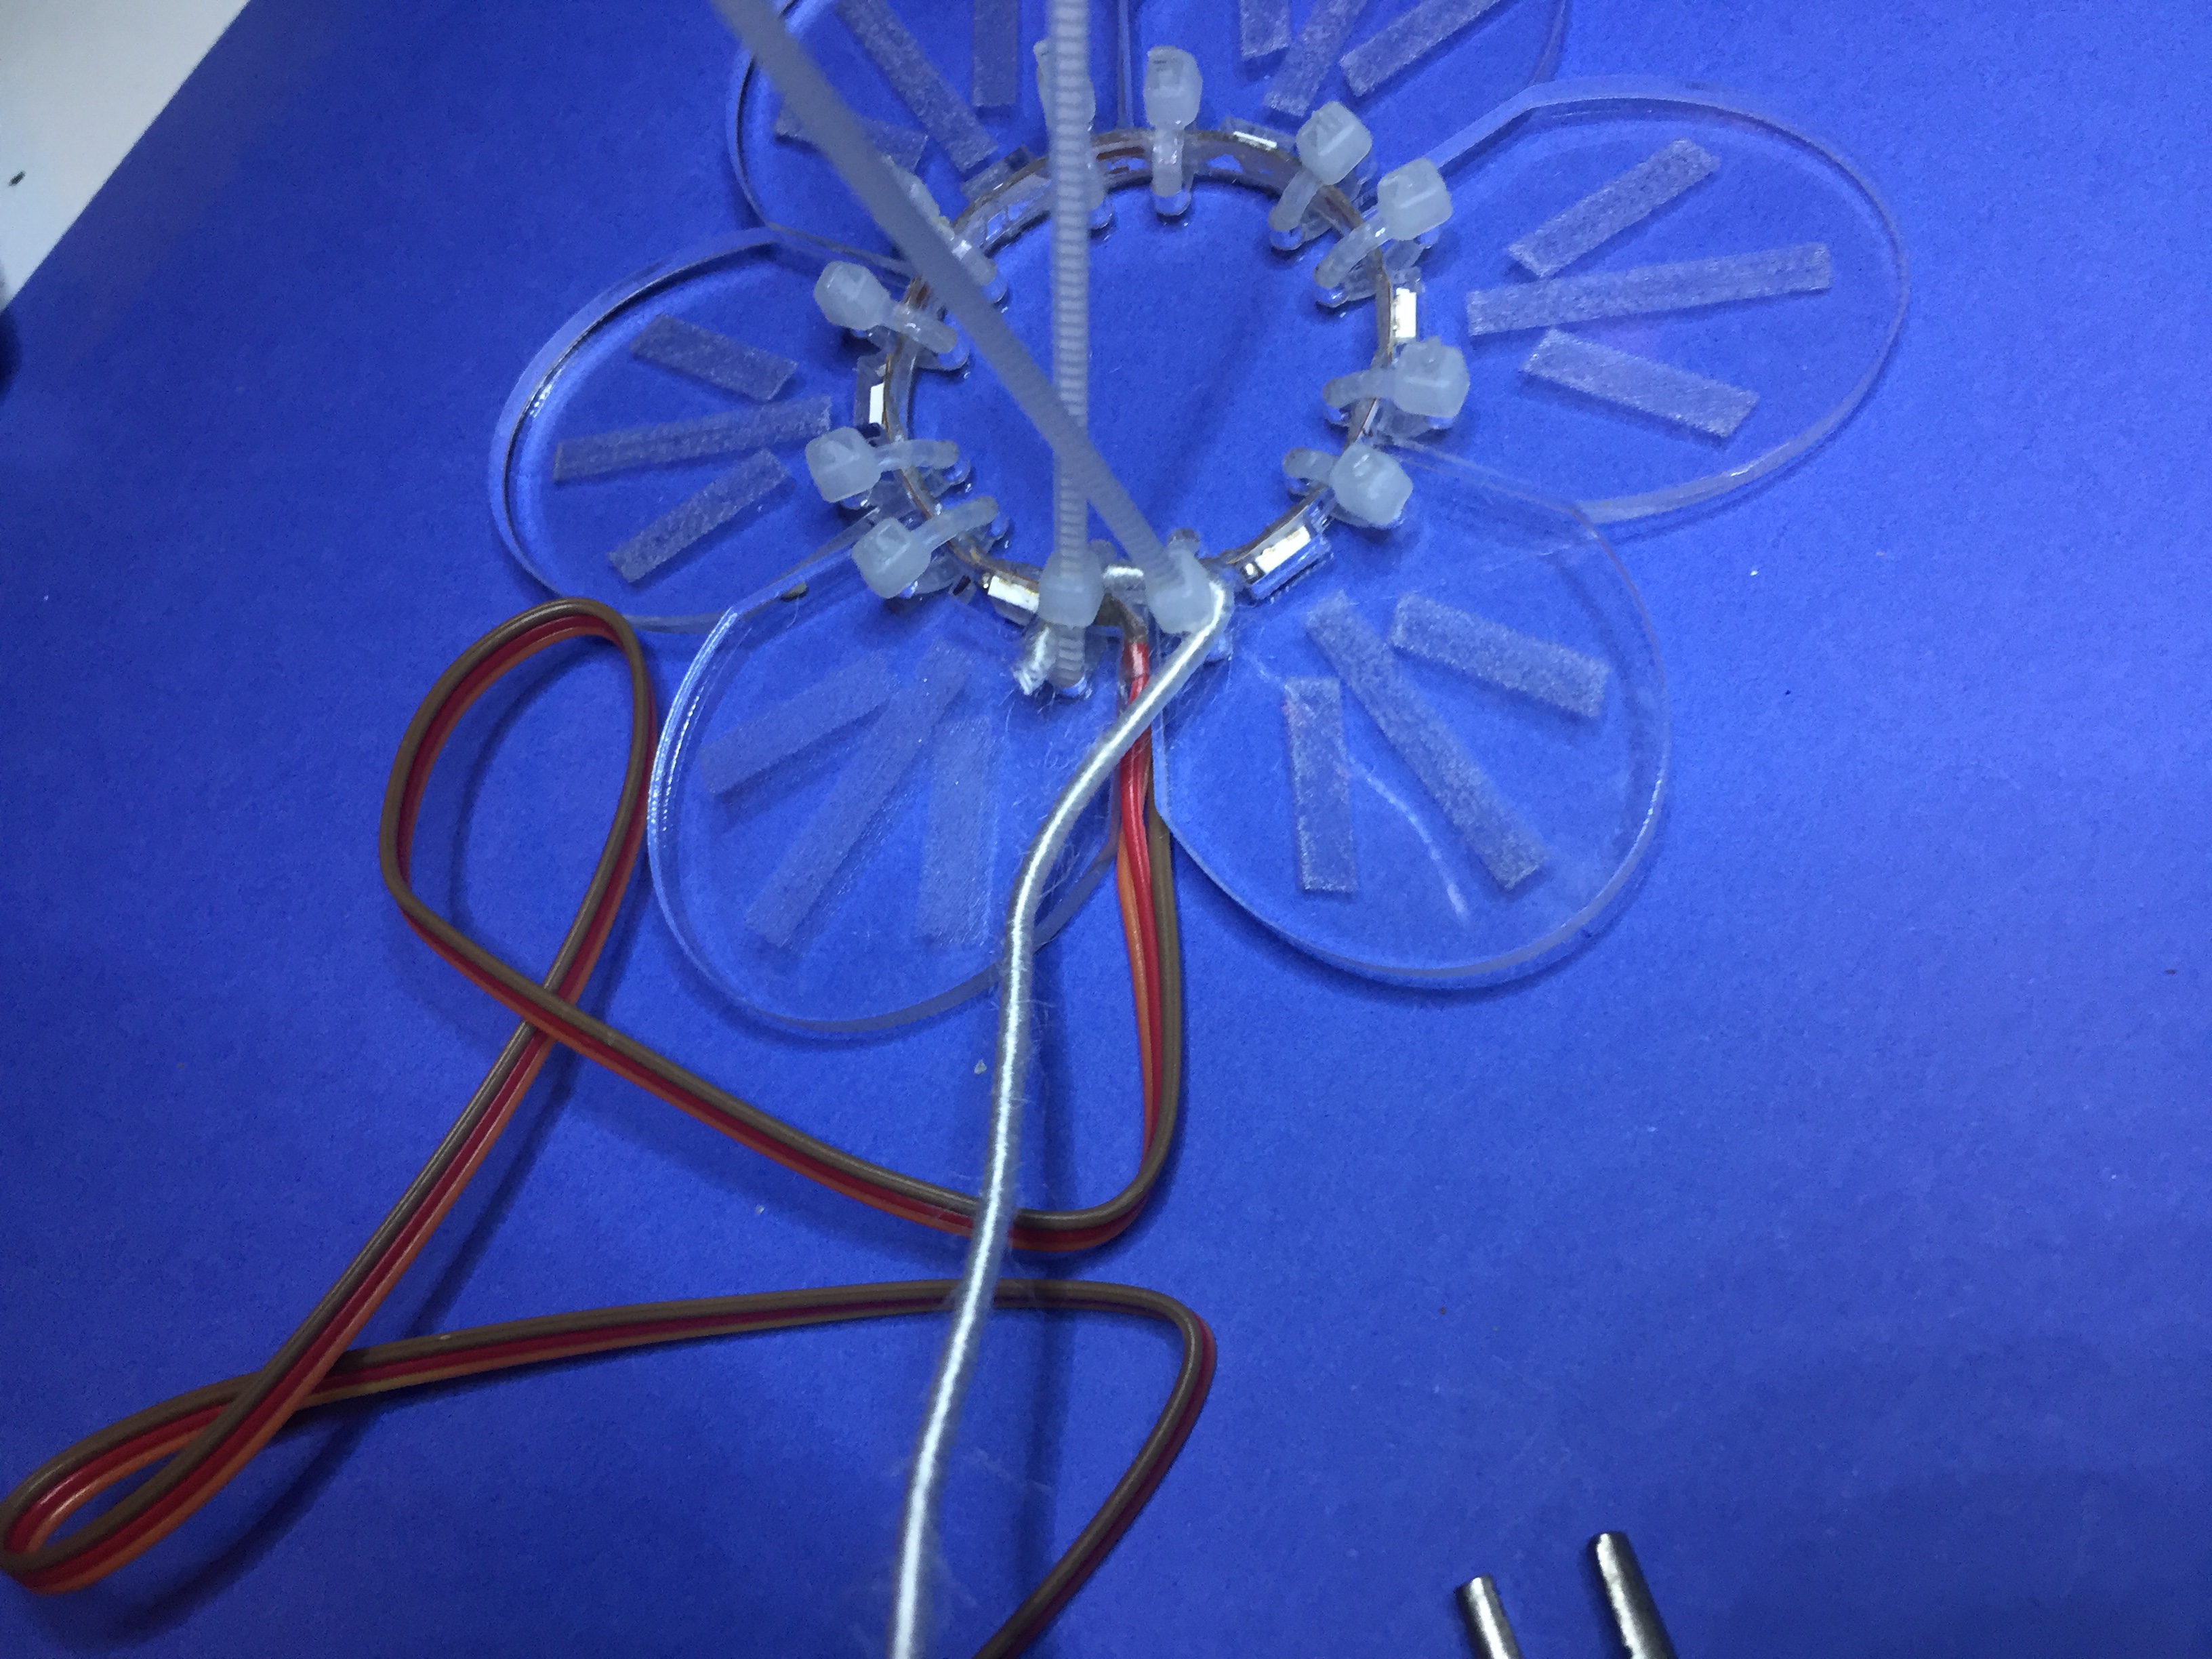
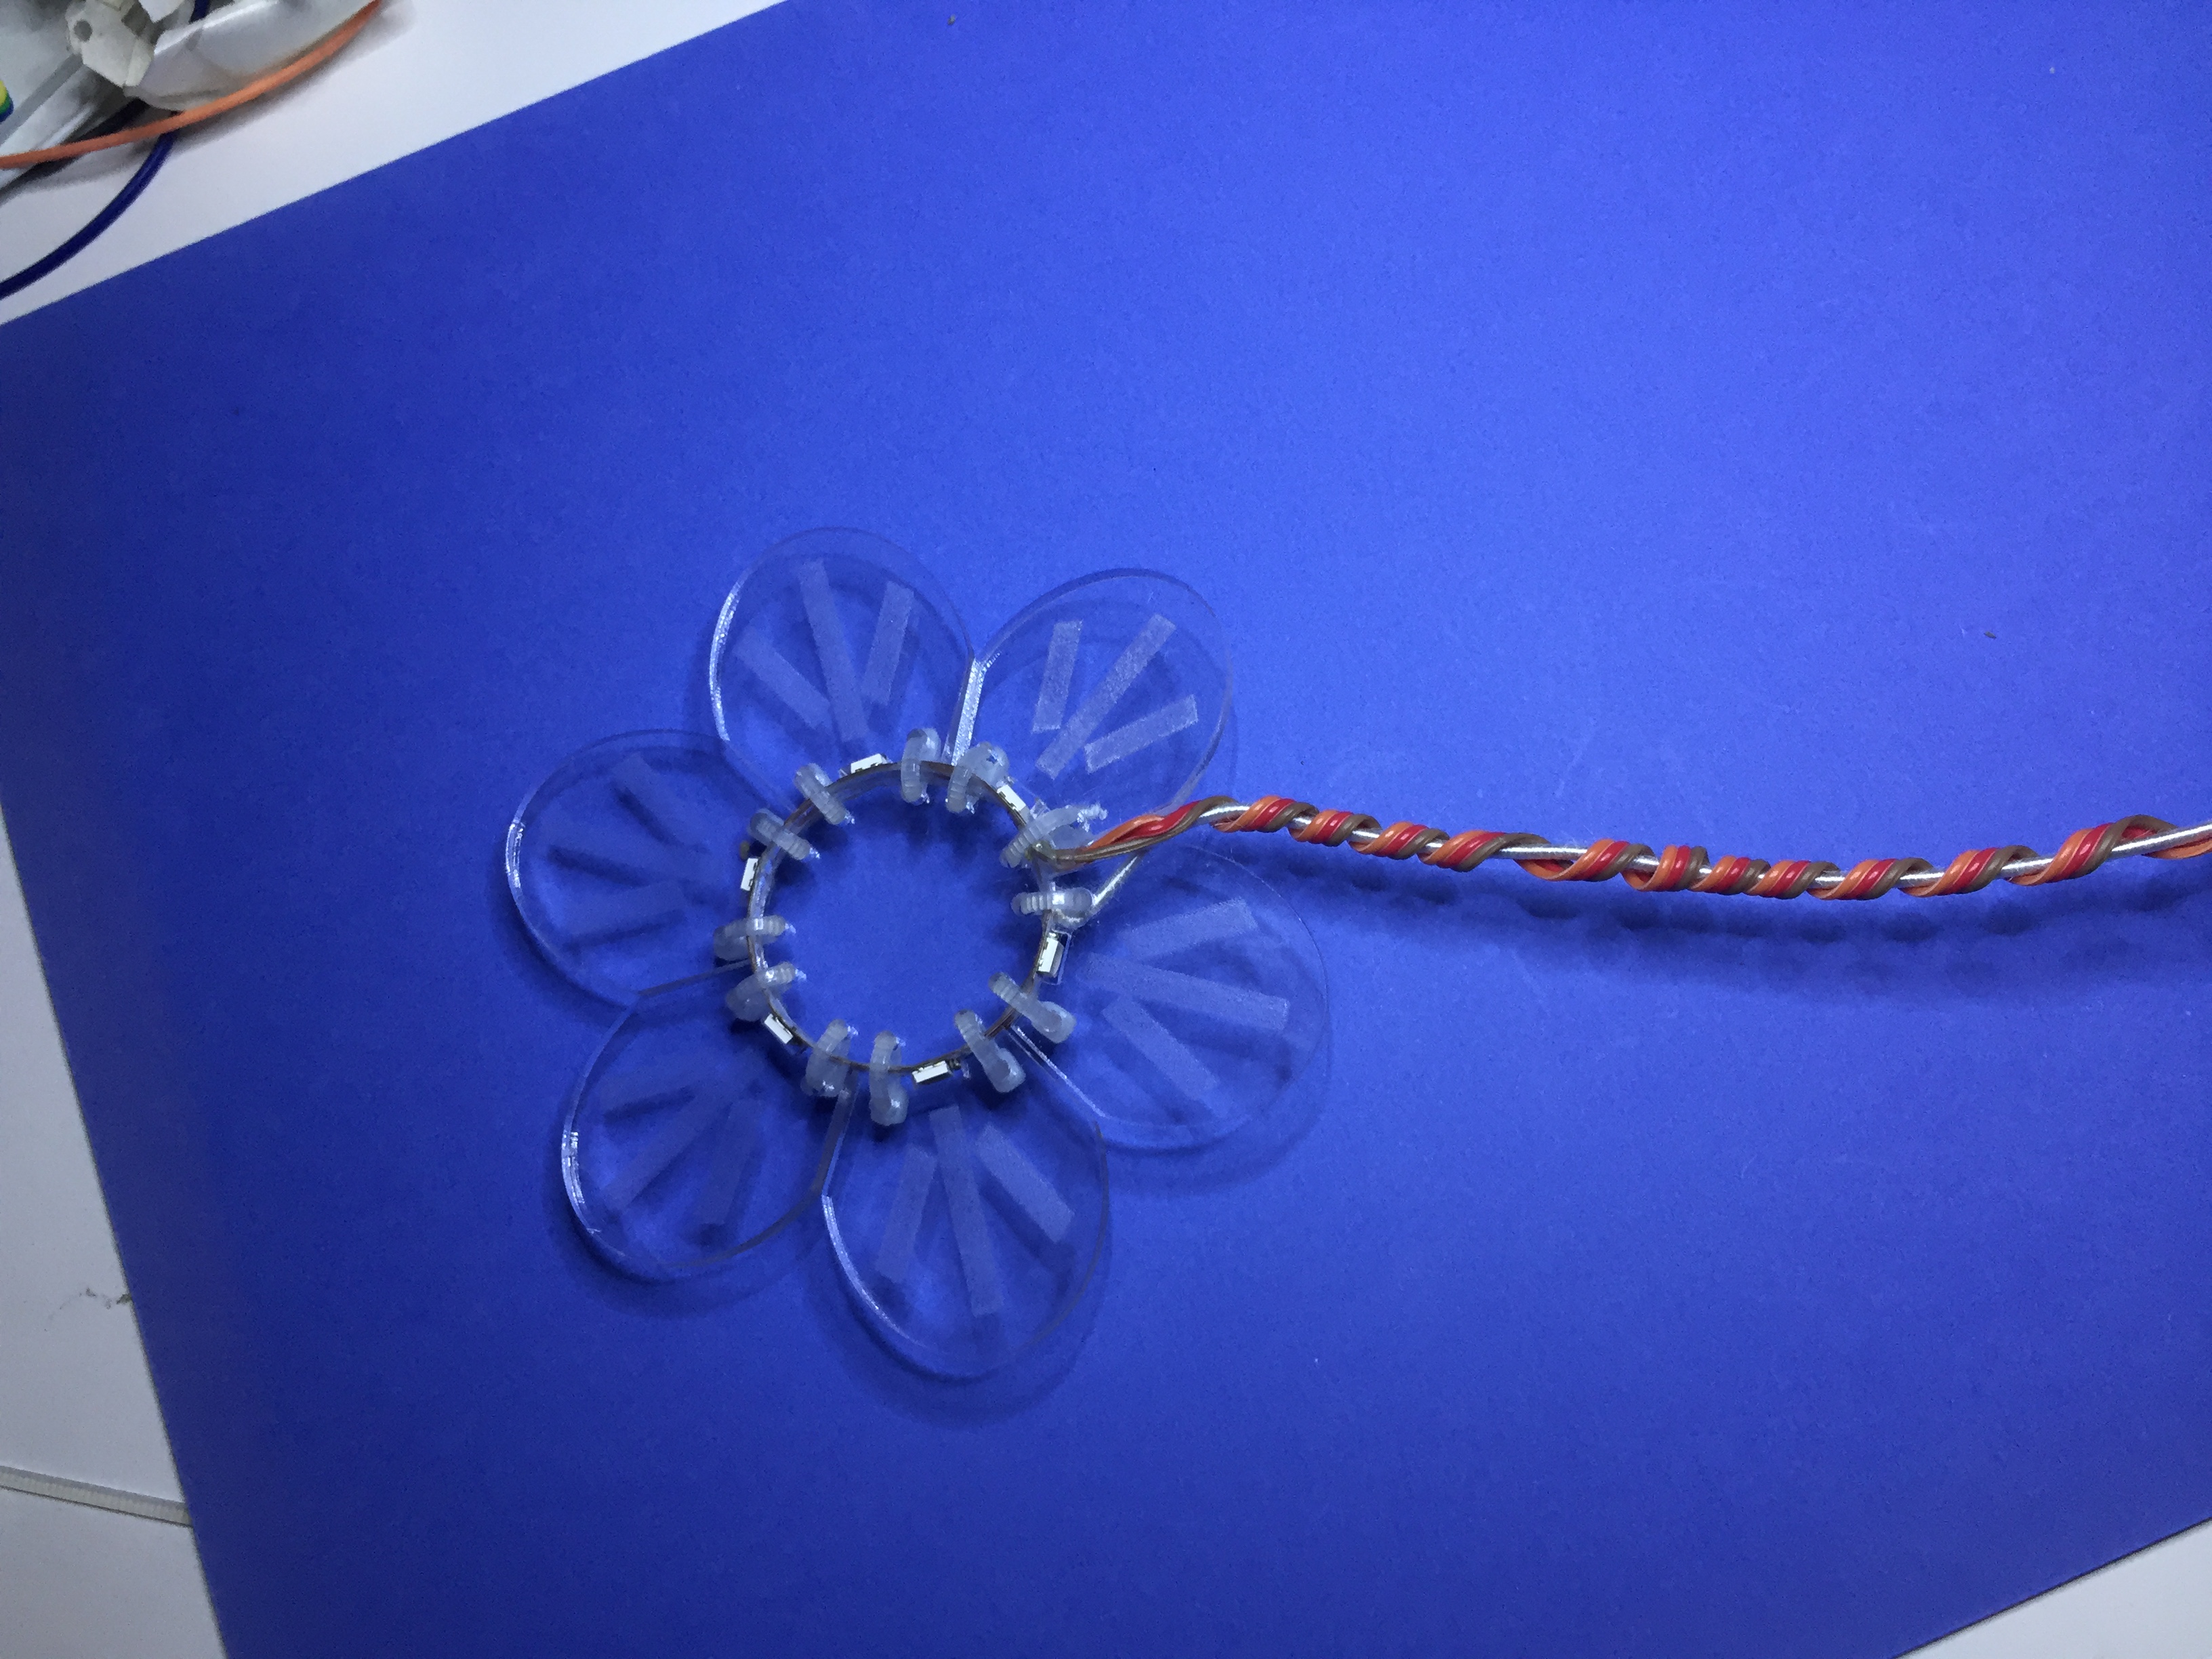
Wrap the ribbon cable around and around the wire to make a colorful stem. You can use a small piece of tape at the bottom to secure it. The zip ties should hold securely enough that you can pick up the flower by the stem. Attach your micro controller, and program it to make different light patterns.
I used a Gemma M0 running CircuitPython and a code generator called “Brightly” decribed here: http://www.geekmomprojects.com/announcing-bright-wearables-and-brightly to create some colorful patterns, but there are many different ways to generate dynamic patterns with an LED strip. Have fun with it!
Very well done Geek Mom. That is a nice project and will have to give it a try and put a riff on it.