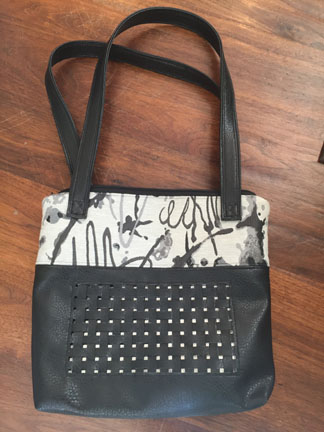
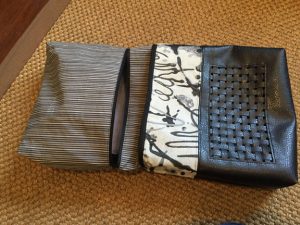
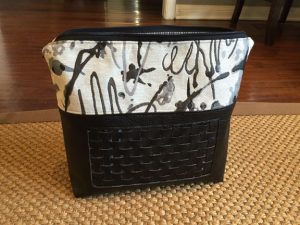
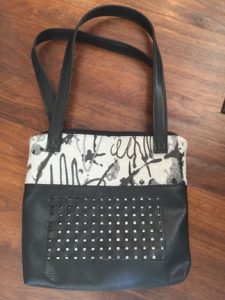
 My previous post describes a handbag containing a Twitter-connected LED matrix. The project was somewhat complicated to assemble – particularly the handbag sewing and construction. This post describes a simpler and more practical way to incorporate an LED matrix into a handbag. I’ve made several different versions of this project now, involving different styles of handbag. The version described here produces a vinyl tote bag with contrasting accent fabric as seen above.
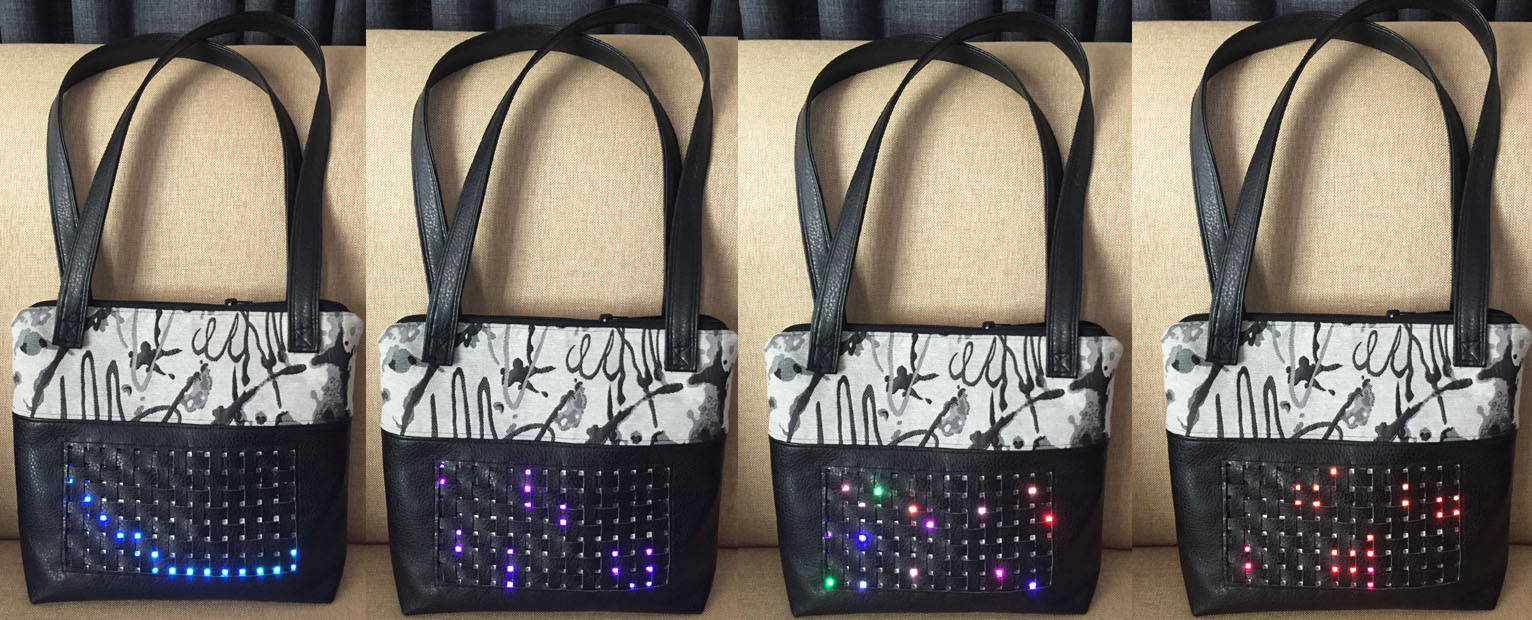
Video demonstration of the handbag below:
Step 1: The LED Matrix
You can buy flexible LED matrices, but it is straightforward to construct your own. The advantage of making your own matrix is the flexibility to choose the exact dimensions and pixel resolution you want. To make your own flexible RGB led matrix, you will need:
- Flexible addressable RGB LED strip, ideally with adhesive backing. The two primary kinds of LEDs available in addressable LED strips are the APA102 (called DotStar on Adafruit) or the WS2812 (called NeoPixel on Adafruit). Either kind works fine for this project. I happen to like the APA102 LEDs because they can be used with a wider range of microcontrollers, but they are a little more expensive than the WS2812 LEDs, and have an extra data line to connect. It really is a matter of personal choice.
- Vinyl backing to hold the strips in place
- Wires and solder to join the strips
- Microcontroller (I used an Arduino Uno) to test the matrix
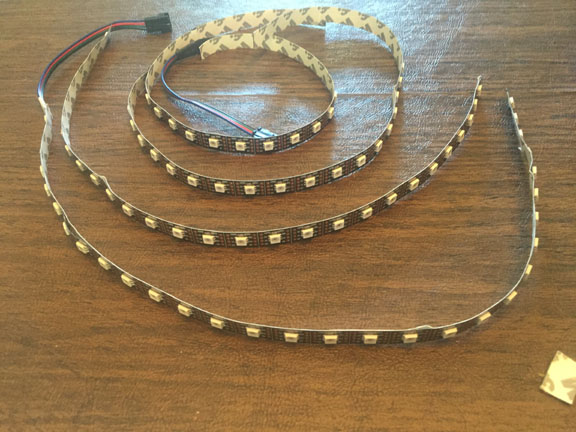
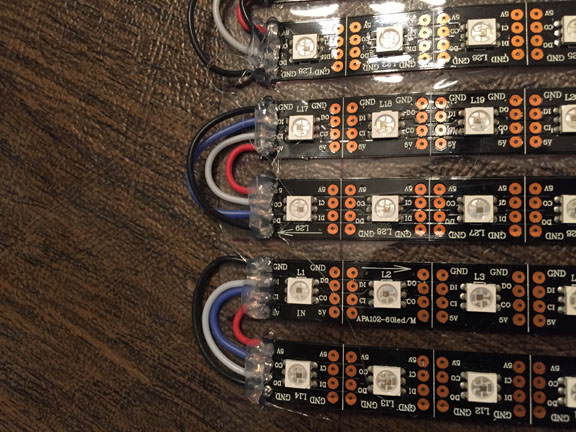
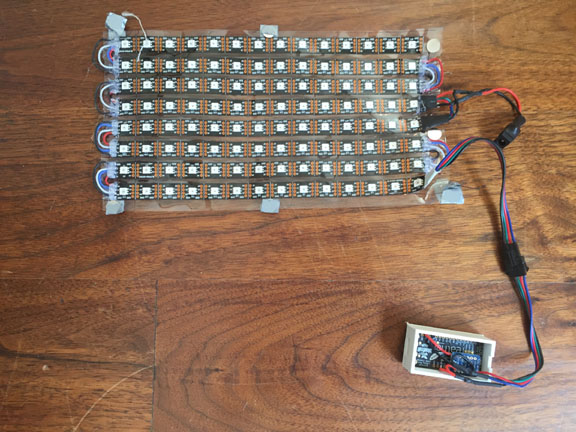
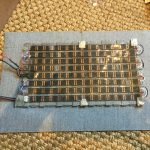
First, figure out what dimensions you want your matrix to be. Keep in mind that LED strips tend to have a join at 1/2 meter increments. The spacing at the join is slightly different and can ruin the symmetry of a matrix. I purchased a 2 meter strip with 60 LEDs/meter. It had a join every 30 LEDs, so I cut around the joins and cut the strip into 8 pieces, each 14 LEDs long (with 8 leds left out).
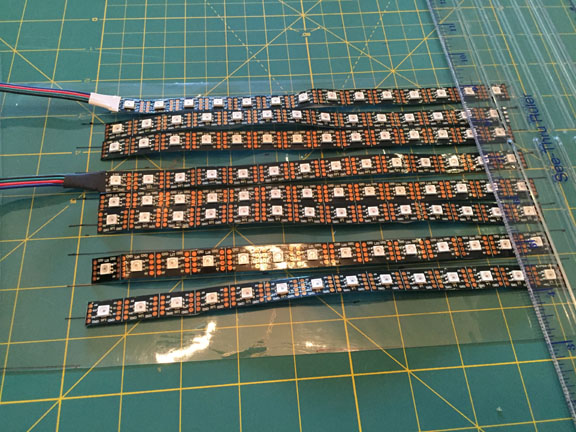
Next, cut a piece of vinyl large enough to hold the LED strips. Draw lines in sharpie to indicate the spacing of the strips. The intra-LED spacing of my strips was 1.1 cm, and the height of each LED was 0.5 cm, so I spaced the strips 1.6 cm apart to have identical vertical and horizontal LED spacing. Line the strips up on the vinyl in the shape of the matrix, being sure to orient them so that the current can flow from the end of one strip to the beginning of the next. Usually, arrows on the strip indicate its directionality.
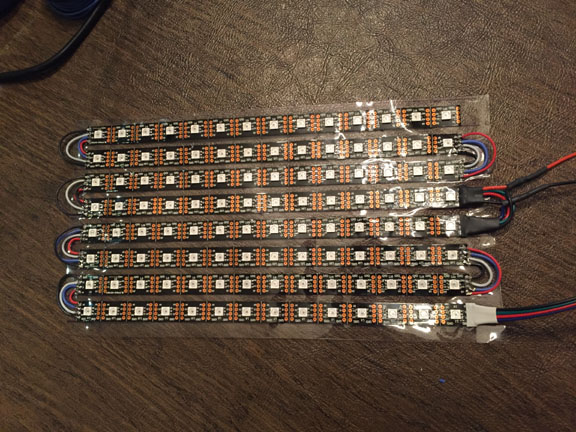
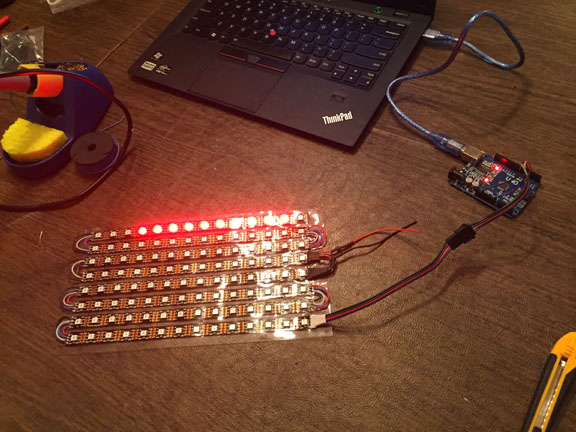
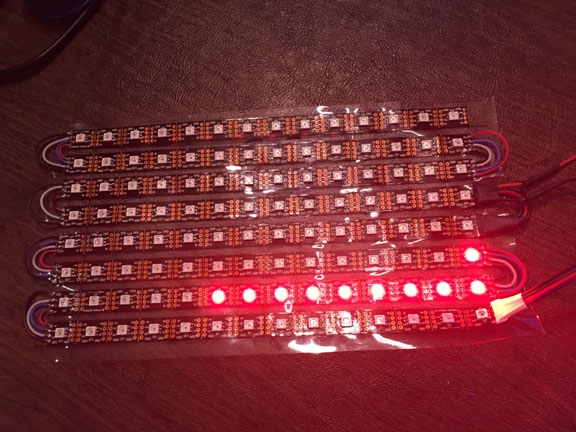
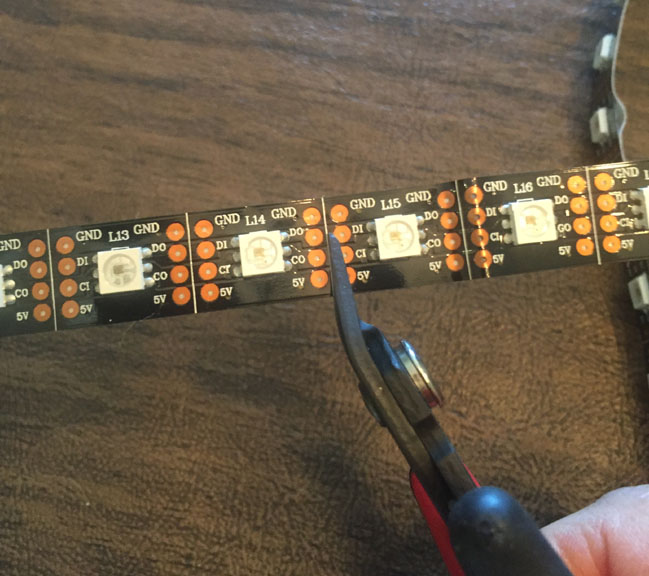
Peel the backing off of each strip, and press it onto the vinyl. It is helpful to peel and press as you work your way down the strip. Once the strips are secured, cut wire into short lengths to connect each strip to its neighbors. I used 26 AWG silicone wire for its flexibility. Solder the pads on the end of each strip and tin the ends of each wire before soldering the wires to the pads. I found that if I wasn’t careful, the strands on the wires would sometimes spread out and short with a neighboring contact. After soldering each strip to the next one, I would test the connections by connecting the matrix to an Arduino Uno and running the Adafruit Strandtest Arduino sketch to make sure all of the connected LEDs would light up correctly. Once all of the connections were made and tested, I used a hot glue gun to melt hot glue over the solder joints. This provides strain relief for the wires and also prevents any stray strands from the stranded silicone wire from coming loose and causing a short.
Step 2: Electronics and Power
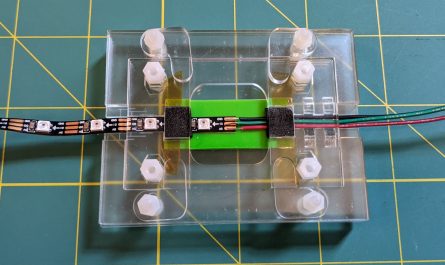
An Adafruit feather M0 with bluefruit bluetooth LE provided the control and IoT connectivity for this project. The wiring was pretty straightforward. The Feather operates at 3.3 V and the APA102c pixels require 5 V, so I used a logic level converter to connect the two. Since the communication was strictly one-way from the Feather to the LEDs, this may not have been strictly necessary, but I decided to err on the side of caution.
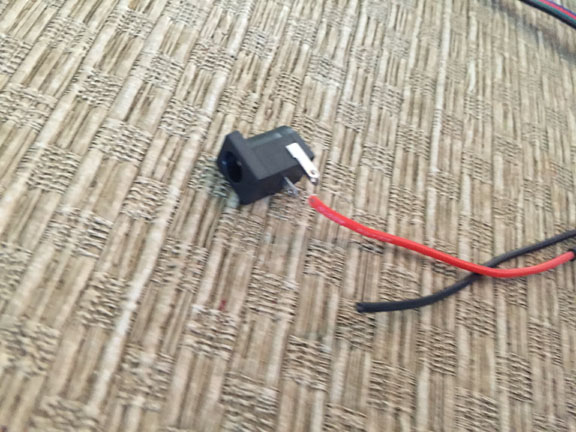
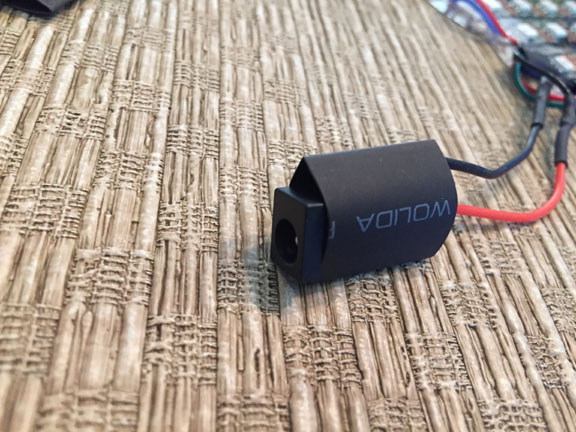
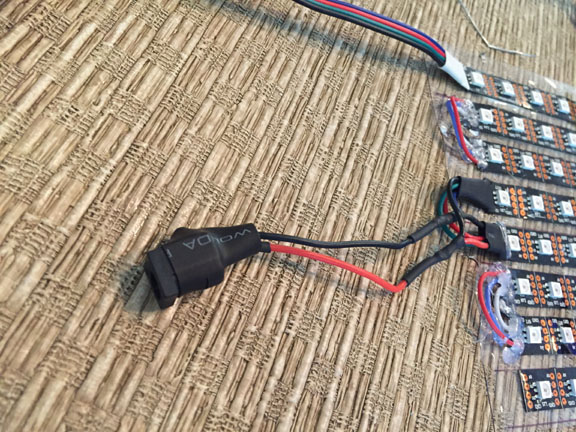
To connect power, I wired a barrel-jack connector to the power and ground wires in the middle of the LED matrix as shown above. The barrel-jack connector is meant to be soldered to a breadboard, but I soldered the power wires to it directly and covered it with shrink-tubing for strain relief. The feather board receives power through its connection to the LED matrix.
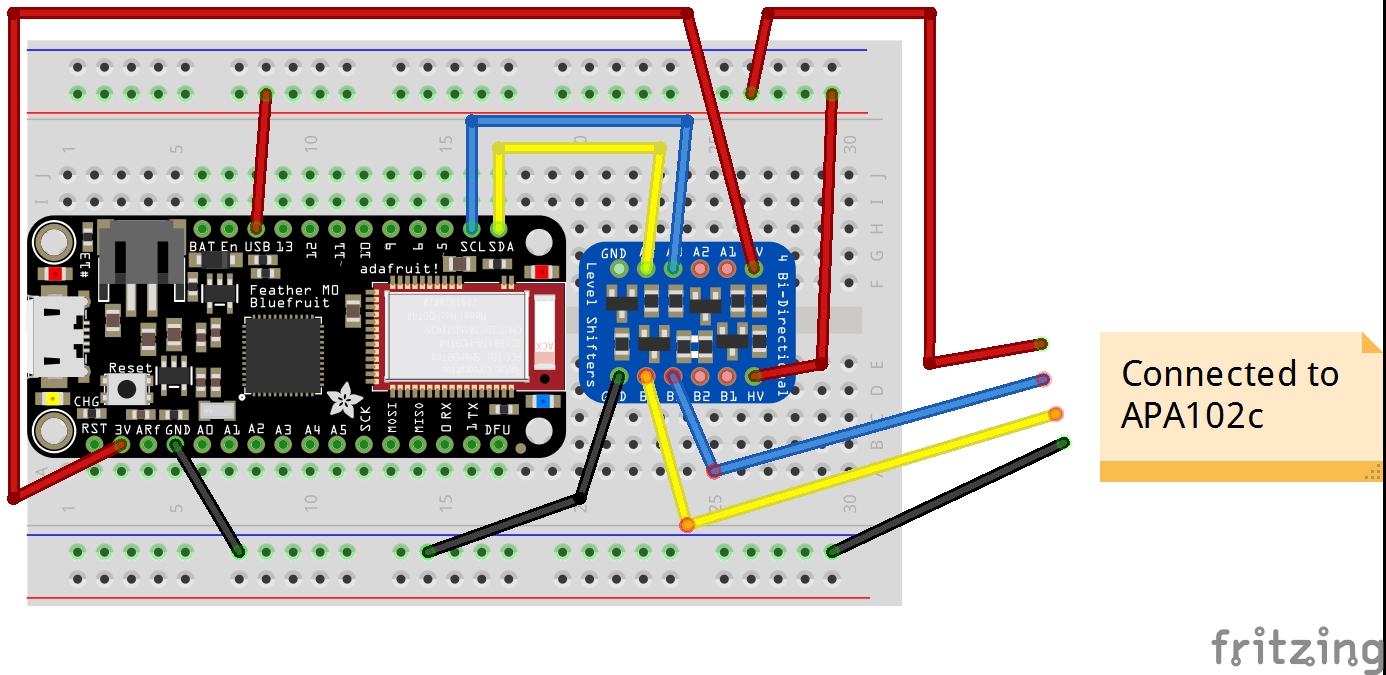
Wiring feather and logic converter is shown above.
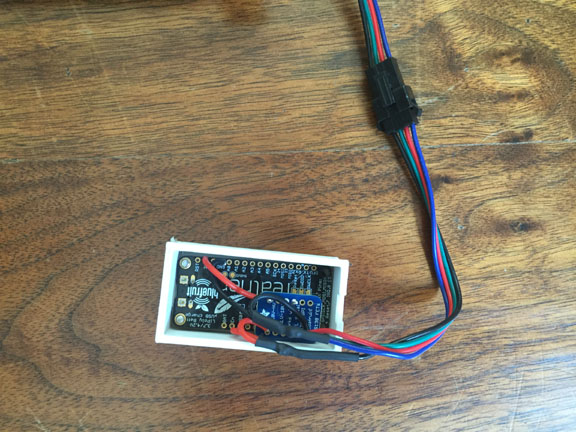
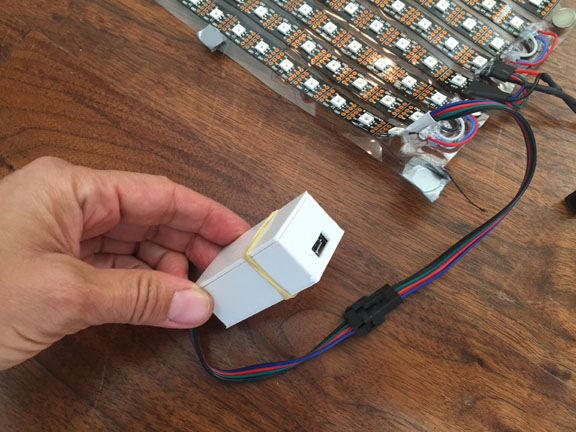
I 3D-printed a small case to hold and protect the electronics inside the bag. The box has a hole to allow connection to the Adafruit feather M0 for programming.
Step 3: Woven LED Matrix Cover
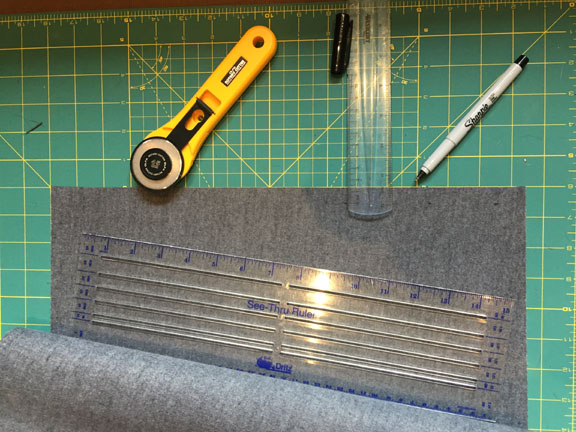
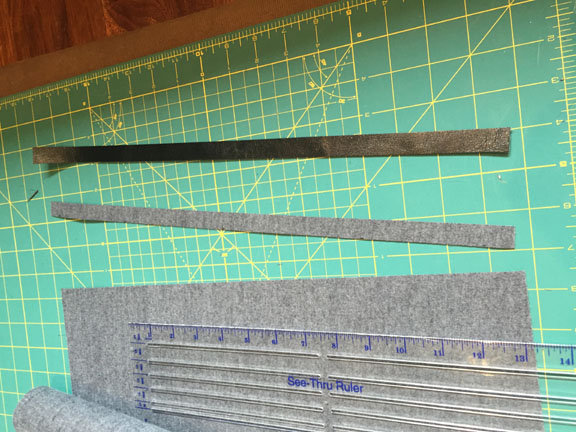
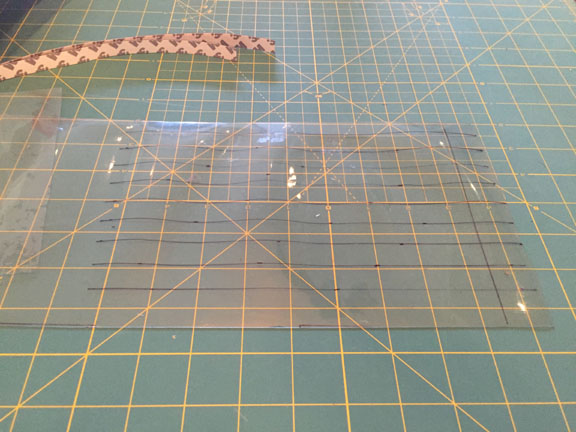
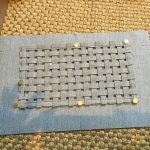
When the LED matrix is finished, it’s time to make the cover for it. This is done by weaving thin strips of vinyl (or leather) between the LEDs. My matrix had 1.1 cm spacing between the LEDs (vertical and horizontal), so the first step was to cut a bunch of 1.1 cm wide vinyl strips. This is most easily done by marking the spacing on the wrong side of the vinyl with a sharpie, and cutting the strips with a rotary cutter and ruler.
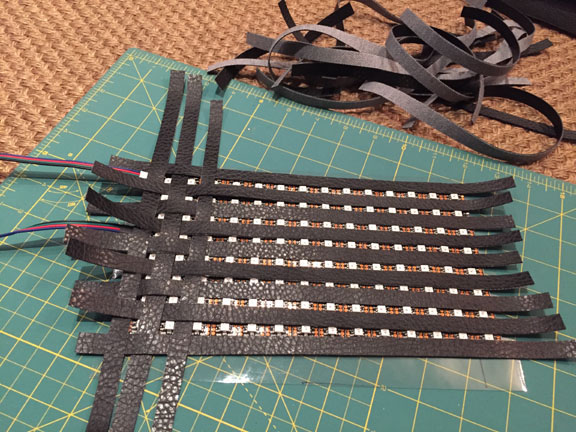
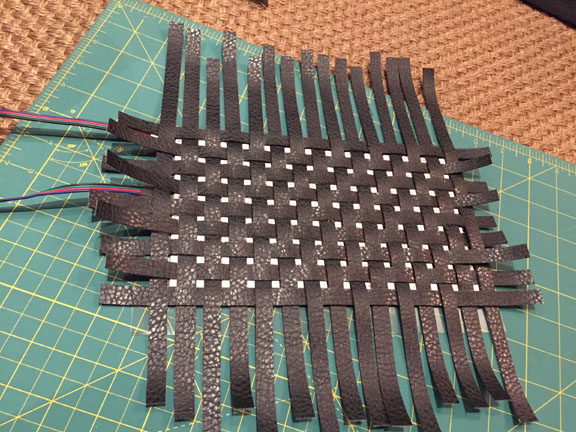
Next, lay out the LED matrix, to use as a template for placing the strips. Lay out the horizontal strips between the LEDs with one strip at the top and bottom as shown. Then start weaving additional vertical strips between the horizontal ones. This is most easily accomplished by doing the weaving at the end of the horizontal strips, and then sliding the vertical strips into position afterwards. Push the strips into position so that only the LEDs show through the holes in the grid.
Once the grid is complete, use small dabs of fabric glue to secure the thin strips in place. I squeezed the fabric glue onto a paper plate and used a toothpick to dab small amounts of glue between the strips. Start with a corner of the vinyl grid, then work your way around the perimeter, very lightly gluing down all the overlapping strips to each other (NOT to the LED matrix) Once the perimeter is glued, apply glue to enough of the overlapping positions in the center of the grid so that the strips will not slide around when the vinyl grid is lifted off of the LEDs.
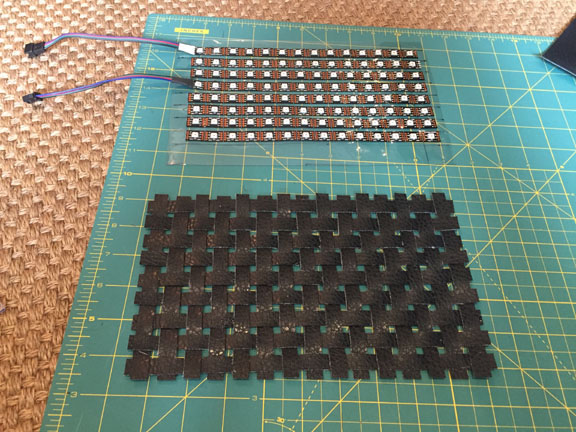
When the glue is dry, lift the grid off of the matrix and trim the fringes.
Step 4: Sewing a Fabric-Topped Tote Bag
To make a tote bag, you will need the following supplies:
- Vinyl or leather (same as used for the grid)
- Lining fabric
- Accent fabric for the exterior
- Fusible interfacing
- Two zippers – one for the purse exterior, and one for the lining
I strongly recommend having a walking foot attachment for your sewing machine. A leather needle may be useful as well.
The size of your handbag will depend on the size of your LED matrix, so if your matrix is a different size than mine, you may have to resize some of the pieces accordingly. I will describe the handbag construction using the same size pieces I used.
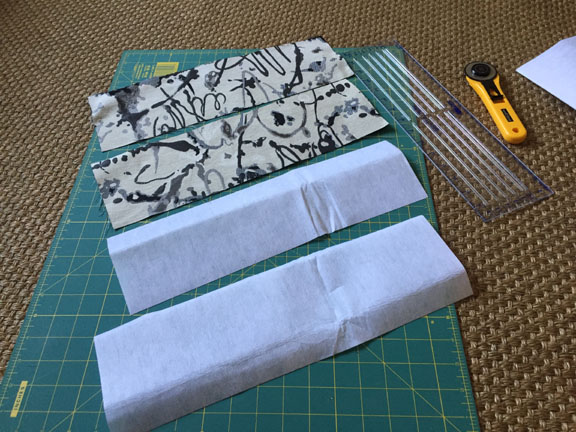
Cut the fabric pieces:
The fabric pieces required for the body of the bag are:
- 2 x vinyl (16 x 9.5″)
- 2 x accent fabric (16 x 5.5″)
- 2 x lining fabric (16 x 14″)
- 1 x pocket from lining fabric (if desired)
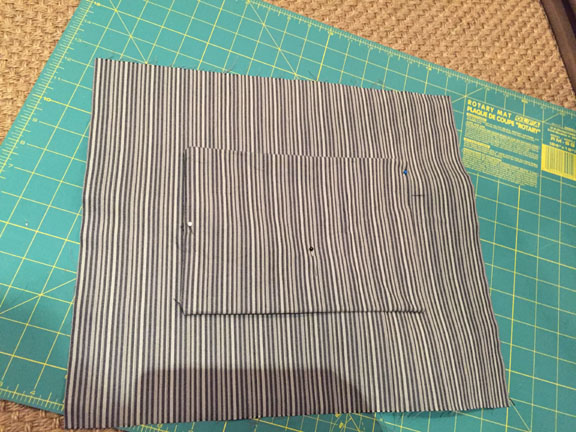
Cut a hole for the LED matrix in one of the vinyl pieces:

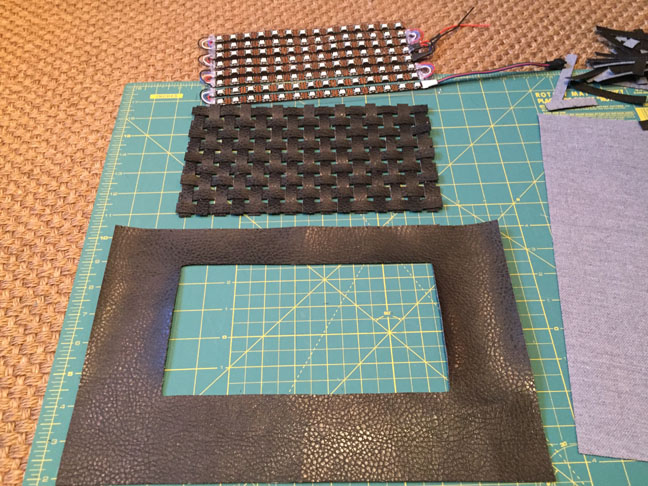

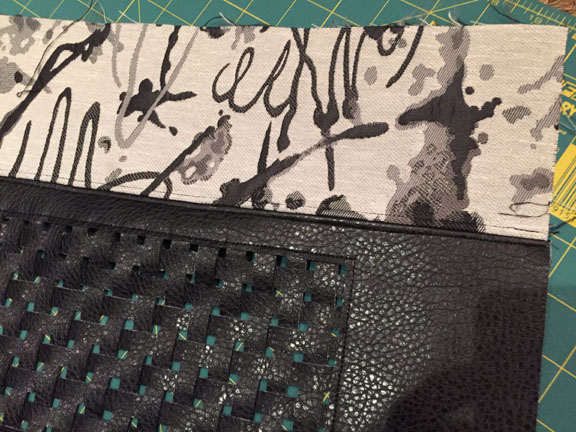
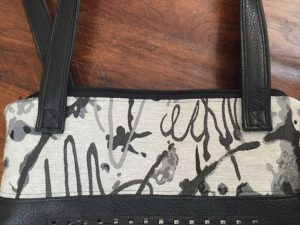
This will be the front of the handbag. My LED matrix measured 21.8 cm by 11.6 cm from the corners of the upper left LED to the bottom right LED. I cut a rectangular hole of those dimensions out of the front vinyl piece, about 1 1/2″ from the top of the piece, and centered as shown below.
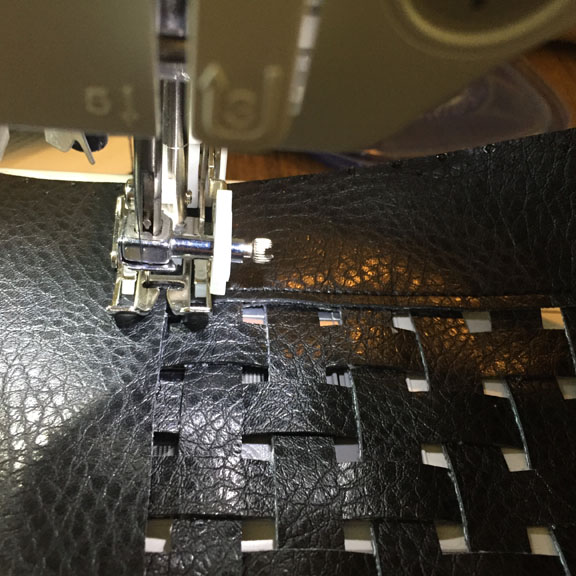
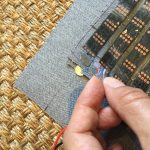
Use a light line of fabric glue around the perimeter of the hole that you’ve cut on the wrong side of the vinyl, and glue the vinyl matrix cover into place. When the glue has dried, sew around the perimeter of the hole with about an 1/8″ seam to hold the vinyl matrix cover in place in the front of the handbag.
Use Magnets to Connect Grid to LED Matrix
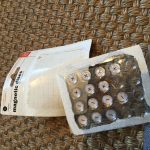
I wanted to be able to re-use the LED matrix in different projects, yet it needed to be held firmly in place in the handbag so that the LEDs displayed through the holes in the vinyl grid. The solution was small, adhesive magnetic snaps. These can be stuck to both the vinyl and the LED matrix in the proper places to hold them aligned. This makes it easy to remove the LED matrix and snap it back into place. For extra security, I reinforced the magnets on the matrix with a little duct tape, which doesn’t show. Once the magnets are in place, remove the LED matrix and set it aside until the handbag is fully sewn.
Prepare the Lining Pieces
Cut two pieces of fusible interfacing just slightly smaller than the lining pieces and fuse the lining pieces to the interfacing, following the instructions that come with the interfacing. Pick one piece of the lining to be the front and another to be the back piece. On the back piece, sew in a slip pocket (shown above) or zipper pocket, if desired. Cut the front piece horizontally across, about 2″ down from the top, and sew in a zipper which goes all the way across. This will give us an opening into the lining through which we can access the electronics. Once the zipper is sewn into the front lining piece, top stitch the zipper so it lies flat. Then trim the height of the front lining piece to be the same as the back piece if they have become different.
Add Accent Fabric
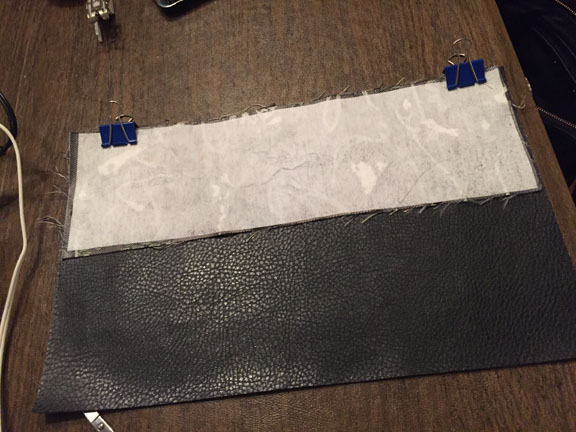
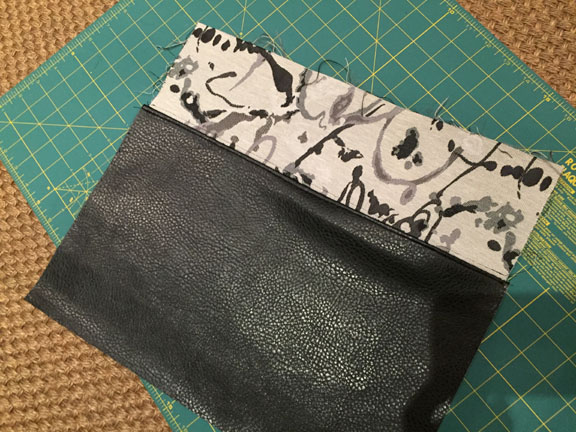
Take the accent fabric and iron-on the a fusible backing. Then, using binder clips (pins will make holes in the vinyl), clip the accent fabric to the vinyl right sides together, and sew the accent fabric to the front and back vinyl fabric pieces with a 1/2″ seam allowance. Then flatten the allowance and top stitch above and below the seam so that it lays flat.
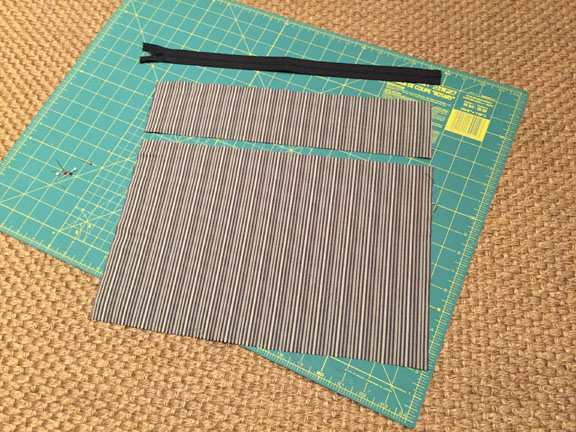
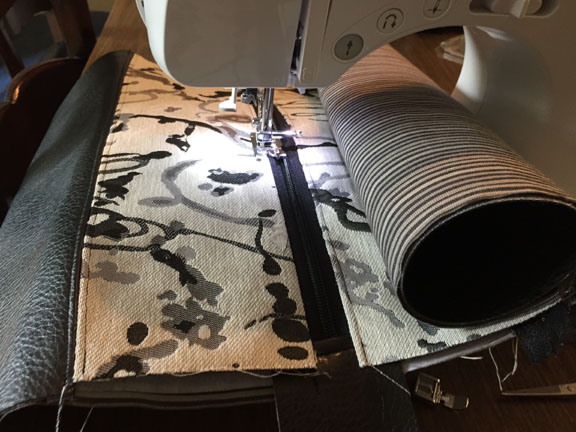
Sew in the Zipper
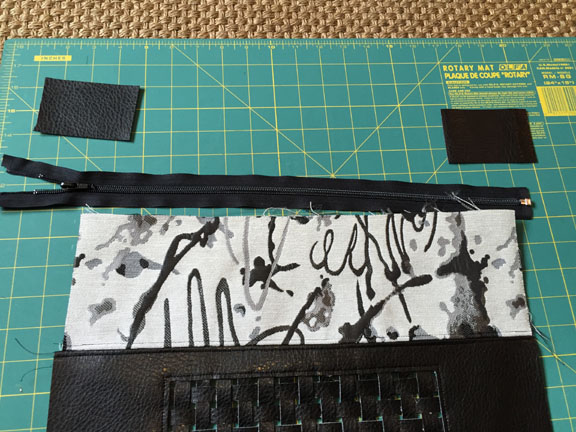
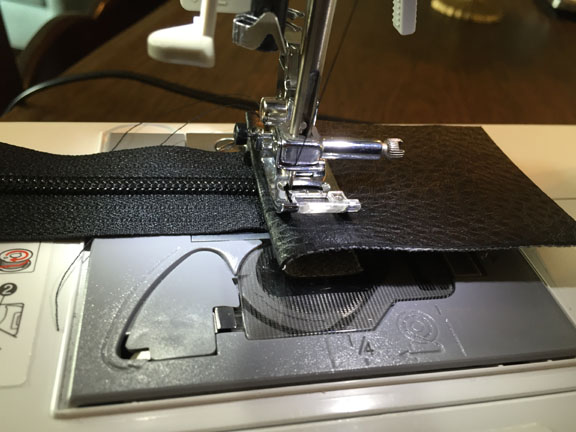
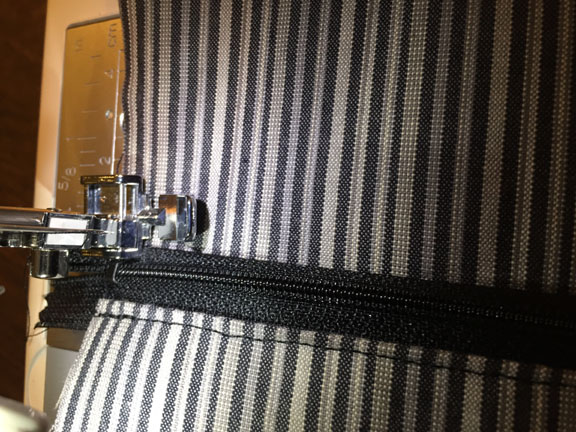
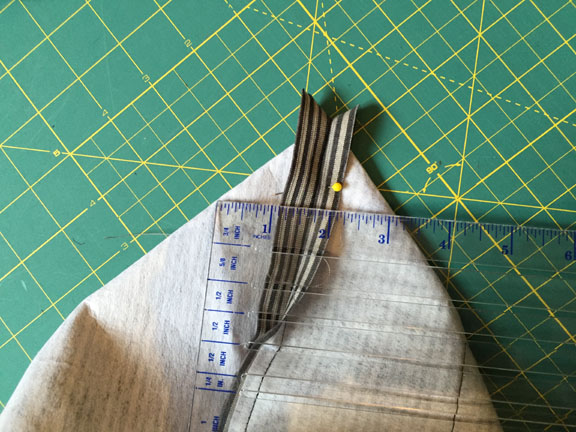
Your zipper should be longer than the width of the bag. It can be trimmed to size if it is too long. For appearance, we will cover the ends of the zipper with small vinyl pieces. Cut two small pieces of vinyl – about 2″ x 3″. Fold over the edges of each about 1/2 ” and pin them to the zipper so that the exposed length of zipper is smaller than the width of the bag (see image). Clip the end covers to the zipper and sew across them, near the fold to hold them to the zipper.
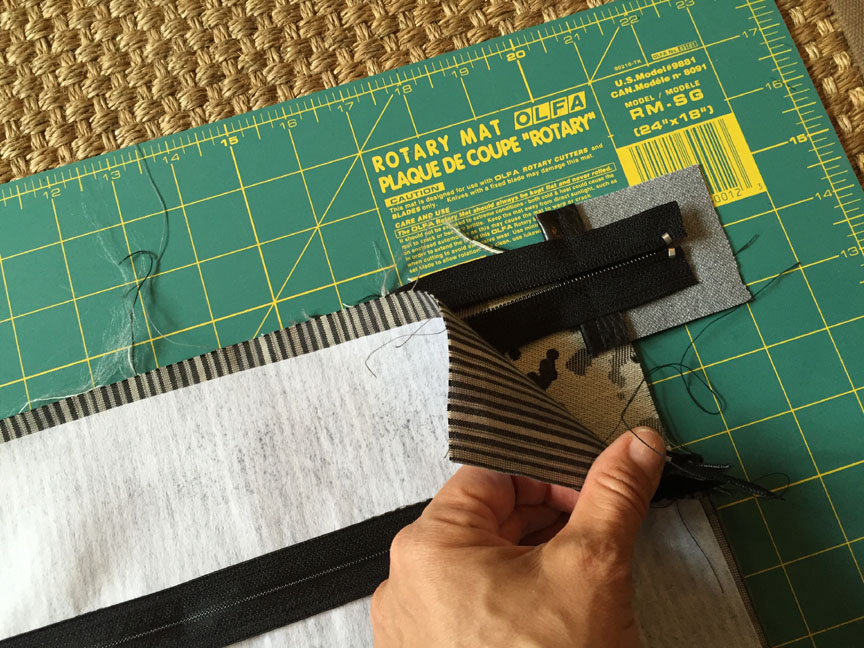
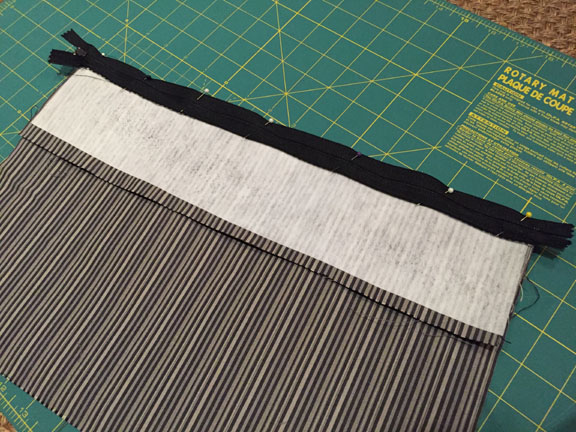
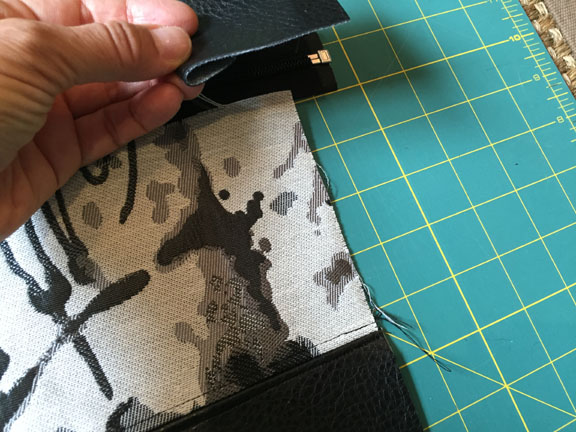
Now take the zipper, the front of the lining and the front vinyl/accent fabric piece of the handbag. Lay the front vinyl/accent fabric piece of the handbag right side up. Place the zipper along the top of the front piece with the right side down. The top edge of the zipper should align with the top edge of the accent fabric. Then place the front lining piece over the zipper facing right side down. Clip the top edge of all three elements together, and sew them together with a zipper foot.
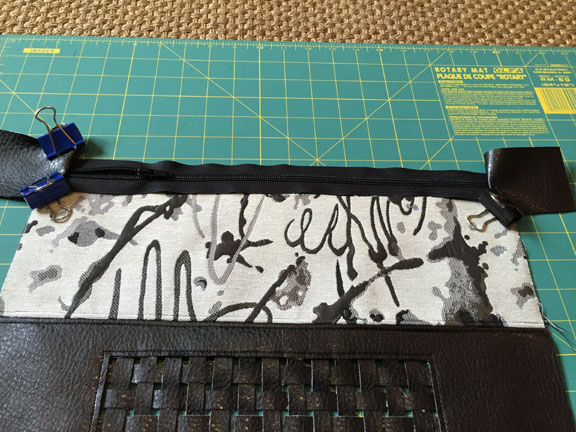
Next flip the wrong sides of the front of the lining and bag together as seen above. Repeat the above process to attach the zipper to the back pieces of vinyl/accent fabric and lining. I didn’t take a picture of this step, and it is tricky to describe, but here is my attempt. Lay out the back piece of vinyl/accent fabric right side up. Then lay out the zipper (which is now sewn on one side to the front of the bag and lining) so that the top of the zipper aligns with the top of the accent fabric, and the zipper is facing right side down. (Note: when the zipper is right side down, the front of the lining fabric should appear right side up) Lay the back piece of the lining over the zipper with the right side down. The top edges of the back piece of vinyl/accent fabric, the zipper and the back of the lining should now all be aligned. Sew across the three with a zipper foot attachment.
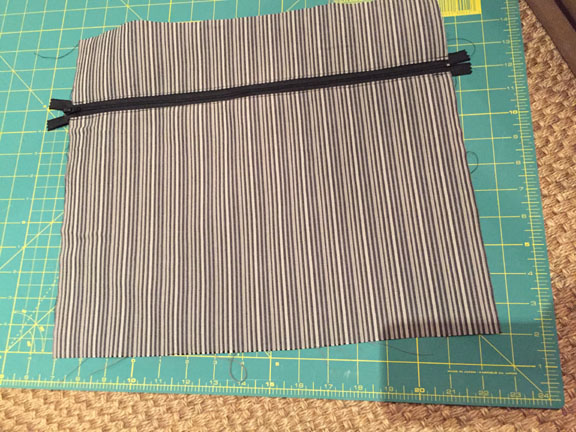
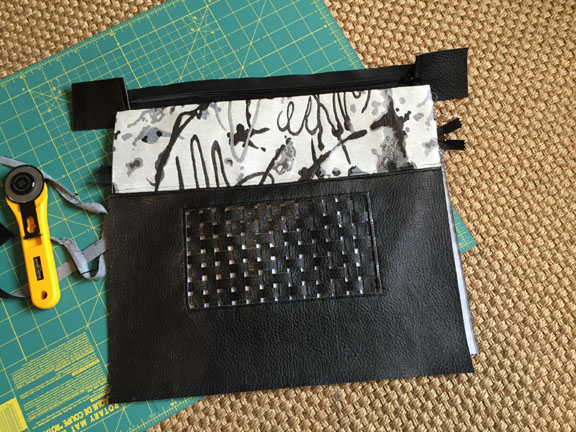
Now that the zipper is attached to the front and the back of the bag, open up the bag with the wrong sides of the front vinyl piece and lining together, and the wrong sides of the back piece and lining together so that it looks like the image above.
Top stitch along the accent fabric, just outside the zipper.
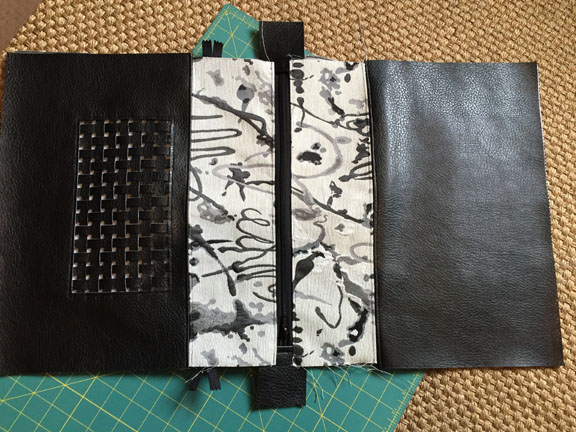
Sew the Outside Edges of the Handbag Together
Before completing the next sewing step, it is important to open up both the zipper in the lining and the main zipper halfway, because we will be inverting the bag through these zippers. Do this now or you will regret it!
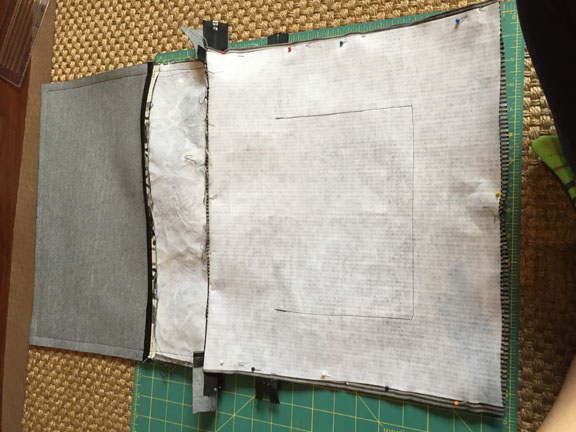
Now open up the bag so that the right sides of the outside face together and the right sides of the lining face together. Pin around the perimeter of the bag. When pinning the front pieces of the bag together, do your best to line up the seams where the accent fabric meets the vinyl. It will look much better this way. After pinning sew all the way around it with a 1/2″ seam. You will have to stop sewing at the zipper, and start again on the far side as you traverse the perimeter.
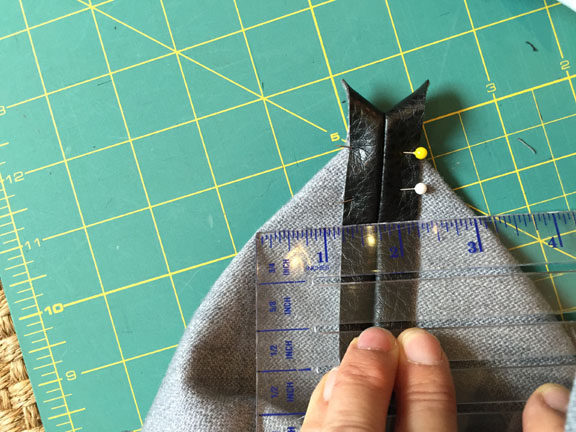
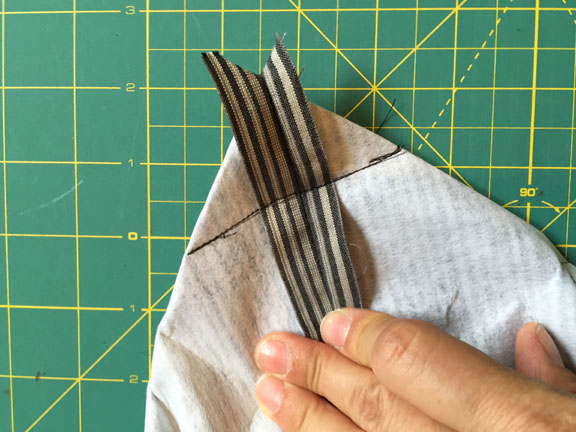
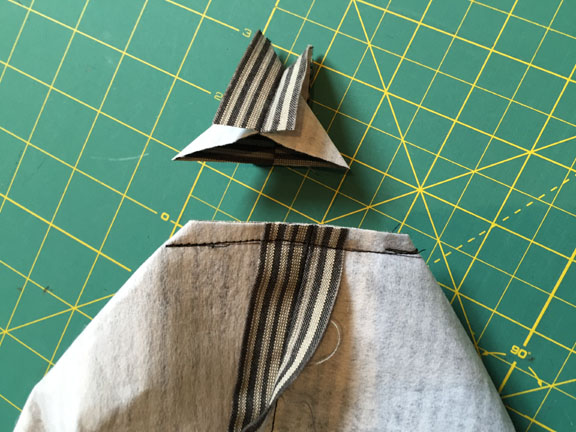
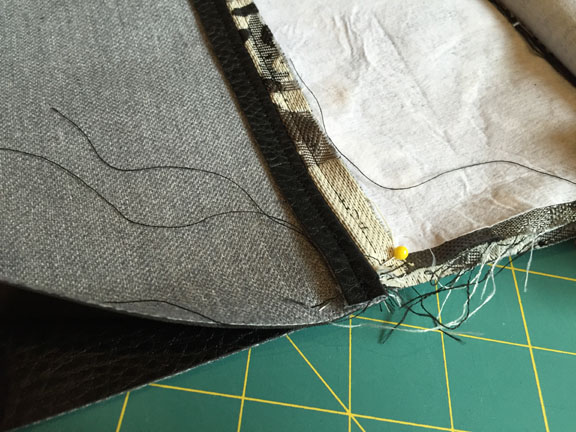
Before inverting the bag, we will square the corners. Do this for both corners on the vinyl and both corners on the lining. For each corner, flatten them out and line up the seams as shown above. Measure out a line 3 inches long that is perpendicular to the seam. Sew across the marked line, being sure to keep the seams as aligned as possible. It will look better when inverted if the seams line up. Once sewn, cut off the extra corner fabric as shown above.
Once done squaring the fabric, your bag should look something like the picture above.
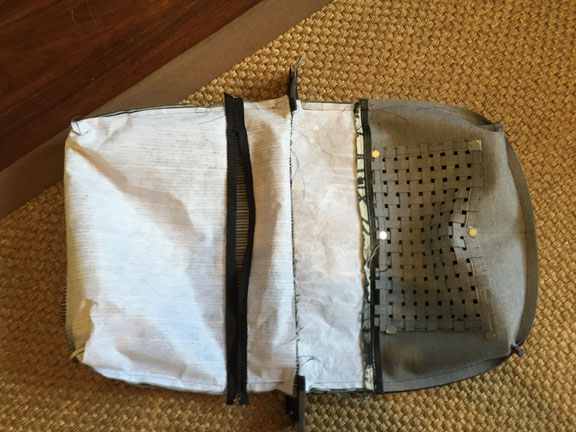
Now invert the bag, pulling it through the hole in the lining. Then push the lining into the handbag through the main zipper. It should look like the pictures above.
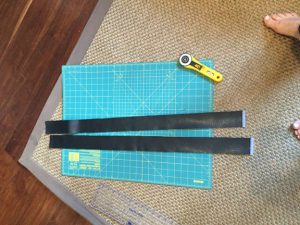
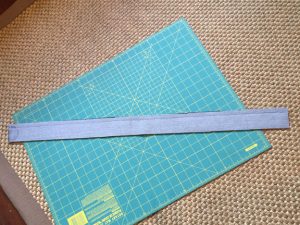
All that is left is to add the straps. You can sew your own, or use a webbing fabric. I sewed some out of vinyl by cutting long strips, three inches wide. I then sewed along the length, right sides together, then inverting them. The best way to invert long, narrow straps like this is to clip a safety pin to one end, and pull it all the way through. I topstitched down both sides of each strap to have them lay flat.
Once you have straps, they can be simply sewn to the front of the accent fabric wherever you feel is most aesthetically pleasing. When the bag is complete, you can unzip the lining and connect the LED matrix to the vinyl grid with the magnetic snaps.
Step 5: The Code
The code for the matrix handbag drives several different animations and allows for input of text via UART bluetooth communication. The source for this project is available at https://github.com/geekmomprojects/woven-led-handbag. It uses the fastled animation libraries to control the LED matrix and the Adafruit BLE and bluefruit libraries to allow BLE control of the display using the Adafruit Bluefruit app.
Bluetooth Connectivity:
Adafruit has a nice tutorial on how to use their bluetooth app. I am using it to pass along commands via UART communication. Commands must begin with an exclamation point to be executed. The commands that can be passed in this way are:
!next or !n – moves to the next animation in the series
!bxxx – where xxx is a 3-digit number sets the brightness level from 0-255
!pal – selects a different color palette for the animations. Palettes are chosen from a pre-set sequence.
You can also simply type in text which will scroll across the matrix. As long as the text is not preceded by an exclamation point, it will display as written.
MQTT:
Another nice feature of the Bluefruit app is that it allows connection to an MQTT feed. I have an MQTT server (mosquitto) running on a Raspberry Pi, but you could also use Adafruit.io to send data. The data is streamed directly to the UART feed to display across the screen. Currently, I use Node-Red on the same Raspberry Pi running the MQTT server to look for tweets containing the hashtag #twitterbag. If a tweet containing the hashtag is found, Node-Red sends an MQTT message containing the Twitter username of the person who sent the tweet. The Adafruit bluefruit app treats the received message as UART text. Since the usernames are preceeded by an ‘@’ symbol, the code processes each username and displays it in a different color as it is then scrolled across the bag.
You could adapt this method to have the handbag run updates based on trending twitter hashtags or allow people to tweet to the bag directly.
Hi,
I am very impressed with what you do, you are pretty much mind blowing with your design and coding skills. I am specially a fan of e-texttiles. I am myself a huge nerd and make video games ! I am in dire need of your working purse and fashion dress. Is there ANY way you can sell me one before wednesday next week ?
If not, is there any other way i can get my hands on it for a week ? It will help me showcase this at a huge conference with my product.
Regards
Abhishek
Thank you very much for your inspiring website. I wanted to do something with a bag and leds as I found your site. Very beautiful and we’ll explained..
This looks great 🙂 Thanks for the detailed instructions. I have just ordered some lights and a controller. Going to try and make myself a bag for festival season. xxxx
That’s awesome! Thank you for letting me know. Please let me know how it turns out!
OK, my [wife’s] version of the nice handbag is complete;-)
https://www.bytesalad.org/~marco/20190910_170005.jpg
https://www.bytesalad.org/~marco/20190905_150827.jpg
I’ll clean up my changes to the software and the Adafruit BLE app at some point and create some forks;-)
Thanks for the interesting idea and the complete writeup;-)
— Marco
Wow! She did an amazing job! Thank you for sharing the pictures – I love seeing projects from people who’ve found my tutorials useful. Best to you and your wife!
Debra
I did the work as a present for her;-)
— Marco
Then she’s very very lucky, and you have done an amazing job!