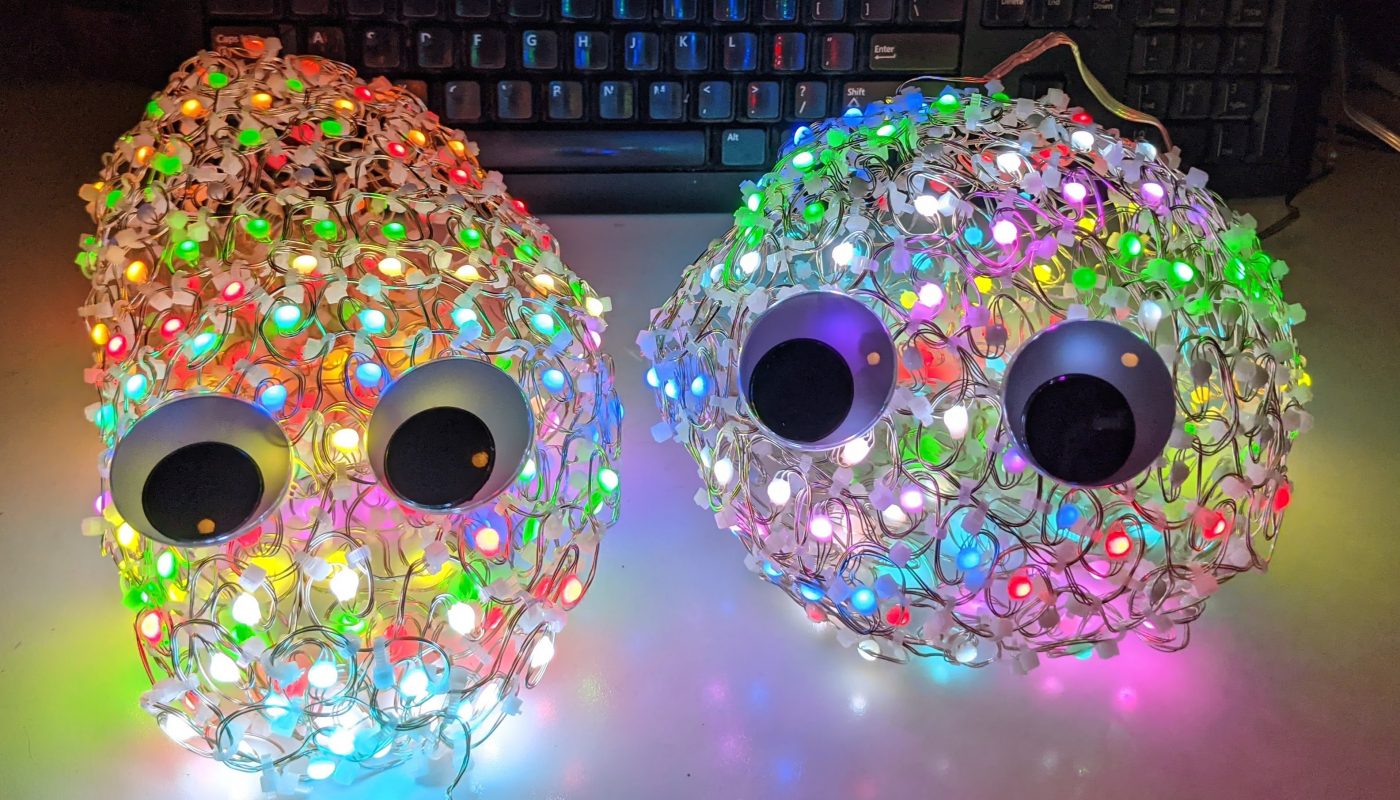
The cute creatures shown above are spheroids comprised of nothing more than bent LED string lights and zip ties. The LED Blob is a simple, silly project that’s enjoyable to build and fun to play with, requiring absolutely no special skill with electronics to assemble and enjoy.
I will be a guest this coming Wendesday, Oct. 13, 2021 on Alpenglow Industries’ livestream, where we will discuss and demonstrate techniques to build and code your own LED blob. If you’d like to join and build along with us, you can purchase the build materials yourself, and tune in for what promises to be an enjoyable making session. Alpenglow has their own blog post with a different approach to the build for additional blob-building options.
Materials:
- Addressable fairy light string in either 200 LED or 100 LED lengths (blobs above use 200 LEDs)
- (Optional, depending on build technique) Bulk bag of small white zip ties
- (Optional, but really, really fun) Large googly eyes
Tools:
- Flush cutters, nail clippers or small scissors to cut the zip ties (if used)
Blob Origin Story
The “blob” project came about as a happy accident. I was playing with some new (at the time) bendable wire-based LED string lights, attempting to fold them into a decorative “trim” to sew onto a garment. Each LED was centered in its own bent spiral, which looked attractive and reduced the original 10cm intra-LED spacing.
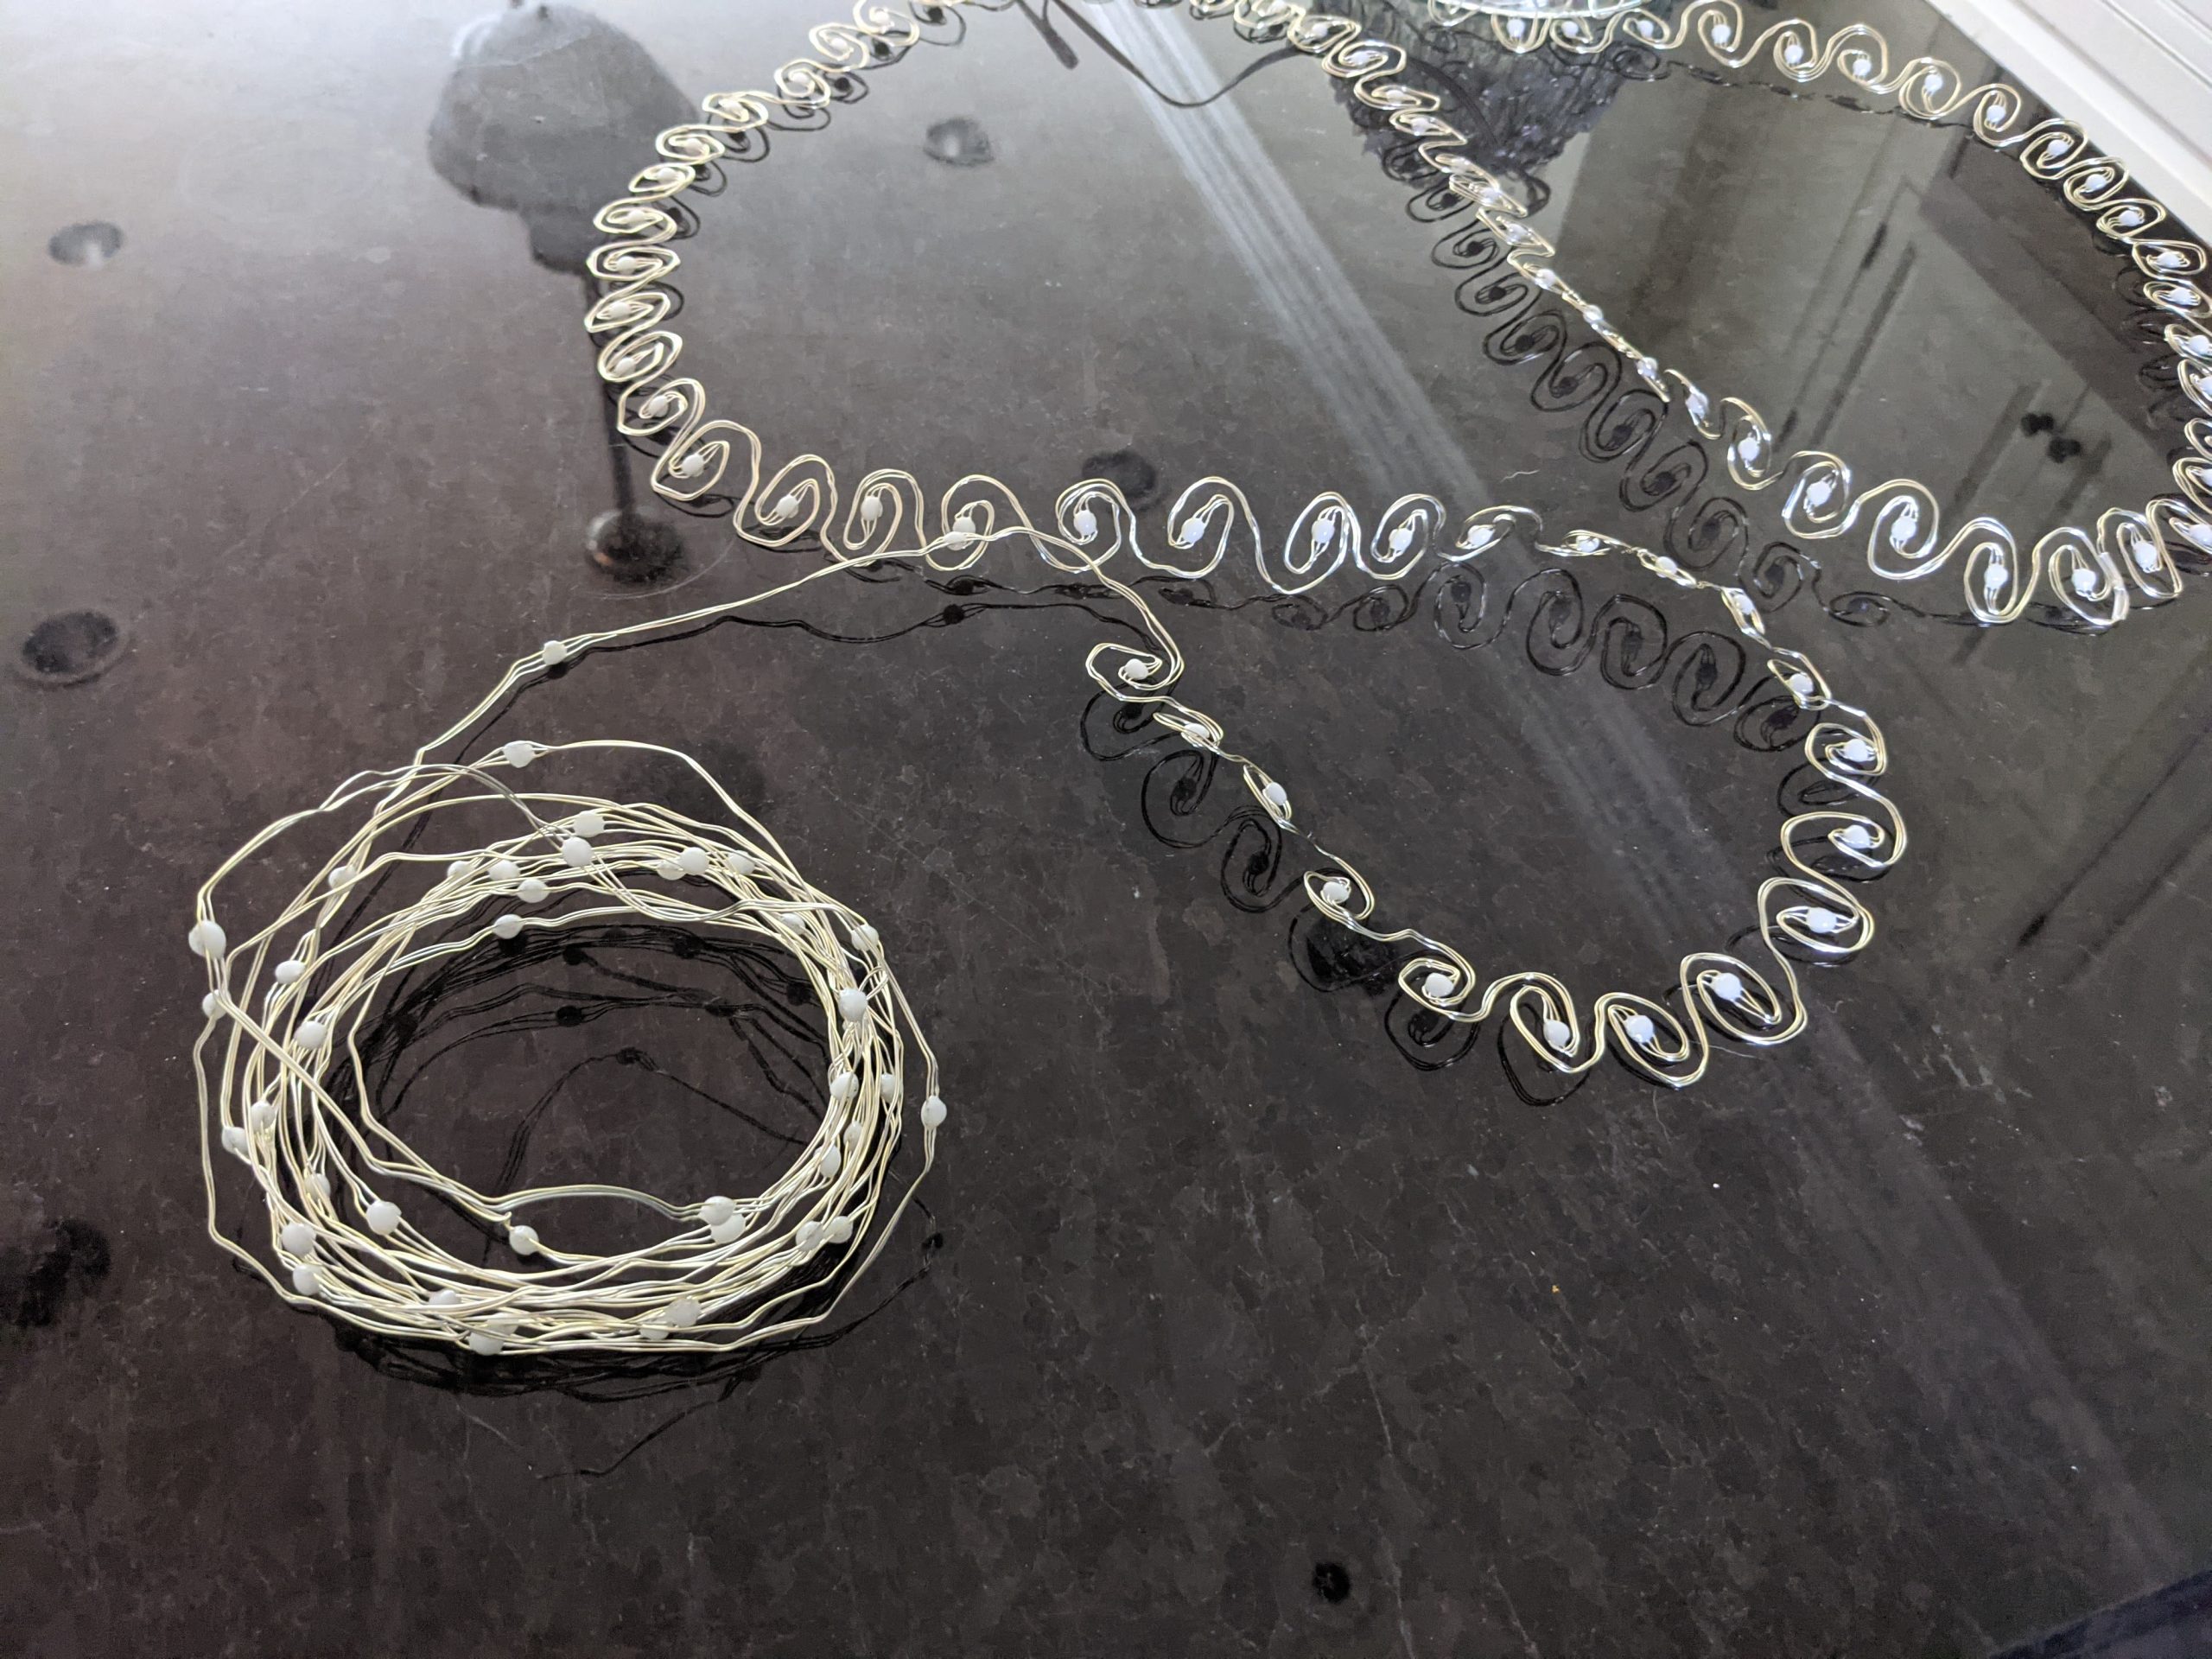
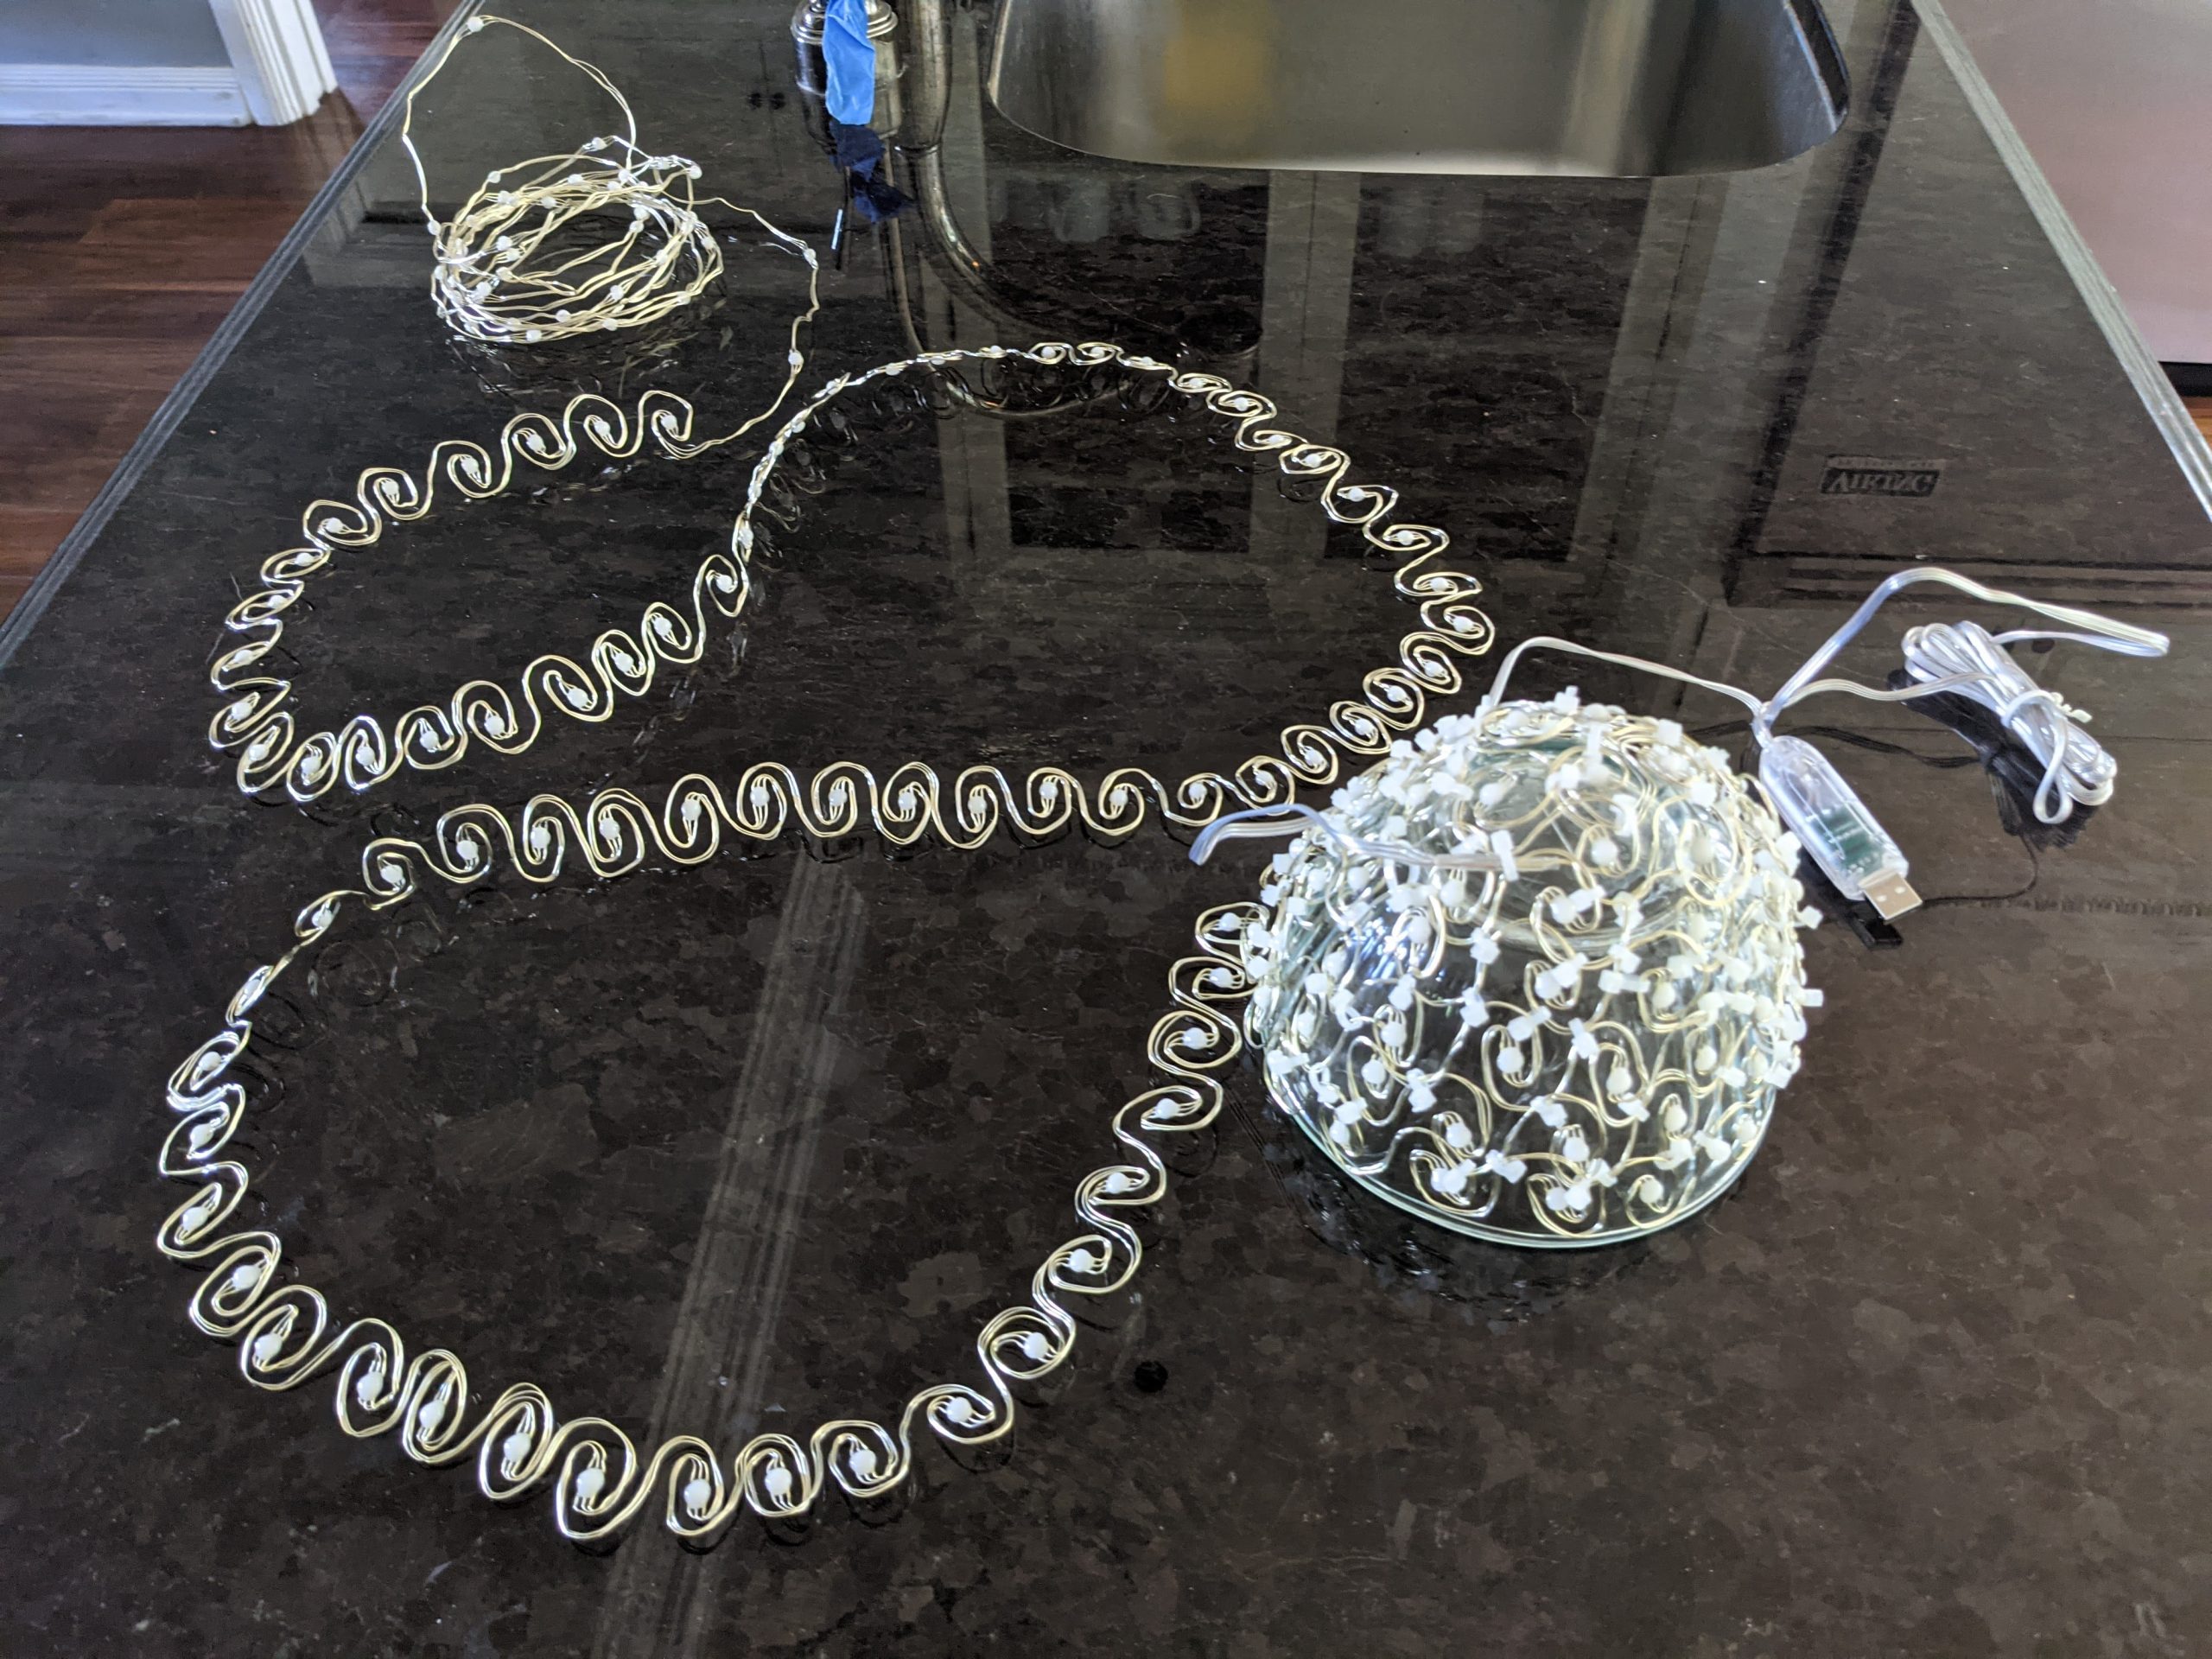
The bent wires (above) held a spiral shape extremely well, so I decided to see if they could form a three dimensional structure. Winding the spiraled wire around an inverted bowl for form, I used zip ties to attach each spiral to its closest three or four neighbors. The resulting spheroid shape held together remarkably well, and its springy nature is irresistible to play with. Adding a set of large googly eyes gives them a bit of extra personality as a finishing touch.
Rise of the Blobs
I had so much fun with the project, that when Carrie of AlpenGlow Industries (alpenglow.com) came to visit, and we found ourselves waiting for pizza, we had our own build-a-blob session. Carrie has mad fiber arts skills and figured out a way to “knit” the LED string together that didn’t require zip ties to hold the shape. We will explain both techniques on her livestream this October 13.


Build Your Own Blob
Building an LED string blob feels a lot like knitting/crocheting. It’s a diverting project that keeps your hands busy but doesn’t require intense focus. The materials are simple and inexpensive, and the organic resulting shape disguises inadvertent mistakes and leaves a lot of room for variation in technique. There’s really no way to do it wrong, and illuminated LEDs make everything look good (my motto: “LEDs improve everything”).
Some tips for the spiral wire/zip tie technique:
- The resin-encased LEDs have a front/back side. The back is dimmer. Try to keep the front of each LED facing outward in your blob. If you do make a mistake, you can usually just bend the wires to turn the LED around without disturbing the rest of the build. You’ll want to turn the string on periodically, or keep the LEDs turned on while building to check their direction.
- It’s very easy to tangle the wire once it’s been unspooled. It’s easiest to unspool the wire in lengths of 10-15 LEDs at a time, then bend and zip tie that group before unspooling any more
- If you want to make a spheroid shape, keep track of when you’ve used approximately half the LEDs in your string, so that you can start narrowing the diameter of the rings comprising the blob
- Build details don’t show once the LEDs are illuminated, so don’t worry about errors, breaks in the pattern, etc…
Directions for the spiral wire/zip tie technique:
- Unspool about 10 LEDs from your coiled LED string, then secure the rest of the coil to prevent tangles.
- Bend the LEDs into the pattern shown below, one at a time. It’s hard to describe the exact technique to make the shape, but start by holding the LED by the wires on both sides and rotating it so that the wire wraps around it as shown. Make sure you rotate each LED in the same direction to keep the pattern the same.
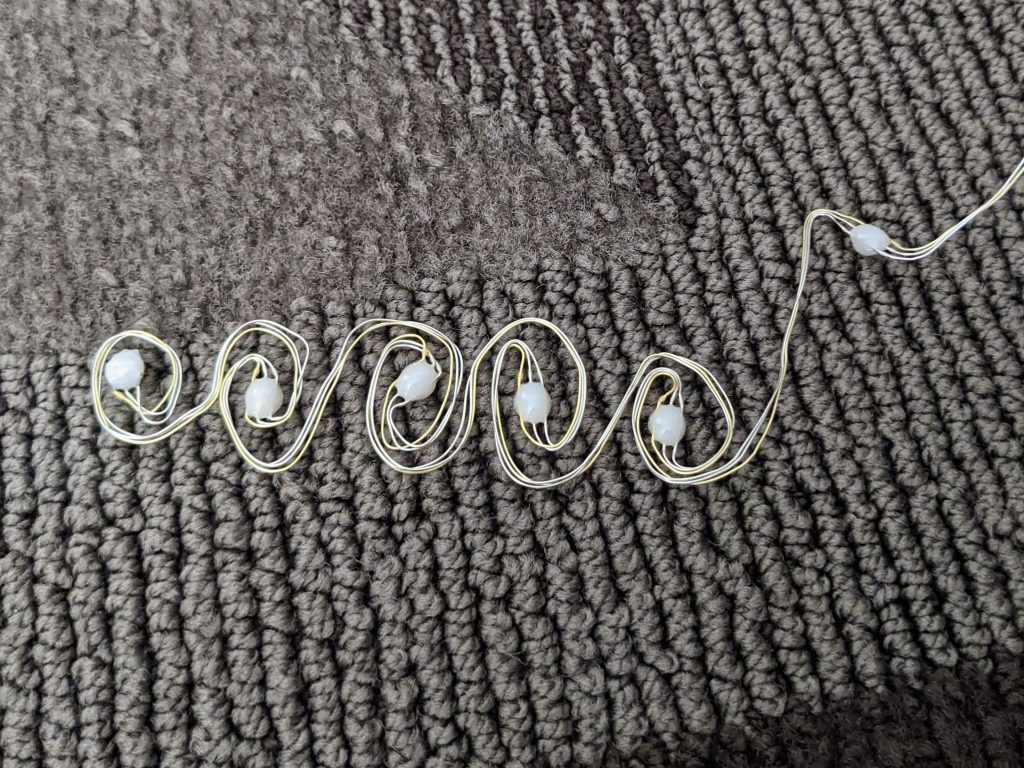
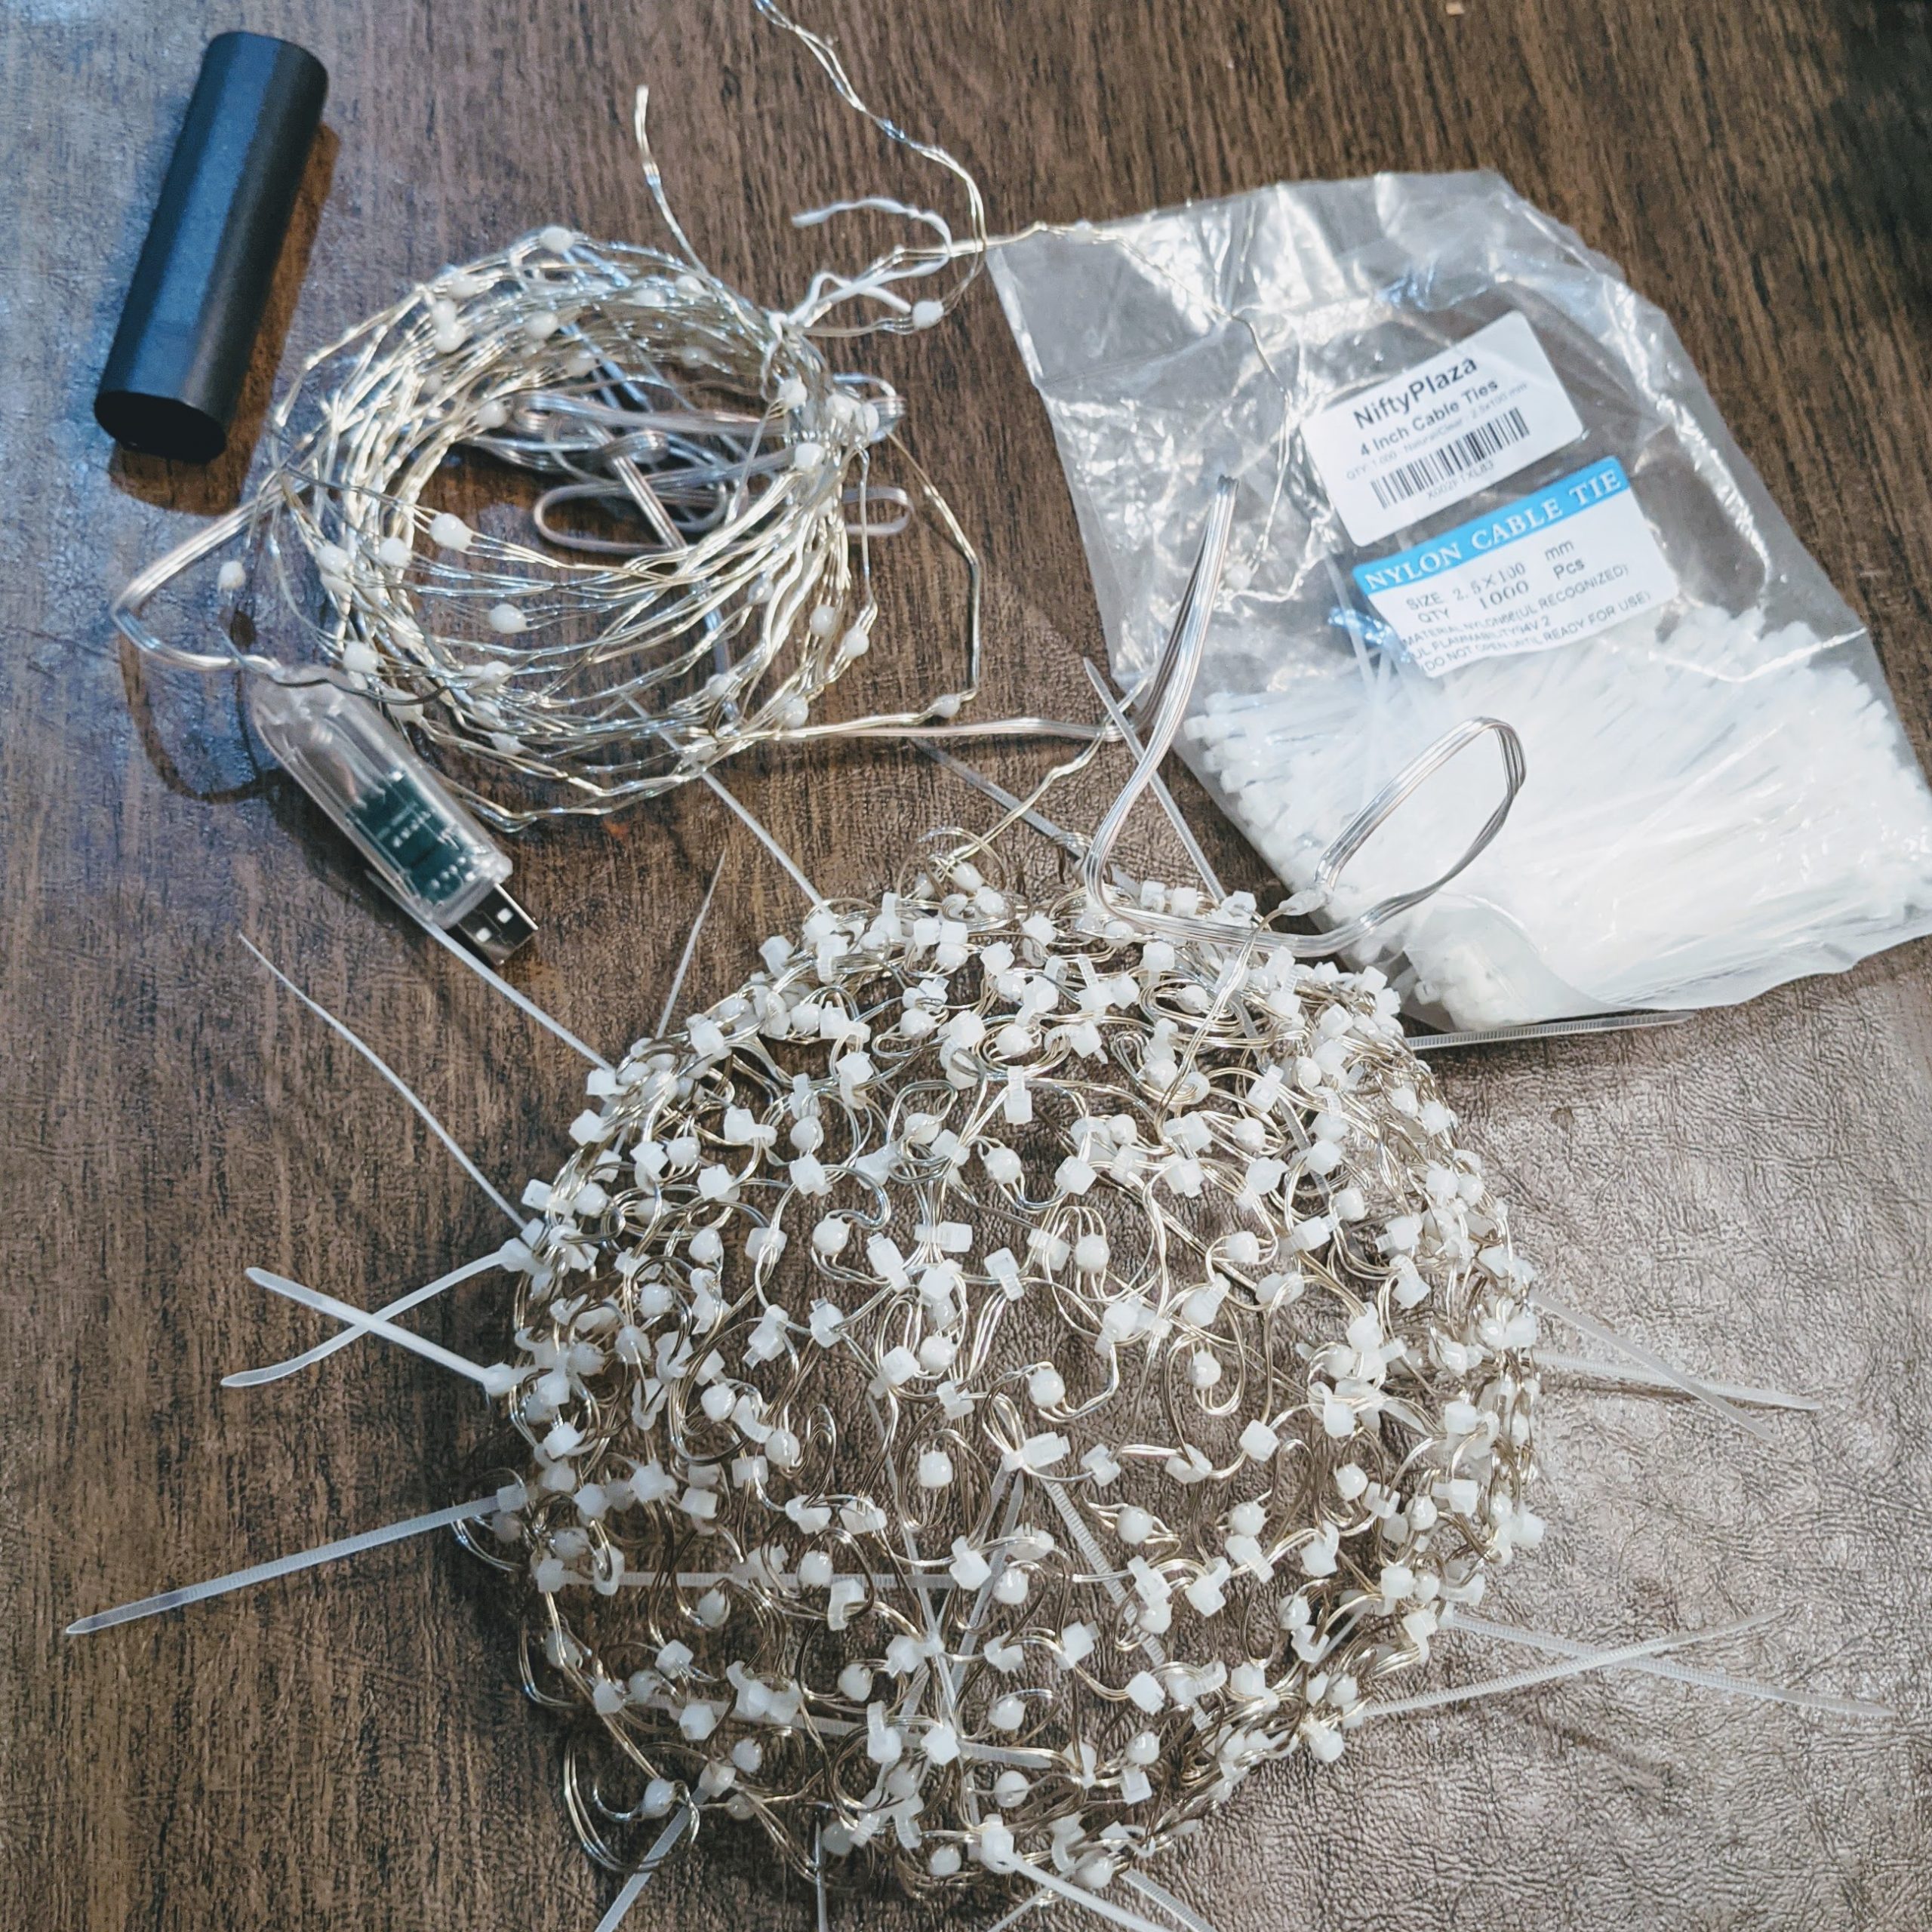
- After you have a length of about 10-15 swirls, start to wrap them into a spiral pattern using zip ties to attach each to its four nearest neighbors as shown in the image below. This will work most easily if each row in your sphere that is forming is offset by half a “swirl” from the row above and below it as shown. Carefully (so as not to clip the wire) trim the ends of the zip ties . Flush cutters are easier to use than scissors for this task.

- The first row will consist of only a few LEDs (3-4), and each row of swirls will be slightly longer than the one before it, creating the spherical shape of the blob. Try to keep approximate track of how many LEDs you have used in your blob. When you are halfway through the LED string, you will need to make each subsequent row just a bit smaller than the one above it to create a symmetric second hemisphere.
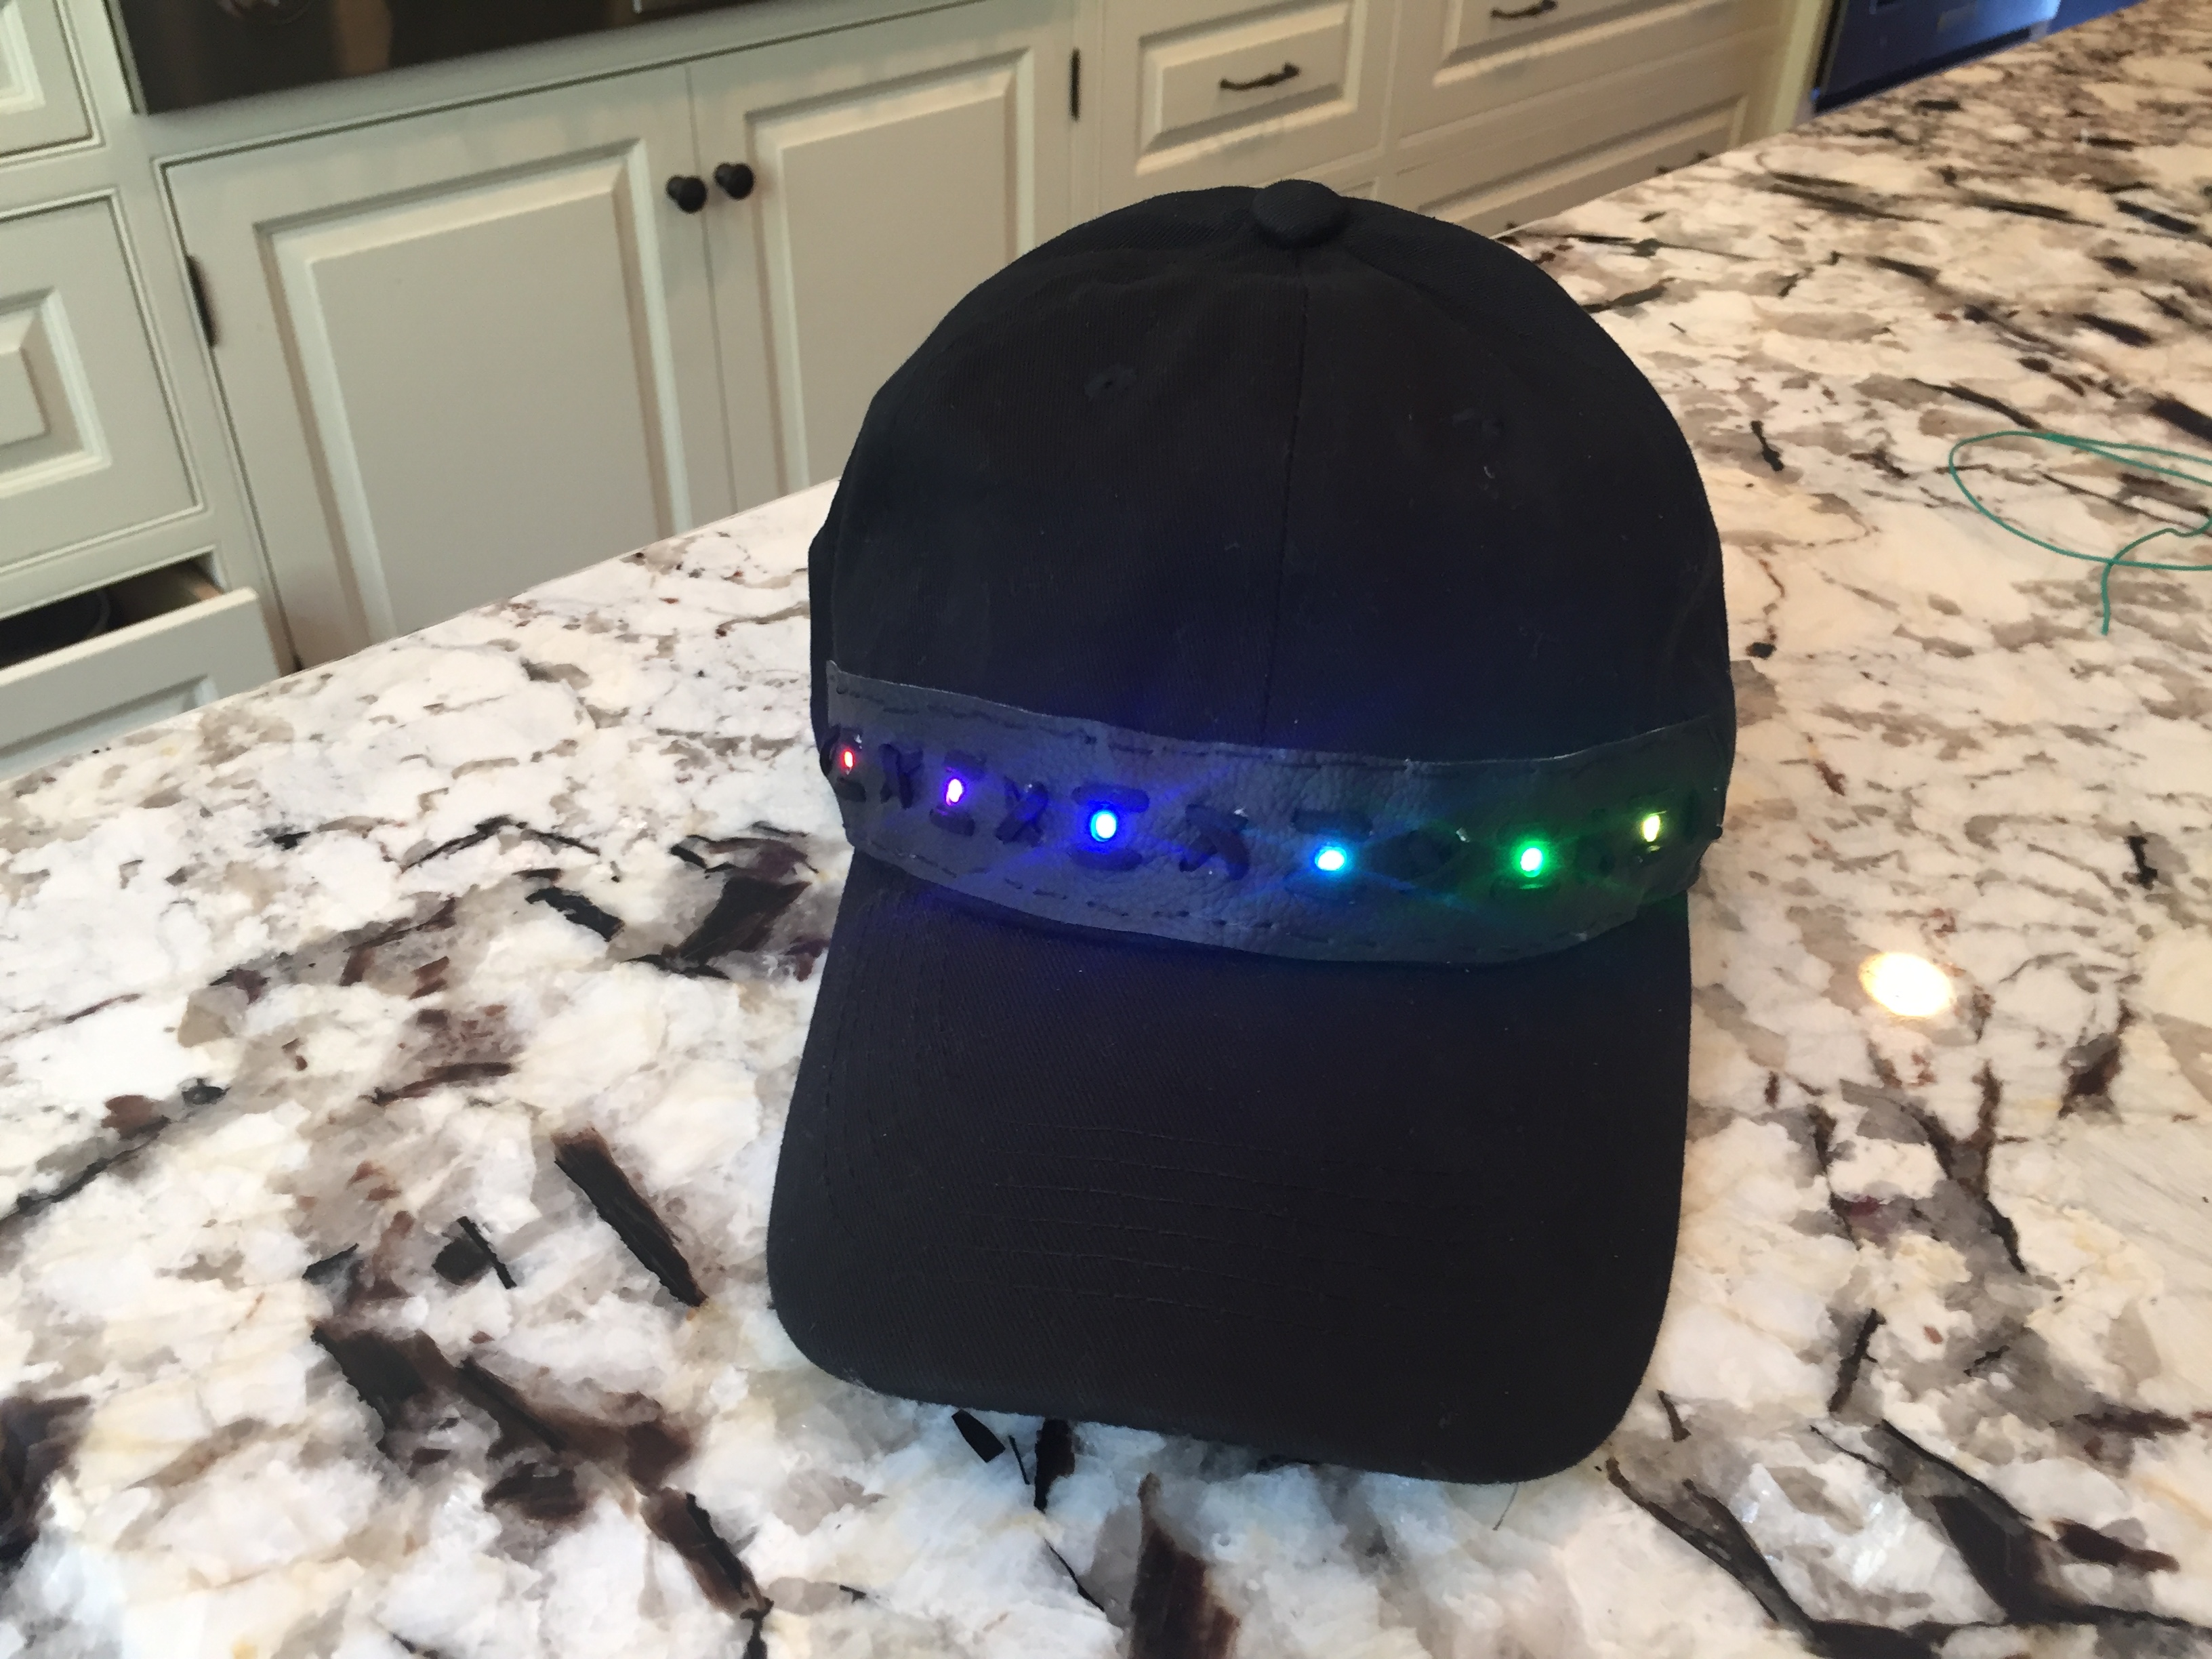
You Can Make a Hat…
LED strings offer more creative build possibilities than just a blob. If you use a 100 LED long string, and form a hemisphere rather than a spheroid, you can also make yourself a colorful hat. The pictures below show me having a bit of fun with the build. I would, however, definitely recommend trimming the zip ties before wearing your new colorful cap.

Code it Up
The addressable fairy light strings come with their own controller containing several dozen patterns. No additional hardware is needed, unless you want to code your own patterns. If that’s the case, you can cut off the built-in controller, and wire it to your own controller board. I’ve experimented with using WLED on an ESP8266/ESP32 and the proprietary software on Ben Hencke’s wonderful PixelBlaze board. Both worked quite well.
Additionally, I’ve coded the LEDs to be sound reactive using Adafruit’s CLUE board running Arduino code, though, for reasons I don’t fully understand, I’ve run into difficulty trying to code the LED string using MakeCode with both Adafruit’s CircuitPlayground Express and the BBC micro:bit.
The LEDs use pretty much the same protocol as WS2812/SK6812 LEDs (Neopixels), with the exception that every LED on the string has a fixed address, meaning that pixel #32 in the string will retain that address even if you were to cut and resolder the string in a different order. You can get a bit more information about the properties of those strings in Adafruit’s description of them here.
If you attach the LEDs to your own controller, you will need to sand or melt (hot solder on the tip of a soldering iron works very well for this) the coating off the cut wire ends to make the electrical connections. Unlike most LED strings/strips, the middle wire on these fixed-address LED strings is GND. The power wire is distinct because it has a slightly darker/redder color than the others.
Looking for More?
If you want to see more tips and a live demo on blob building, check out AlpenGlow Industries’ Build-a-Blob blog post and tune into their livestream on their YouTube channel this October 13. Hope to see you there!