I discovered e-textiles this past fall. The Arduino LilyPad is a micro controller designed to be included in clothing and other projects using soft circuits. There are some interesting LilyPad projects online, such as Leah Buchleys turn signal jacket, this jacket with an LED array, and this LED Matrix quilt by Katie Dektar. Reading about these projects inspired me to try one myself. I know the basics of sewing, so I figured that part wouldn’t be too bad, and I was interesting in learning more about micro controllers like the LilyPad.
Since my FIRST LEGO Leauge (FLL) team (I hope to write about FLL in a different post) had an upcoming tournament, I decided to make a light-up sweatshirt with our team’s logo. I didn’t document the construction process at the time, so there are no photographs of the work in progress, however the project is simple enough that you can easily see how it works by viewing the final result.
The step-by-step process and results of this project are below:
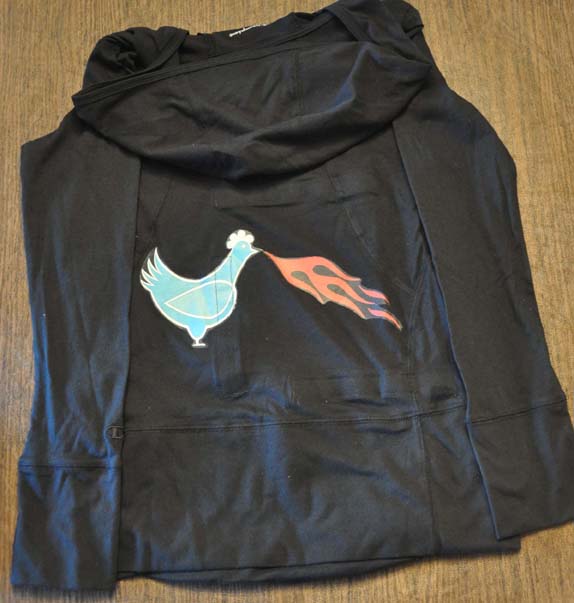
(1) I decided that I wanted the circuitry and LEDs to be hidden, so I needed a sweatshirt that was thin enough to let the LEDs shine through from underneath. I found a thin black cotton hoodie on Amazon. Our team name was the “Fire Breathing Chickens”, and our logo was, naturally, a fire-breathing chicken. To get the logo onto the hoodie, I used iron-on fabric transfers for dark fabrics that run through an ink jet printer, also from Amazon. I printed the logo onto the transfer paper, making sure that the outside of the design was black to blend in with the fabric and, following the package directions, ironed it on to the outside of the sweatshirt.

(2) I wanted to make the “fire” part of the logo light up, so that is where the LEDs needed to go. To keep the stitching completely hidden, I decided to sew all of the circuitry onto a separate fabric panel which would attach to the inside of the hoodie with Velcro. To set up the correct placement of the LEDs, I printed out the fire part of the logo onto paper, cut it out, and traced the outline onto the fabric panel with sharpie. I lightly glued 10 Arduino LEDs around the perimeter of the sharpie outline with fabric glue. The Arduino LEDs come with resistors built-in, so it is not necessary to add resistors to the circuit. I added the Arduino LilyPad Simple Board micro controller (smaller than the regular Arduino LilyPad) just to the side of the flame, close by the LEDs to minimize the amount of stitching needed.
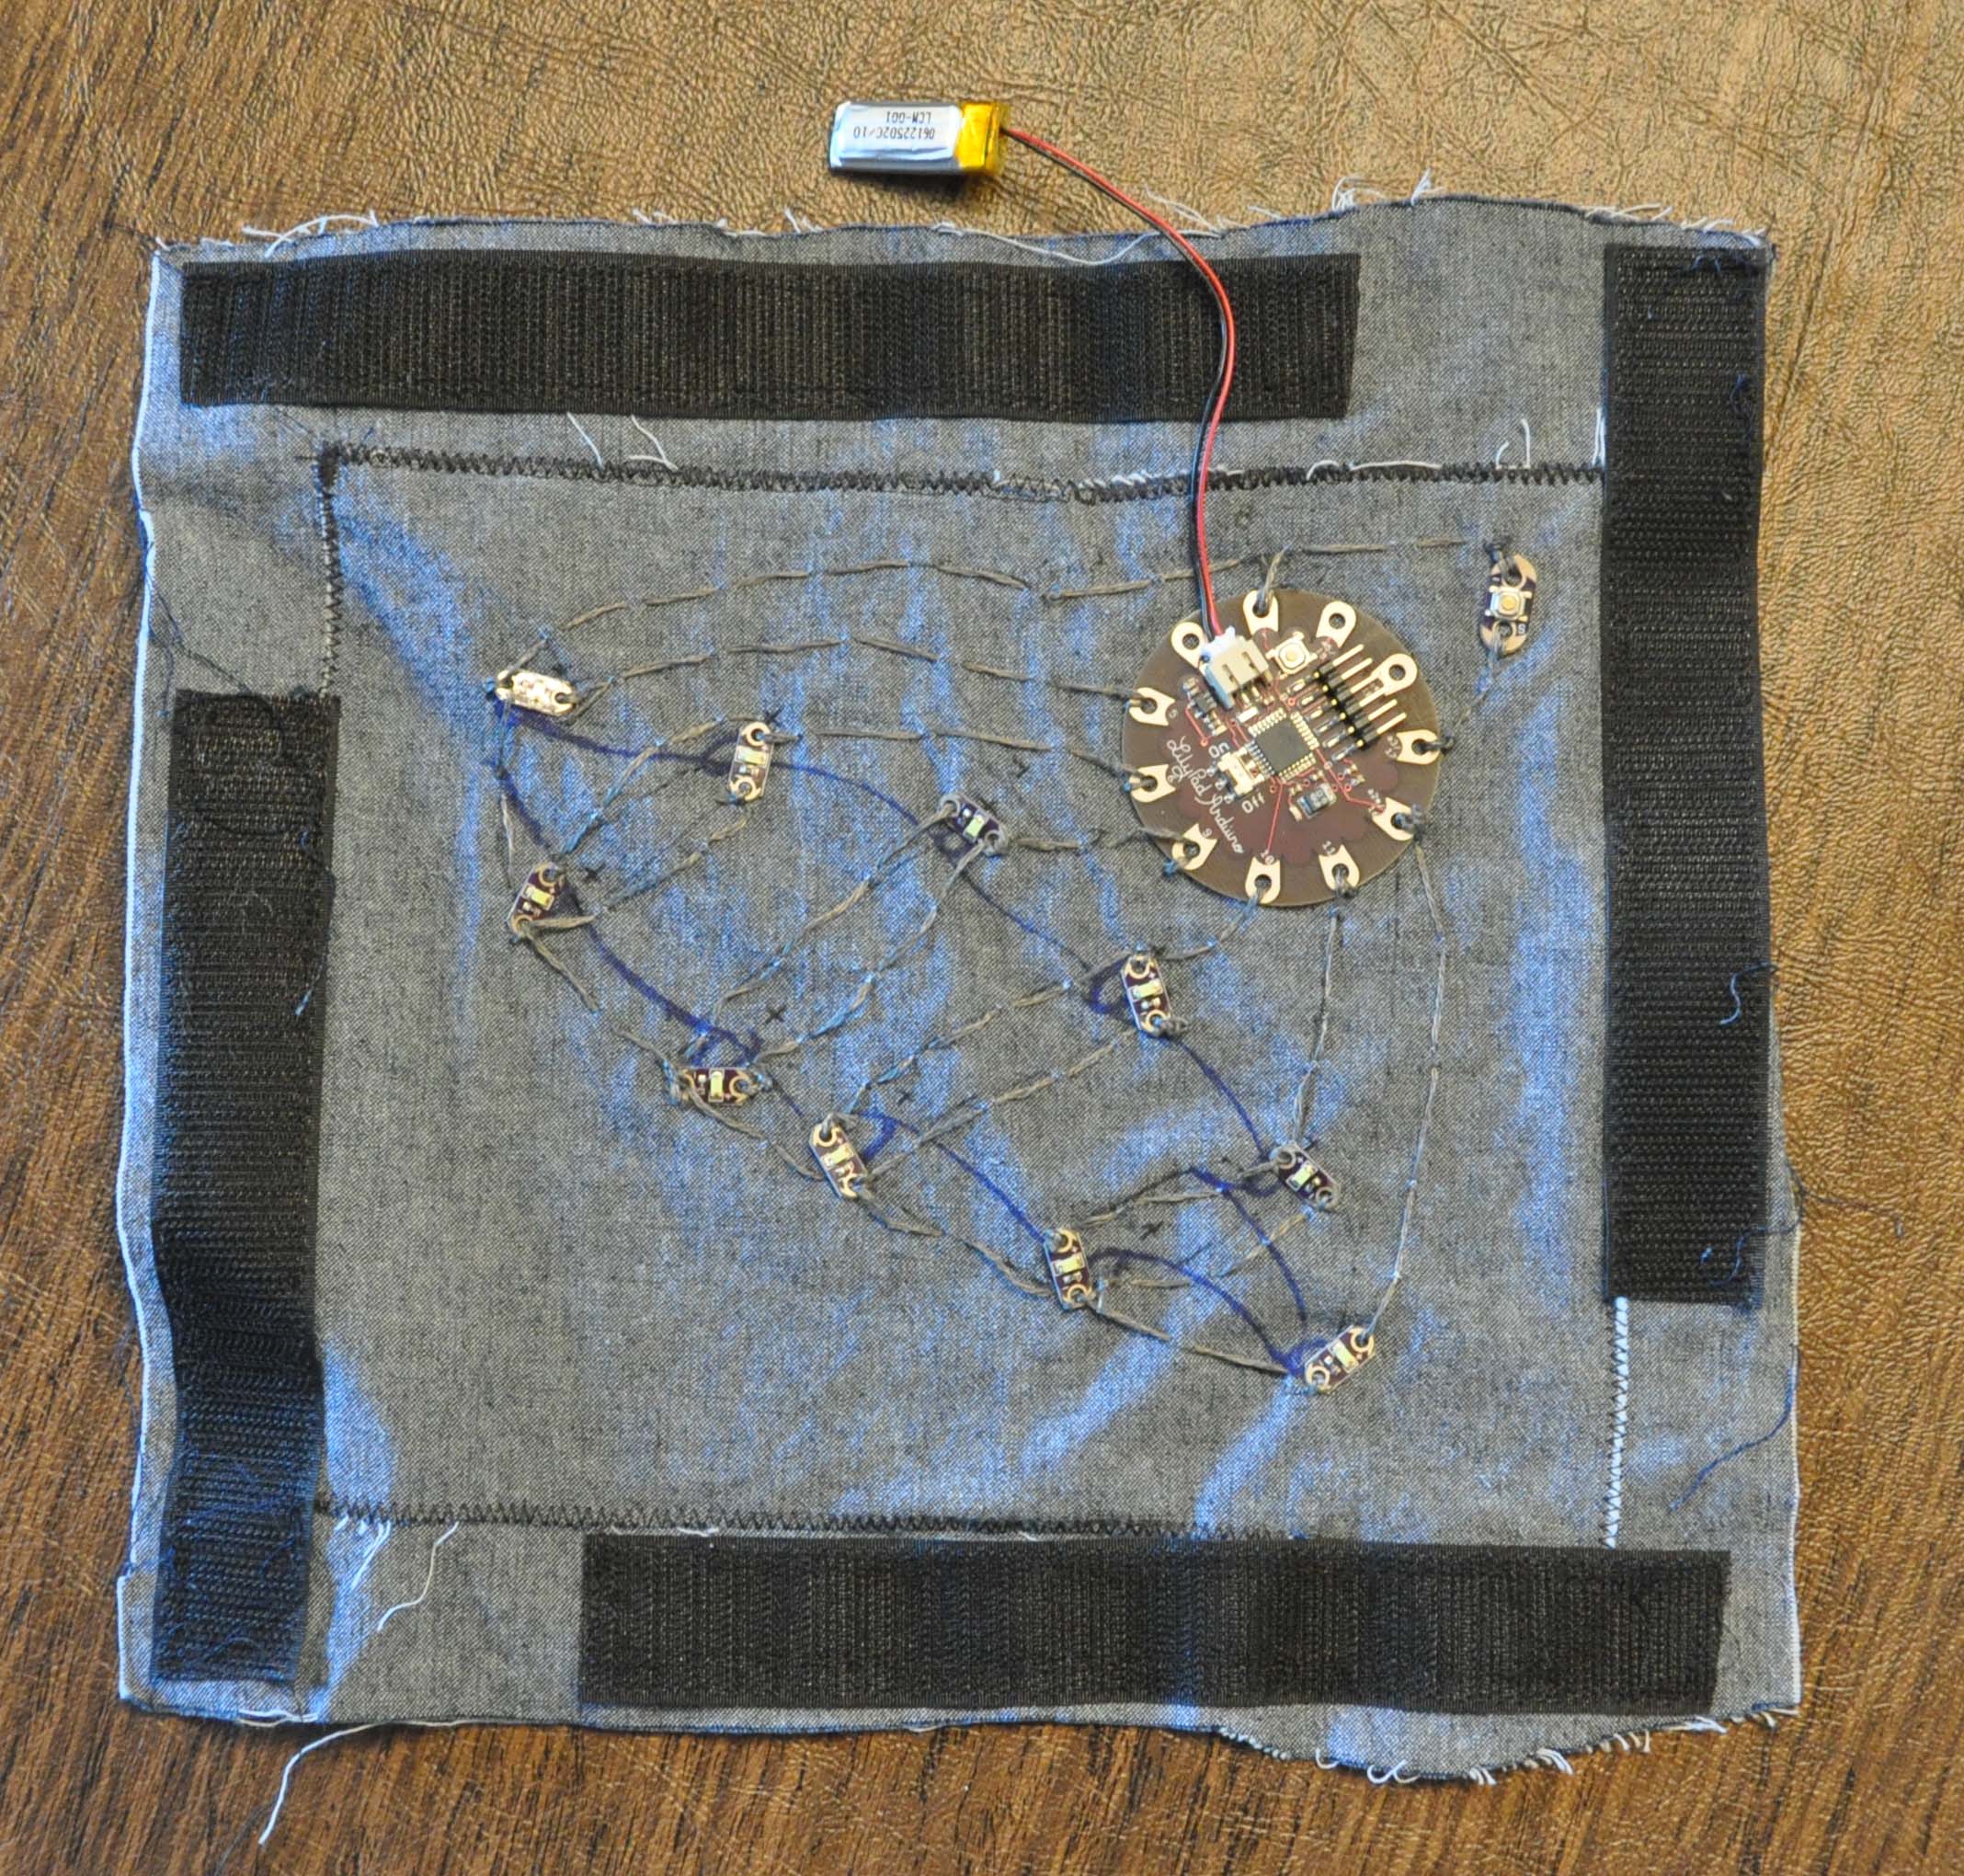
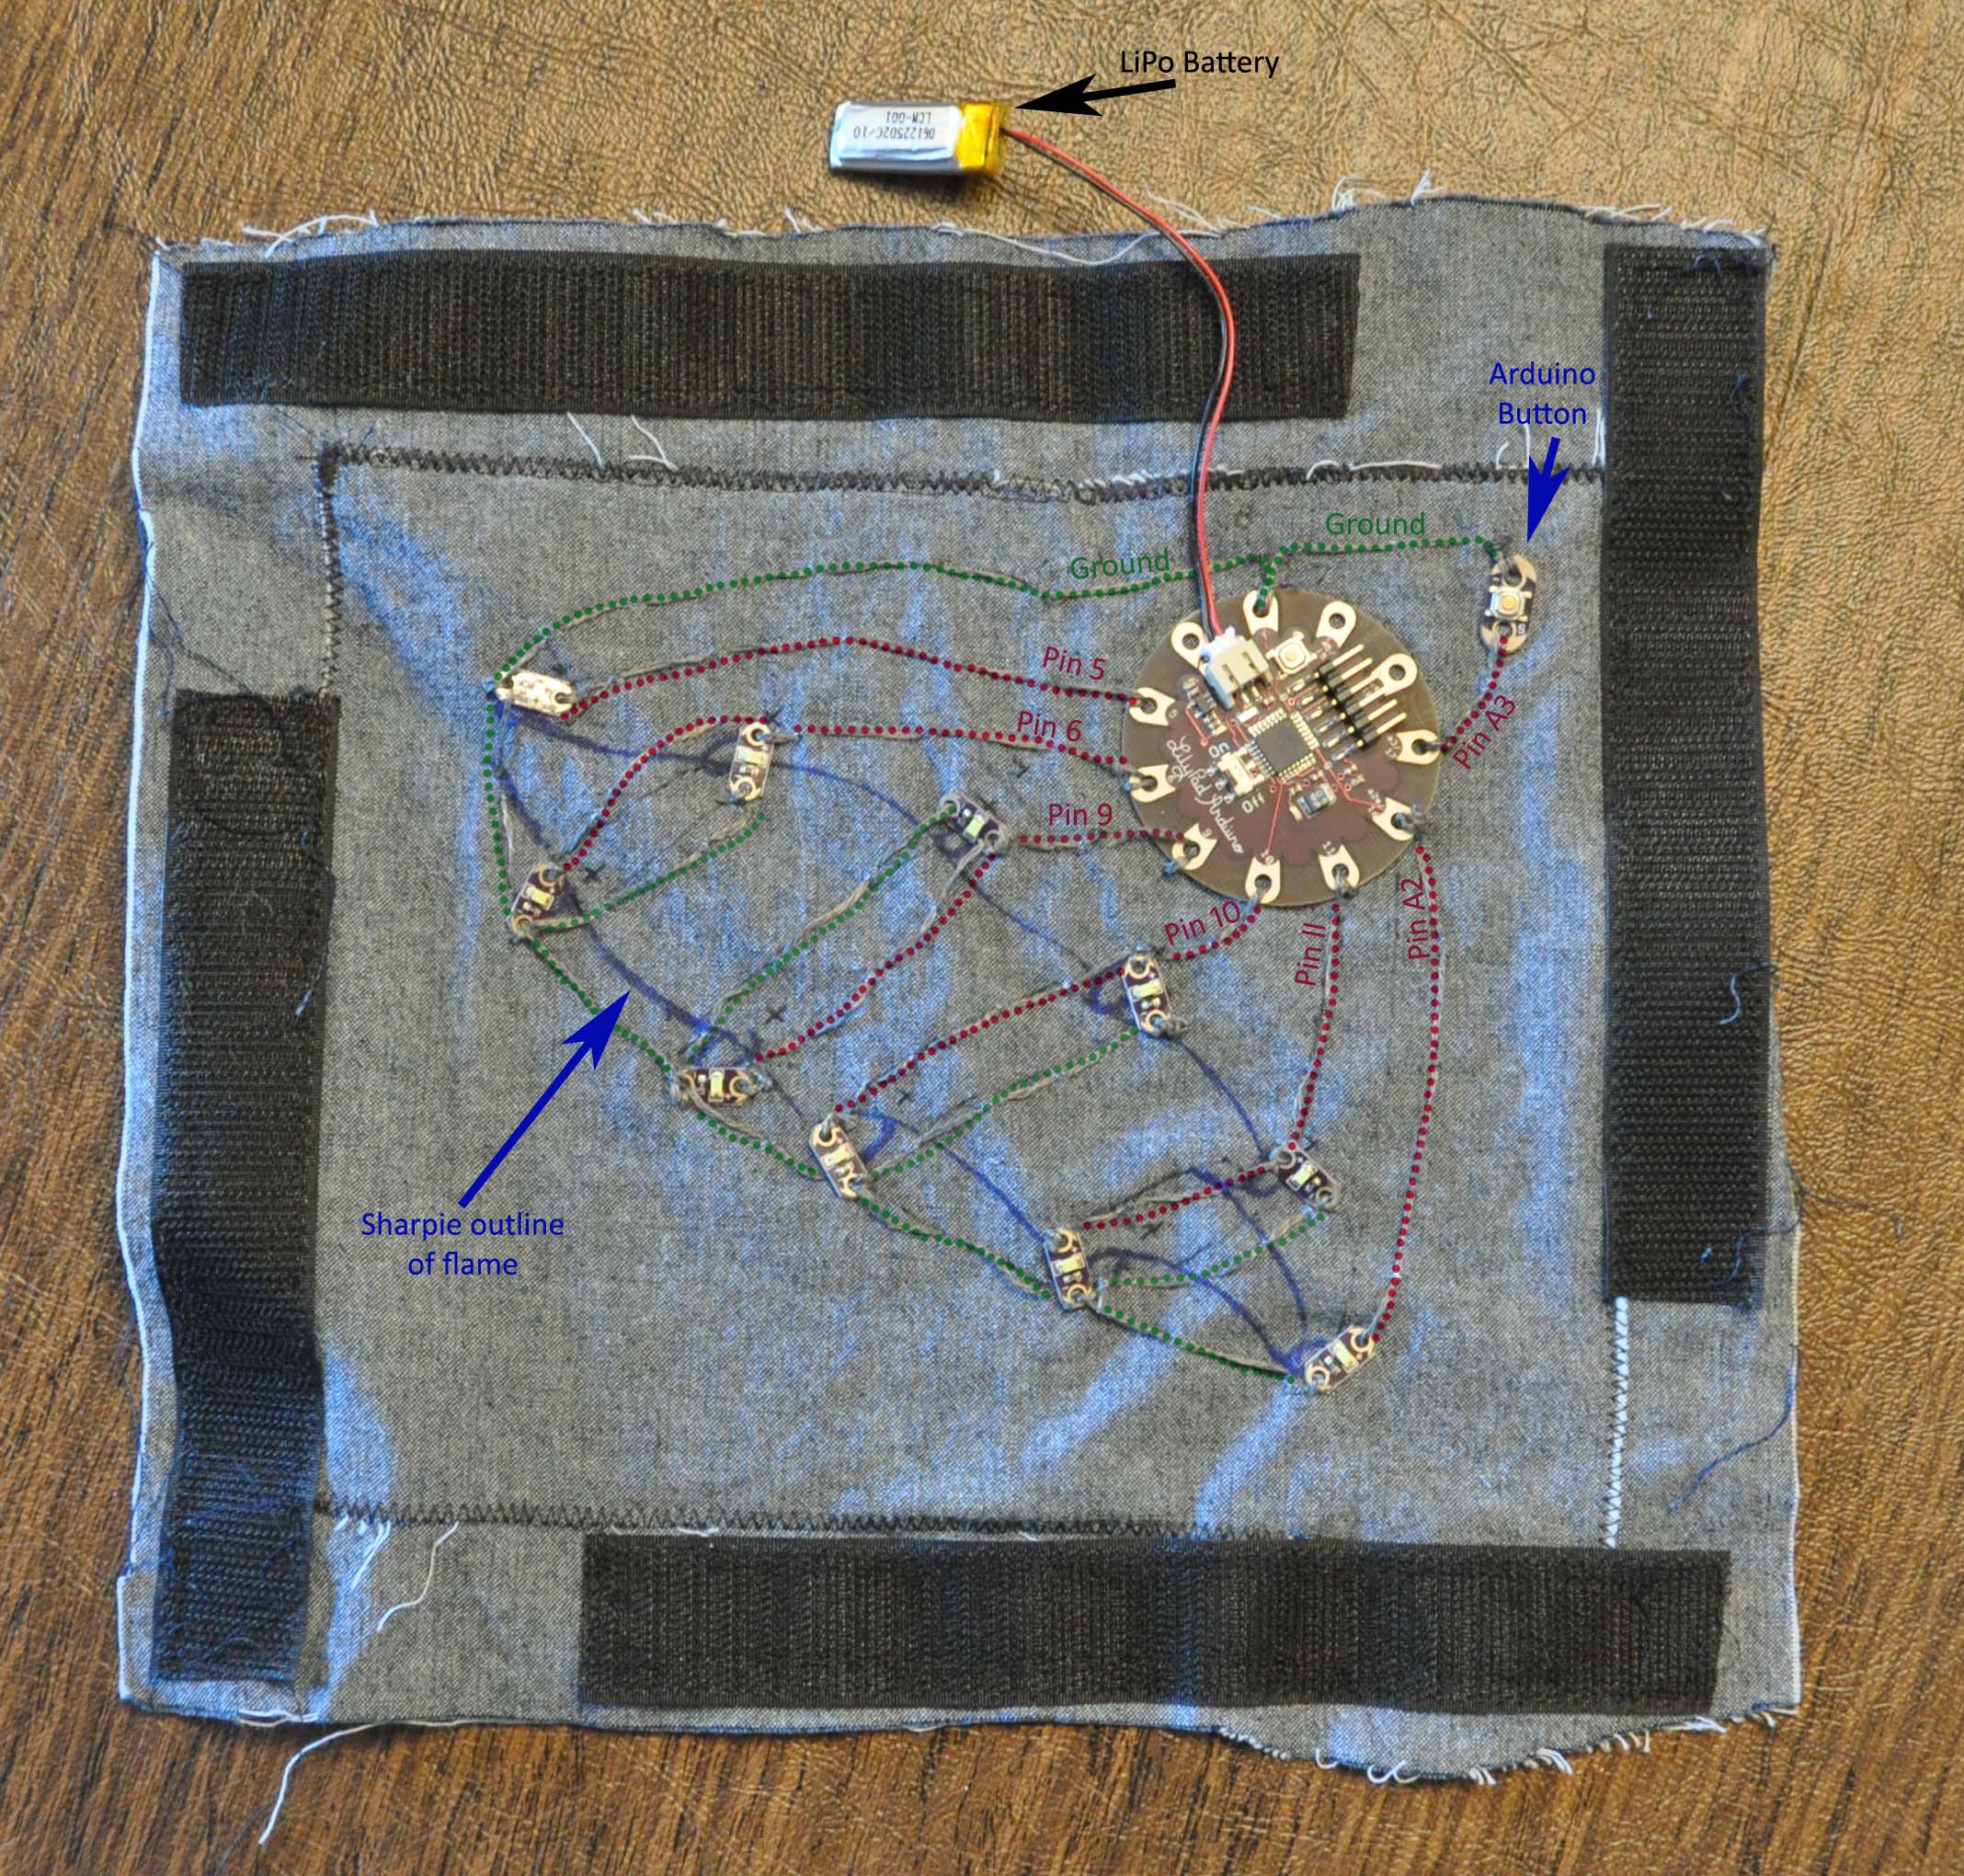
(3) I then proceeded to plan and lightly trace the circuits with ballpoint pen. The LilyPad Simple Board has nine output pins. To keep the stitching from getting too complicated, I connected one LED each to pins 5 and A2, and two LEDs in parallel to each of pins 6, 9, 10 and 11. I sewed the circuits by hand, making large stitches with conductive thread. The conductive thread is pretty coarse, so you’ll want a needle with a large eye to sew with it. I kept most of the thread on the top side of the panel. Since the back side of the panel would be in contact with my skin, I sewed a layer of fabric over it to reduce any risk of shorting or shocking me. Once the circuits were sewn, a rechargeable Li Po battery was connected to the LilyPad Simple Board to provide power. There were still a few output pins left on the LilyPad, so I decided to add an Arduino button to pin A3, in case I wanted to send some input to the circuit.
(4) The circuit was now complete, so it was time to write the program. If you are looking to learn the basics of Arduino programming, Leah Buechley has a good tutorial on using the Arduino LilyPad that includes instructions in setting up and using the Arduino programming environment. I decided to make the LEDs light up in several different patterns which could be toggled by pressing the button sewn on to pin A3. If I had to do it again, I might use hardware interrupts to handle the toggling from one pattern to another, but the way I did it was pretty simple and worked easily. The code is shown at the end of this post. Below is a video showing the different blink modes of the fabric panel.
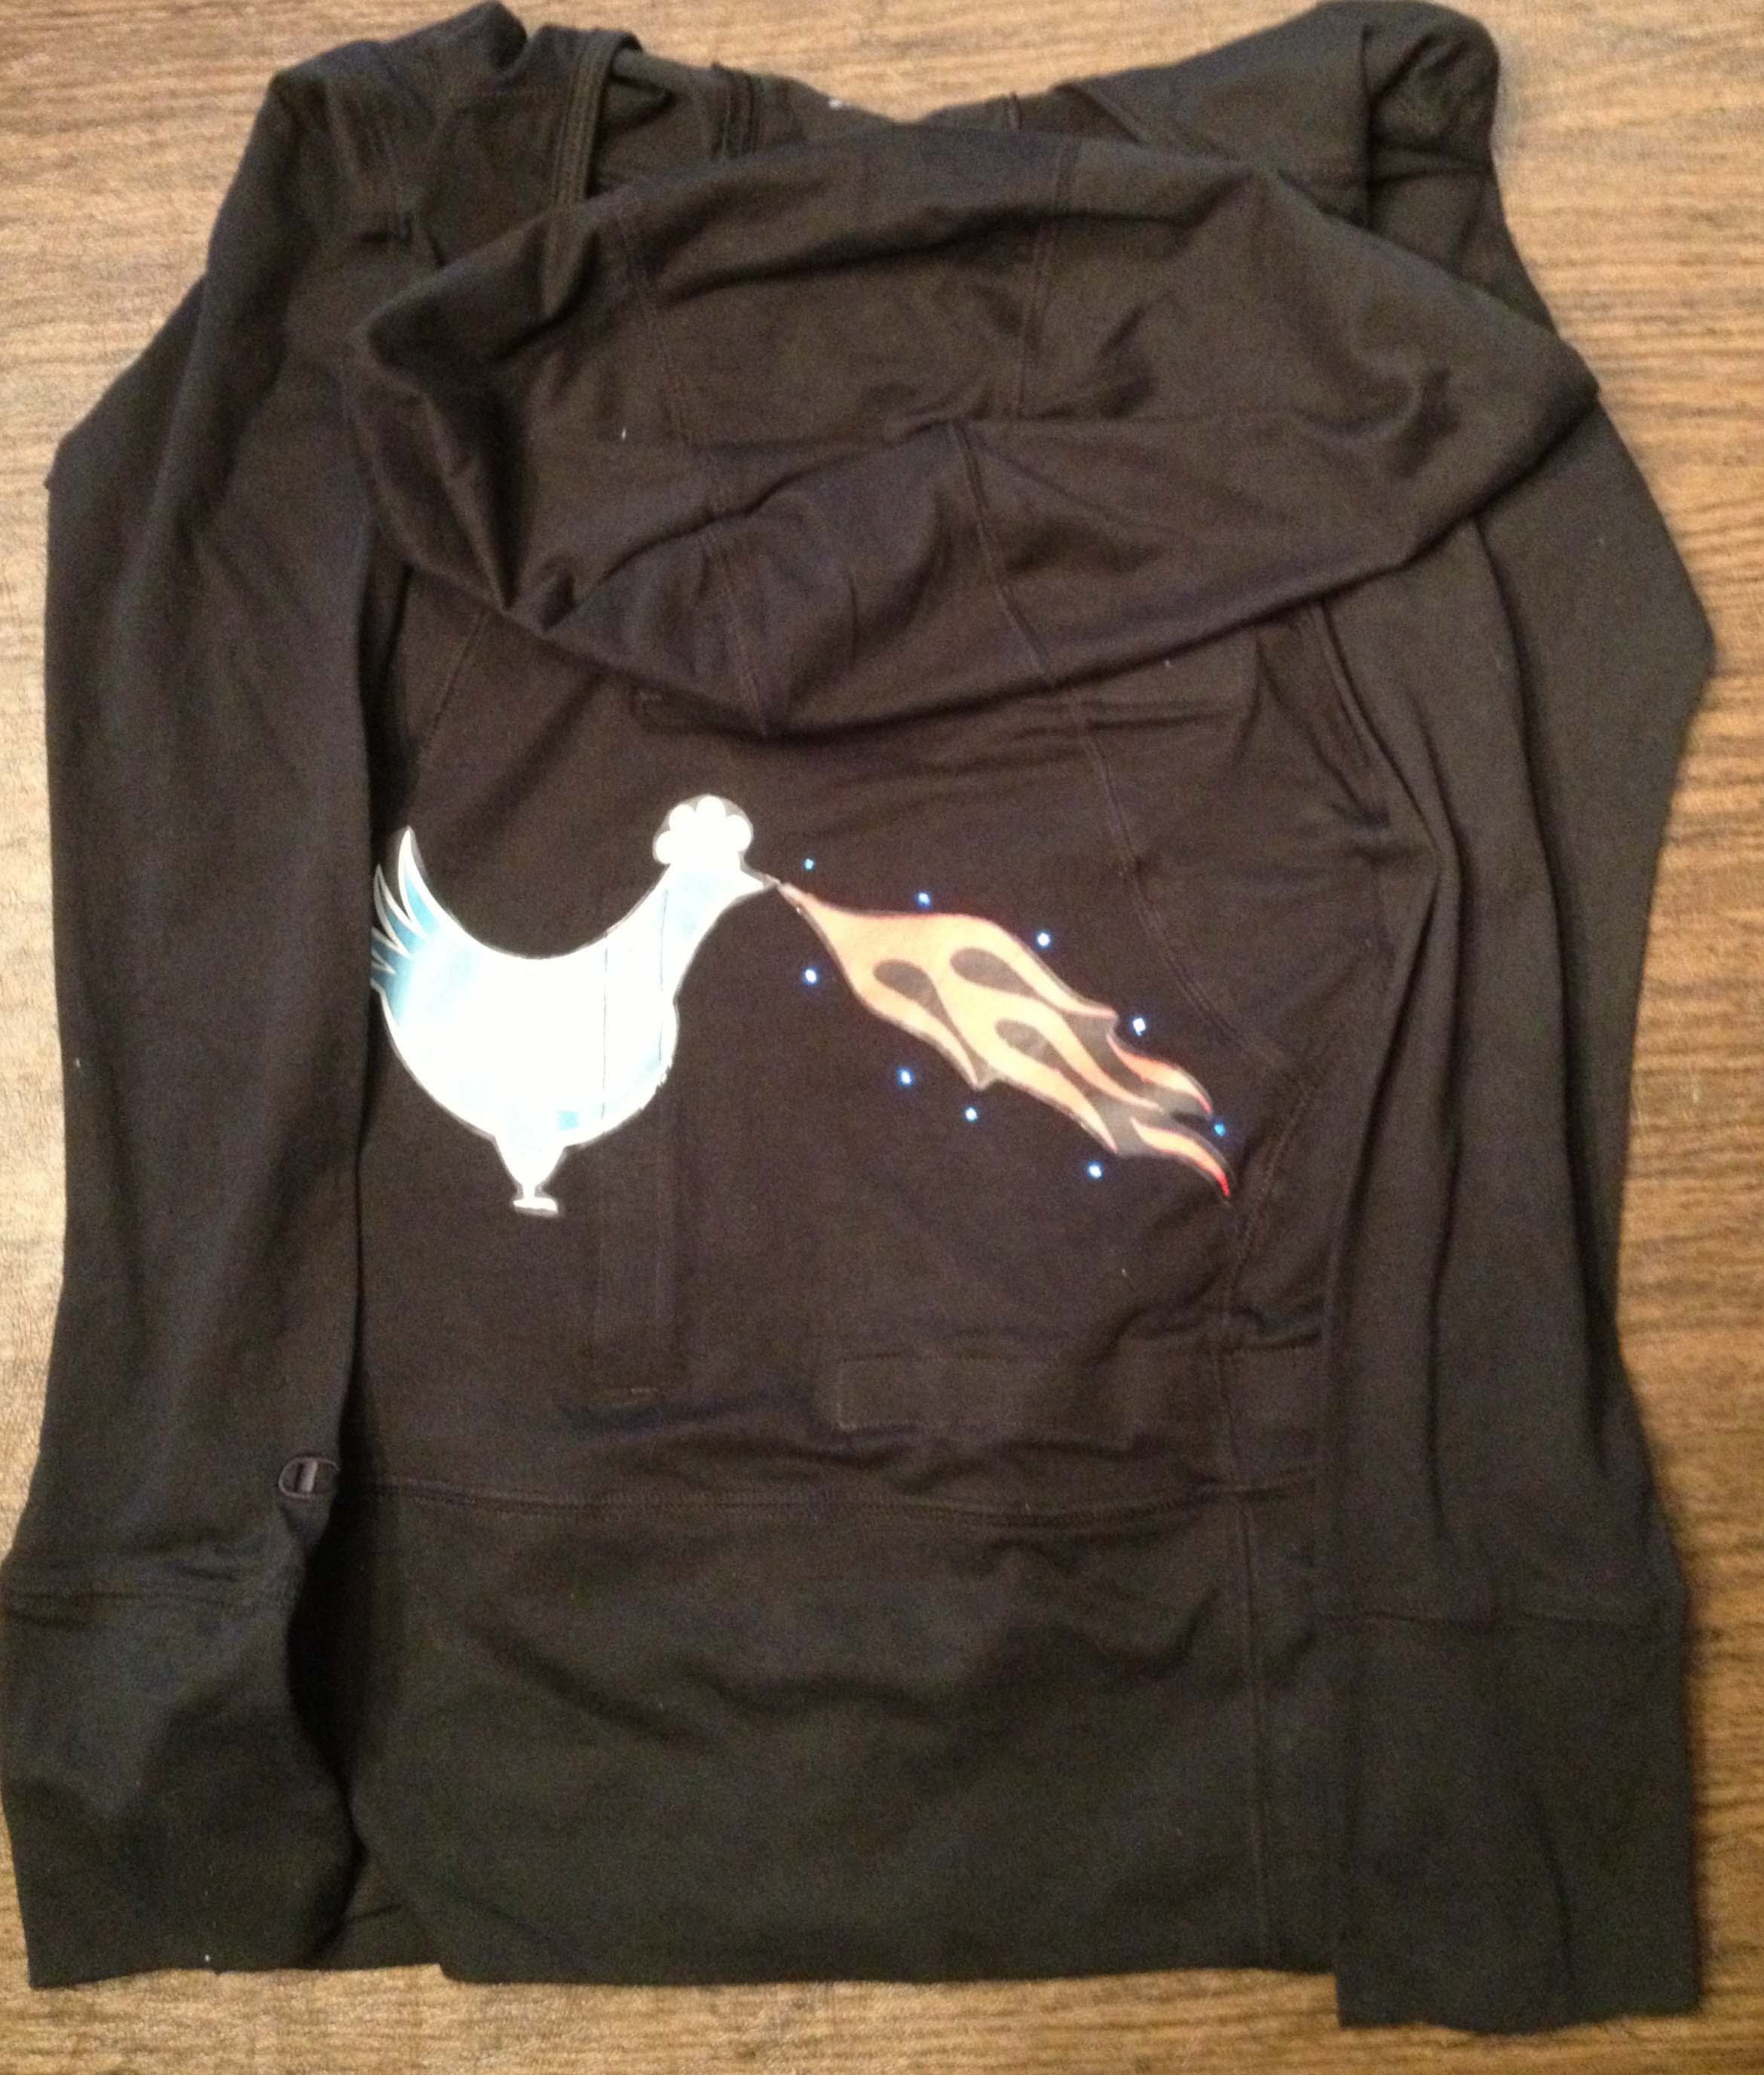
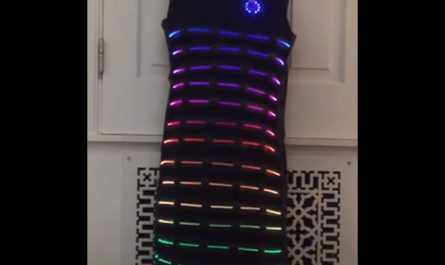
(5) I sewed four Velcro strips to the inside of the sweatshirt, and four corresponding strips to the fabric panel, so that it could be easily attached and removed inside the sweatshirt. You can see some of the stitching through the chicken logo, but it’s not too obtrusive. Here is what the sweatshirt looks like with the light-up panel inside.
Below is the code that runs the Arduino LilyPad Simple Board:
[codebox 1]
I notice the code isn’t available on this tutorial. Is there anyway it can be posted?
I’m so sorry, I no longer have the code available.