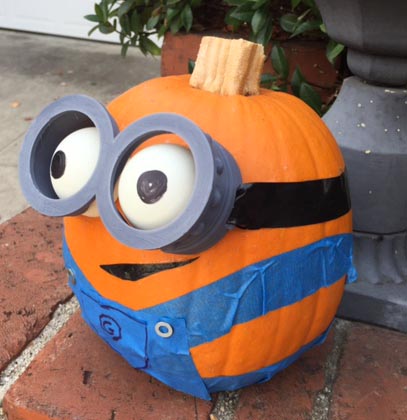
I love Halloween for its spooky and amusing decorations and am always amazed by the creativity people put into making jack-o-lanterns. However, it’s frustrating to put hours of creative work into carving a pumpkin, just to have it rot after only a few days. The simplest solution is no-carve pumpkin decorating. You can find articles on painted and embellished pumpkins online, however, I haven’t seen any that explore the possibilities that a 3D printer adds. So, I thought I’d bring a little high-tech to my arts-and-crafts projects.
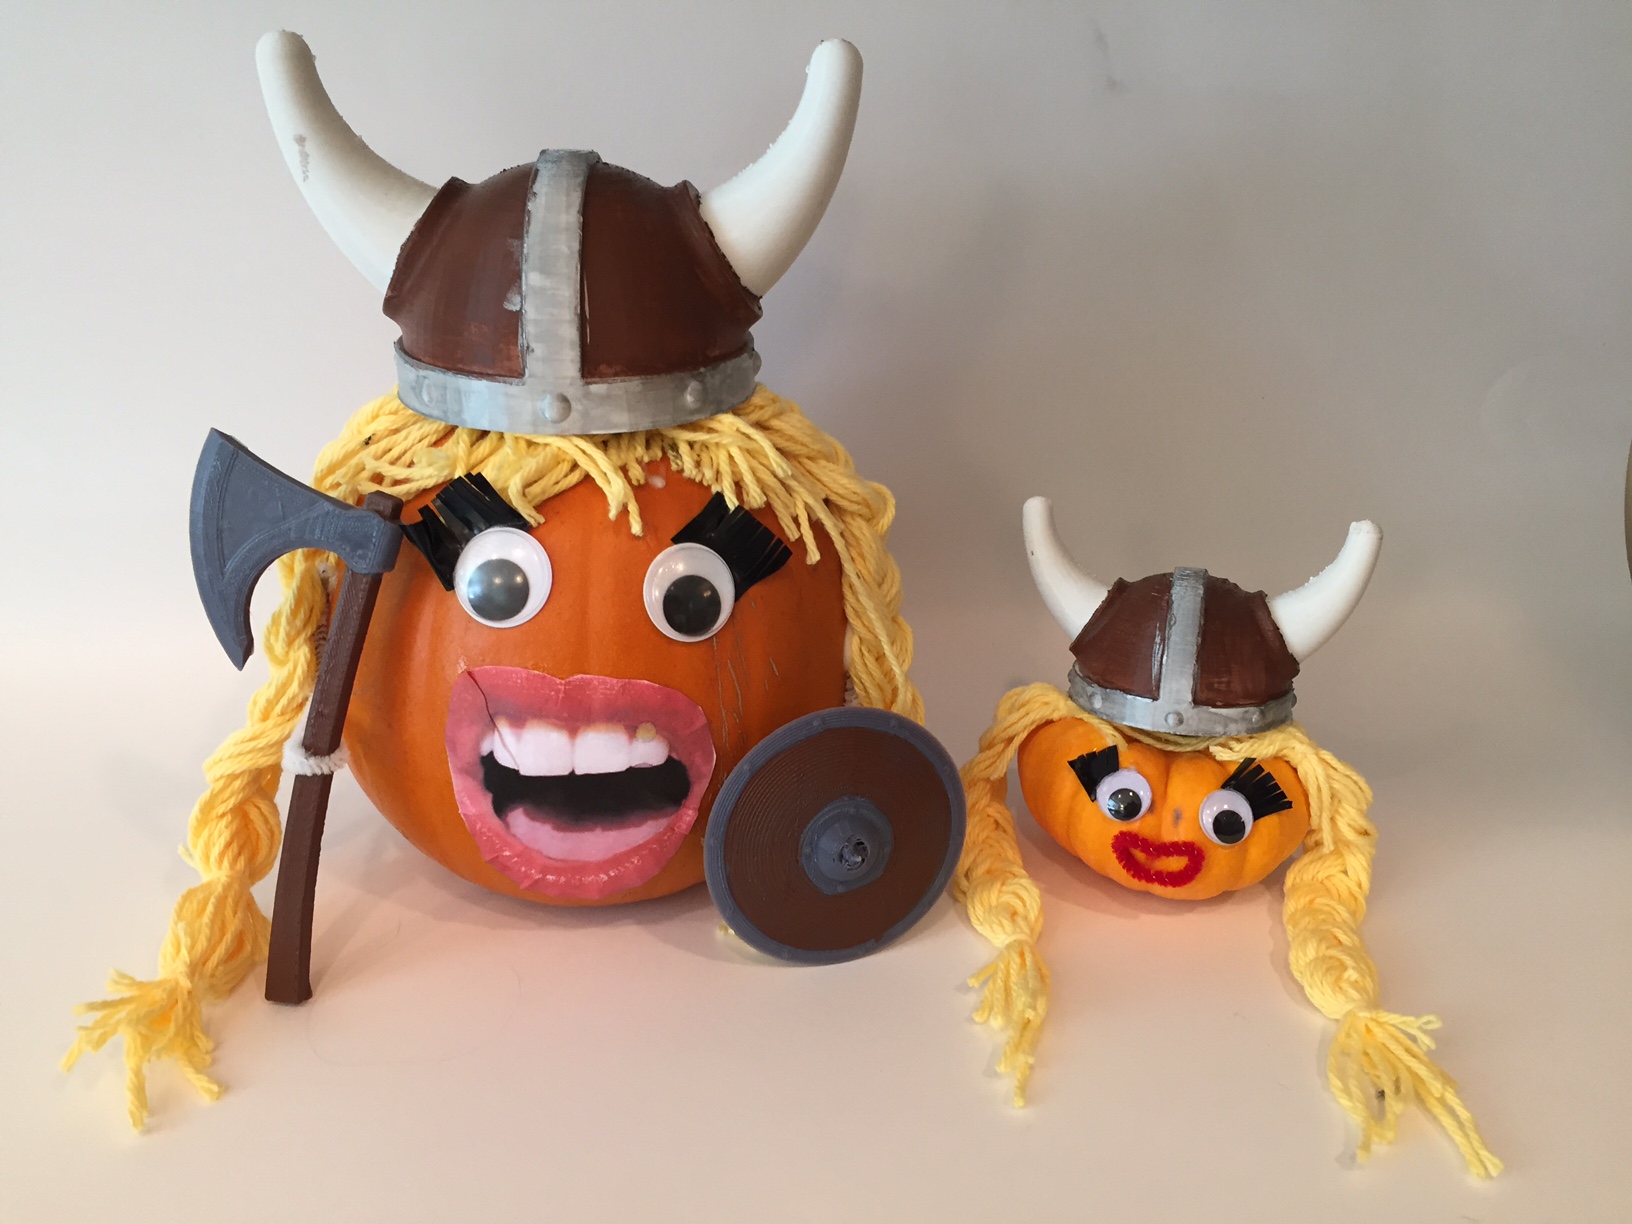
The beauty of 3D printing is the vast array of resources that are available. Sites like Thingiverse, Pinshape and Cubify offer user-uploaded models for just about anything you can imagine. Want to make a Viking jack-o-lantern? Download and print models for a helmet (www.thingiverse.com/thing:685486), battle axe (www.thingiverse.com/thing:685488) and shield (www.thingiverse.com/thing:685478). Add a little paint, googly eyes, pipe clearners and yarn and voila!
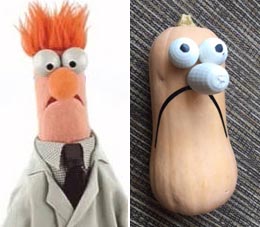
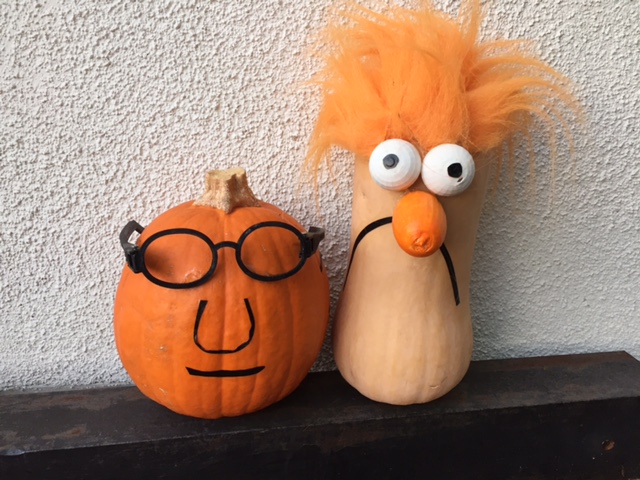
While you can find existing accessories in a costume or craft store, 3D printing your own allows you customize them in a number of ways. Firstly, you can easily scale them to any size that your printer can handle. I made the same viking helmet in two different sizes. Secondly, if you don’t find the item you want, you can design it yourself! I wanted to turn a spaghetti squash into Beaker from the Muppets. All he needed besides the wild hair was round eyes and a long, bulbous nose. With Google Sketchup (free CAD software) and the STL Extension plugin, I was able to create the simple design and export an STL file for the printer.

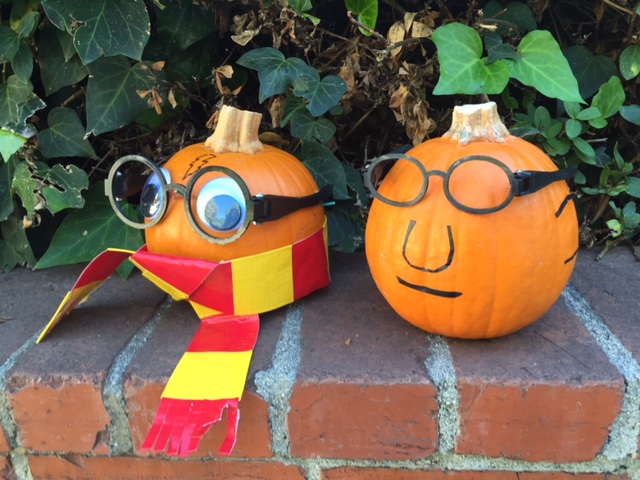
Once printed, the pumpkin accessories can be further modified. These Harry Potter glasses were a great design, but I needed them to wrap around the pumpkin a little better. Soaking the arms of the glasses in very hot (near boiling water) for about 20 seconds allowed me to bend them to the contour of the pumpkin before they hardened again. I also used the same glasses design for a Dr. Bunsen Honeydew pumpkin. His lenses were a bit more oblong than Harry Potter’s, but rather than edit the design, I printed them, then soaked the frame in hot water and squished the lens area just enough to turn them from circles to ovals. Note that I used PLA to print all my accessories. I believe you could do the same thing with ABS, but you might need to let it get a little warmer before it will reshape.
Painting is a great way to add color and detail to the a 3d print. I used a cheap paintbrush and outdoor acrylic paint from Michael’s Crafts for mine. Here is a good article on painting 3D printed models.
The best adhesive I found for attaching PLA to a gourd has been Gem-Tac glue. The smaller parts attached easily. For larger parts, I used painters tape to hold them in place until the glue had a chance to dry – usually after only a few hours. So far all the accessories have held fast to my pumpkins, despite the 90 degree heat-wave we’re having here.
I hope you have as much fun decorating your pumpkins and squashes as I have. 3D printing makes it just that much better. Happy Halloween!
There is a 3D scanned pumkin model available for download at: http://www.neomek.com/pumpkin
The ideas for 3d printing is so fun & a great way to use it!