This post describes how to draw vector and raster images on an Etch a Sketch with EtchABot. As described previously, EtchABot converts an Etch A Sketch to an versatile, easy-build CNC drawing machine.
In image drawing mode, EtchABot receives instructions through the Arduino serial port. When connected to a computer running software that converts images to a series of drawing commands, EtchABot can reproduce vector (SVG) or raster images.
Arduino Firmware:
All software is found on GitHub at https://github.com/geekmomprojects/EtchABot. The library files in the EtchABot directory (EtchABot.cpp, EtchABot.h and keywords.txt) should be placed in a directory named EtchABot with the other Arduino libraries. See https://www.arduino.cc/en/Guide/Libraries if you need guidance installing the library.
The “examples” folder contains a sketch called “EtchABotDriver.ino” which should be opened in the Arduino IDE and downloaded onto the Arduino. This sketch allows the EtchABot to respond to commands through the serial port to draw and erase as well as to report its current settings.
Image Software
The software which translates the images into drawing commands is written with a Node.js server and a JavaScript client running in a web browser. I tried to port the code into Electron to make it a standalone desktop app, but was unable to get Electron to play nicely with the Node serialport package. The image software is still a work in progress, so look for future updates on GitHub.
Image Software Installation
Step 1: Install Node.js and Dependences
Before installing the software, you will need to download and install Node.js from the Node.js downloads page. When Node installs, it comes with a package manager called “npm” which simplifies installing the needed dependencies.
After installing Node, open up a command line prompt (cmd or PowerShell in Windows, Terminal on a Mac, bash in Linux) and navigate to the EtchABot directory named “nodefiles”. Inside this directory is a file named “package.json”. Node will use this file to install all necessary files to run the EtchABot program.
From inside the “nodefiles” directory type:
[code language=”PowerShell”]
npm install
[/code]
and npm will install the necessary dependencies into a folder named node_modules.
Step 2: Start the Node server
Now, to start the Node server running, you must connect your Arduino (with the EtchABotDriver.ino sketch already installed) to a serial port. Be sure you know the name of the serial port (one way is to open the Arduino IDE and look at Tools→Port). Then, from inside the “nodefiles” directory type “npm start — portname” . E.g. if your serial port is COM5, type:
[code language=”PowerShell”]
npm start — COM5
[/code]
A web server will start running on port 8000, and if all goes well, you should see output like that below. If you would rather use a different server port, you can change that in the file “EtchABot/nodefiles/server/server.js”. Just search for the number 8000 and change it to something different.

Step 3: Start the client
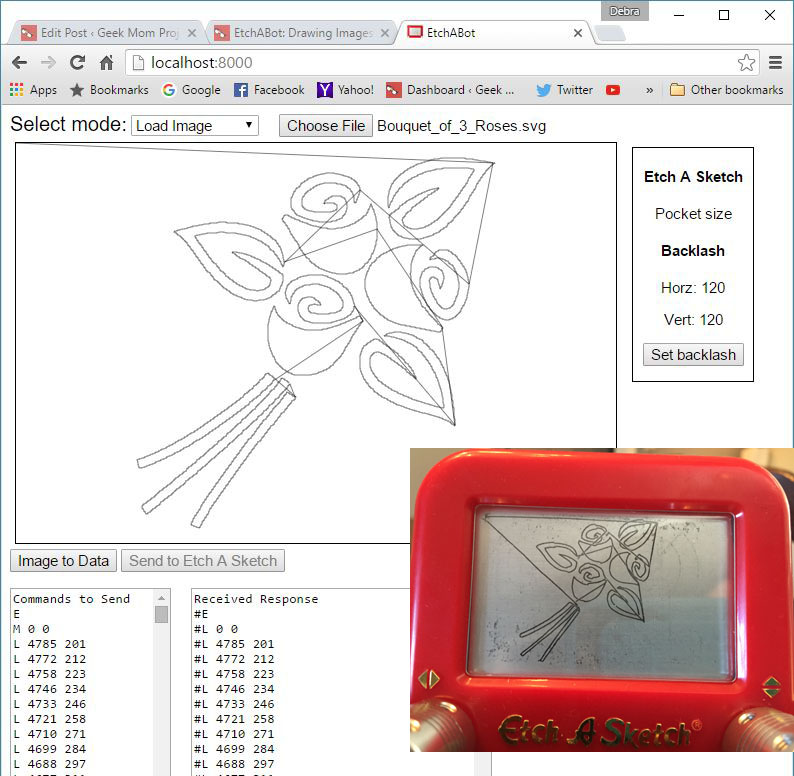
Now open a browser window and type “localhost: 8000” as the URL. You should see a web page that looks something like this (minus the red arrows and text):
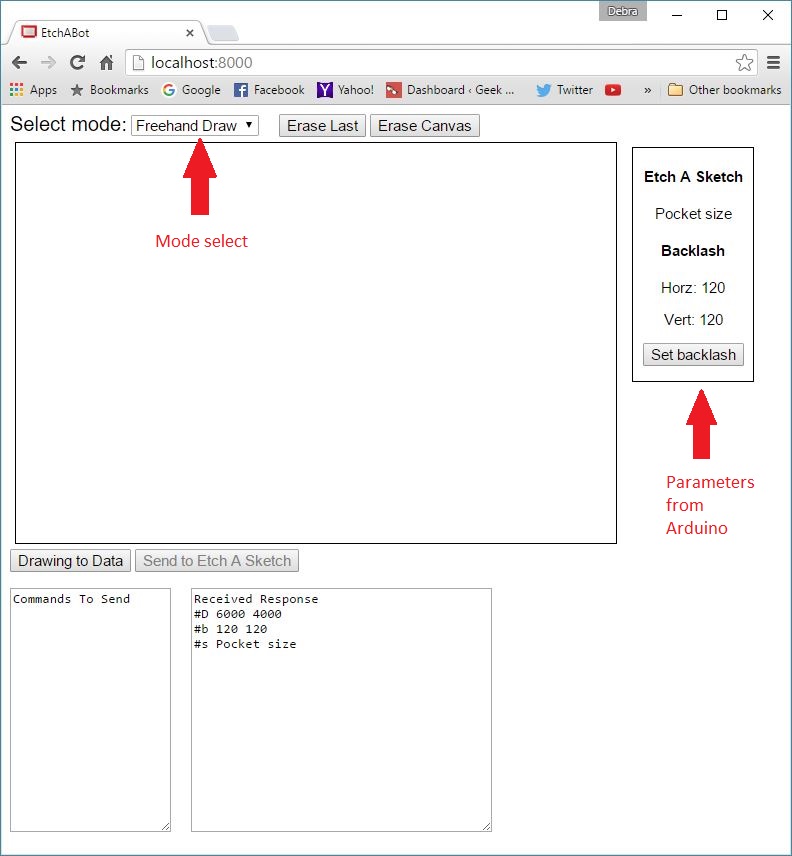
The outlined box at the right side of the screen (second red arrow above) shows information from the EtchABot. When the client starts up, it polls the EtchABot asking for its size (Pocket or Travel) and its backlash settings (I discuss Etch A Sketch backlash in the previous blog post). If the settings are not showing correctly, try reloading the page. You can change the current backlash settings by clicking the “Set backlash” button. This change won’t be permanent – the backlash correction will reset to the default every time you restart the Arduino. If you want to change the default backlash settings permanently, you will have to edit them in the Arduino EtchABot library before downloading the EtchABotDriver.ino sketch to the Arduino.
The dropdown menu (first red arrow above) lets you select whether the program runs in Free Draw mode (user draws the input) or in Image mode which allows you to upload a vector or raster image.
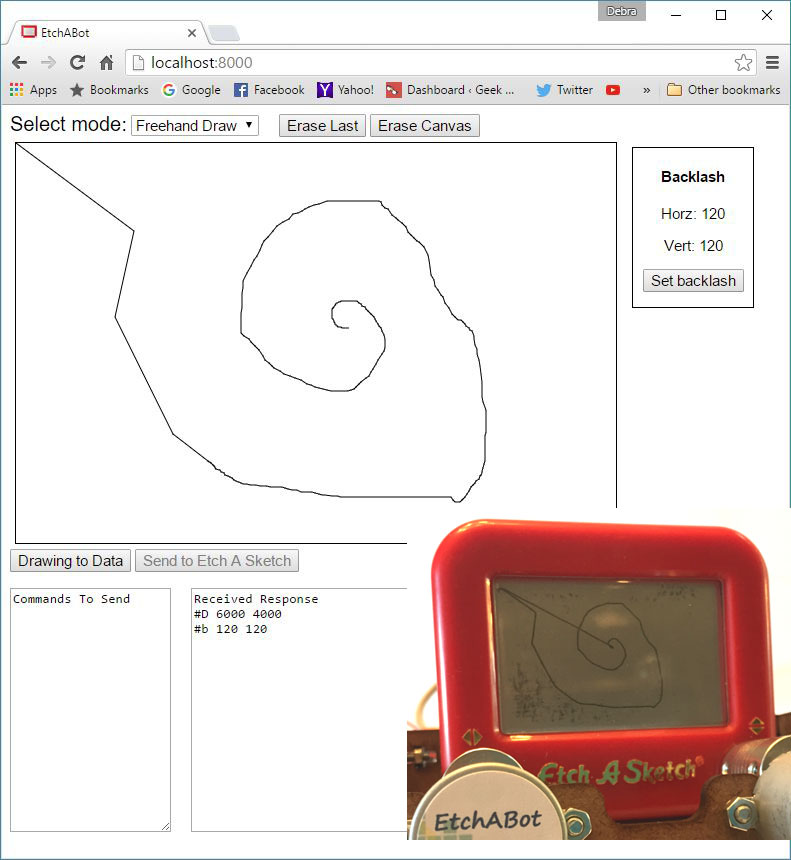
Free Draw mode is pretty straightforward. Use the mouse to draw a pattern in the large box. When done, click the “Image to Data” button to convert the image into a series of drawing commands. Then click “Send to Etch A Sketch” to start the drawing. EtchABot will erase itself, then reproduce the drawing in the Etch A Sketch. EtchABot will always return the cursor to the origin (upper left corner) after finishing, so the final Etch A Sketch drawing will show an additional line to the origin.
Using Image mode is straightforward as well, but you will will need to do some pre-processing of most images to get them to turn out nicely on the Etch A Sketch screen. Vector and raster images each work a little differently.
Vector Images:

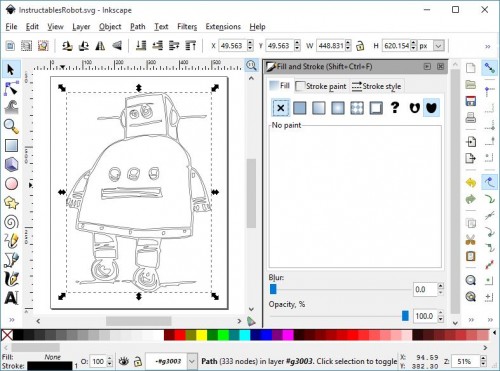
Vector images look better and draw far more quickly with the Etch A Sketch drawing mechanism than raster images. EtchABot can take SVG (Scalable Vector Graphics) image files if they are formatted in a certain way. They must consist of only paths that are not grouped. Additionally, objects to be drawn should have stroke (outline), but no fill. If you have an existing SVG, the easiest way to put it into the right form is to use a vector file editing program like Inkscape (freeware), followed by a program to remove extra elements from the SVG, like SVG Cleaner.
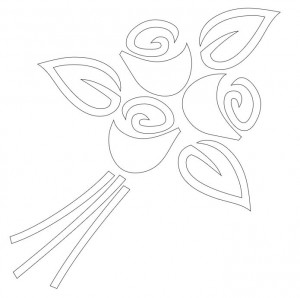
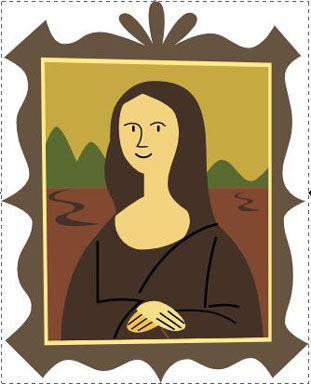
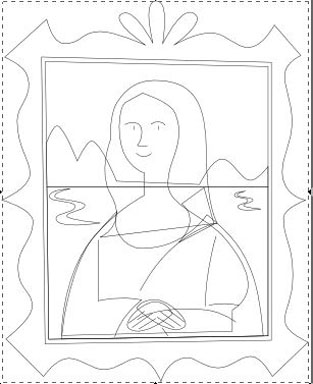
Some SVG files may not be adaptable to EtchABot. For example, if the SVG has hidden lines, behind overlapping shapes, these lines will become visible when the fill is removed. Also, since the EtchABot can’t lift the stylus, it will draw lines between the various paths in the picture. If the paths are not ordered well, or are far apart, you will end up with lots of lines criss-crossing your picture. See below for examples:
Here are some basic steps to follow to prepare the SVG before drawing it with EtchABot.
First use Inkscape:
- Open the SVG in Inkscape. Select the whole image, and select “Object→Fill and Stroke” from the menubar. In the dialog box that opens, first click on the “fill”tab and click the “x” to remove all fill from the SVG.
- Then select the “Stroke paint” tab in the same dialog box. Select “Flat color”, which is the first square next to the “x”. Set the color RGBA values to “0 0 0 255” for opaque black.
- Next select the “Stroke style” tab in the same dialog box. Set the stroke width to 1 pixel. Then close the Fill and Stroke dialog box.
- Be sure the entire image is still selected, then choose “Object→Ungroup” from the menubar.
- While the entire image is still selected, choose “Path→Object to Path” from the menubar.
- If you would like to remove excess white space from , or add padding to the edges of the SVG, select “File→Document Properties” from the menubar. In the Document Properties dialog box, click “Resize page to content”. You can assign left, right, top and bottom margins around the image here. I usually choose margins of about 5% of the image size. Once you’ve selected margin values, click the “Resize page to drawing or selection” button.
- Save the image. The default format will be an SVG file.
Once you are done with Inkscape, you can streamline the SVG with SVG Cleaner or SVGO to get rid of unnecessary text that may confuse the EtchABot SVG parser. I won’t go into details of how to use these programs, but SVG Cleaner is fairly straightfoward the SVGO link contains a lot of explanation on how to use it.
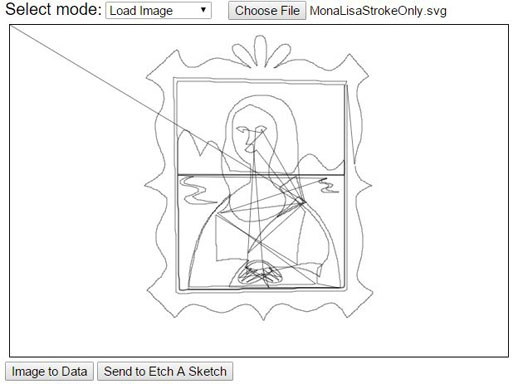
Now that the SVG is ready, be sure the EtchABot software is in Image mode, click the “Load Image” button, and upload the SVG file. Select the “Image to Data” button. If the SVG is complicated, this may take a while – I mean a really, really long while, like a minute or two. I intend to put a progress bar into the program while the SVG is getting converted to coordinates, but haven’t had a chance yet.
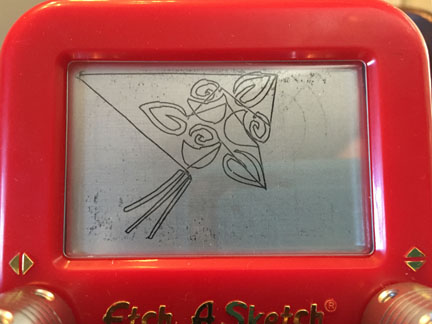
When it is done converting the SVG to coordinates, the EtchABot software will draw the SVG as it appears, but with additional lines connecting the different paths – as it will appear on the Etch A Sketch. Be sure the EtchABot motors have power (the switch is on), and select “Send to Etch A Sketch” when you are ready to start drawing. The EtchABot will first erase, then begin drawing the SVG file. The stylus will return to the origin when the drawing is finished.
Raster Images:
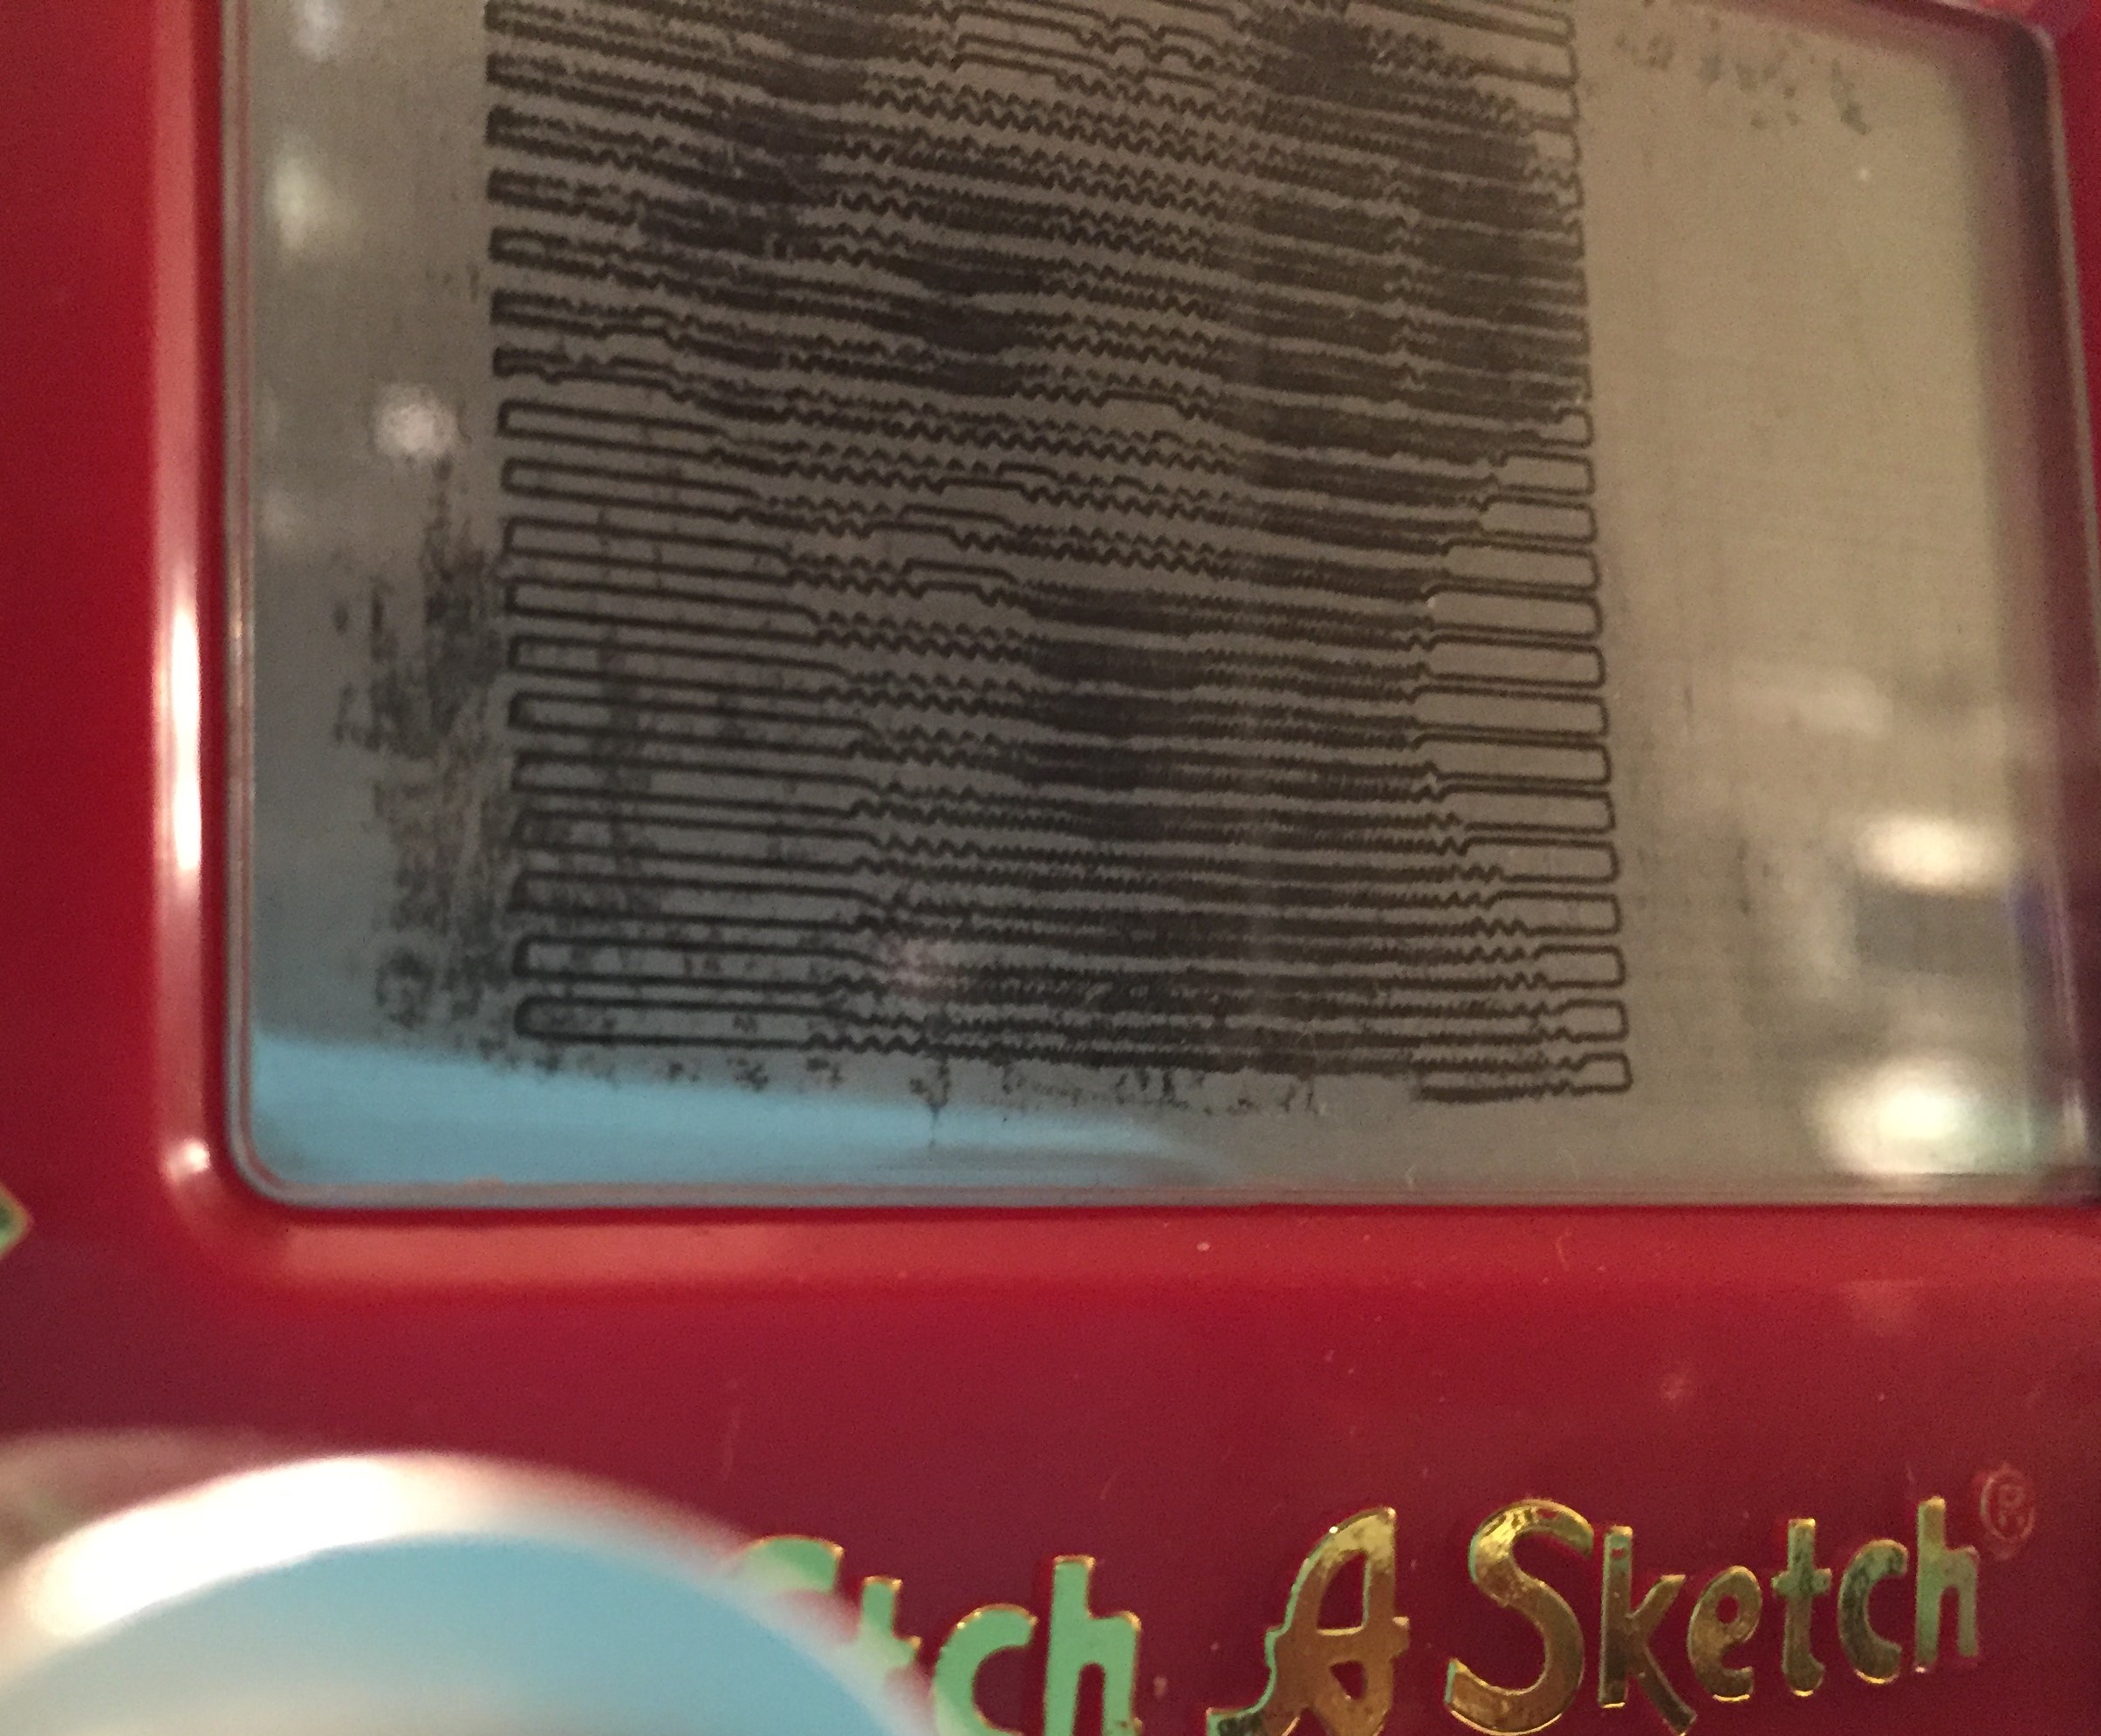
An Etch A Sketch is much better suited to draw vector images than raster images, however the EtchABot software does have the ability to render raster images by shading different parts of the Etch A Sketch with different density of lines. EtchABot converts a raster image to a usable format by scaling down the resolution to no more than 48 pixels on a side and converting the image to gray scale. When rendering a raster image, Etch A Bot runs the stylus back and forth across the Etch A Sketch screen, creating vertical jitters at each dark pixel. The darker the pixel, the larger and denser the jitters are. EtchABot can only really render about 6 visible shades of gray at this resolution. Images that work best consist of simple, large shapes with sharp contrasts. Any fine detail will be lost.
Because many tiny vertical lines are used to construct the image, it is important to use good values for the backlash calibration. See the original EtchABot post for calibrating backlash for each Etch A Sketch.
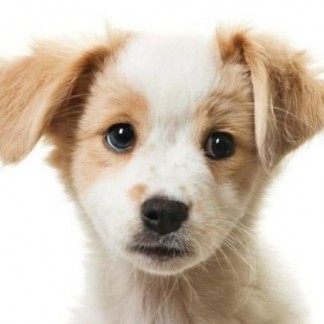
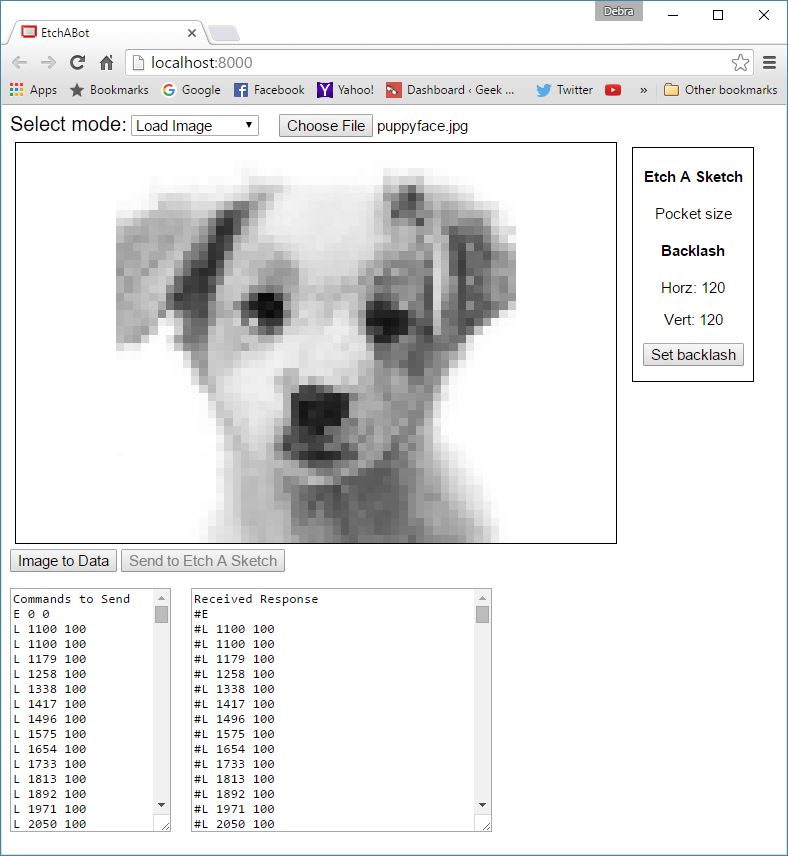
To draw a raster image with EtchABot, make sure the EtchABot software is in Image mode. Click “Load Image”, and pick a raster image to load. Select the “Image to Data” button, and the image will be transformed in to low resolution gray scale. If the image isn’t clear on the screen, then it will look even worse on the Etch A Sketch. The best raster images for EtchABot are simple and high contrast.
When you are ready to draw the image, select the “Send to Etch A Sketch” button, and the EtchABot will erase itself, then start to draw the image. It scans back and forth along the screen drawing one pixel at a time. Depending on the color of the pixel, it will have a number of vertical “jitters”. The darker the pixel, the more jitters it will have and the taller the jitters will be. Because of this, darker images will take longer to draw than lighter ones. Raster images take a long while to draw in any case. The image above took over an hour.
That’s all for now on the EtchABot. I have some kits for the Pocket Size EtchABot on sale at tindie: https://www.tindie.com/products/geekmomprojects/etchabot/. If you do decide to make your own – either with a kit or on your own, please let me know how it turns out!

How can add z axis. I Want to make a pen plotter.can you please help me?