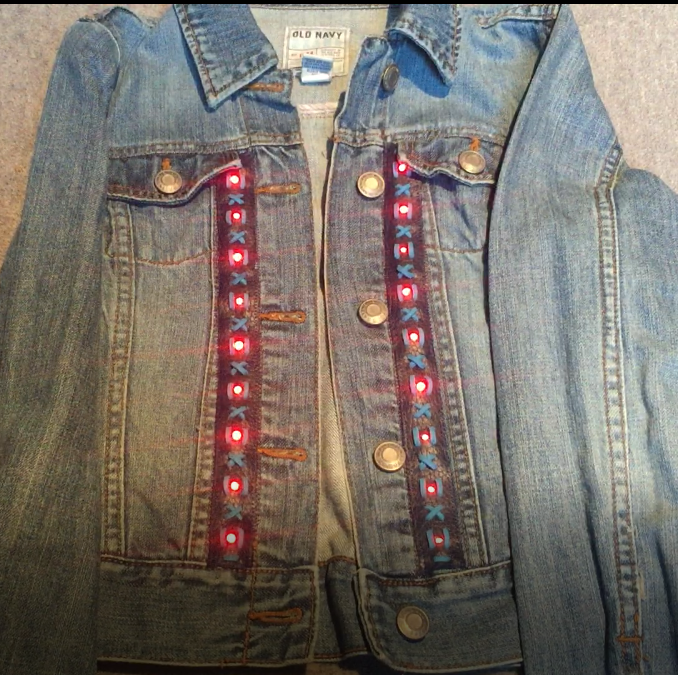
I love embedding LEDs in wearable projects, but prefer the wiring and electronics to be hidden. In this post, I’ll show a technique I’ve found useful in sewing LED strings into clothing and accessories. It lets the light shine through, but hides the wires and PCBs. This technique uses ultra suede cord to lace the LED string to a strip of vinyl fabric, which contains holes that allow the LEDs to shine through. Once attached, it is straightforward to sew the vinyl strip onto wearable projects. Thus far I’ve used this technique to make LED jackets and handbags, and in this post, I’ll use it to make an LED baseball hat.
Tools:
- Vinyl cutter to cut out the hole pattern (I have a Cricut Maker). It is also possible to use a leather punch or hole punch and awl instead.
- Plastic needle
- Sewing machine or standard needle and thread
- Soldering iron/solder
Components:
- Vinyl Fabric that works in a vinyl cutting machine (leather would work too). Cricut’s branded faux leather works well, and I’ve found suitable vinyl in home furnishing fabric stores.
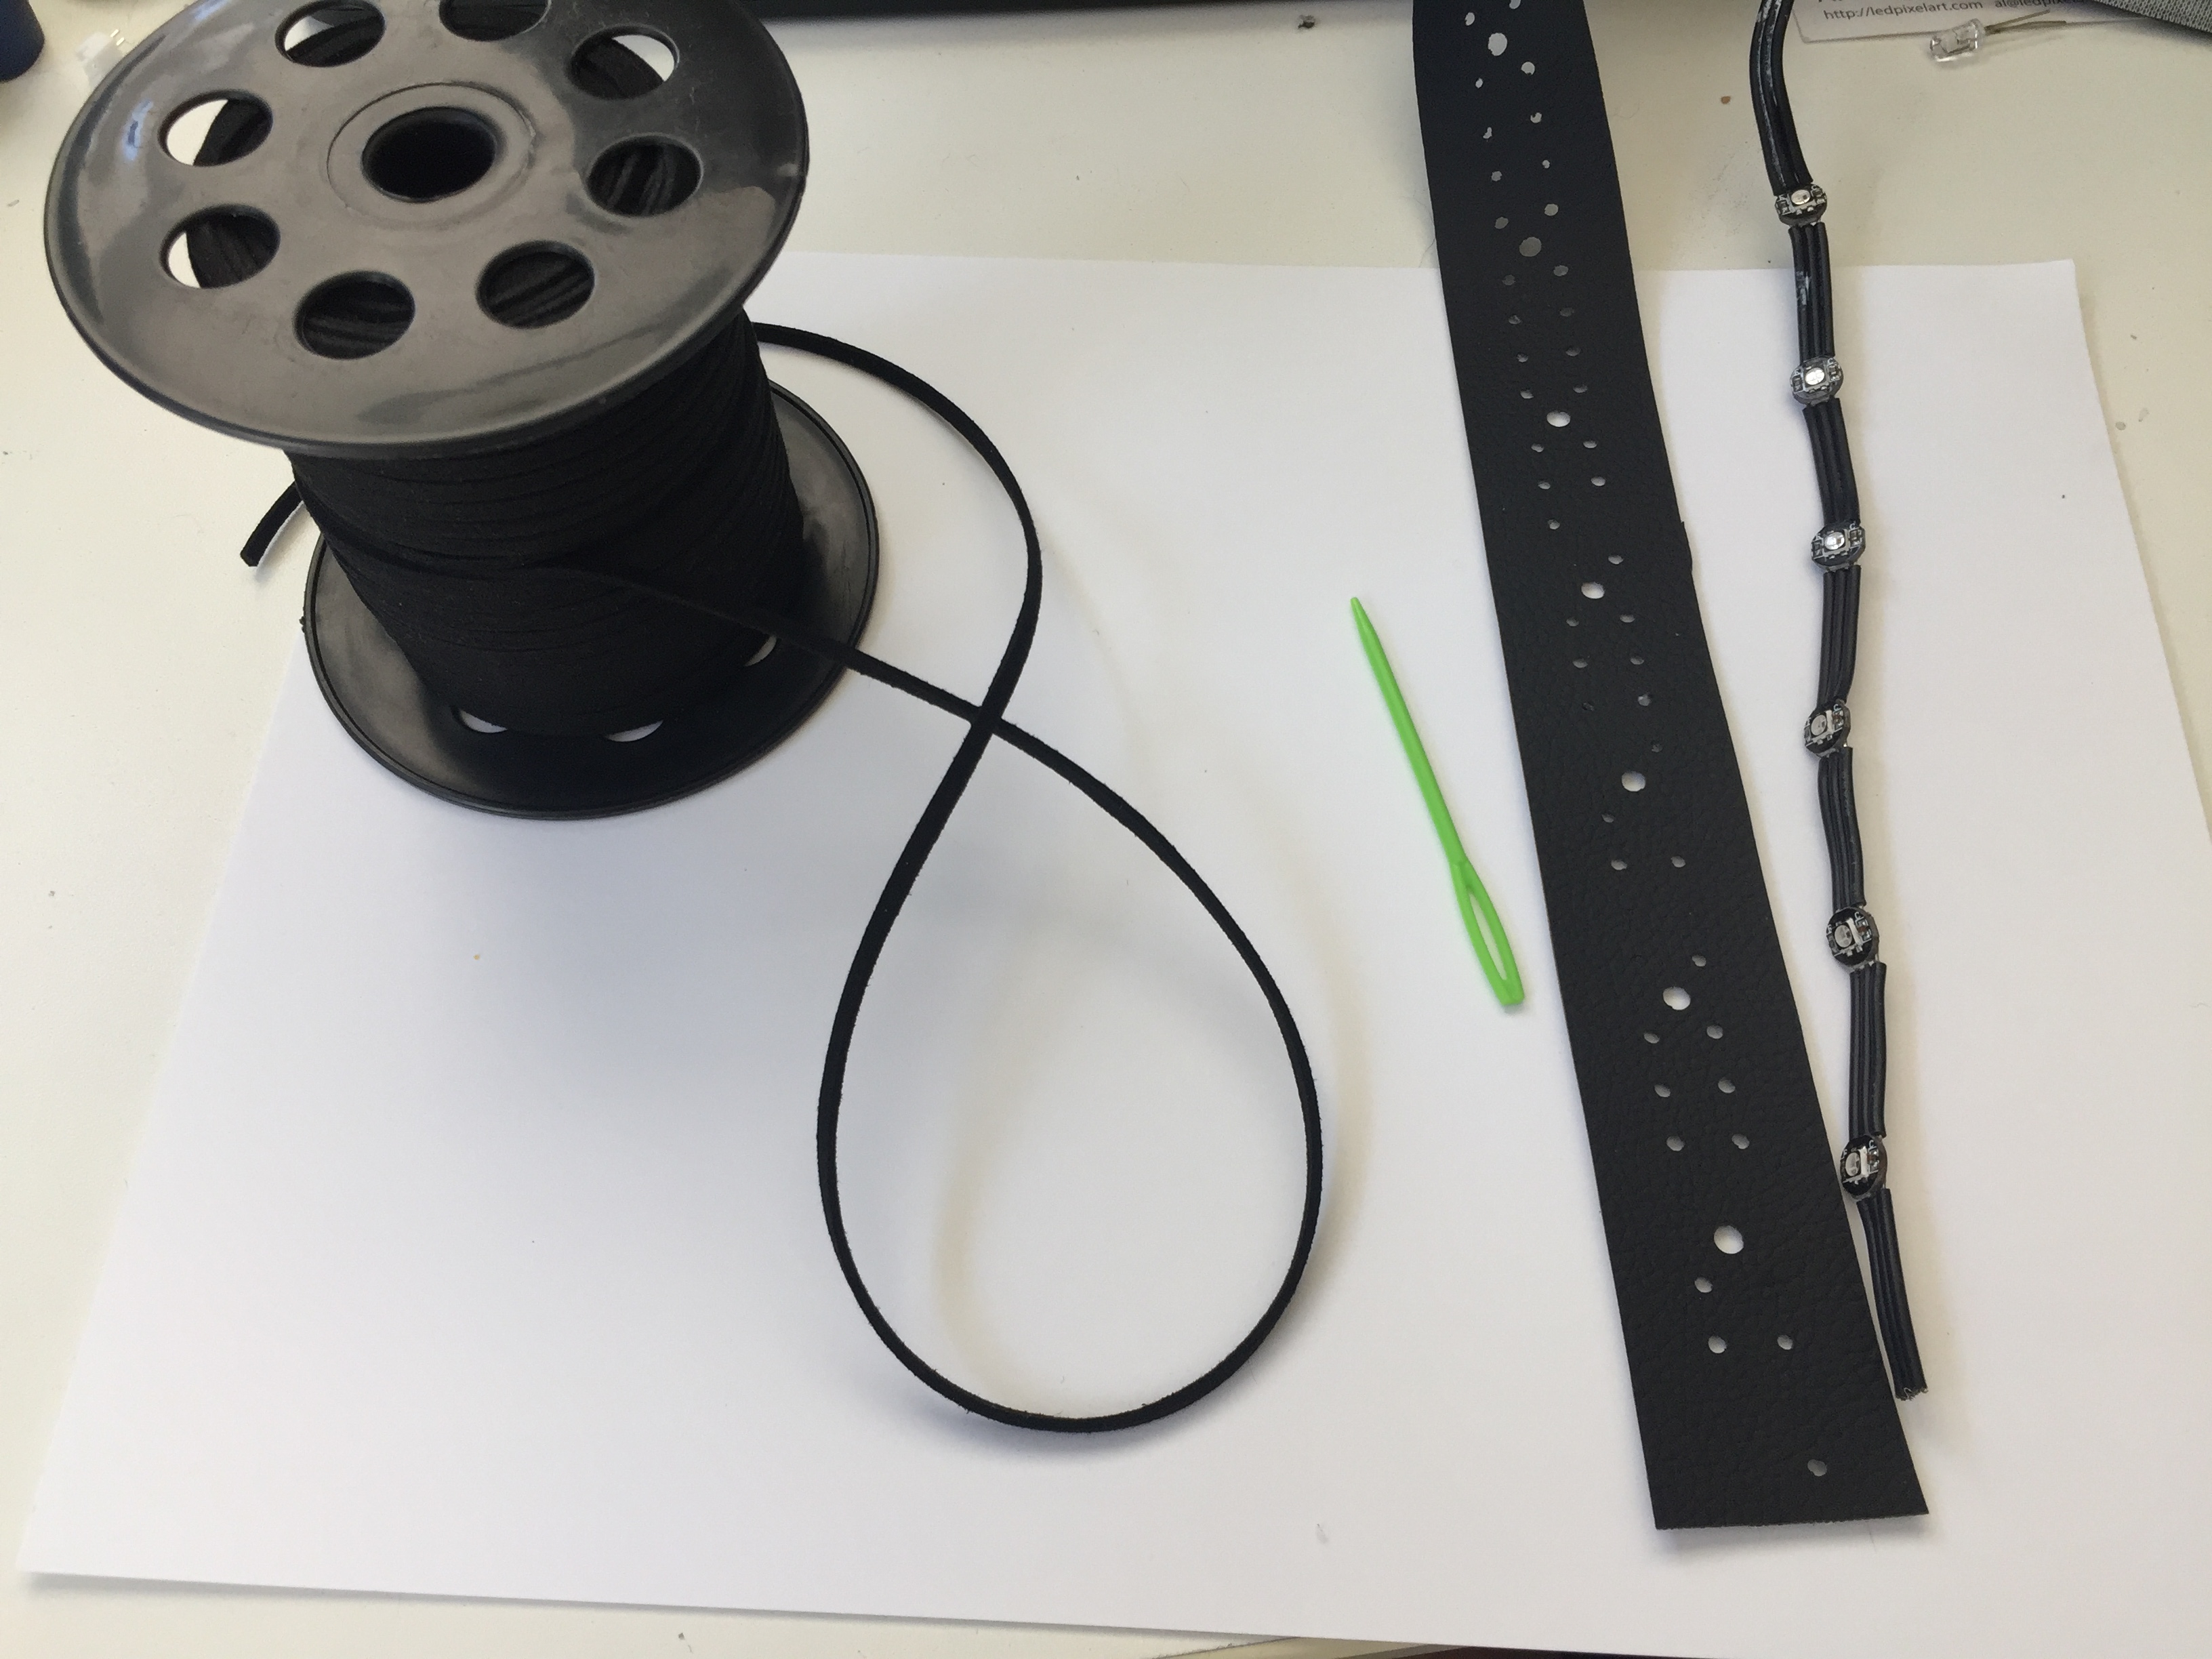
- 3mm faux suede cord
- pre-soldered LED string (this one has small 3535 SK6812 LED’s with 3cm spacing) An LED string is different from the ubiquitous LED strips found everywhere. The string has the LEDs mounted on tiny PCBs connected by flexible wires. LED strings tend to be more flexible than LED strips.
- Trinket M0, Gemma M0, or other micro controller of your choice to create LED patterns
- Power supply for LEDs and microcontroller
- Wire/connectors
Instructions:
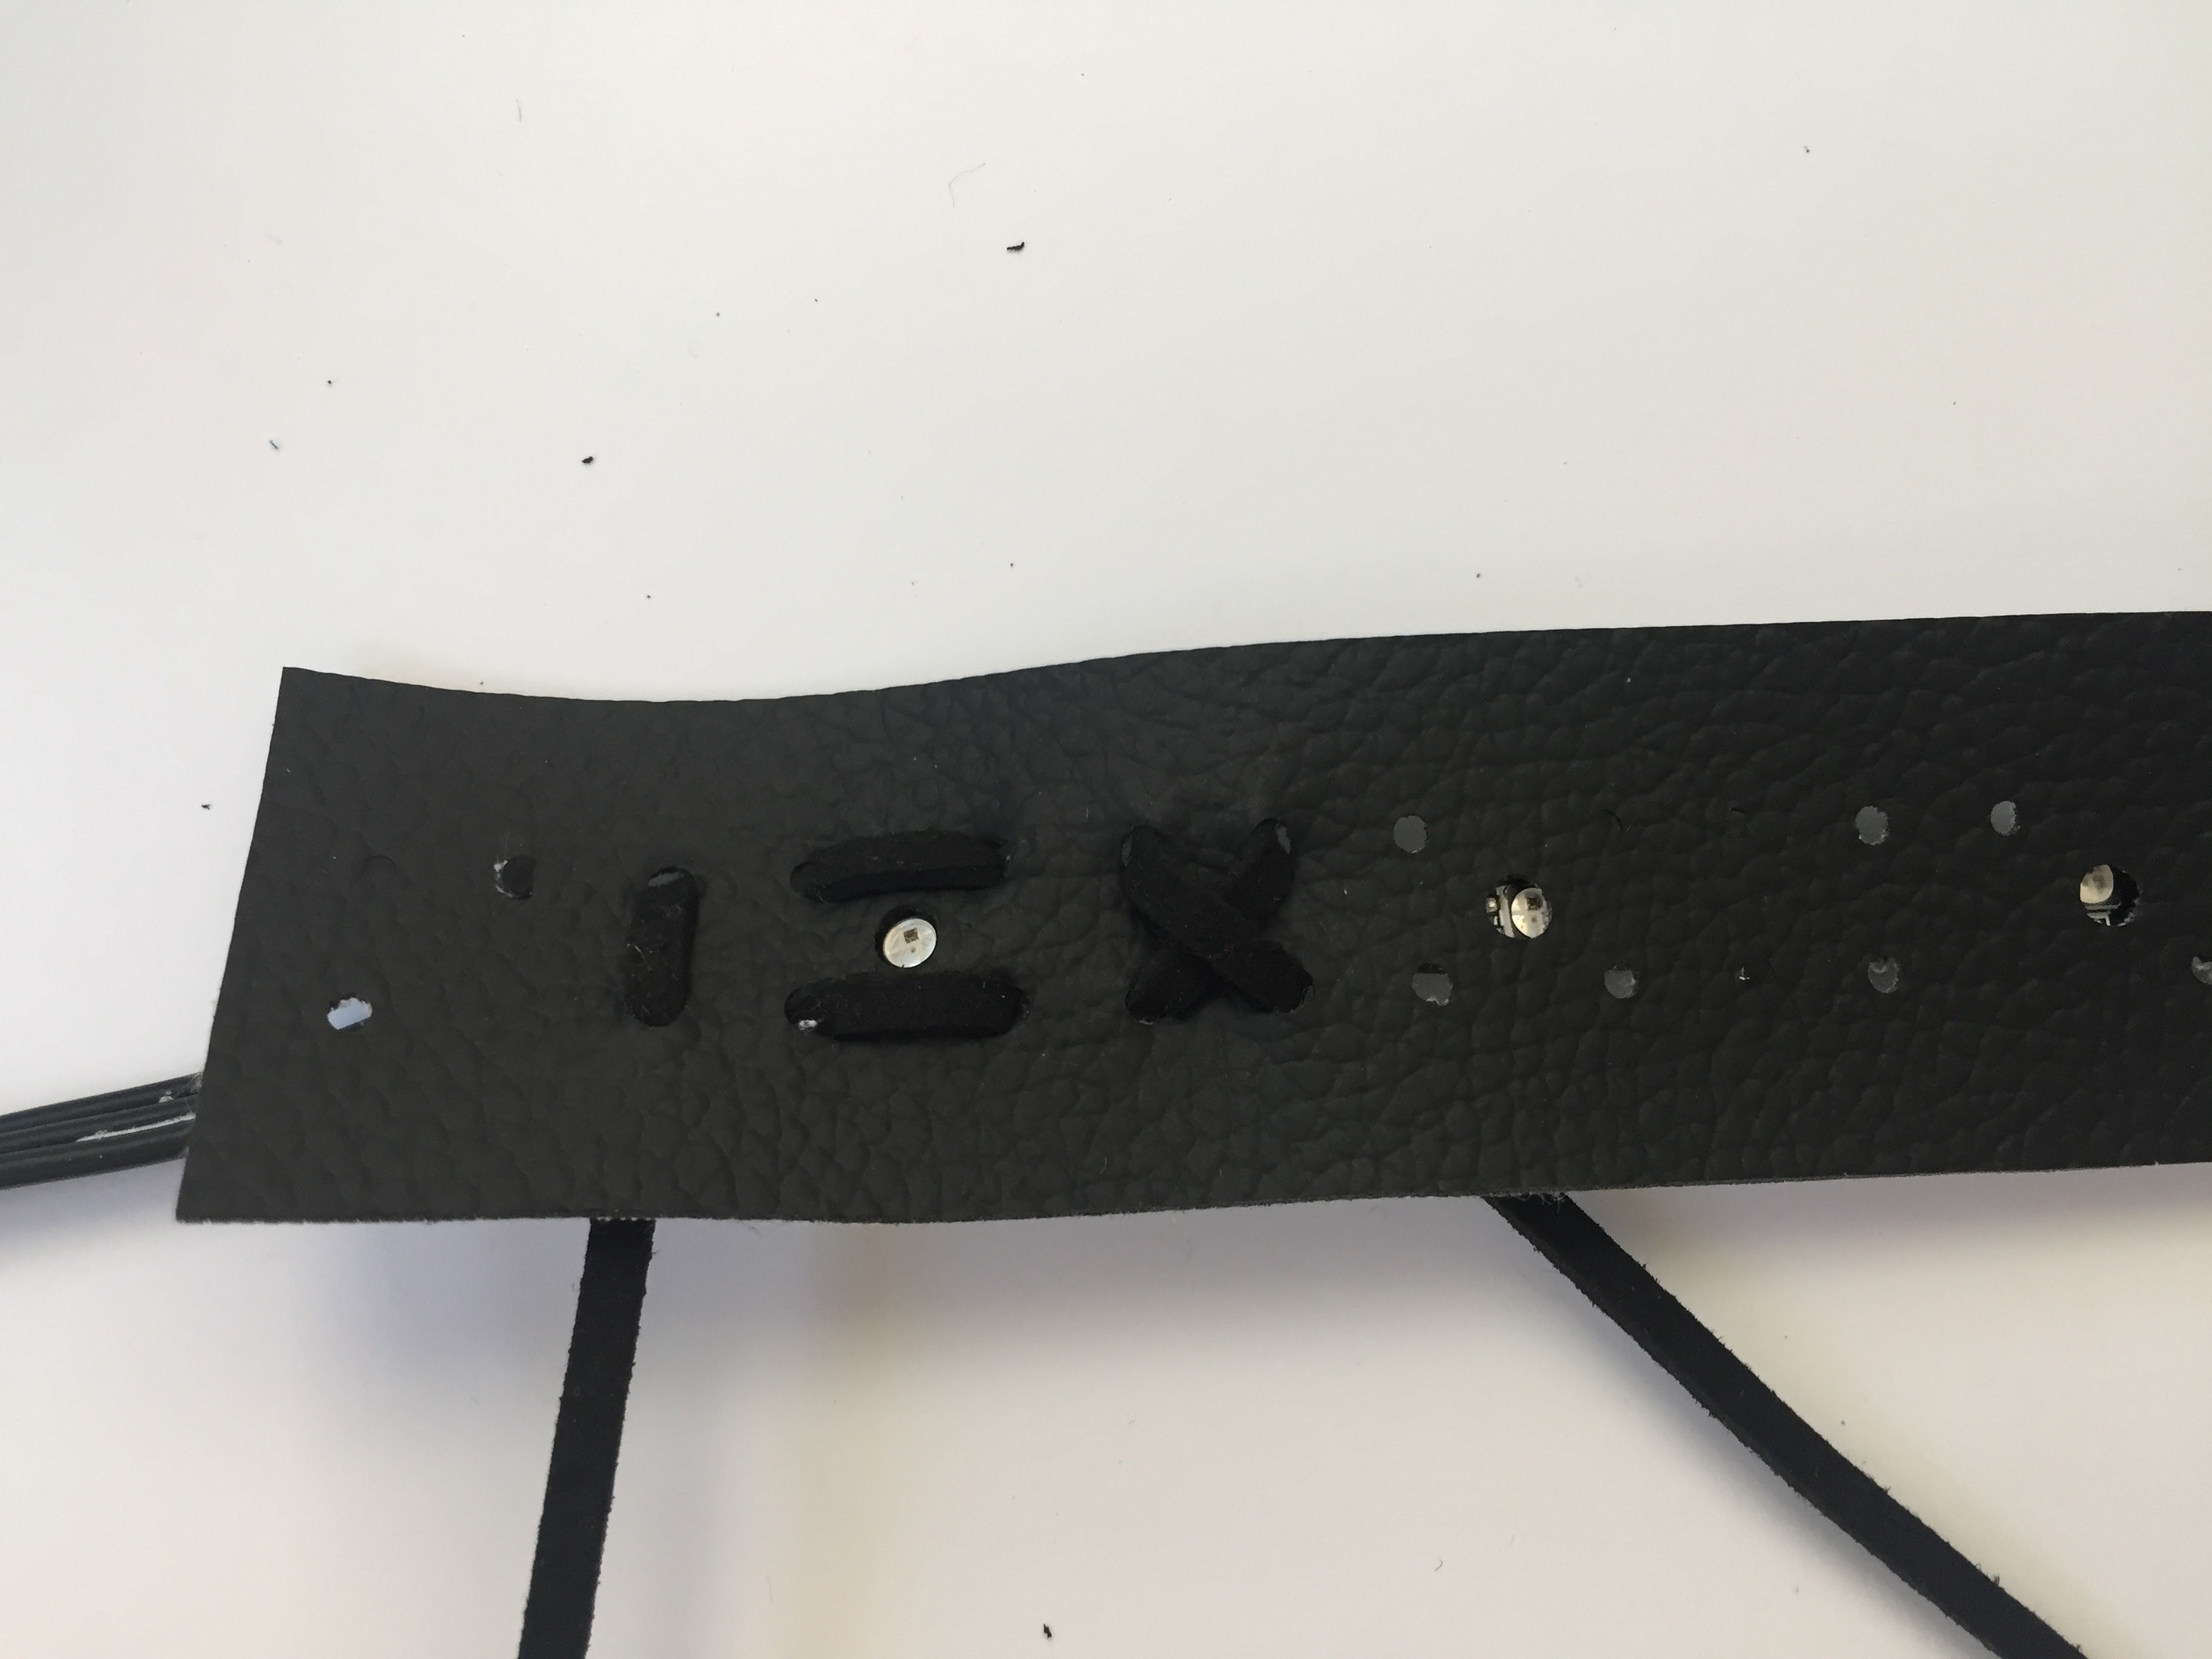
First, we’ll cut a strip of vinyl to hold the LED string. Measure the size and spacing of the LEDs in your string. This will help determine the pattern of holes to cut into the vinyl. My LED string has small SK6812 3535 LEDs at 3cm intervals. I’ve found that a 4mm diameter aperture allows the LED to shine brightly through the vinyl while still hiding the electronics. The holes for lacing are 2.7mm in diameter.

Below is the pattern for the strip I used. If your LED string is different, you will have to adapt the pattern so that the holes for the LEDs are in the correct place. The larger holes in the center are 4mm in diameter align with the LEDs, and the side holes (2.7 mm diameter) allow a cord, which will hold the string in place, to be laced through the vinyl.

If you have a vinyl cutter, you can save the image above (It’s an SVG) and import it into your vinyl cutter’s software to cut vinyl strips for your project. Otherwise, you can print it out (using this PDF VinylStripPattern ) to use it as a template to punch hoes in your vinyl with a hole punch (for the larger holes) and awl (for the side holes).
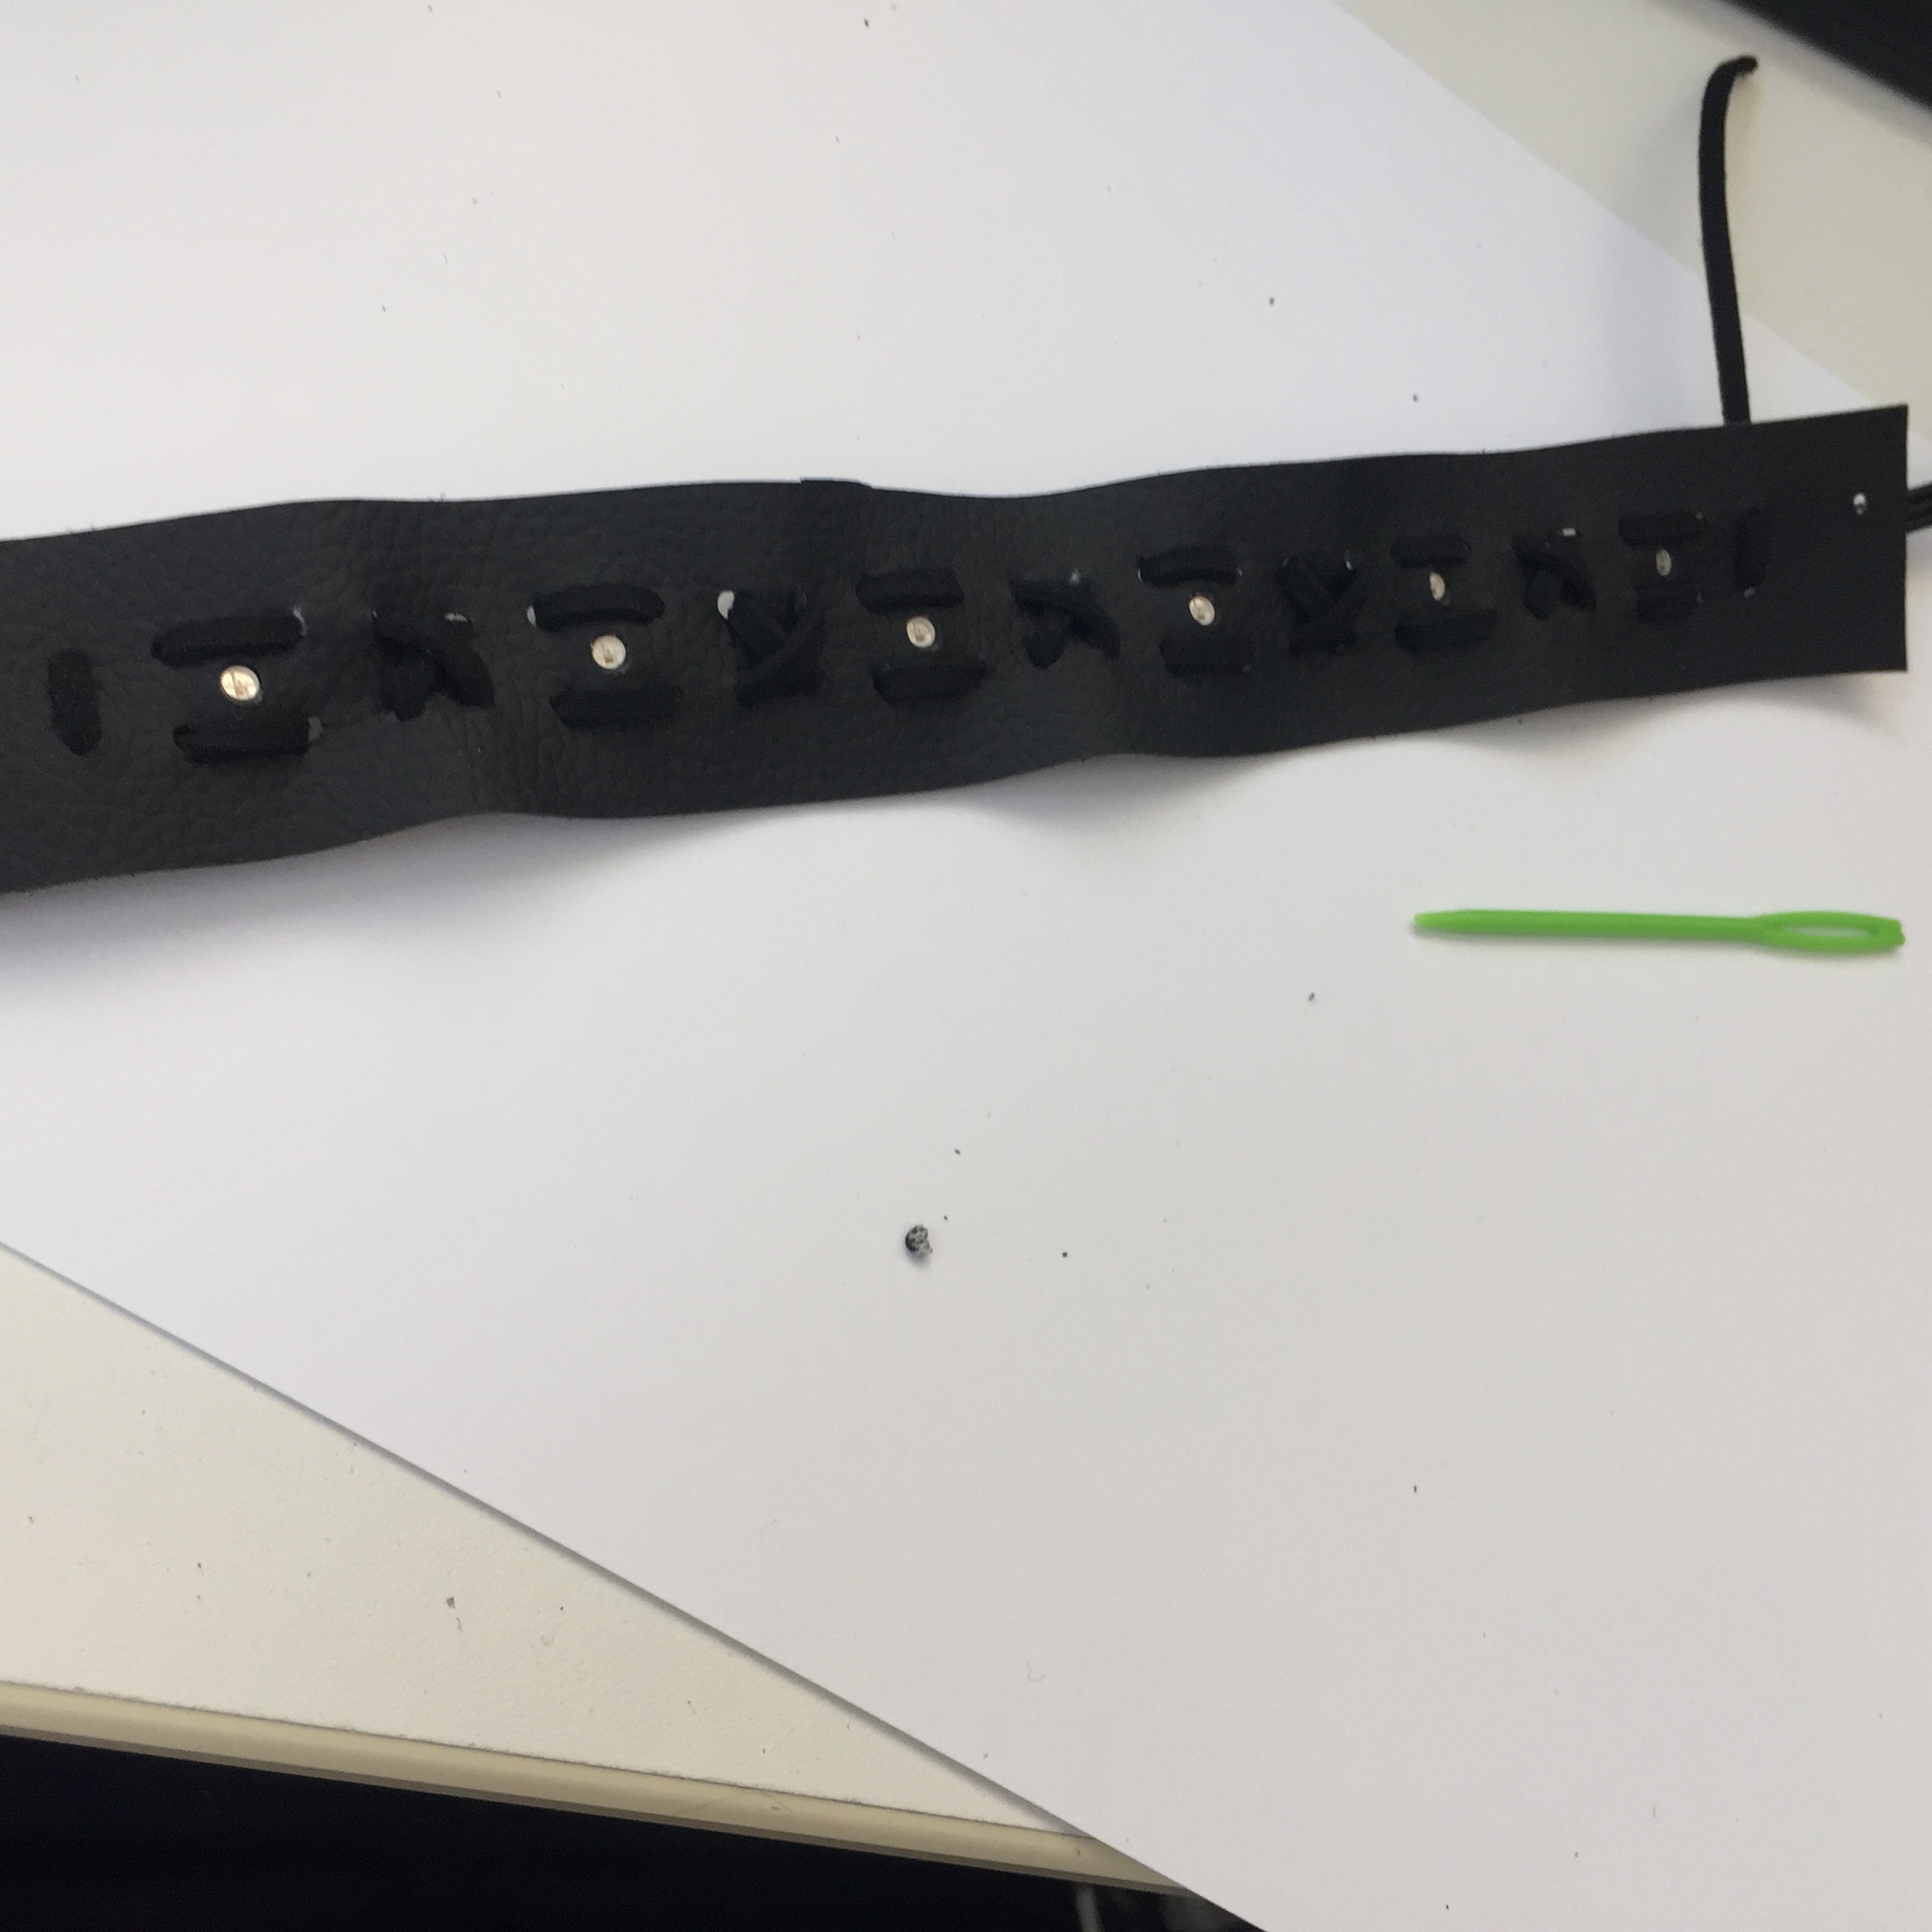
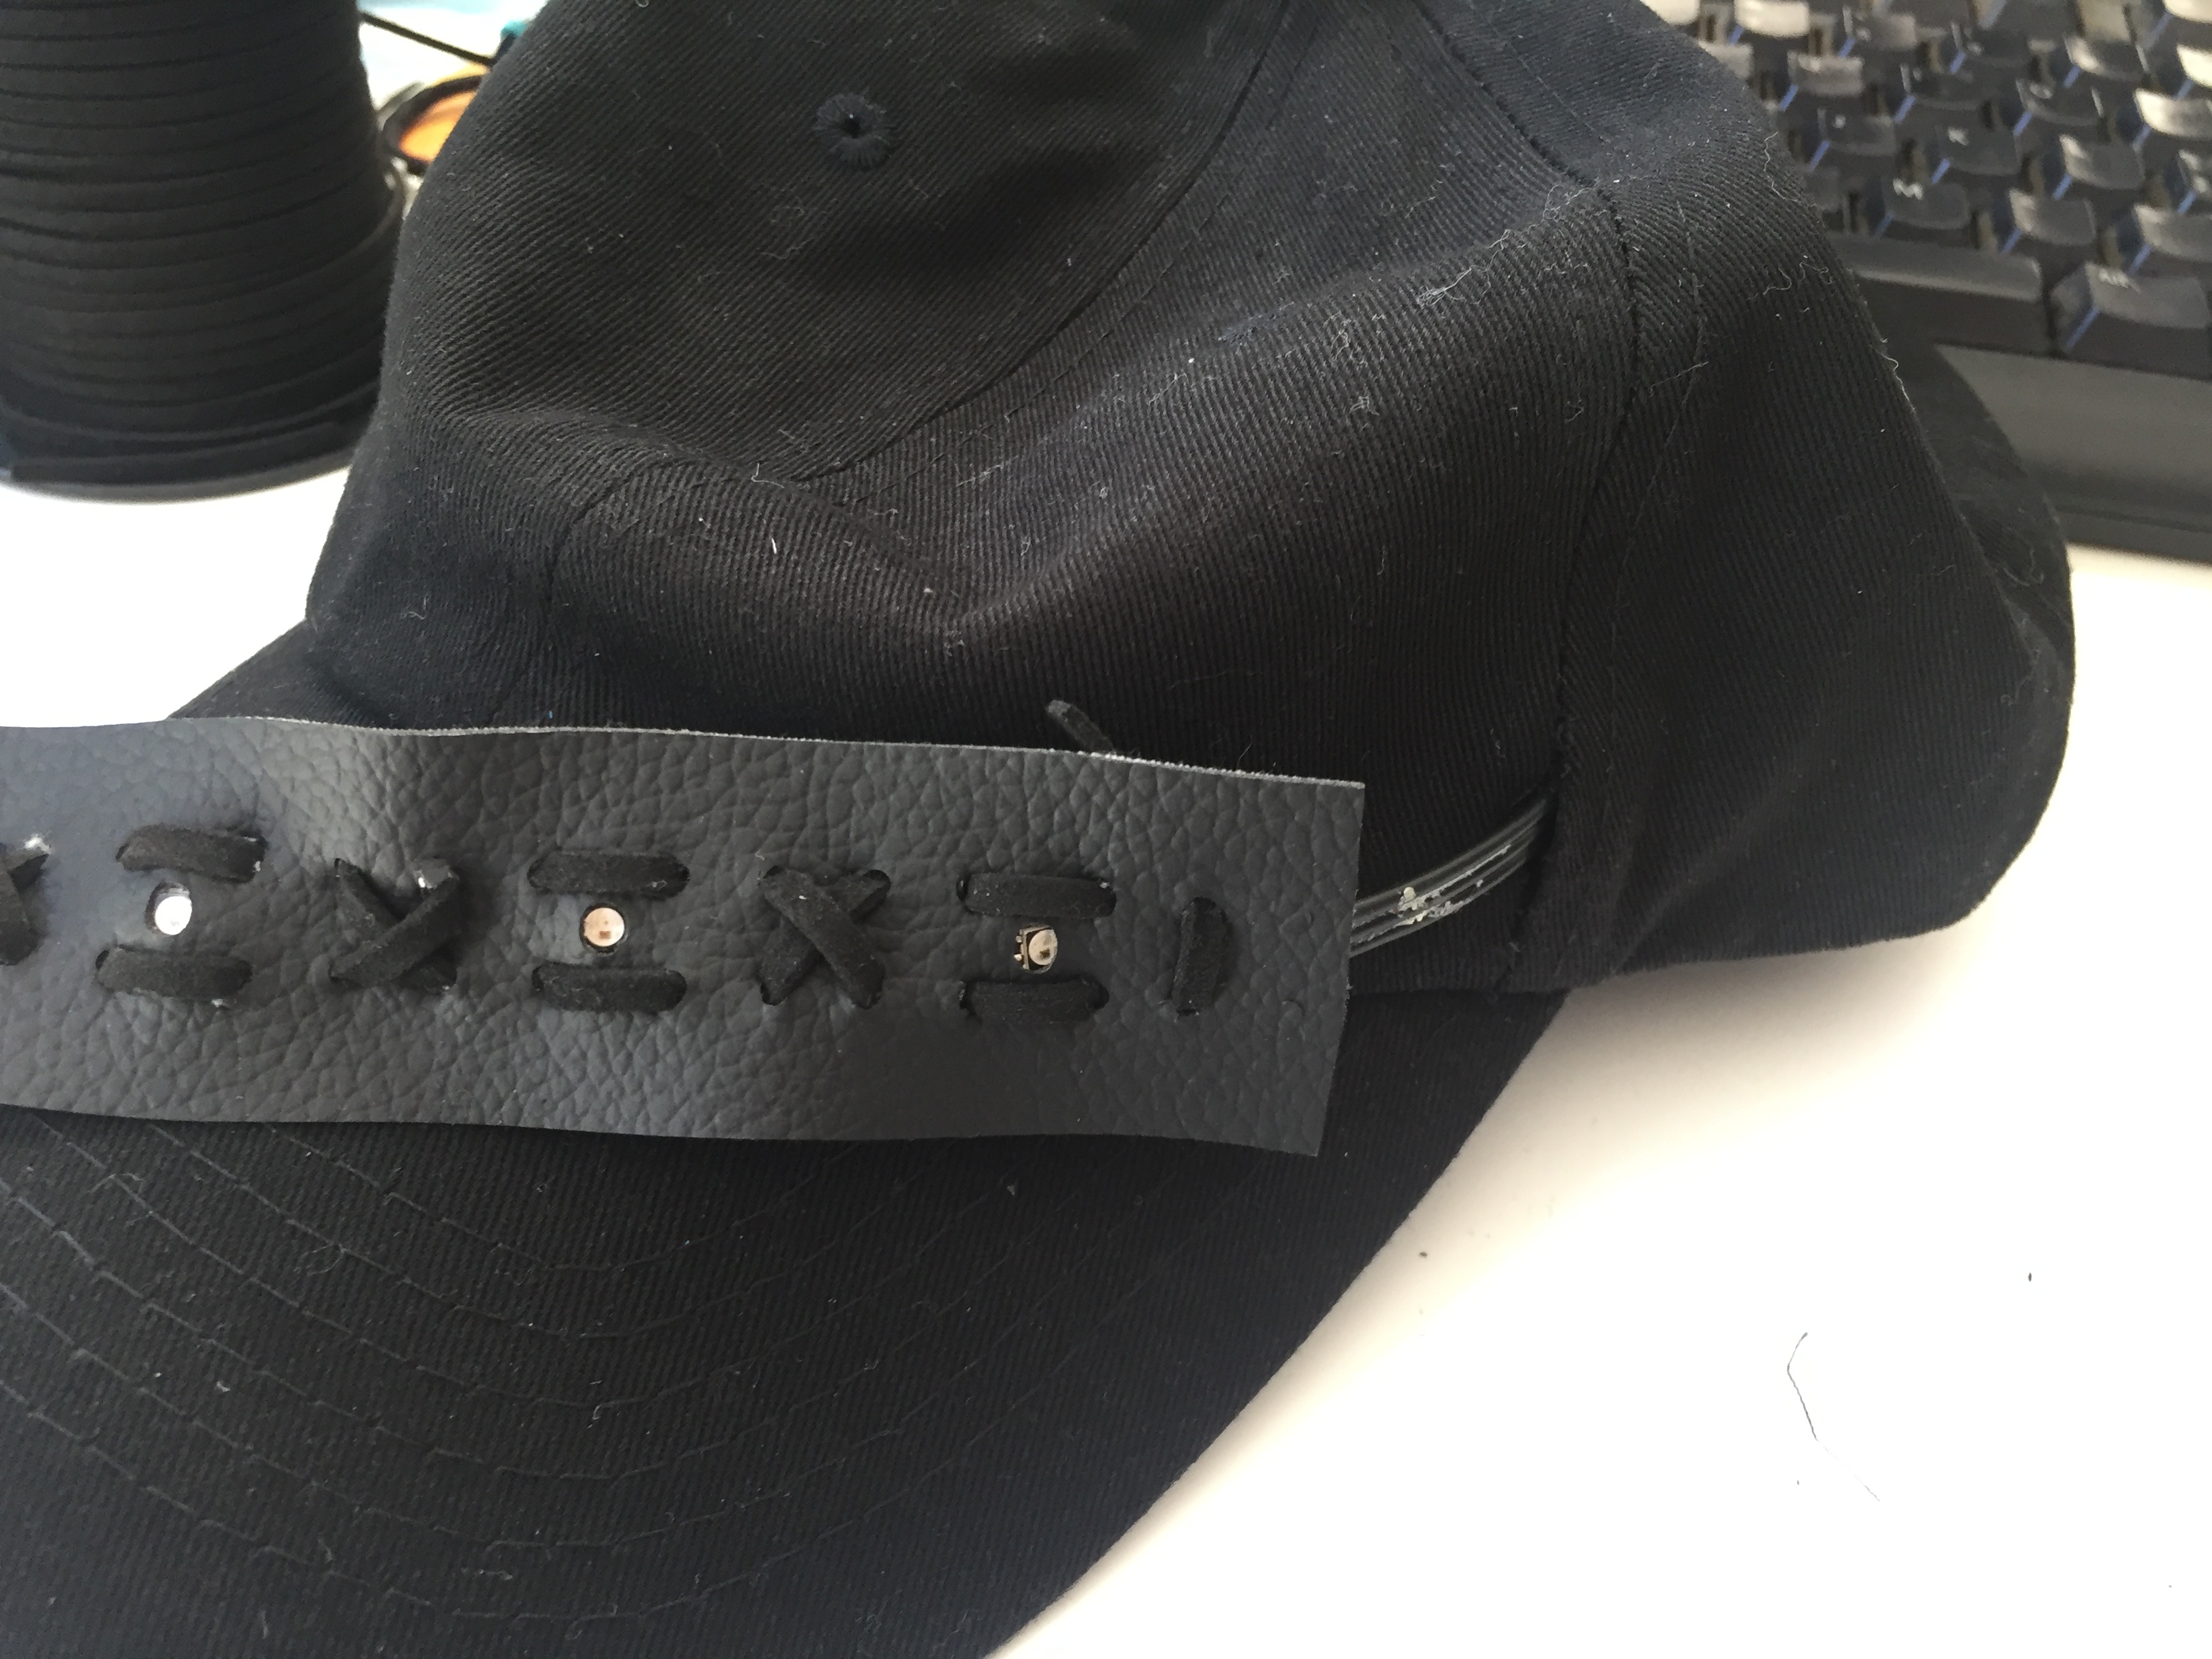
Here’s what my cut vinyl strip looks like. Not all of the smaller holes got cut out completely in the vinyl cutter. It’s easy to pull those out by hand or poke them out with a plastic needle.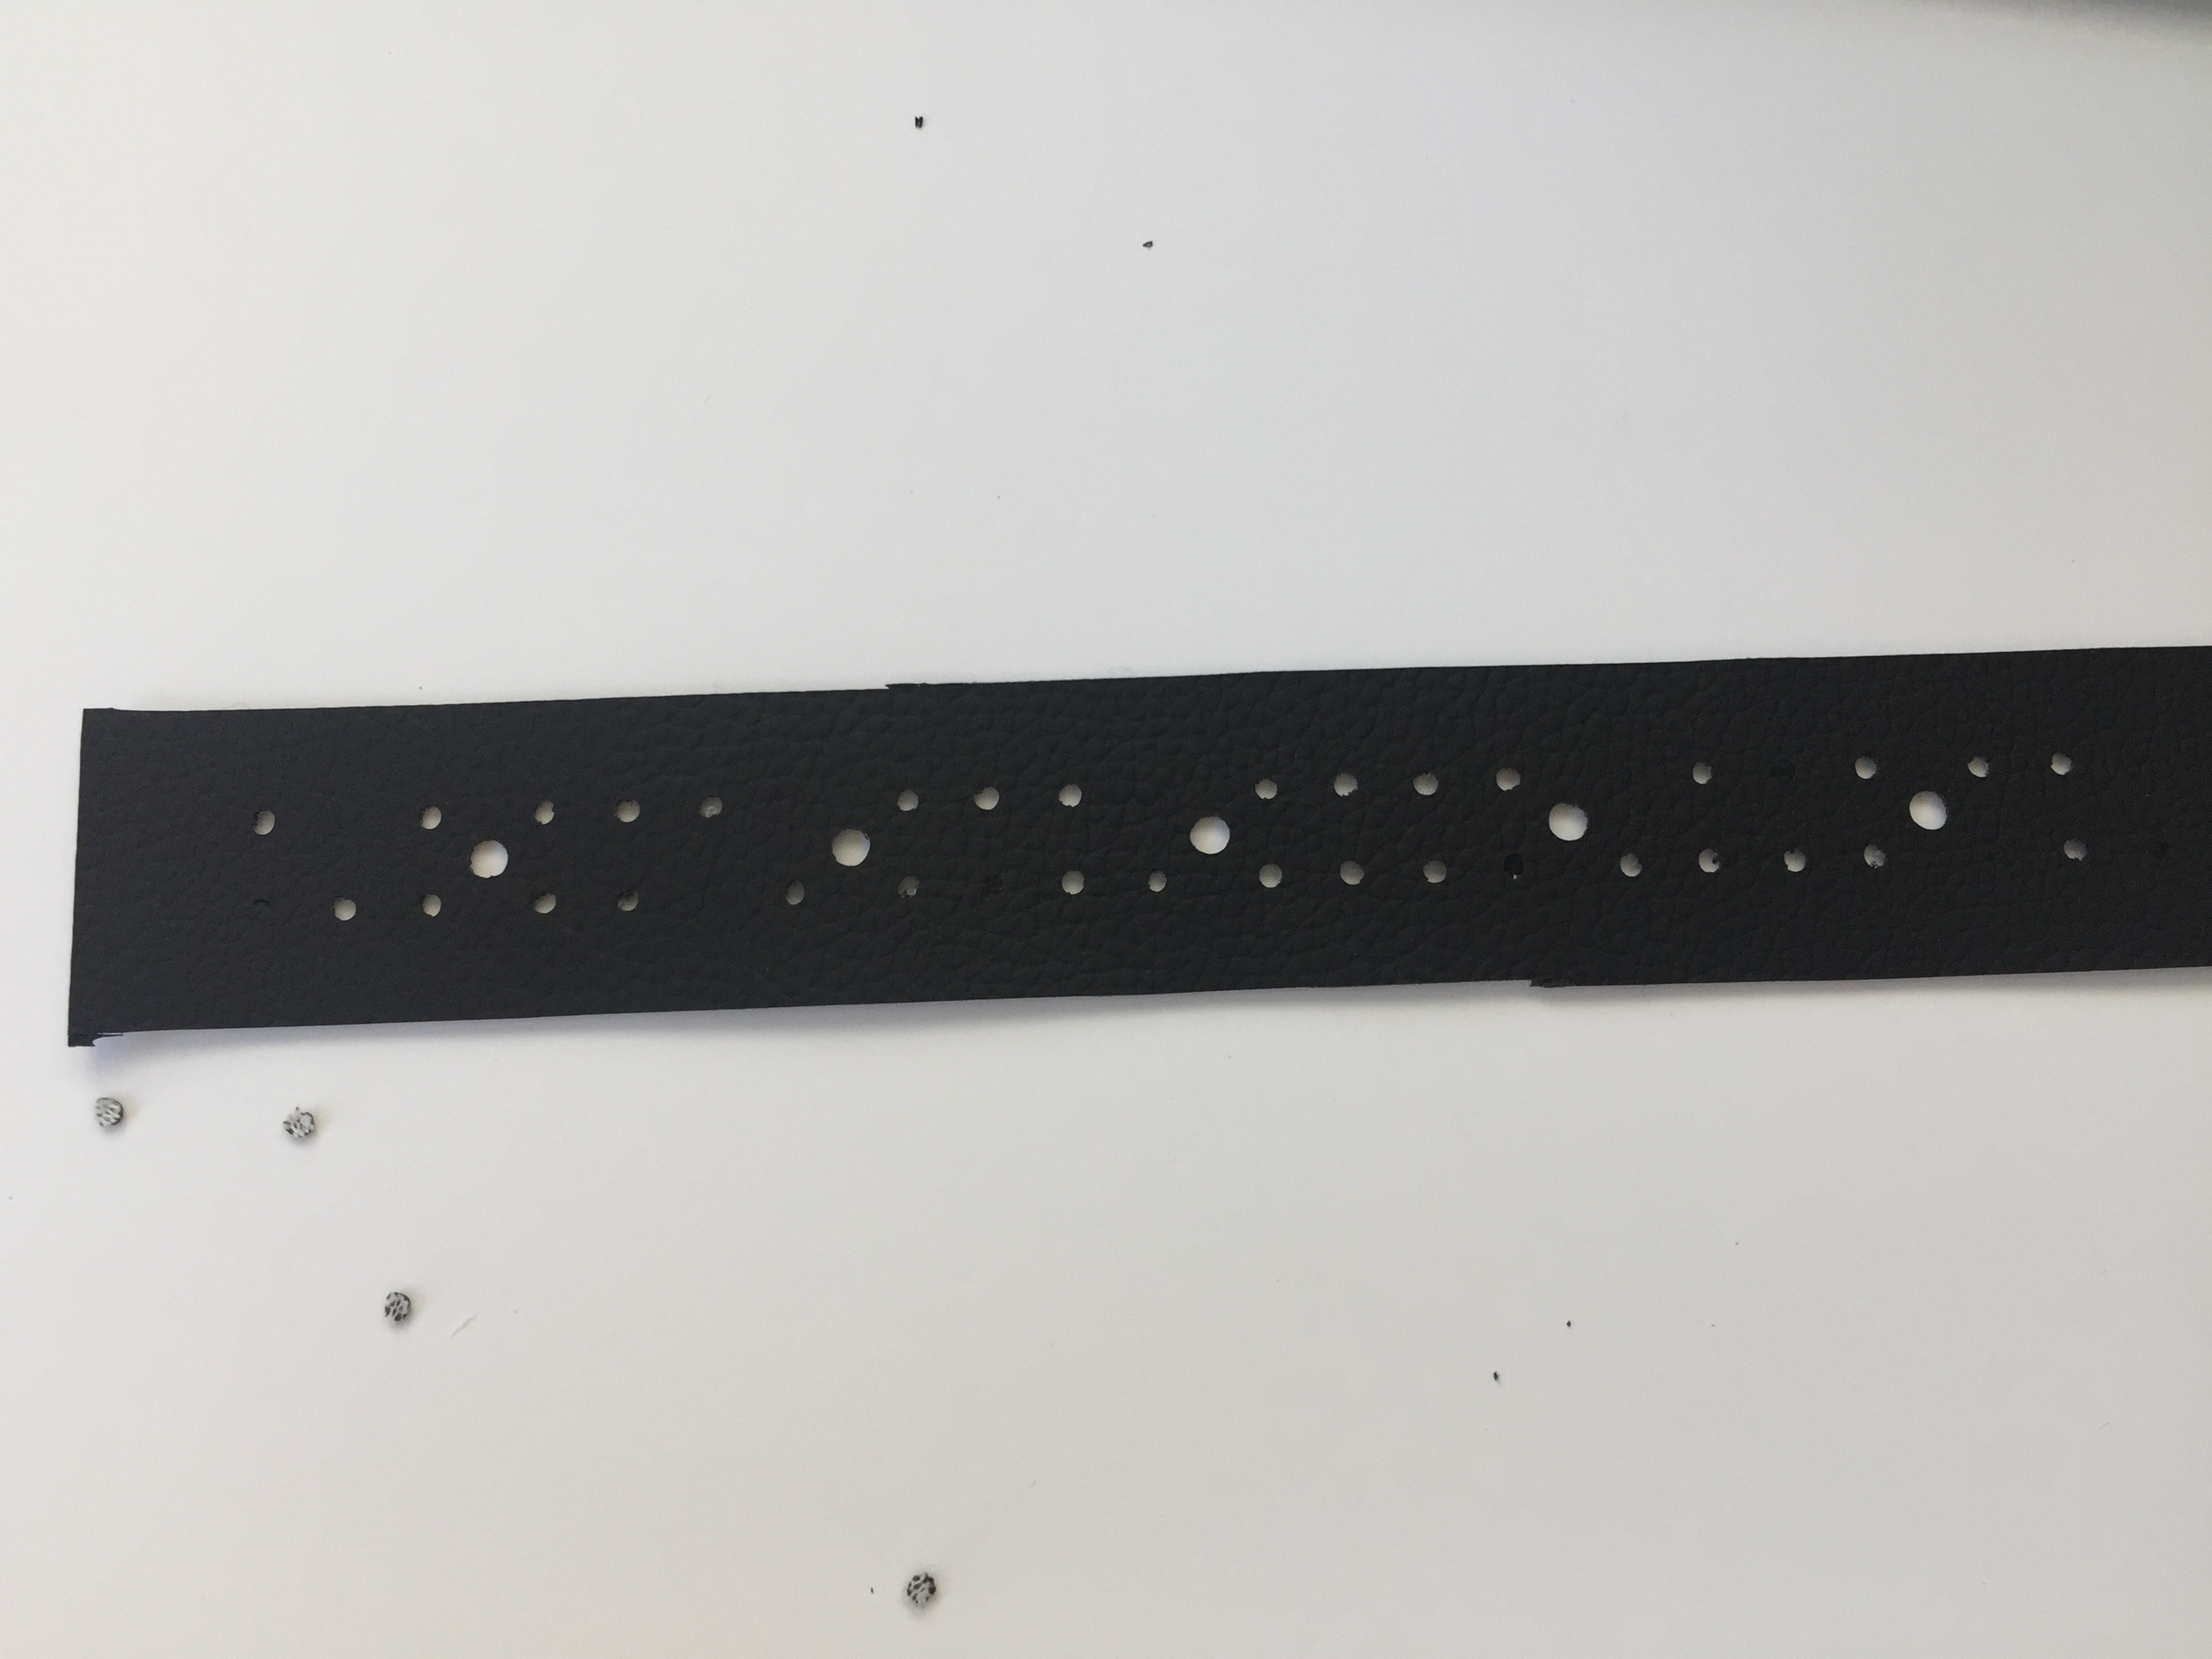
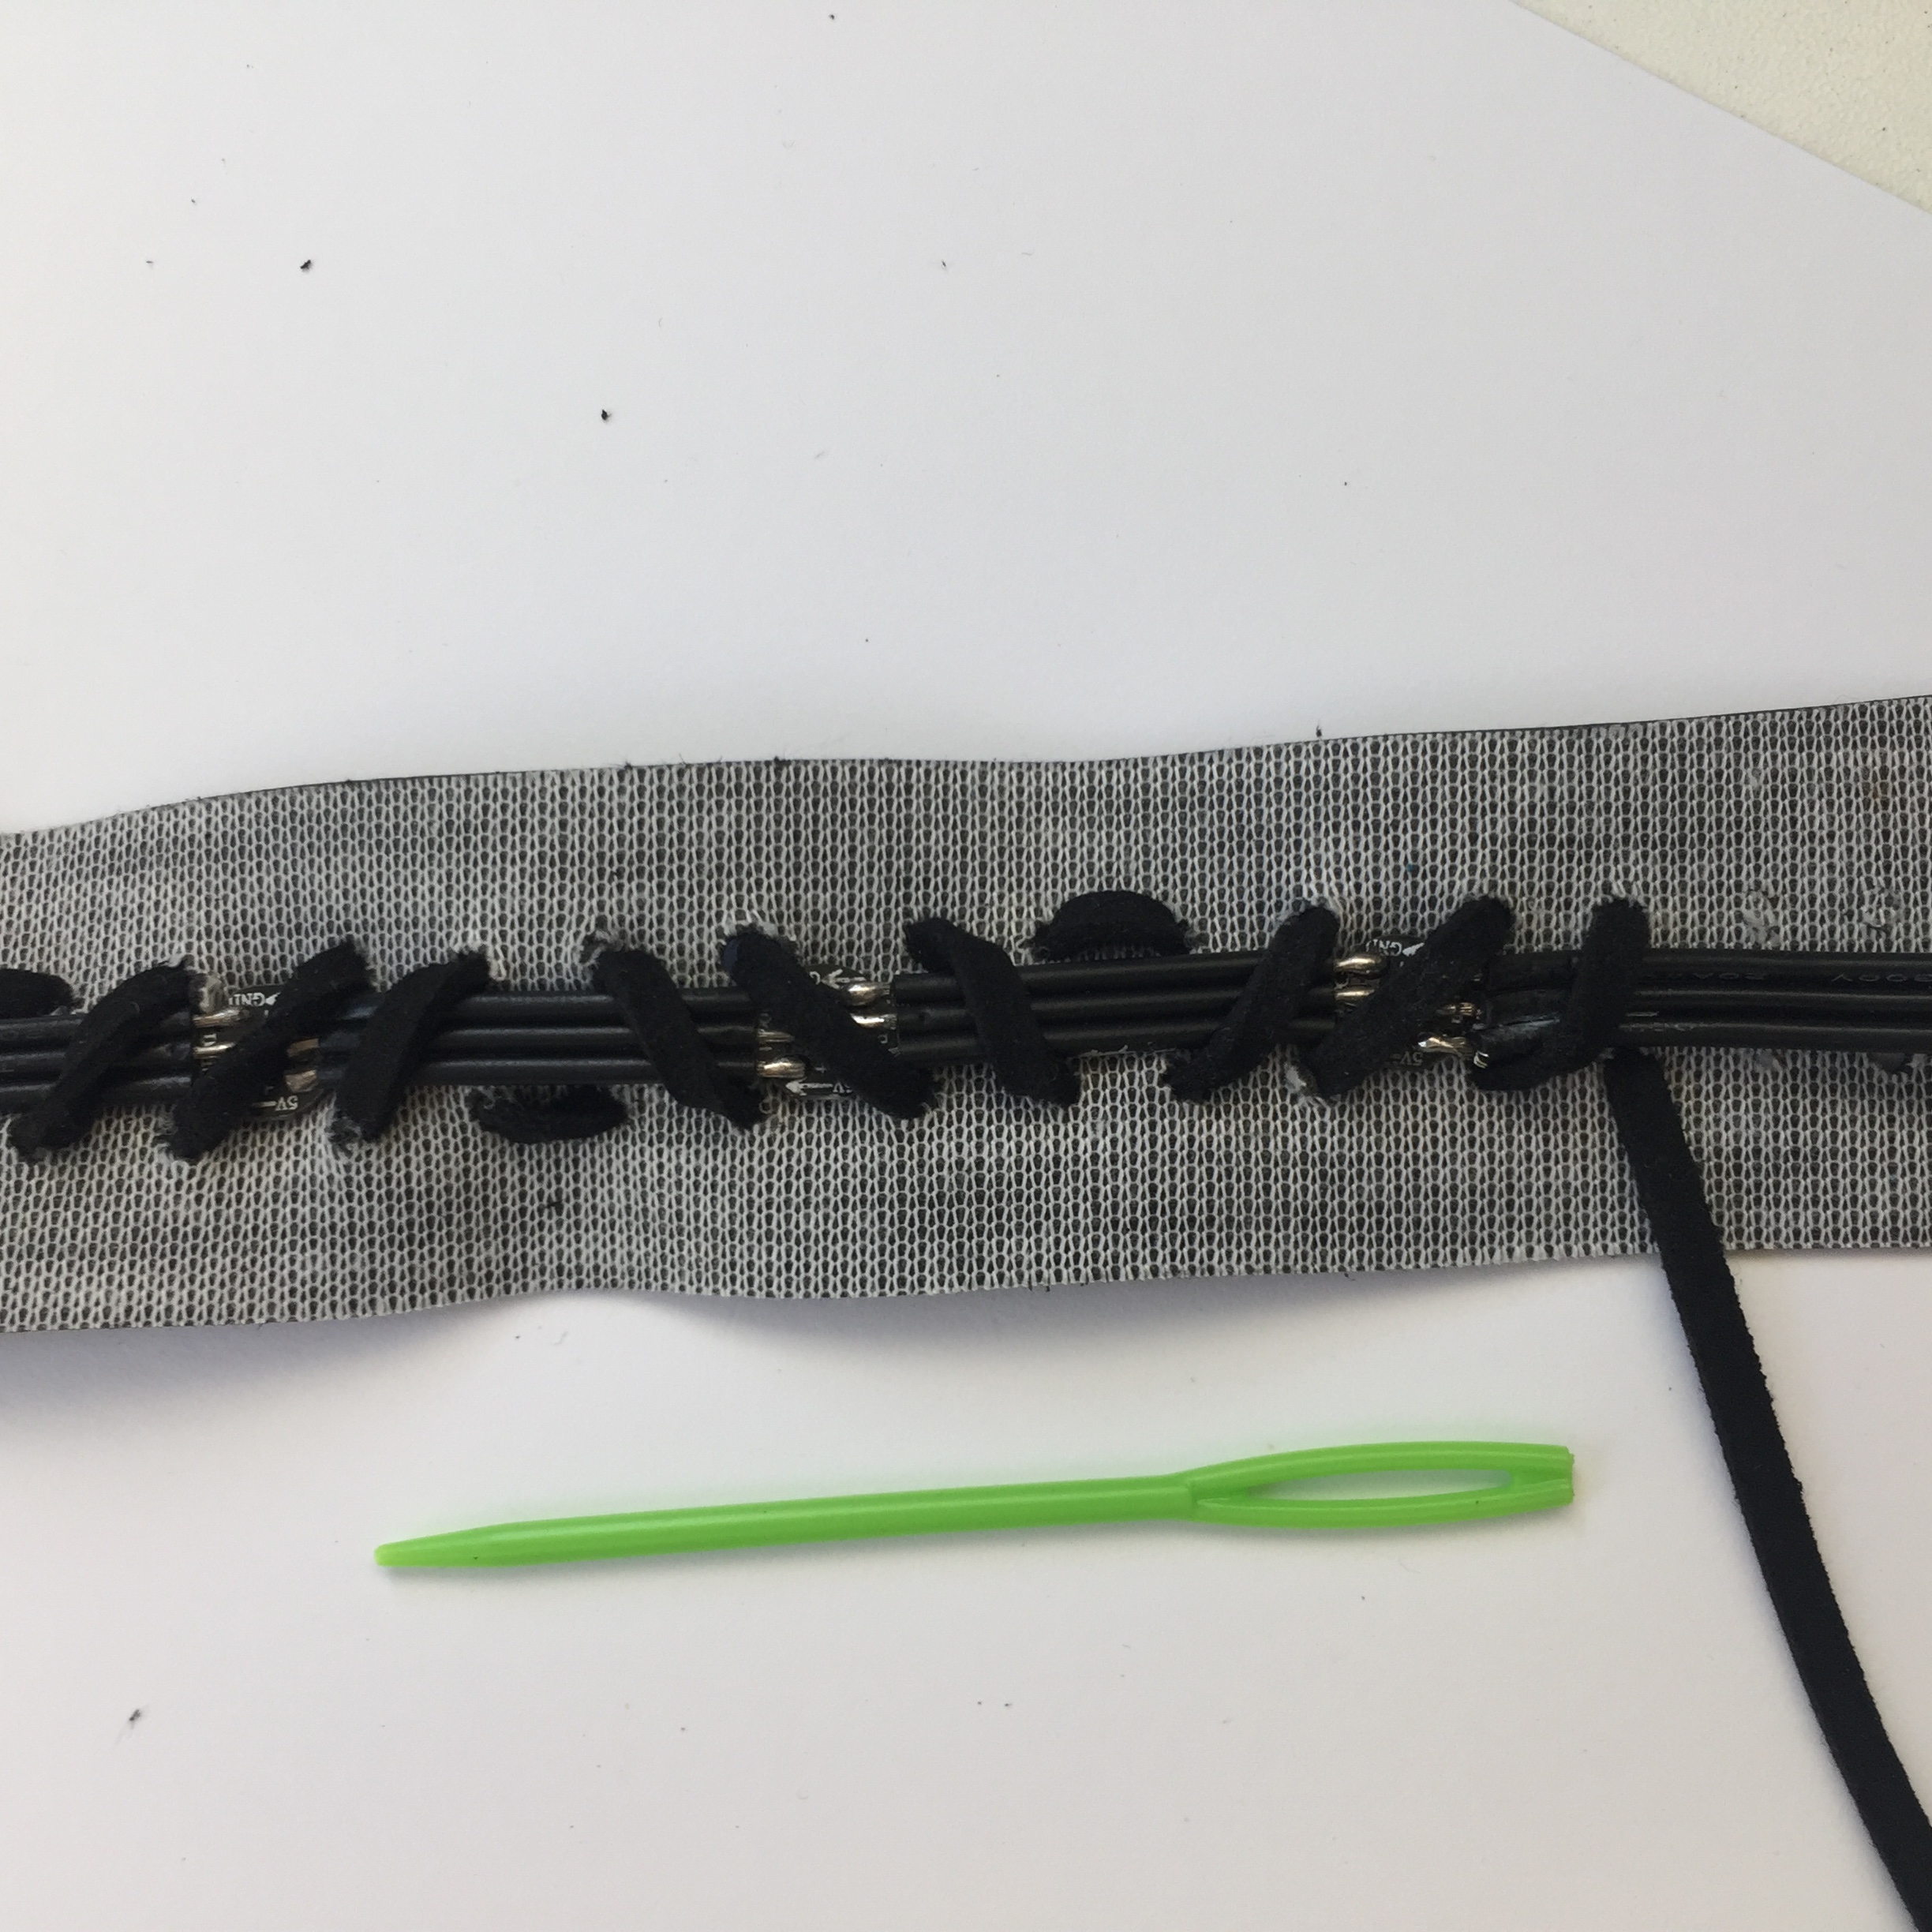
The next step is to align the LED string behind the vinyl and lace it into place so that it stays. The repeated lacing pattern I use is shown below. It is designed to wrap around the LED string as much as possible to hold it in place. It may look complicated, but after a little practice you get used to the pattern. To get started cut a length of suede cord, thread the plastic needle and start lacing, following the pattern below. Leave the ends of the suede cord loose in case you need to make adjustments. They will be tied off at the end. Be sure that all stitches on the bottom side of the vinyl pass around the LED string.
Don’t worry if everything doesn’t seem to be lining up initially – you can make adjustments as you go.

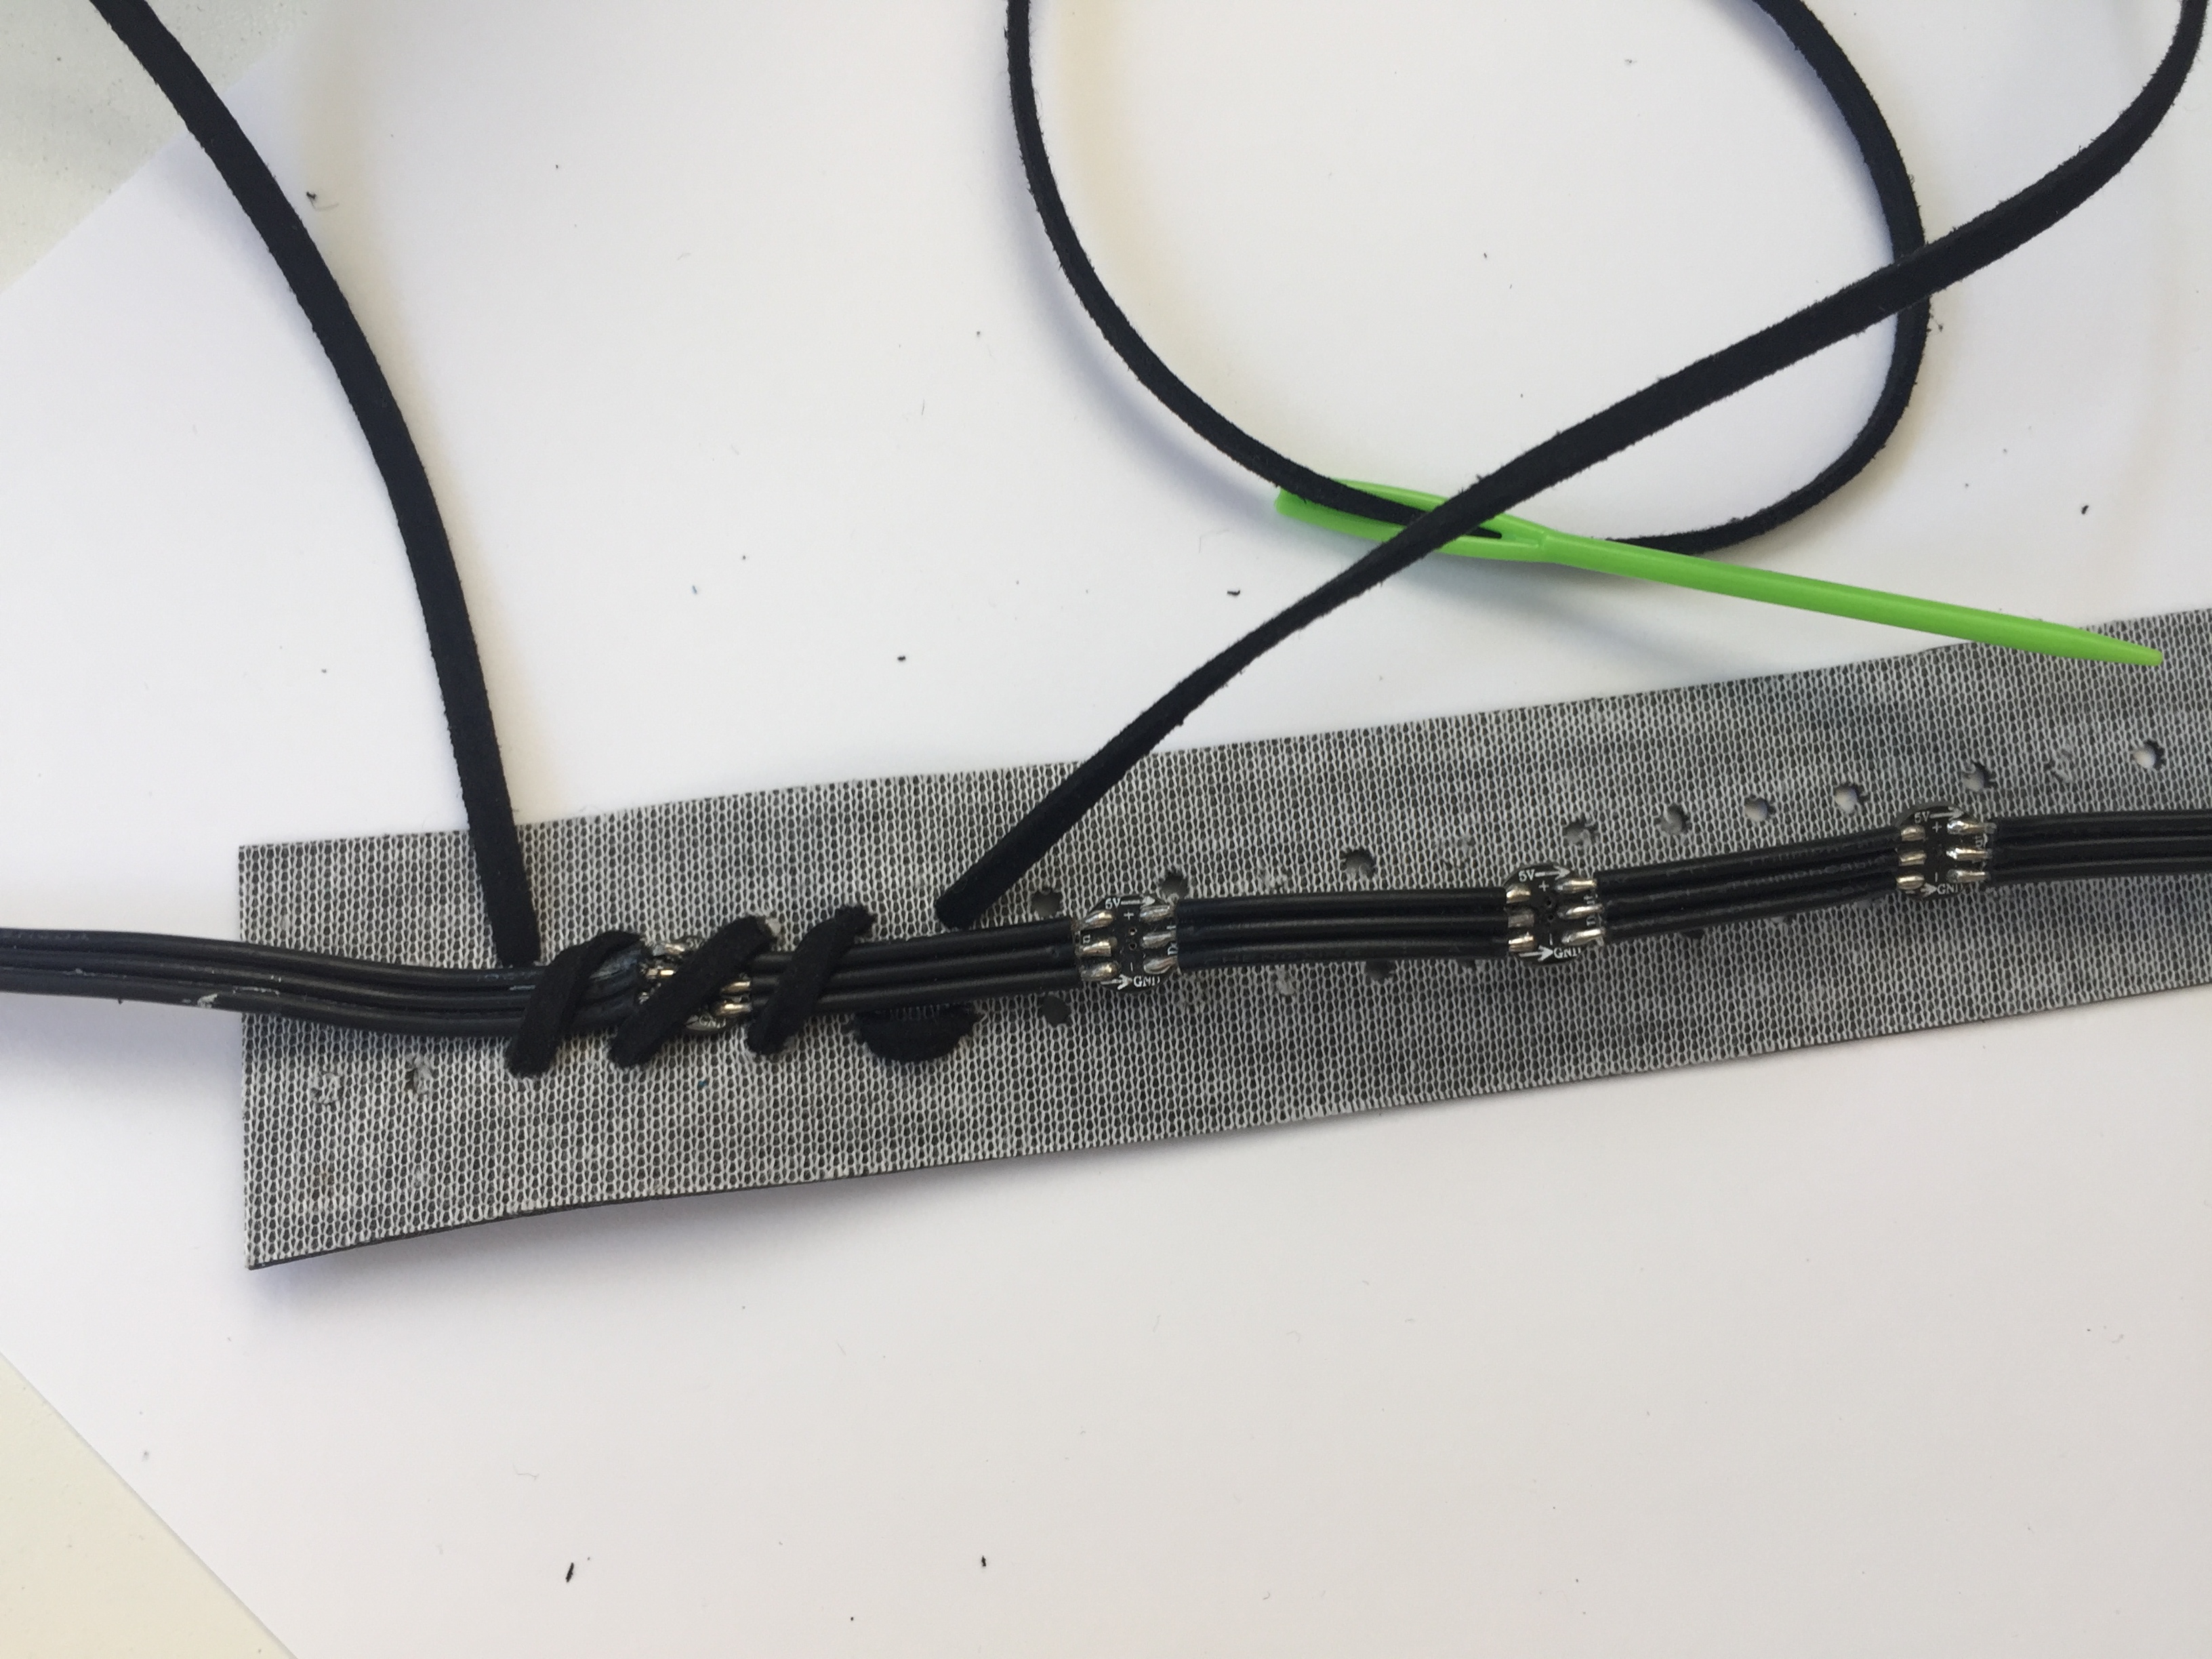
When you are finished lacing, make sure that the LEDs are aligned with the holes, and tie the loose ends of the cord into a double knot. You then have a sewable LED strip to add to your next project. You can sew along the sides of the strip with a sewing machine or needle and thread.
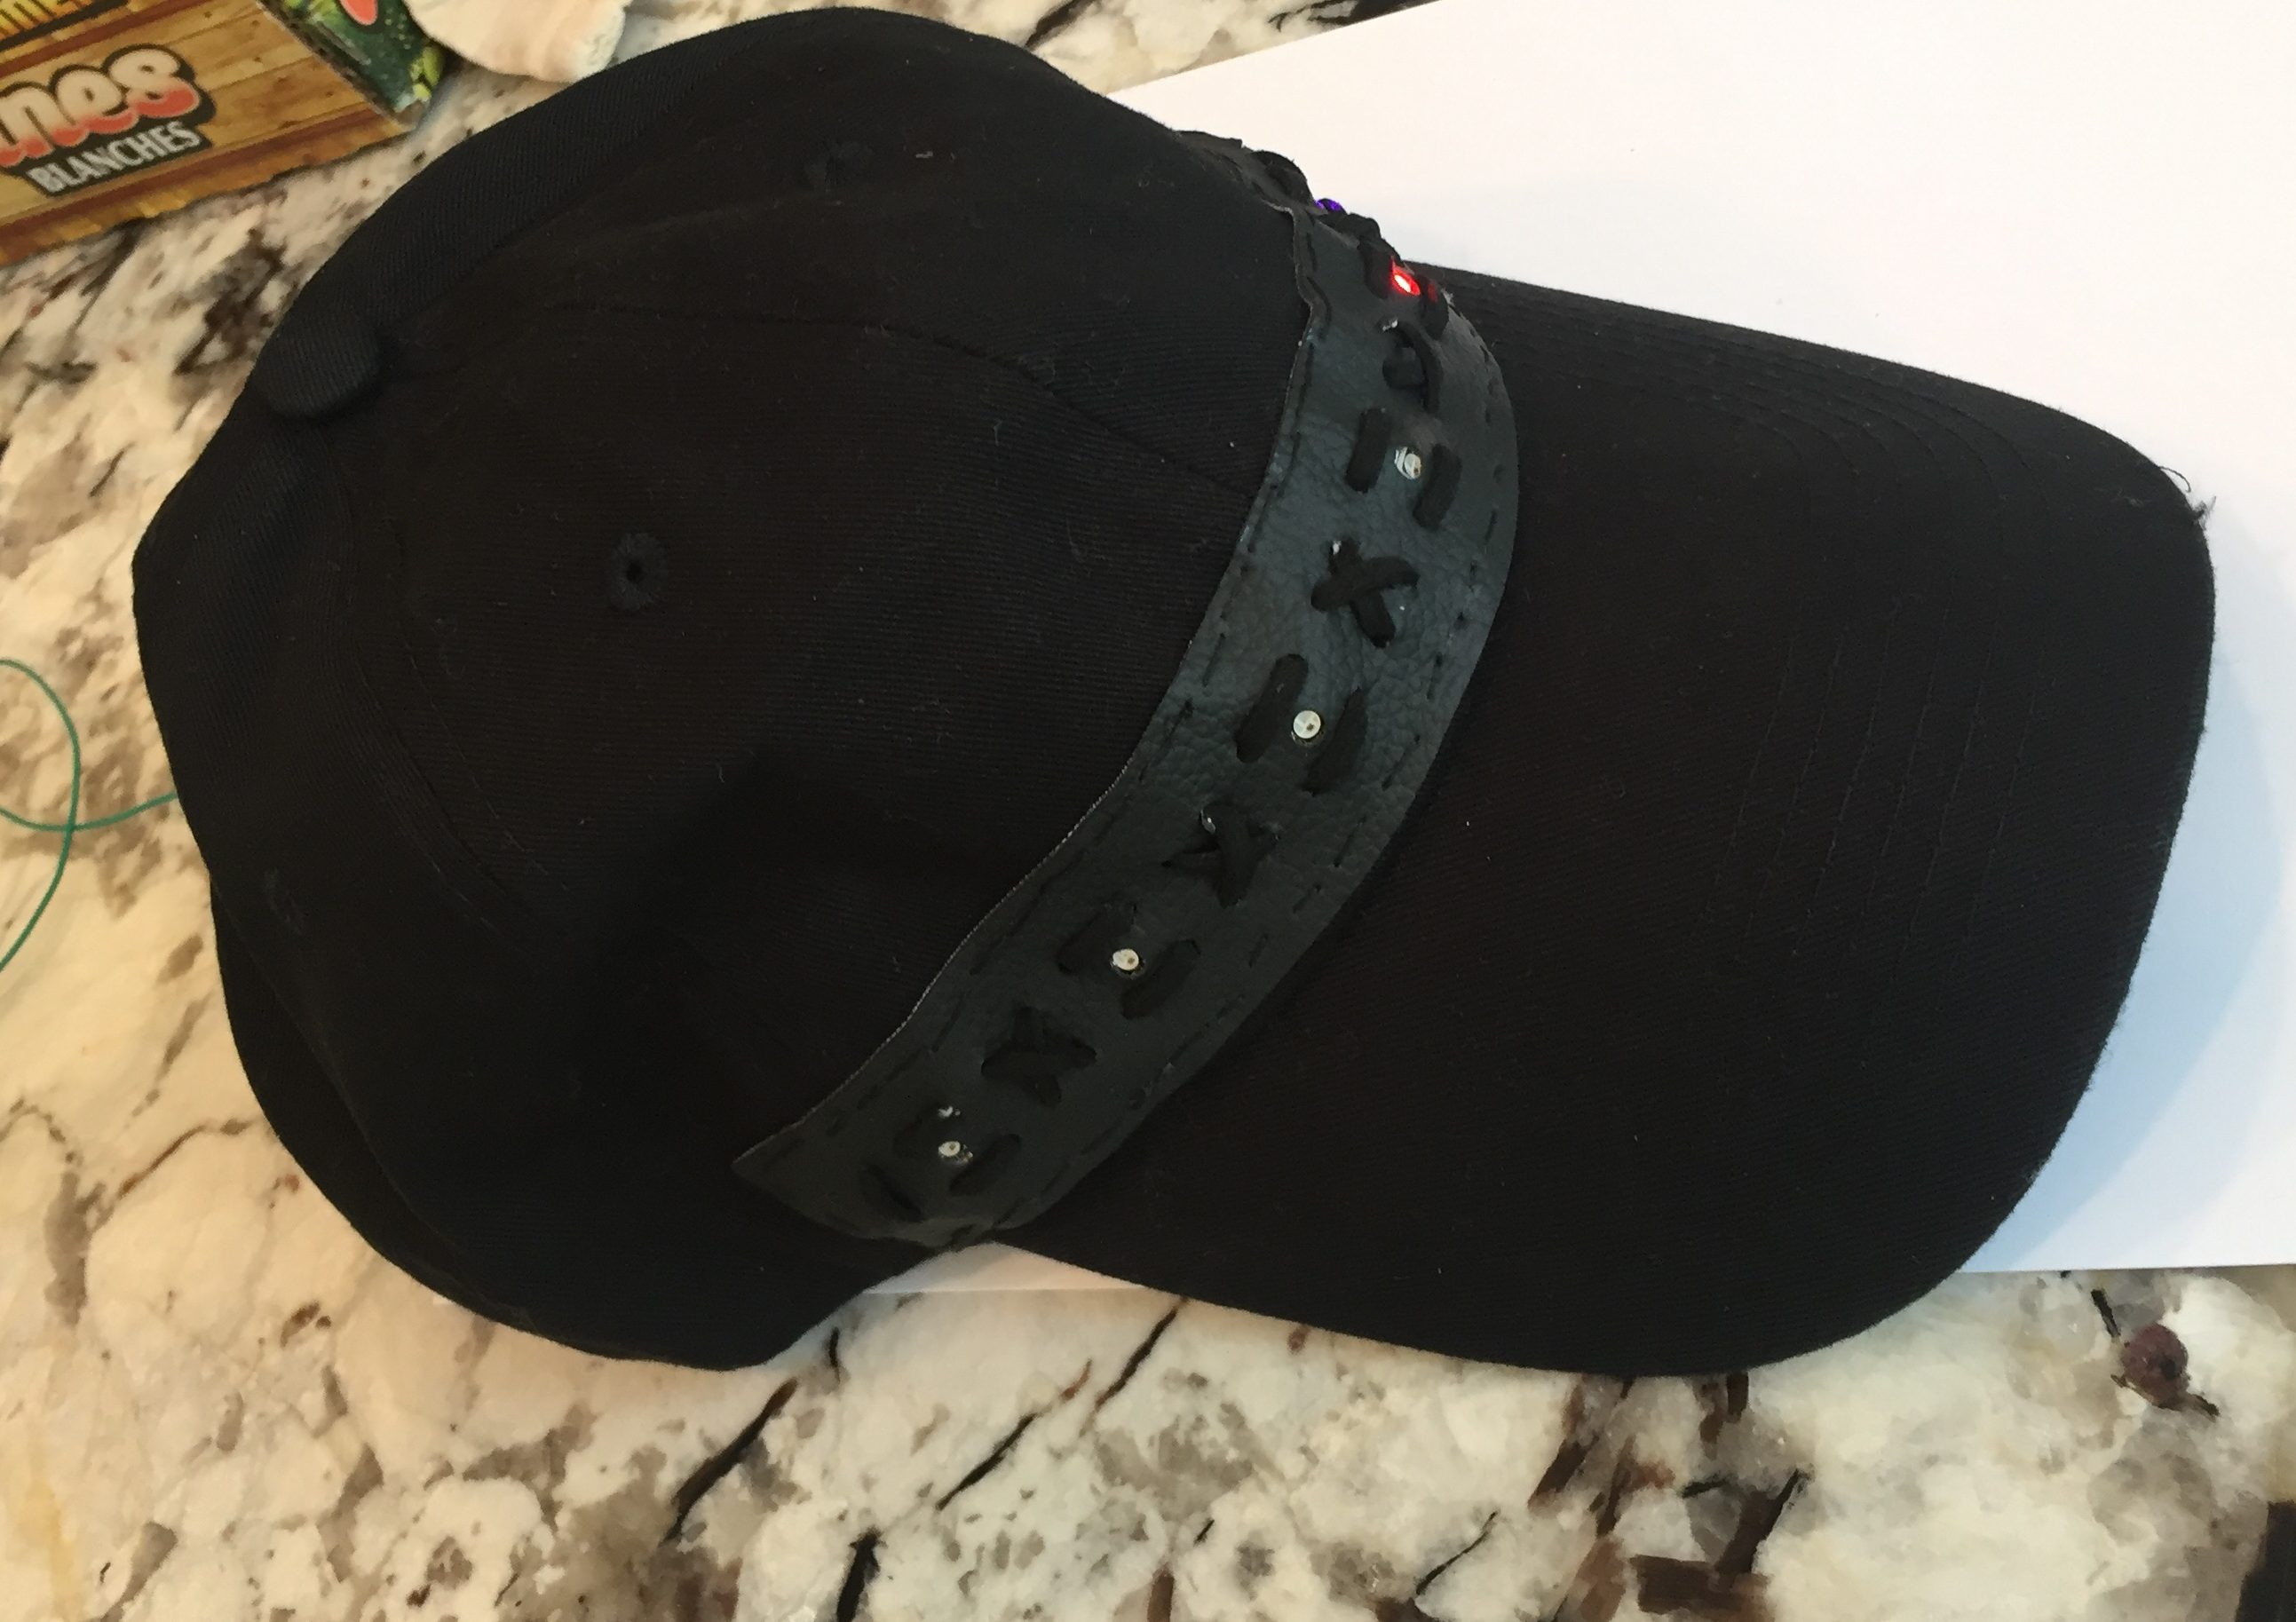
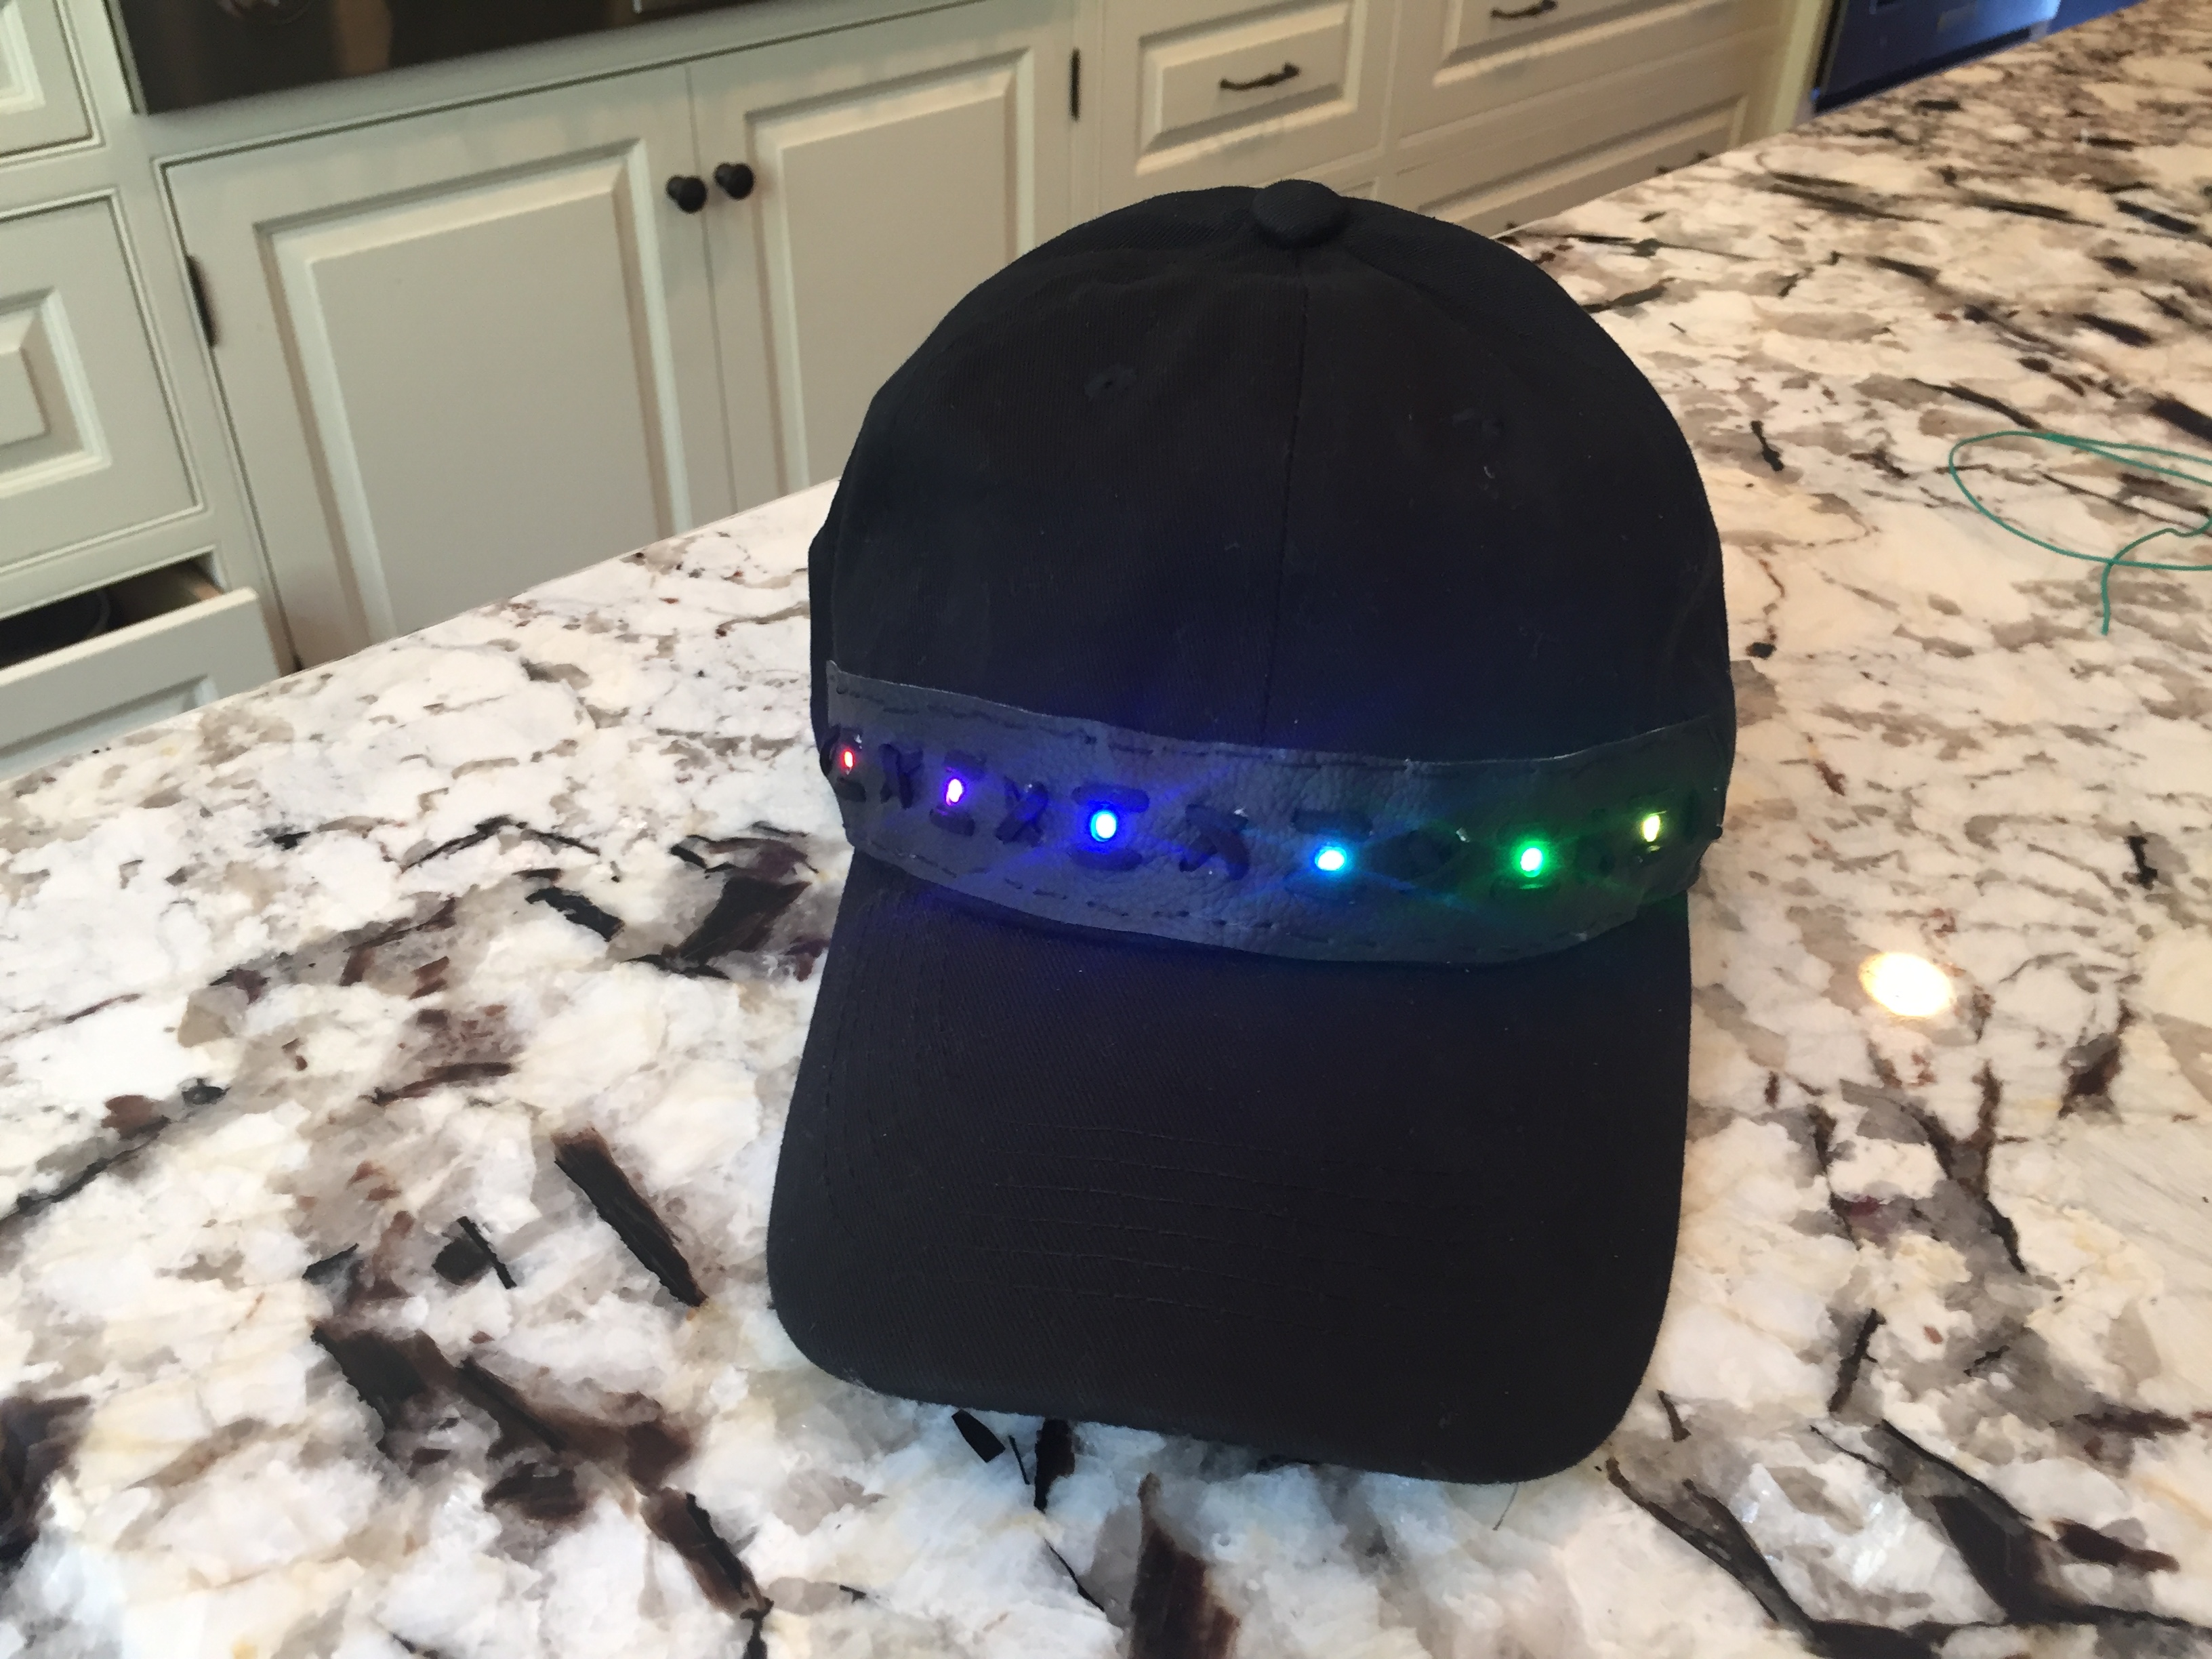
I’ll use a needle and thread to hand sew the strip to a baseball hat. I’m not very good at hand-sewing, but the nice thing about LED projects is that people tend not to look too closely at your stitching when your clothing is lighting up!
First I aligned the strip with the hat, and see where the wires should disappear into the interior of the hat. I made a small slit in the side of the hat and slid the LED wires into the hat interior. The slit will be covered up by the vinyl when it is sewn into place.
After sewing the strip into place, I attached a Gemma M0 by soldering it to the light string and added a and small LiPo battery for power. Luckily, both elements fit nicely inside the inner rim of the cap.
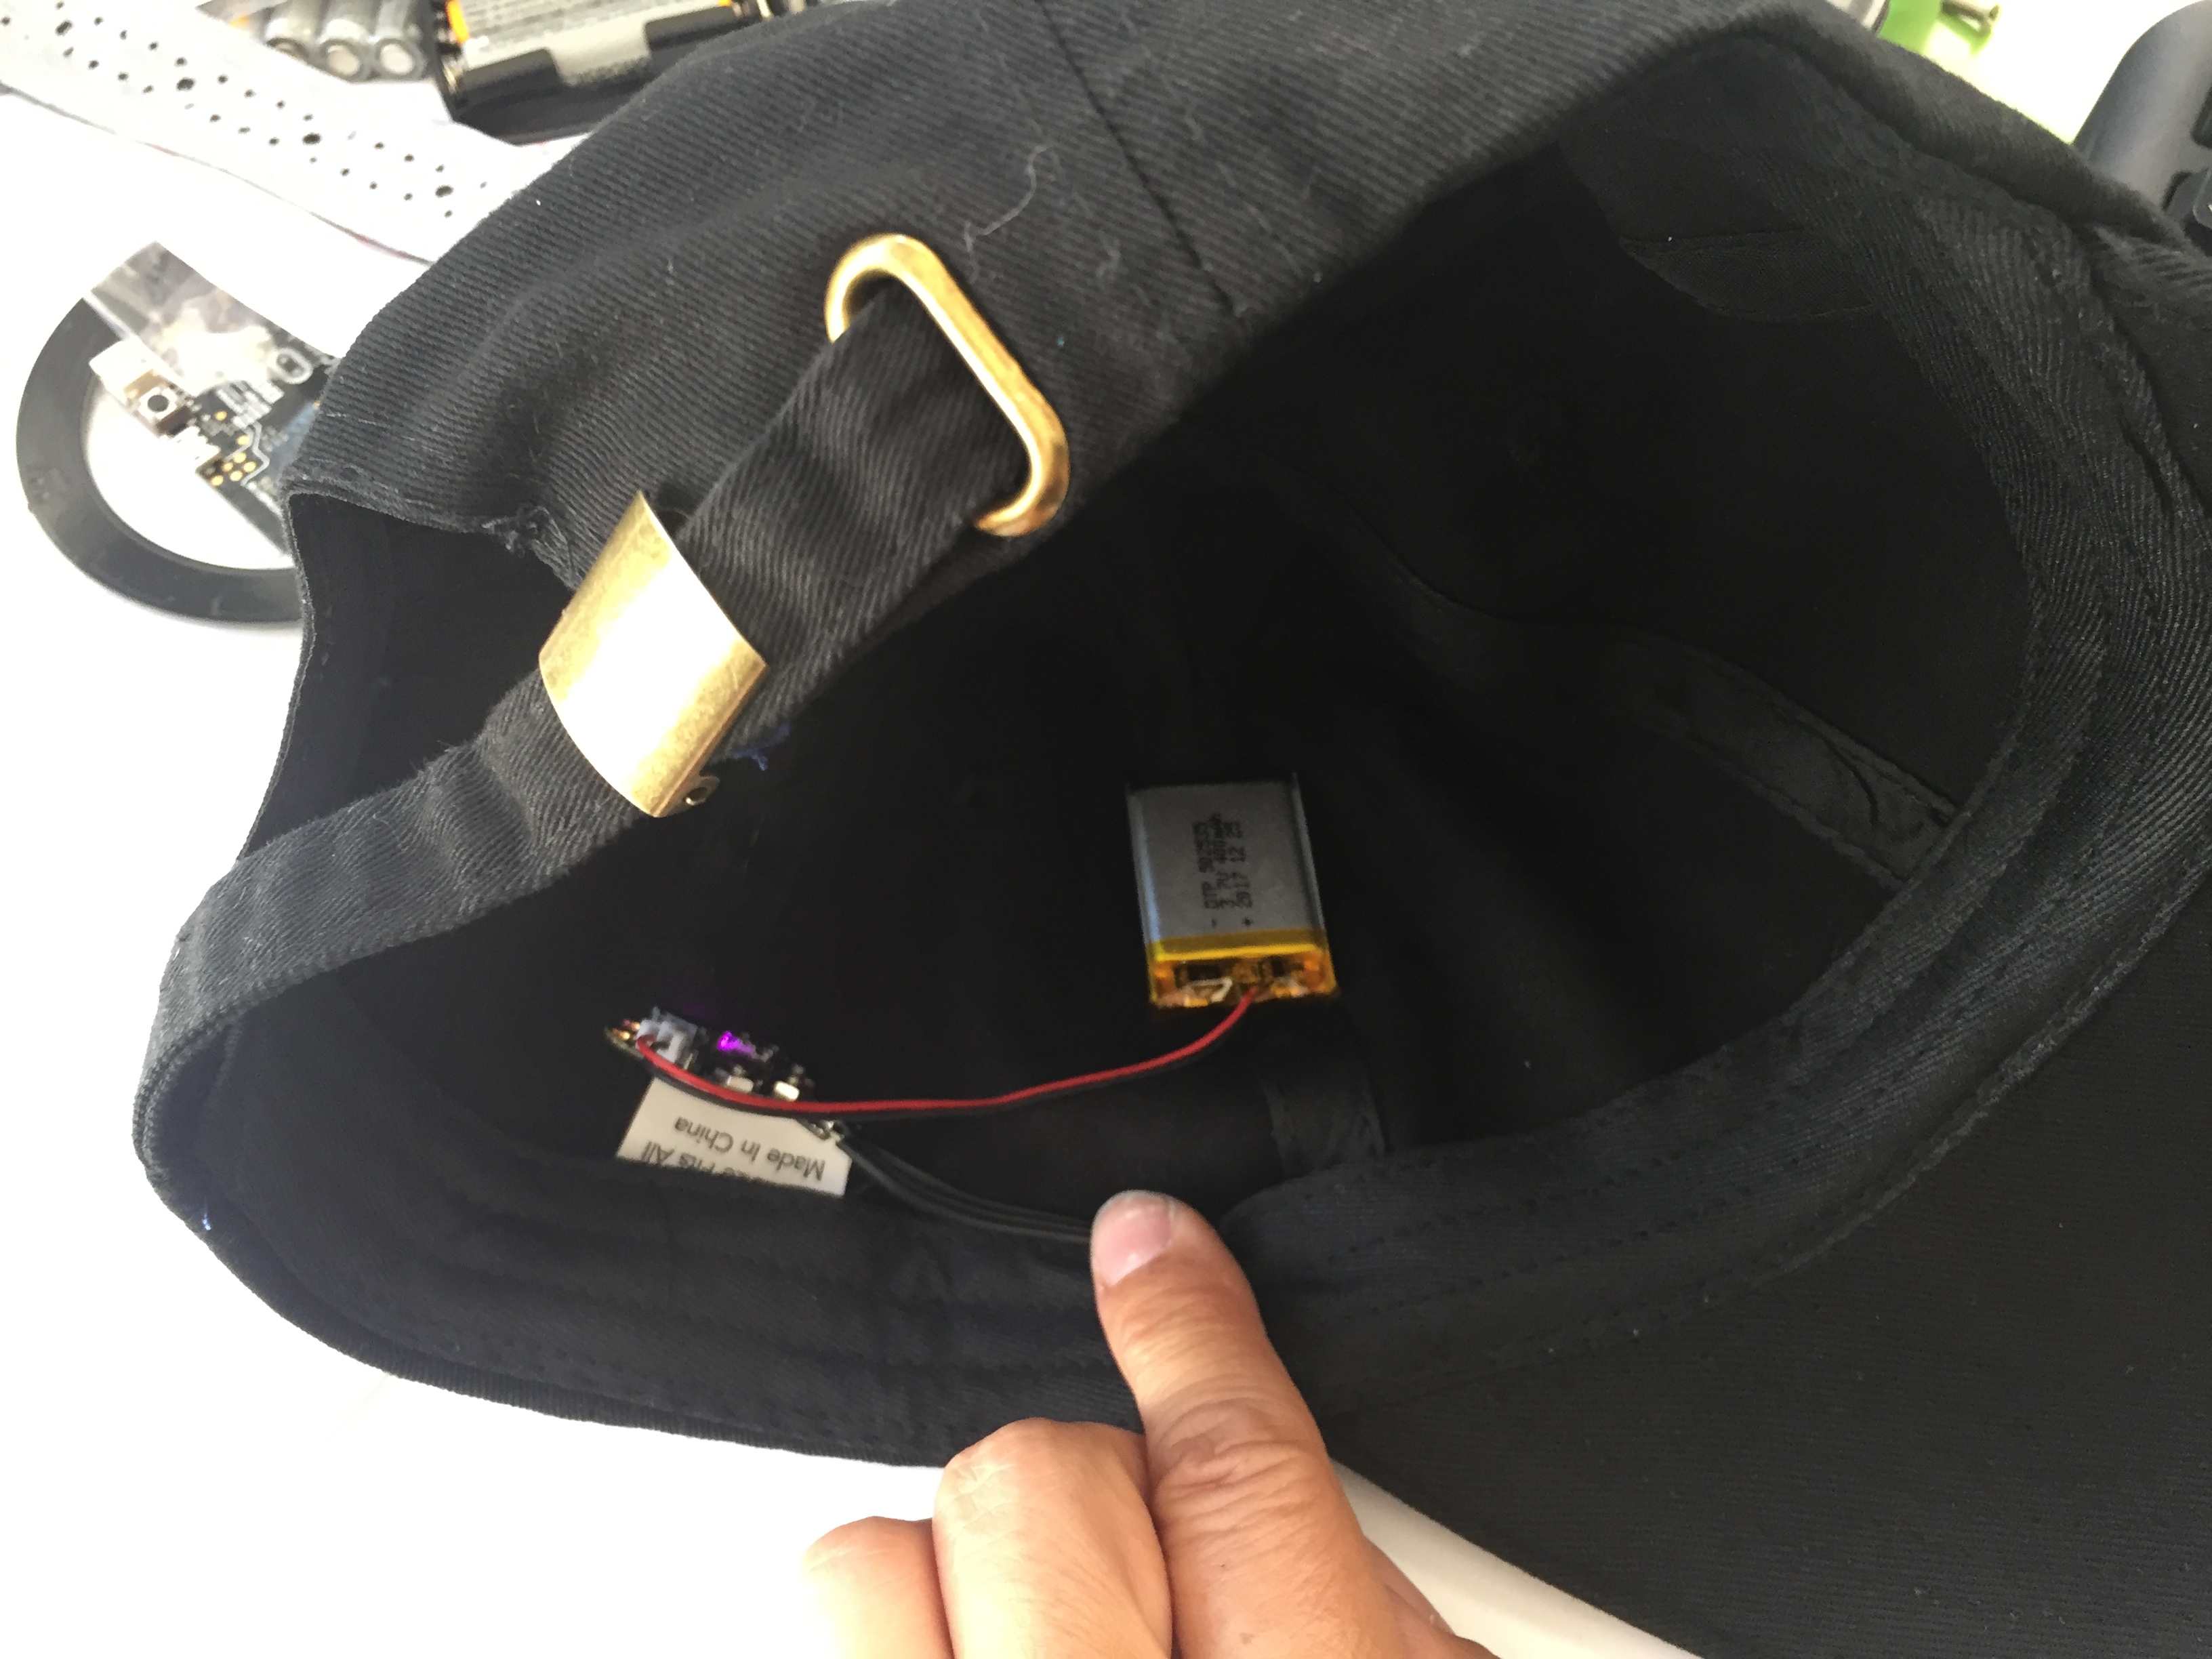
I used a Circuit Python code generator I wrote called Brightly to program the patterns on the Gemma M0, and voila – a programmable LED cap!